Advertisement
Table of Contents
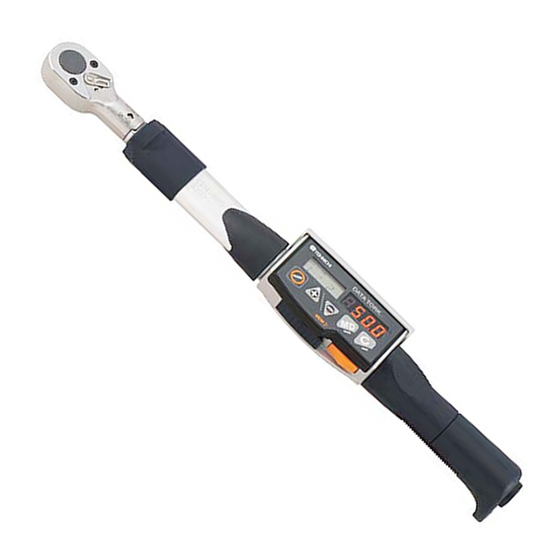
CEM3-P Program Version
Quick Start
1)
After installing USB driver, and program software, set up "task list" in registration.
(Reference "CEM3-P Software Quick Start" or manual).
2)
Move counter to "000", hold MD key for 2 seconds. "DAT-IN" appears in display area. Press
Orange MEM key to enter set up mode:
Select Mode M or T, Auto-reset time, Buzzer on/off, Data out method, baud rate, default
settings, date and time setup.
(See standard CEM3 Quick Start for more details)
3)
After confirming software setup ports and baud rates, install cable & hold down "MD" key for
2 seconds "DAT-IN" appears. In software select "transfer", check groups and hit "transfer".
If loading bar appears transfer is completed.
4)
Use arrows to move count number off of "000". Group id will appear. Select group name by
pressing MD key. Display will flash; use arrow keys to scroll through groups. Select by press-
ing MEM key.
5)
Number of bolts will flash then part name will appear. Press "MD" key to check upper and
lower torque limits. If you need to go back to groups names press down arrow key.
6)
Begin taking measurements or tightening and save by pressing MEM key.
7)
When ready to download select max. count number to be included. "--" will appear in the dis-
play to indicate readings are stored in that count.
8)
Press "MD" 1x for data out D-OUT, press MD 2x, for ALL OUT ,. Select Receive Menu "Data"
in software then press MEM to activate selection. Save data to Excel file. To clear out data on
wrench press MD. 3x for D-Clr 4x for ALL CLR.then press MD and C keys at the same time.
CLEAR will flash in the display and data will be deleted.
Advertisement
Table of Contents

Related Manuals for Tohnichi CEM3-P


Summary of Contents for Tohnichi CEM3-P
- Page 1 Quick Start After installing USB driver, and program software, set up “task list” in registration. (Reference “CEM3-P Software Quick Start” or manual). Move counter to “000”, hold MD key for 2 seconds. “DAT-IN” appears in display area. Press Orange MEM key to enter set up mode: Select Mode M or T, Auto-reset time, Buzzer on/off, Data out method, baud rate, default settings, date and time setup.
- Page 2 CEM3-P Program Version Quick Start Basic Keypad Instructions: On count of 1 or higher • Select Group: Hold MD key until screen flashes • Use Up(+) or Down (-) to Scroll Groups Press MEM key to Select • Number of Fasteners:(Flashes quickly) Ex.
Need help?
Do you have a question about the CEM3-P and is the answer not in the manual?
Questions and answers