Tohnichi DATA TORK CEM3-G Operating	 Instruction

Tohnichi DATA TORK CEM3-G Operating Instruction

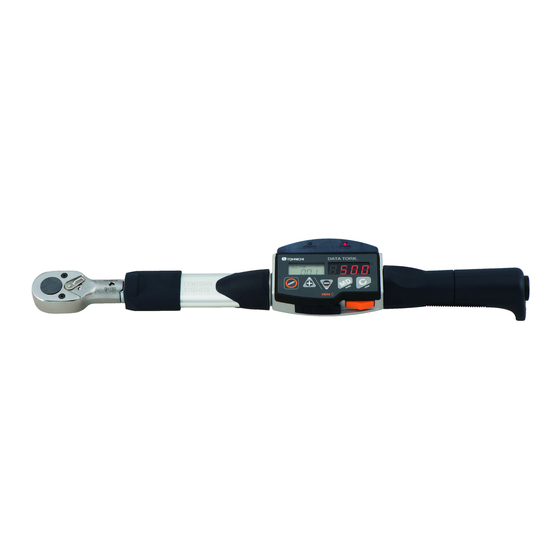
Digital torque wrench

Advertisement

MODEL CEM3-G
OPERATING INSTRUCTION
CEM3-G
CEM3-G Model
CEM100N3X15D-G
To use this product properly and safely, please read this manual carefully before use. If you have
any question about the product and its operations, please contact your nearest distributor or
TOHNICHI MFG. CO., LTD.

Advertisement

Table of Contents
loading
Need help?

Need help?

Do you have a question about the DATA TORK CEM3-G and is the answer not in the manual?

Questions and answers

Summary of Contents for Tohnichi DATA TORK CEM3-G

  • Page 1 OPERATING INSTRUCTION CEM3-G CEM3-G Model CEM100N3X15D-G To use this product properly and safely, please read this manual carefully before use. If you have any question about the product and its operations, please contact your nearest distributor or TOHNICHI MFG. CO., LTD.
  • Page 2 Cautions on Safety To the user Read these operating instructions carefully before use. For any questions, contact a Tohnichi authorized distributor or Tohnichi office. Keep these instructions for future use. Safety symbol This symbol indicates attention is required for your safety. When this symbol appears in these instructions, pay particular attention for your safety concerns.
  • Page 3 (3) Pay attention to the condition of your workplace. Do not use the charger or storage battery in the rain or other wet conditions. • Doing so may cause an electric shock and/or damage to the product. Keep the workplace brightly lit. •...
  • Page 4 To change accessories, follow the instruction manuals. • Doing otherwise may cause injuries. Check the cable of the charger periodically, and contact the nearest distributor or Tohnichi for repair. • Doing otherwise may cause an electric shock and/or a fire.
  • Page 5 (12) Connect the torque wrench and the interchangeable head firmly. If there is strange smell or fire on usage, stop use. Move this instrument to a safety place, and contact Tohnichi. * For handling of used battery * Nickel metal hydrogen battery is used on this product.
  • Page 6: Table Of Contents

    (3) Measurement mode • MODE-M (Inspection mode) • MODE-T (Tightening mode) (4) Data sampling mode 6. Usage (Delivery condition from Tohnichi) .....10 7. Explanation of functions ..........11 8. Operation examples............13 (1) Inspection mode measurement (Without judgment OK/NG)....13 (2) Inspection mode measurement (With judgment OK/NG) ....14 (3) Tightening mode measurement ............15...
  • Page 7: Outline

    Outline CEM3-G series is the digital torque wrench designed for "Retightening torque measurement" "Loosening torque measurement" as well as for precision tightening. Features (1) Manages measured value and data Can trace measured date and time. (2) Dual display Dual display LED and LCD (liquid crystal) adopted. Torque value is displayed on bright, easy-to-see 7 segment LED, and other function is displayed on LCD.
  • Page 8: Components

    Components (4) (5) (6) (7) (8) (9) (10) (11) (12) (13) (1) Interchangeable head Picture above shows attached QH interchangeable head. Tohnichi head SH, RH, QH, RQH, DH, HH, FH are also available. PH cannot be used. (2) Protection cover This cover protects from scratch and breakage.
  • Page 9 (17) External output terminal Connect USB cable (No. 584) to this terminal. (18) Infrared output window Terminal to transfer data to Tohnichi infrared data receiver R-DT999. (19) Reset button Push reset button display error or malfunction happens. No need to push every time after charging.
  • Page 10: Explanation Of Each Mode

    (DFS). M-2 mode: M-2 is compatible with the old CEM2 model. M-2 mode can save only 99pc of data (same as CEM2). However, M-2 mode is compatible with the same Tohnichi data filing software (DFS) which was used by CEM2.
  • Page 11: Usage (Delivery Condition From Tohnichi)

    Usage (Delivery condition from Tohnichi) This chapter explains simple usage on Tohnichi delivery condition (Dual display mode). (1) Install attached interchangeable head QH and socket (options). (2) Push power button. Do not apply force to the socket at this time.
  • Page 12: Explanation Of Functions

    Explanation of functions CEM3 has several other functions in addition to "mode" functions. (1) Auto zero function In RUN mode, push key, and auto zero adjustment works. If the displayed torque is more than 7.5% of the max capacity torque, the display shows "Err9". <Display shows Err9>...
  • Page 13 (6) Power saving function If not used for 1 minute, 7-segment LED darkens to save power. Touch any key then it returns. (7) Auto power off function If not used for 3 minutes, it automatically turns off. (8) Residual battery indication Battery condition is indicated on LDC by the following 4-step indicator.
  • Page 14: Operation Examples

    Operation examples (Dual display mode) This chapter shows operation examples on case-by-case basis. LCD and LED displays are respectively shown. If you select LCD for display mode, LED display will be kept off (Refer to P24 (11) Display mode setting.). For detailed setting method, refer to 10.
  • Page 15: Inspection Mode Measurement (With Judgment Ok/Ng)

    (2) Inspection mode with OK/NG judgement It judges whether the measured data is within the set range. (OK: Upper limit Measured torque Lower limit) Setting (example) Measurement mode: MODE-M Upper limit: 55 Nm DUAL MODE LCD MODE Lower limit: 50 Nm 1.
  • Page 16: Tightening Mode Measurement

    (3) Tightening mode measurement It informs when torque reaches the target range by buzzer and LED, and alarms when it is out of the range by another buzzer. (OK: Upper limit Measured torque Lower limit NG: Measured torque > Upper limit, Lower limit >...
  • Page 17: Measurement Data Readout

    (4) Checking the measured data To check the measured data, use key to move the counter where you wish to see the data. : Send the counter forward : Send the counter backward (Keep it pushed to fast-forward) DUAL MODE LCD MODE Counter Counter...
  • Page 18: Calculation Function

    (5) Data processing function It processes the measured data to calculate the data quantity, maximum/minimum/average torque of the selected data range. DUAL MODE LCD MODE 1. Use key to select the Set the upper end 10 : 30 N·m N·m upper end of the counter to 52.0 52.0...
  • Page 19: Output Data At A Time (Pc, Printer Output)

    (6) Output data at a time (PC, Printer) Outputs the selected range of measured data (measured value/measured time) to an external device at a time. According to the external device, select the communication settings as follows (Refer to P23 (8) Communication mode setting). To PC through RS232C (No.575): select "PC"...
  • Page 20: Output Data At A Time (Infrared Output)

    (7) Output data at a time (Infrared output) Transfer the selected range of measured data to R-DT999 Data Tank. Set the communication setting to "IFR" (Refer to P23 (8) Communication setting). DUAL MODE LCD MODE 1. Use key to set to the upper end of the counter to Set the upper end (Counter 200) 10 : 30...
  • Page 21: Measurement Data Memory Clear

    (8) Data clearance Delete the measured data. DUAL MODE LCD MODE (Delete 1 data) 1) Delete 1 data Select the data to delete and push 10 : 30 N·m N·m 1. Use key to select the data 52.0 52.0 to delete. 2.
  • Page 22: External Output Format

    External output format (1) PC output form Communication spec. RS232C compliant Synchronous method Start-stop synchronization Baud Rate Select from 2400, 4800, 9600, 19200 bps 7bit (PC Output) Data Length 8bit (USB Serial Output) Stop Bit 1bit Parity None • M-3 Mode R E , 9 9 9 , 1 0 0 .
  • Page 23: Settings

    Settings This chapter explains settings of various types of modes and functions. (Sample displays shown below are all LCD (left) display.) Counter 1. Set the counter to 000 (M-3 mode) or 00 (M-2 mode). 10 : 30 N·m Dual 2. Push for 2 seconds till it enters measurement mode.
  • Page 24 (4) Lower limit setting key to set the lower limit value and push N·m 000.0 confirm. N·m 040.0 (5) Tightening direction setting key to select the tightening direction and push tUrn N·m confirm. CW: clockwise tUrn N·m CCW: counter-clockwise (6) Auto memory/reset setting key to select time for Auto memory/reset and push N·m 5.0_...
  • Page 25 (9) Communication baud rate setting key to select the communication baud rate and push N·m 2400 to confirm. Note) If select PRN, communication baud rate is fixed as 2400 bps. N·m 4800 Note) In M-2 mode (CEM2 compatible mode), baud rate must be set to 2400 bps.
  • Page 26 (13) Clock display Push to save settings and goes to measurement mode. rtC1 N·m 12:59:59 Push to save and go on to the next setting. rtC2 N·m 06.12.31 (14) Clock setting Setting of Hour key to select hour and push to confirm.
  • Page 27 Setting of Date key to select data and push to confirm. rtC2 N·m 06.01.31 Measurement display Settings complete. 10 : 30 N·m Dual Mode N·m Mode...
  • Page 28: How To Transfer Data To Software Through Usb Cable

    How to transfer data to software through USB cable • Setting on PC (1) Install the driver accompanying No.584 USB cable. (2) Set the communication port and baud rate. • Setting on CEM3-G (3) Set "USB" on communication mode setting, and select the baud rate in line with PC setting. •...
  • Page 29: Charging

    (6) If it should emit some abnormal smell or generates abnormal heat, stop using it immediately and move it to a safe place. Contact Tohnichi or nearest Tohnichi distributor. (7) When not in use for a long time, charge it to full, and remove the battery to keep it. It is recommended that it should be charged at least once every half a year.
  • Page 30: Options

    Options (1) Battery pack (BP-5) (2) Charger (100-240V) (BC-3-G) (3) Interchangeable head (SH, RH, QH, RQH, DH, HH, FH) PH of interchangeable head can not be used. (4) Communication cord • CEM3-PC (D-SUB 9 pin female) (Catalogue No.575) • CEM3-PC (USB A type) (Catalogue No.584) (5) Exclusive printer (EPP16M3)
  • Page 31: Specifications

    Specifications Overall length L' Effective length L CEM100N3 X15D-G Torque Range Capacity Newton Metric American Hand Power Min. Max. 1digit Min. Max. 1digit Min. Max. 1digit [N·m] [N·m] [kgf·cm] [kgf·cm] [lbf·in] [lbf·in] P [N] CEM10N3X8D-G 2-10 0.01 20-100 20-90 48.1 CEM20N3X10D-G 4-20 0.02...
  • Page 32 TEL: +1-(0)678-423-5777 FAX: +1-(0)678-423-1333 4046 Hwy. 154 Suite 103 Newnan, GA 30265 TOHNICHI SHANGHAI MFG. CO., LTD. TEL: +86-(021)3407-4008 FAX: +86-(021)3407-4135 Rm. 5 No. 99 Nong1919. Du Hui Road. ●ⒸTOHNICHI Mfg. CO., LTD. All Rights Reserved. Minhang. Shanghai. P.R. China 16.07.D 14.04.L...

This manual is also suitable for:

Cem100n3x15d-g

Table of Contents