
Related Manuals for Tohnichi DATA TORK CEM3-G-WF


Summary of Contents for Tohnichi DATA TORK CEM3-G-WF
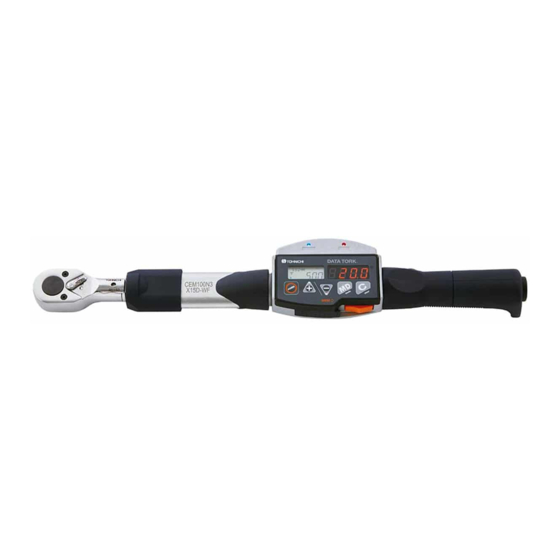
- Page 1 Wireless Digital Torque Wrench “DATA TORK” MODEL CEM3-G-WF Operating Instruction CEM100N3X15D-(G)-WF...
- Page 2 Safety Precautions Please read this operating instruction carefully before use. For any questions, contact a Tohnichi authorized distributor or Tohnichi office. Keep this instruction for future use. Safety Precautions A signal word accompanies the safety symbol, which indicates the level of cautions on safety of people and the appropriate use of the equipment.
- Page 3 Use only the authorized designated accessories and optional equipment. Do not use any other accessories or optional equipment other than those designated in this manual. It may cause accident or injuries. Do not throw the battery into a fire. ...
- Page 4 To change accessories, follow the instruction manuals. Doing otherwise may cause injuries. Check the cable of the charger periodically, and contact the nearest distributor or Tohnichi for repair. Doing otherwise may cause an electric shock and/or a fire.
- Page 5 12) Connect the torque wrench and the interchangeable head firmly. If there is strange smell or fire on usage, stop use. Move this instrument to a safety place, and contact Tohnichi. * For handling of used battery * Nickel metal hydrogen battery is used on this product.
-
Page 6: Table Of Contents
Contents Outline ............................7 Features ............................7 Composition ..........................7 Components ..........................8 Explanation of each mode ......................11 5.1. Measurement mode (Default: MODE-T) ................11 5.2. Display mode (Default: MEMCNT) ................11 Explanation of each feature ...................... 12 Operation examples - Inspection mode operation ..............15 7.1. - Page 7 Specifications .......................... 47...
-
Page 8: Outline
1. Outline CEM3-G-WF is 2.4/5GHz Wireless LAN digital torque wrench. It is ideal for either tighten fastener inspection or production tightening. 2. Features Connect to a network or directly to your device using IEEE 802.11 11a/b/g/n 2.4/5GHz wireless Available the 2.4 GHz and 5 GHz dual bands ... -
Page 9: Components
(16) (17) (15) (1) Interchangeable head The drawing above shows attached QH interchangeable head. Tohnichi head SH, RH, RQH, DH, HH and FH are also available. NOTE: PH head can't be used (2) Wireless LAN module There are wireless LAN module and antenna inside... - Page 10 (12) : Clear key Clears saved data (measurement value, date) on peak mode. Takes auto zero adjustment on run mode (13) Grip There is a battery pack (BP-5) inside (14) Battery cap Remove it when exchanging battery (Counter clockwise thread) (15) Charge jack Connect BC-3-G charge to this jack for charging (16) External output terminal...
- Page 11 [Description of wireless LAN module] Wireless LAN communication Wireless LAN status LED power LED Wireless LAN power LED Red LED turns on during wireless LAN power is on. Press and hold for 2 seconds when CEM3-G-WF power is on to turn off all power. ...
-
Page 12: Explanation Of Each Mode
5. Explanation of each mode CEM3-G-WF has two modes that are Measurement mode and Display mode 5.1. Measurement mode (Default: MODE-T) Inspection mode (MODE-M) MODE-M is ideal for re-tightening and breakaway inspections. The tool makes judgement the measured torque result if there are set the High/ Low limit torque values. ... -
Page 13: Explanation Of Each Feature
Turn off the power once and turn it on again without touching any keys. -If error disappears, then is operates normally. -If not, contact TOHNICHI or the nearest distributor to ask for repair. <Err 8> Error in data memory ... - Page 14 6.5. Mute By setting “Off” on buzzer output setting, the buzzer sound on key operation will be turned off. However, over-torque alarm, tightening completion, NG judgment alarm remains effective. 6.6. Electric power saving When it is left without any key operation of tightening operation for about 1 minute 7-segment LED darkens to save electricity.
- Page 15 6.10. Over-torque alarm/ Peak torque hold starting value (N.m case) Torque range Over-torque alarm Peak hold starting torque Auto zero range Model 1 digit (105% of Max. (7.5% of Max. (7.5% of Max. Min. Max. capacity torque) capacity torque) capacity torque) CEM10N3X8D-G-WF 2.00 10.00...
-
Page 16: Operation Examples - Inspection Mode Operation
7. Operation examples - Inspection mode operation Counter display mode without judgment 7.1. Captures, stores and outputs the peak torque (Default) Set measurement mode to “MODE-M” (Default) Set display mode to “MEMCNT” and Hi/ Lo limits to “0” (Default) iii. Make sure the LCD left side display shows counter between “001”... -
Page 17: Counter Display Mode With Judgment
Counter display mode with judgment 7.2. Captures the peak torque and makes judgment due to your setting tolerance. Then stores and outputs the data to server Set measurement mode to “MODE-M” (Default) Set display mode to “MEMCNT” and High/ Low limit values NOTE: if you set Hi/ Lo limits to "0"... -
Page 18: High/ Low Limit Values Display Mode With Judgment
High/ Low limit values display mode with judgment 7.3. Shows High/ Low limit values on left display. When press key or Auto reset It makes judgment in the range or not after measurement, then outputs data to the server Set measurement mode to “MODE-M” (Default) Set display mode to “TORQUE”... -
Page 19: Operation Examples - Tightening Mode Operation
8. Operation examples - Tightening mode operation 8.1. Counter display mode with judgment Gives the beep intermittent and blue LED blinking when approach on settings torque. Captures the peak torque and makes judgment due to your setting tolerance. Then stores and outputs the data to server Set measurement mode to “MODE-T”... -
Page 20: High/ Low Limit Values Display Mode With Judgment
[When judgment is NG] The tool gives the solid red LED. Press key to store and output data, press to clear the measured data. If there is "NGAUTO" output setting the data will be output automatically even if get judgment result is NG. If there is wireless LAN connection on the tool, it outputs data. vii. - Page 21 Once reaches on low limit torque value the tool gives beep continuous and blue LED. [When judgment is OK] When press key after measurement, tool stores the peak torque and timestamp. If there is wireless LAN connection on the tool, it outputs them. NOTE: The time of timestamp is at the key pressed.
-
Page 22: Operation Examples - Counter Display Mode Operation
9. Operation examples - Counter display mode operation 9.1. Checking the measured data : Send the counter forward : Send the counter backward Press and hold it to fast-forward Example) Refer the data on counter #200 and timestamp Note: When press key while display timestamp the counter moves and shows counter data immediately Example) Refer the data on counter #200 and... -
Page 23: Data Processing Function
9.2. Data processing function It processes the measured data to calculate the data quantity, maximum/ minimum/ average torque of the selected data range Set the counter number to the upper end that you need using keys, then press key to the next Example 1) To process data 001 to 200 Set counter to 200 and press key. -
Page 24: Batch Output Of Measurement Data
9.3. Batch output of measurement data It outputs the selected measurement data (torque and timestamp) to external device Build connection with server via wireless LAN before proceed it Set the counter number to the upper end that you need using keys, then press key to the next Example 1) To process data 001 to 200... -
Page 25: Data Clearance
9.4. Data clearance Set counter # to be deleted using Press to delete data Set the counter number to the upper end that you need using keys, then press key to the next Example 1) To process data 001 to 200 Set counter to 200 and press key. -
Page 26: External Output Format
External output format 10.1. Wireless LAN communication specifications Wireless Standard IEEE 802. 11a/b/g/n 11b/g/n : 2.4/ 5GHz Frequency 11b/g : 2.4GHz 11n/a : 5GHz 11b : Max. 11 Mbps Transmission Speed 11a/g : Max. 54 Mbps 11n : Max. 72.2 Mbps 11b : DSSS Modulation Method 11a/g/n : OFDM... - Page 27 1 2 3 4 5 6 7 8 9 10 11 12 13 14 15 16 17 18 19 20 21 22 23 24 25 26 27 28 0 1 0 + 1 0 0 1 2 3 4 5 6 Serial number Header torque with decimal point...
- Page 28 1 2 3 4 5 6 7 8 9 10 R E 0 0 3 O K CR LF ・Received error or setting error 1 2 3 4 5 6 7 8 9 10 11 12 13 R E 0 0 4 E R R O R CR LF...
-
Page 29: Example Of Communication
10.4. Example of communication When set to 20.00 for Higher and 10.00 for lower limit torques for CEM50N3X12D-G-WF External device CEM3-WF Upper and lower limite setting A T 0 3 7 CR LF Response R E 0 0 3 , O K CR LF When set to 100.0 for Higher and 90.00 for lower limit torques for CEM200N3X19D-G-WF External device... -
Page 30: Various Settings
Various settings 11.1. Setting items Setting items Display Default Selectable from Note Measurement mode MODE-M MODE-M/ MODE-T Display mode dISP MEMCNT MEMCNT / TORQUE N ・ m/ kgf ・ cm/ kgf ・ m/ Unit of torque USEL N ・ m lbf ・... -
Page 31: Setting Procedure By Key Operation
11.2. Setting procedure by key operation Set the counter to “000” using keys Press and hold more than 2 seconds to get in setting mode i. Measurement mode setting Select the measurement mode using “MODE-T”: Tightening mode “MODE-M”: Inspection mode Press to save setting and go to next Press... - Page 32 iv. Higher limit torque setting Set the number using Move the digit using Press to save setting and go to next Press to skip setting and go to next Press to return to Measurement mode v. Lower limit torque setting Set the number using Move the digit using Press...
- Page 33 viii. NG data processing setting Select “NG_MAN” or “NGAUTO” using Press to save setting and go to next Press to skip setting and go to next Press to return to Measurement mode “NG_MAN” (Manual output): When judgment result is NG the auto reset feature will be declined Press to output or to clear data...
- Page 34 xi. Communication mode setting Select the communication mode from "WLAN", "WLANDR", "PC" or "USB" using “WLAN”*: Wireless LAN via access point “WLANDR”*: Direct LAN connection with device “PC”: RS232C output “USB”: USB serial connector output Press to save setting and go to next Press to skip setting and go to next Press...
- Page 35 xiv. Default setting Select the "DFT-Y" for factory reset or "DFT-N" for NOT, using "DFT-Y" then press The tool will be factory reset, all data deleted and settings back to default Press on "DFT-N" or press to skip setting and go to next Press to return to Measurement mode xv.
- Page 36 Press to proceed date settings Press to return to Measurement mode Set the year using Press to save setting and go to next Press to skip setting and go to next Press to return to Measurement mode Set the month using Press to save setting and go to next Press...
-
Page 37: Wireless Lan Connection Procedure
*System requirements OS: Windows 7/ Windows 8/ Windows 8.1/ Windows 10 12.2. CEM3-WF Setting Software installation procedure Download "CEM3-WF Settings Software" and USB driver from Tohnichi Mfg. website (https://en.global-tohnichi.com/) Install USB driver. Please refer the installation procedure for USB driver in the folder iii. - Page 38 Click “Next” to proceed Click “Install” to proceed with the software installation...
- Page 39 vii. Installation completed, click “Finish” After installation, the shortcut of "CEM3WFSTS" setting software will be created on the start viii. menu desktop screen * Trademarks Microsoft, Windows and Windows Vista are registered trademarks of the Microsoft Corporation.
-
Page 40: Wireless Lan Setting Procedure
12.3. Wireless LAN setting procedure Set counter number to "000" (Run mode) using Press and hold for 2 seconds to get into Measurement mode setting Make sure display shows either "MODE-M" or "MODE-T" iii. Connect the CEM3-G-WF torque wrench and PC using USB cable Start "CEM3WFSTS"... - Page 41 Enter or select the parameters then hit "Send" to update CEM3-G-WF wrench settings “Receive”: Confirm current settings on CEM3-G-WF wrench The parameters on software display will be updated “Initial Value”: The parameters on software display will be cleared It does not update settings on CEM3-G-WF wrench [Description of parameters] CEM3-G-WF wrench settings ...
-
Page 42: Notes For Wireless Lan Connection
vii. Once upload setting is completed displays "Completion" viii. Unplug the USB cable and press to exit setting mode 12.4. Notes for wireless LAN connection 12.4.1. Battery setting for laptop or tablet PC There is concern to the wireless LAN connection due to battery setting if use laptop or tablet PC with default settings. - Page 43 iii. Click “Change advanced power settings” Pulldown “Wireless Adapter Settings”, “Power Saving Mode”, then select “Maximum Performance” for “On battery”. Click “OK” to save the setting.
-
Page 44: Procedure Of Wireless Lan Connection Via Access Point
12.4.2. Note on charging during wireless LAN connections Press and hold for 2 seconds to turn CEM3-G-WF power and wireless LAN connections off then plug in the DC jack for charging. If plug in the DC jack when CEM3-G-WF is connecting on wireless LAN the tool is turned off forcibly also wireless LAN connection does off too. -
Page 45: Procedure Of Wireless Lan Connection With Tablet Pc
12.6. Procedure of wireless LAN connection with tablet PC Communication mode: “WLANDR” Make sure tablet PC is turned on then press to turn on CEM3-G-WF which is set wireless LAN connection settings When CEM3-G-WF is ready to communicate the blue "STATUS" LED blinks and awaiting connection with tablet PC NOTE: If there is no connection with laptop or tablet PC over 3 minutes, the wireless LAN power will be turned off to save battery and turn off Wireless LAN power LED. -
Page 46: Battery
Battery Battery life BP-5 battery can be recharged about 500 times depending on conditions before it dies. When it is old, replace it with a new BP-5 battery At the delivery conditions, BP-5 battery is empty. Make sure to charge it before use. How to install the battery Turn the cap clockwise to remove it. -
Page 47: Charging
Temperature must be kept within 0-40 degrees Celsius range when charging. If it should emit some abnormal smell or generates abnormal heat, stop using it immediately and move it to a safe place. Contact Tohnichi or nearest Tohnichi distributor. vii. - Page 48 Specifications Torque Range Capability Max. Metric American Hand Model Min.-Max. 1 digit Min.-Max. 1 digit Min.-Max. 1 digit Force [N ・ m] [kgf ・ cm] [lbf ・ in] CEM10N3X8D-G-WF 2-10 0.01 20-100 20-90 48.1 CEM20N3X10D-G-WF 4-20 0.02 40-200 36-180 92.2 CEM50N3X12D-G-WF 10-50 0.05...
- Page 49 ■Tohnichi Shanghai Mfg. Co., Ltd. 东仁扭矩仪器(上海)有限公司 Tel.+86 21 3407 4008 Fax.+86 21 3407 4135 RM.5 No.99 Nong1919, Du Hui Road, Minhang, Shanghai, P.R.China ● All right reserved. No reproduction or republication without written permission. ● ©TOHNICHI Mfg. CO., LTD. All Rights Reserved.
Need help?
Do you have a question about the DATA TORK CEM3-G-WF and is the answer not in the manual?
Questions and answers