Table of Contents
Advertisement
Quick Links
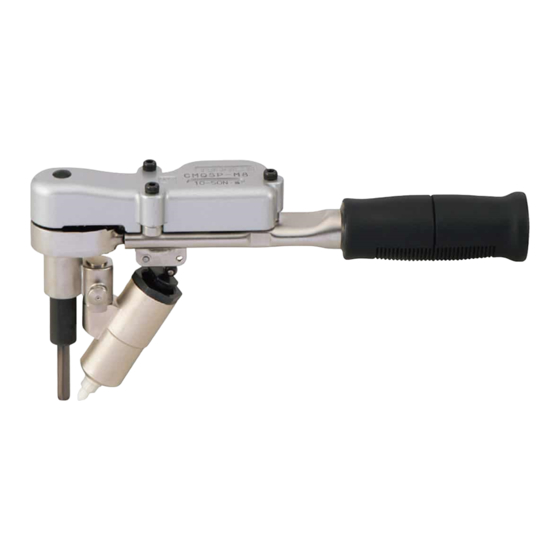
キャップスクリュー用 マーキングトルクレンチ
Marking Torque Wrench fo Soket Screw
お客様へ
本トルク機器をお使いいただく前に、本取扱説明書をよくお読
み頂き正しくご使用下さい。
ご不明な点は、 販売店又は東日製作所までご連絡下さい。なお、
本取扱説明書は大切に保管して下さい。
MODEL
取扱説明書 OPERATING INSTRUCTION
CMQSP
To the User
In order to use the torque wrench properly and safely, please
read this instructions before operation. If any questions,
please contact a Tohnichi authorized distributor or Tohnichi
offi ce. Keep this operating instruction for future use.
Advertisement
Table of Contents

Related Manuals for Tohnichi CMQSP


Summary of Contents for Tohnichi CMQSP
- Page 1 キャップスクリュー用 マーキングトルクレンチ Marking Torque Wrench fo Soket Screw CMQSP MODEL 取扱説明書 OPERATING INSTRUCTION To the User お客様へ In order to use the torque wrench properly and safely, please 本トルク機器をお使いいただく前に、本取扱説明書をよくお読 read this instructions before operation. If any questions, み頂き正しくご使用下さい。 please contact a Tohnichi authorized distributor or Tohnichi ご不明な点は、 販売店又は東日製作所までご連絡下さい。なお、 offi ce. Keep this operating instruction for future use. 本取扱説明書は大切に保管して下さい。...
-
Page 2: Table Of Contents
目 次 Contents 1.安全の為に ・・・・・・・・・・・・・・・・・ 2 1.For your safety ・・・・・・・・・・・・・・・・ 2 2.特長/構成 ・・・・・・・・・・・・・・・・・ 4 2.Features / Component ・・・・・・・・・・・・・ 4 3.使用方法 ・・・・・・・・・・・・・・・・・・ 5 3.How to use ・・・・・・・・・・・・・・・・・・ 5 3−1 マーカーヘッドにインクを補充する ・・・・ 5 3-1.To refi ll the marker head with ink ・ ・・・・・・ 5 3−2 マーカーケースにマーカーヘッドを装填する・・ 6 3-2.To attach the marker head to the marker case ・・ 6 3−3 マーカーケースを本体に取付ける・・・・・・ 7 3-3.To attach the marker case to the main body ・・・ 7 3−4 締付作業を行う ・・・・・・・・・・・・・ 8 3-4.Tightening ・・・・・・・・・・・・・・・・・・ 8 3−4−1 作業環境1 ・・・・・・・・・・・・・ 9 3-4-1.Applicaton Example 1 ・・・・・・・・・・・・ 9 3−4−2 作業環境2 ・・・・・・・・・・・・・ 9 3-4-2.Application Example 2 ・・・・・・・・・・・・ 9 3−5 マーカー位置の調整方法 ・・・・・・・・・ 10 3-5.How to adjust the marking position ・・・・・・・10 3−5−1 六角棒の出代調整 ・・・・・・・・・ 10... -
Page 3: 1.安全の為に
となり、事故や怪我の原因となることがあります。 It may cause deterioration of product durability and accuracy, 6.高所での締め付け作業では工具の脱落防止策をとる damage on and deformation of the product, which may lead トルクレンチを落下させると、本体の破損だけでなく重大な to accident and injury. 事故や怪我の原因となることがあります。 6.Take measures to prevent accidental drop of the wrench 7.トルクレンチの修理部品は東日指定部品以外使用しない when using it at high location. トルクレンチの修理をする場合は、お買い求めの販売店又は Dropping a wrench may not only cause damage on itself, but 弊社に問い合わせ、必ず東日指定部品を使用してください。指 also involve others in the accident. 定部品以外を使用すると、精度不良や耐久性の低下、破損によ 7.Do use only parts approved by Tohnichi for repair and る怪我の原因となることがあります。 maintenance purpose. For repair and maintenance, please contact your place of purchase, or Tohnichi for assistance in obtaining the approved repair parts. Using unauthorized parts may cause deterioration of product accuracy and durability, and result in accident. - Page 4 使用上の注意 Directions for use 1.仕様上のトルク調整範囲内でご使用ください 1.Use tool only within the adjustable torque range 調整範囲外ですと精度不良となったり、特に高い場合耐久性 Using beyond this range may result in accuracy failure and が低下することがあります。 deterioration of durability especially when setting over the 2.使用前に必ずトルク値を確認してください highest torque range. 注文時に指定トルクがある場合、御指示されたトルク値に 2.Make sure to check the torque value before use. セットしておりますが、作業前に確認してからご使用ください。 If you select torque at the time of your purchase, the wrench 3.トルク単位を間違わないよう確認してください will be set for the requested value before delivery. However, 4.トルクレンチは水中や海中で使用しない we advise you to check it before use. 内部構造に劣化が生じ、事故や怪我の原因となることがあり 3.Be careful not to mix up the torque measurements (Nm, ます。 kgf.cm, lbf.in, etc) もしトルクレンチを水中や海中に落としてしまったら、点検 4.Do not use it in water or in the sea. や修理を受けてください。 It may cause deterioration in the internal mechanism, and lead 5. 六角棒レンチはボルトの六角対辺寸法に合ったものを使う to accident or injury. If you drop it in water or sea by accident, 合わないものを使用すると、事故や怪我の原因となることが please have it inspected or repaired. あります。 5.Please select a hex wrench which corresponds to the bolt 6.有効線上を握ってトルクを掛けてください size. 有効線上を握らないと正しいトルク値が得られません。 Using an unsuitable one may cause accident or injury. 7. 「カチン」音がしたら締め付けをやめてください 6.Please grip the handle within the effective-length mark to ...
-
Page 5: 2.特長/構成
2.特長/構成 2.Features / Components 特長 Features ・ 設定トルクに達し、締め付け完了と同時にマーキングします。 ・Mark will be applied only upon reaching the set torque. ・六角穴付ボルトとワークに「合いマーク」をつけます。 ・“Corresponding mark” will be put on the hex socket screw (P 9 3-4-1. 作業環境 1 で御使用の場合に限ります ) and the work piece.(P9 3-4-1. Application Example 1 only) ・ボルトの緩みや人為的な緩め(戻し)が判ります。 ・You can easily detect both intentional/accidental loosening ・後工程だけでなく、出荷後も正しく締められたことが判りま of bolts. す。 ・You can see the bolt tightening condition not only during ・1回のインク補充で約3000回のマーキングが出来ます。 the manufacturing process but also after their delivery. ・速乾性不滅インクでマークが消えません。 ・Approx. 3000 markings per refi llable ink cartridge ・Quick drying ink is durable and cannot be removed without using solvent. 構成 Components 1.本体 ・・・・・・・・・・・・・・1 台 1.Main body・・・・・・・・・・・・・・1 pc 2. 六角棒レンチ ・・・・・・・・・2 本 ( 予備 1 本含む ) 2.Hex wrench・・・・・・・・・2 pcs (one is for a spare) 3.マーカーヘッド... -
Page 6: How To Use
3.使用方法 3.How to Use 3−1 マーカーヘッドへのインクの補充 3-1) To refi ll the marker head with ink ①金属キャップを外す ① Unscrew the metal screw cap マーカーヘッド上面のネジ式金属キャップをコイン又は Unscrew the metal screw cap on the top of the marker head マイナスドライバーで回し、外して下さい。 with a coin or a fl athead screwdriver. At the time of your purchase, the marker cartridge is empty. 御購入時、 マーカーヘッドにはインクが補充されておりません。 Please fi ll the marker cartridge with ink before use. インクをマーカーヘッドに充填してからご使用下さい。 Please refer to "Notice: Filling in the marker cartridge" on the 最終ページの「初回インク補充時の注意点」をご覧ください。 last page. ②インクを補充する ② Refi ll the marker head with ink ・注射器本体に針を挿入してお使い下さい。 ・Set the injection needle on the syringe. ・針に補充液をつけて充填容量を吸い上げて ・Absorb proper amount of spare ink by a syringe. 下さい。 ・Use up the ink in the syringe. ・補充液は注射器の中に残さず使い切って下 (Ink may dry in the syringe, which may cause clogging). さい。 ・ Please use solvent to clean inside the syringe after (補充液が注射器及び針の中で乾燥すると use. 『目詰まり』の原因となります。... -
Page 7: 3-2.To Attach The Marker Head To The Marker Case
3−2 マーカーケースにマーカーヘッドを装填する 3-2) To attach the marker head to the marker case ①マーカーケースのケースキャップを外す ① Unscrew the case cap ②マーカーヘッドをマーカーケースに入れる ② Insert the marker head into the marker case 注 ) マーカーケースの中にはスプリングが入っています。 Note) There is a spring in the marker case. Slide the marker マーカーヘッドをスプリングの上に乗せ、指で軽く押すとマー head into the spring. To confirm proper mounting of the カーヘッドが上下にスライドする事を確認して下さい。 marker head, push down the marker head a little with a fi nger and check if it slides up and down. ③ケースキャップを締める ③ Tighten the case cap 6... -
Page 8: 3-3.To Attach The Marker Case To The Main Body
3−3 マーカーケースを本体に取り付ける 3-3) To attach the marker case to the main body. ①マーカーヘッドを装填したマーカーケースと本体を嵌合させ ① Align the marker case (the flat side) to the main body る。 (button) and slide it in upward until マーカーケースの平面部と本体のボタンの向きを合わせ、真っ it snaps into place. (See below illustration). 直ぐ置くまでマーカーケースを押込んで下さい。 ②マーカーケースのケースキャップの六角部 ( 対辺24) にス ② Tighten the case cap with a spanner wrench (W=24) パナがけし、キャップを締める。 注意 Caution) 手締めのままですと、 使用時にキャップが緩む恐れがあります。 Tightening the case cap by hand force may not be sufficient スパナ等を使用し、 締付トルク and the cap may loosen during your use. For secure tightening, 15N・m 程度でしっかり締付けて下さい。 please use a spanner wrench, etc at about 15 Nm. 7... -
Page 9: 3-4.Tightening
③マーカーキャップを外す ③ Take off the marker cap インクがキャップの内側に付着したままの状態でキャップを付 It may be diffi cult to remove the marker cap in case the ink is けた場合、 マーカーキャップが取れない場合があります。 キャッ hardened around the cap inside. Please take it off by twisting. プを捩るように取り外してください。 Note) 注意 If you would like to extend the length of the hex wrench, 六角棒レンチの出代を購入時よりも長くして使用される場合 please remove the marker cap before attaching the marker は、マーカーキャップを外してから本体とマーカーケースを嵌 case to the main body. Otherwise, the marker cap and the hex 合させて下さい。マーカーキャップと六角棒レンチが干渉し、 wrench may cross each other and cause damage. マーカーヘッドが破損する恐れが有ります。 3-4) Tightening 3−4 締付作業を行う Please do not leave the marker cap open for more than 30 作業を長時間(30分)以上行わない場合は、印面が乾かぬよ... - Page 10 3−4−1 作業環境1 3-4-1. Application Example 1 CMQSPは作業環境 1 で御使用の際、合いマーク(六角穴 CMQSP is designed to put a “corresponding mark” (On the 付ボルト頭部の外周とワークの一部 ) が side of the bolt and part of the work). This type of marking is 付くように調整してあります。作業環境環境 1 での使用は、通 applicable with the standard setting (no setting change after 常購入した状態で可能です。 purchasing) 3−4−2 作業環境2 3-4-2. Application Example 2 ザグリやフランジ付きで使用する場合は、合いマークは出来ま If the applied part is in a hole or includes a flange like the ...
-
Page 11: 3-5.How To Adjust The Marking Position ・・・・・・・10
3−5 マーカー位置の調整方法 3-5) How to adjust the marking position 3−5−1 六角棒の出代調整 3-5-1.To adjust the length of the hex wrench 六角棒の調整範囲は六角棒の基準 Adjustable range of the hex wrench 出代寸法から縮む方向に 7 mm、 length is +12mm (to extend) and ‒ 伸びる方向に12mmです。 7mm(to shorten) the standard length. 調整工具を本体カバの調整穴に挿 Please insert the adjusting tool in the し込み調整を行って下さい。 adjusting hole (see below illustration). 左回し ( 半時計回り ) で長くなり、 Rotate the tool clockwise to shorten, 右回し ( 時計回り ) で短くなりま and counter clockwise to lengthen the す。 wrench. - Page 12 ②ボタンを押し、止まる所までマーカーケースを下に引いて下 ② Keep the button pressed and slide down the marker case さい。 until it stops. ③図のように90° 廻して下さい。 ③ Rotate the marker case by 90 degrees (See below 印面が乾かぬようにマー illustration) Then, put the marker cap カーキャップをして下さ on so it will not dry up. い。 ④ボタンを押し、 マーカーケースを下に引き抜き取って下さい。 ④ Keep the button pressed again, and slide the marker case ...
-
Page 13: Options
名称 二面幅W(mm) カタログNo Width across fl at (mm) Nominal screw Catalogue No. CMQSP−M6ビット 5 724 CMQSP−M8ビット 6 725 CMQSP−M10ビット 8 726 CMQSP−M12ビット 10 727 ②CMQSP用マーカーヘッド No792 ② CMQSP marker head No.792 ③インク・溶剤 ③ Spare ink, solvent 名称 色 カタログNo Model Catalogue No. 補充インクW 白 776 Spare ink White 補充インクY 黄 777 Spare ink Yellow 溶剤 白・黄用... -
Page 14: Specifi Cations
OVERALL (kg) MAX. TORQUE 最大 Max FLAT dimension LGTH LGTH (N・m) R Φ d φ d1 φ d2 CMQSP-M6 5 〜 25 46 121 27 16 0.85 CMQSP-M8 10 〜 50 46 121 27 16 0.85 CMQSP-M10 20 〜 100 37.5 18 103.5 46 153 27 17... - Page 15 関連製品のご紹介...
- Page 16 ② -3 Fill the ink into the marker cartridge through the hole of the metal screw cap. ③ インク補充後、注射器内を溶剤で洗浄して下さい。 ③ Rinse the syringe with solvent. 二回目からは、不足量だけ補充して下さい。 For a refi ll, fi ll in only for the shortfall. 詳しくは取扱説明書 “3-1 マーカーヘッドへのインクの補充 ” For details, please refer to the OPERATING INSTRUCTION 3-1) お読み下さい。 To refi ll the marker head with ink ●本社 TEL.03-3762-2451(代表) FAX.03-3761-3852 〒143-0016 東京都大田区大森北2-2-12 ●東京営業所 ■ TOHNICHI MFG.CO.,LTD. TEL.03-3762-2452 FAX.03-3761-3852 TEL.81-3-3762-2455 FAX.81-3-3761-3852 〒 143-0016 東京都大田区大森北 2-2-12 2-12,Omori-Kita,2-Chome Ota-ku,Tokyo JAPAN E-mail: sales@tohnichi.co.jp E-mail: overseas@tohnichi.co.jp WebSite: http://tohnichi.jp ●北関東営業所 TEL.028-610-0315 FAX.028-610-0316 ■ N.V.TOHNICHI EUROPE S.A. 〒 320-0811 栃木県宇都宮市大通り 2-3-7 泉ビル 7F TEL.32-16-606661 FAX.32-16-606675 Industrieweg 27 Boortmeerbeek,B-3190 BELGIUM ●大阪営業所...
Need help?
Do you have a question about the CMQSP and is the answer not in the manual?
Questions and answers