Spypoint SOLAR-DARK Quick Start Manual
Hide thumbs
Also See for SOLAR-DARK:
- Quick start manual (9 pages) ,
- User manual (18 pages) ,
- Quick start manual (30 pages)
Table of Contents
Advertisement
Quick Links
Advertisement
Table of Contents

Related Manuals for Spypoint SOLAR-DARK


Summary of Contents for Spypoint SOLAR-DARK
- Page 1 QUICK START GUIDE SOLAR-DARK COMPARABLE * v.1.5...
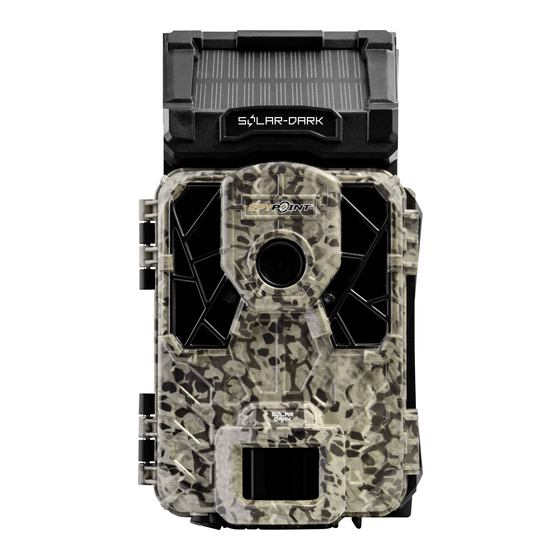
- Page 2 1x 16 GB SD card 1x Installation strap 1x 12 V USB cable 1x Quick Start Guide NOTE Batteries sold separately. User Manual, software updates & FAQs available at: www.spypoint.com/support. COMPONENTS Solar panel Screw-thread for standard ¼”-20 Photo lens Test light...
- Page 3 u i o...
- Page 4 The specifications and characteristics of similar models may vary. Refer to the website or packaging for details. PREPARATION SELECT A POWER SOURCE The camera was designed to be powered by an internal rechargeable battery by means of an integrated solar panel. This power source is generally sufficient for the proper operation of the device.
- Page 5 OPTIONAL POWER SOURCES If the user configures the camera in a way that requires a lot of power, or installs it in a space with little ambient light, or simply for safety, it is recommended that you consider using a secondary power source. When the internal battery charge becomes insufficient, the camera automatically connects to the available optional power source.
- Page 6 (in case all 3 power sources are available): • 12 V battery plugged in the 12 V camera socket. • Internal battery. • AA batteries/lithium battery pack. For more information about the different power sources for your camera, please refer to the User Manual at www.spypoint.com/support.
-
Page 7: Installing An Sd Card
• The card is inserted correctly when a click is heard. FORMAT YOUR SD CARD Before inserting the SD card in your camera, it must be formatted to ensure proper operation. Visit www.spypoint.com/support if you need help formatting your SD card. - Page 8 CONFIGURATION Use the and buttons to navigate the menus and change options, the OK button to select and the BACK button to return to the previous menu. GENERAL SETTINGS SETUP 1. Use the ON/OFF switch to turn the camera ON. 2.
- Page 9 COMPARISON OF HYBRID ILLUMINATION MODES* CONFIGURING THE SETTINGS FOR THE 3 OPERATING MODES From the home menu, select SETTINGS, then PHOTO, TIME-LAPSE, or VIDEO to access the respective mode configuration menu. HOME SETTINGS (Con guration) Photo Start camera Photo (Con guration) Time lapse Detection test Time-lapse...
- Page 10 TIME-LAPSE Interval: This option allows the camera to take photos at regular preset intervals without movement detection. VIDEO Delay: Sets the time interval between each detection before the camera records the next video. Video length: Allows the user to select the duration of the recording.
-
Page 11: Installing Your Camera
INSTALLING YOUR CAMERA MOUNTING BRACKET AND STRAP Install your camera against a tree, using either: 1. The strap and the mounting bracket together. 2. Only the strap inserted directly into the camera. When the camera is installed using the mounting bracket, it can be removed to access the battery compartment without disturbing the installation. -
Page 12: Mounting Bracket
MOUNTING BRACKET To remove the camera from the mounting bracket: 1. Push the tab to release the camera from the mounting bracket. 2. Remove the camera. INSTALLATION WITH THE SUPPLIED STRAP The dimensions of the included strap are 2.5 cm (1’’) X 152 cm (60’’). 1. -
Page 13: Starting The Camera
To produce brighter photos at night, there sould be items reflecting the camera's flash in the background. Please note that the camera should never be directly pointed at the sun to avoid back lighting and faulty detections. TESTING THE CAMERA’S MOTION DETECTION CAPABILITY The test light blinks when the HOME HOME... - Page 14 To ensure that you use your trail camera optimally and that it precisely meets your needs and ultimately to ensure greater success as a hunter, SPYPOINT offers you a range of useful additional digital features. For more details on the SPYPOINT EXPERIENCE, refer to the following website www.spypoint.com/en/spypoint-experience.
- Page 15 DISPOSAL ONLY USE ORIGINAL SPARE PARTS AND ACCESSORIES. If, one day, your camera has been used so intensively that it has to be replaced, or if you no longer have any use for it, you are obliged to dispose of it at a recycling center. Information on return points for your electrical appliance can be obtained from your local waste disposal company or from your local administrative offices.
-
Page 16: Warranty
2-year warranty. We strive to provide our customers with a positive experience and an outstanding service. For a complete list of specifications, features, and settings, visit our SOLAR-DARK page at www.spypoint.com FAQ, User Manual & latest firmware available at www.spypoint.com/support Live chat support at www.spypoint.com...
Need help?
Do you have a question about the SOLAR-DARK and is the answer not in the manual?
Questions and answers