Spypoint Solar-Dark User Manual
Solar trail camera
Hide thumbs
Also See for Solar-Dark:
- Quick start manual (9 pages) ,
- Quick start manual (16 pages) ,
- Quick start manual (30 pages)
Advertisement
Table of Contents
- 1 Table of Contents
- 2 Components / 2
- 3 Specifications / 4
- 4 Power
- 5 Memory Card
- 6 Main Menu
- 7 Configuration Menu / 9
- 8 General Settings / 11
- 9 Installation, Mounting Bracket and Updates / 12
- 10 Transferring Files to a Computer / 13
- 11 Available Accessories
- 12 Troubleshooting / 15
- 13 Warranty and Repairs / 16
- Download this manual
Advertisement
Table of Contents

Related Manuals for Spypoint Solar-Dark


Summary of Contents for Spypoint Solar-Dark
- Page 1 : solar-dark and similar models* www.spypoint.com service@spypoint.com Specifications and features may vary according to model. Refer to our website or package for details. support.spypoint.com Version 7.0...
- Page 2 This manual is designed to guide you through all the great features of easy-to-use, innovative, affordable, and of exceptional quality. your SPYPOINT device so you can optimize its use, all while making the SPYPOINT products are mainly used for hunting or residential and most of your time in the field.
-
Page 3: Table Of Contents
table of contents / 1 Components specifications power memory card main menu configuration menu 9-10 general settings 10-11 installation, mounting bracket and updates transferring files to a computer available accessories troubleshooting warranty and repairs... -
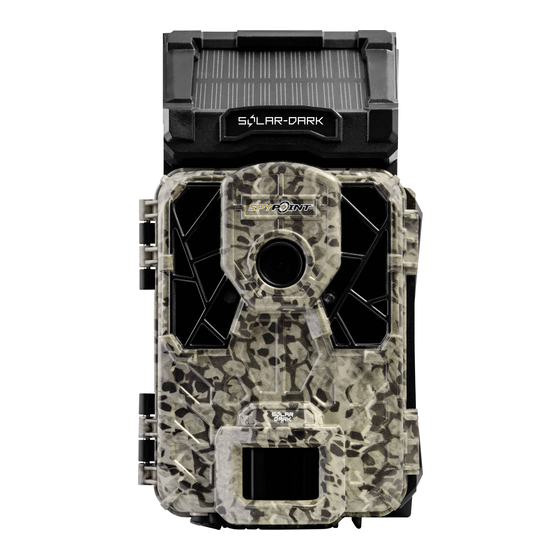
Page 4: Components / 2
components / 2 Solar panel Lockable door latch OK button Microphone Front door Detection lens OFF/ON button Tripod mount Photo lens Cable lock hole Viewing screen Battery compartment/Back door Test light LEDs SD card slot Slot for the mounting strap Light sensor Navigation buttons 12 V jack... - Page 5 components / 3 OK BUTTON SOLAR PANEL Allows the user to make a selection. Absorbs solar energy to charge the internal battery. FRONT DOOR OK (ON / OFF) BUTTON Provides access to the OFF/ON button, the navigation buttons, the viewing screen, Allows the user to confirm a selection and turn the camera on and off.
-
Page 6: Specifications / 4
External battery (12 V jack) 12V battery (KIT6V-12V, KIT-12V, BATT-12V) Date, time, temperature (°C/°F), moonphase, detection system Information appearing on photos only SPYPOINT logo, and camera model Motion sensor Infrared sensor Color during daytime, black and white Capture mode during nighttime Detection angle 40°... -
Page 7: Power
USB charging process. To recharge the internal battery, plug the USB cable provided by SPYPOINT into the camera’s 12 V jack under the device and connect it to one of your Three alternate power sources are available to the user. - Page 8 The camera can be powered by 8 AA batteries (1.5 V). The use of The 12 V battery (#BATT-12V) plugged into the camera The SPYPOINT camera can be powered by a LIT-09/LIT-C-8 alkaline or lithium batteries is strongly recommended. Be sure to offers the benefit of lasting a very long time.
-
Page 9: Memory Card
1h20 2h40 5h20 Note : This SPYPOINT camera is equipped with continuous file recording. When the memory card capacity is full, the camera will continue to record photos or videos by deleting the oldest recorded files. Inserting the memory card Before inserting or removing a memory card, always turn the camera off to prevent any loss or damage to photos already saved on the memory card. -
Page 10: Main Menu
main menu main menu Use the buttons to navigate the interface and modify the selection, the button to confirm your selection and the BACK button to return to the previous menu. starting the camera To turn the camera on and off, press and hold down the button. -
Page 11: Configuration Menu / 9
configuration menu / 9 configuration menu PHOTO, VIDEO, TIMELAPSE GENERAL SETTINGS. Allows the user to configure the photo settings - Sets the options for PHOTO mode. Allows the user to choose the delay between each detection before the camera records the next video. A longer delay Delay minimizes the number of videos taken and maximizes battery life. - Page 12 configuration menu and general settings / 10 timelapse settings - Allows to set the options for TIME LAPSE mode. Allows the camera to take photos at regular preset intervals. For example, if "5 m" is selected in the TIME LAPSE mode, the camera takes a photo every 5 minutes even if there is no detection.
-
Page 13: General Settings / 11
(AA / LIT-09 / 12V) Allows the user to select the battery type in use to get a more precise battery level reading. Displays the date, time, temperature, moon phase, SPYPOINT logo, and camera model on each photo. information appearing... -
Page 14: Installation, Mounting Bracket And Updates / 12
/ 12 Camera software updates Installation with the supplied strap Go to https://support.spypoint.com/EN for instructions on how to perform The dimensions of the included strap are 2.5 cm (1’’) X 152 cm (60’’). camera software updates. -
Page 15: Transferring Files To A Computer / 13
transferring files to a computer / 13 TRANSFERRING FILES TO A COMPUTER • Turn OFF the camera. • Remove the SD card from the camera. • Insert the SD card into the alotted slot on your computer, or use a SD card USB adapter. •... -
Page 16: Available Accessories
ABS plastic SPYPOINT cameras and security boxes. with alligator clips to connect a 12V indicator light. Fits all SPYPOINT cameras. case, AC charger, 3.6 m (12 ft.) power battery to a camera. cable (#PW- 12 ft) and strap included. -
Page 17: Troubleshooting / 15
• Install the latest update (available on on the camera www.spypoint.com under the SUPPORT section). • Replace the batteries or recharge the lithium battery pack. • The camera is in Test mode and detects motion. -
Page 18: Warranty And Repairs / 16
GG Telecom will repair the product or replace it at its discretion with an equivalent product without charge This SPYPOINT product, designed by GG Telecom, is covered by a two (2) year if covered by the warranty described previously. The shipping fees for a sent item will be assumed by the limited warranty on material and workmanship starting from the original date of customer.
Need help?
Do you have a question about the Solar-Dark and is the answer not in the manual?
Questions and answers