Carmanah SpeedCheck-15 Quick Start Manual
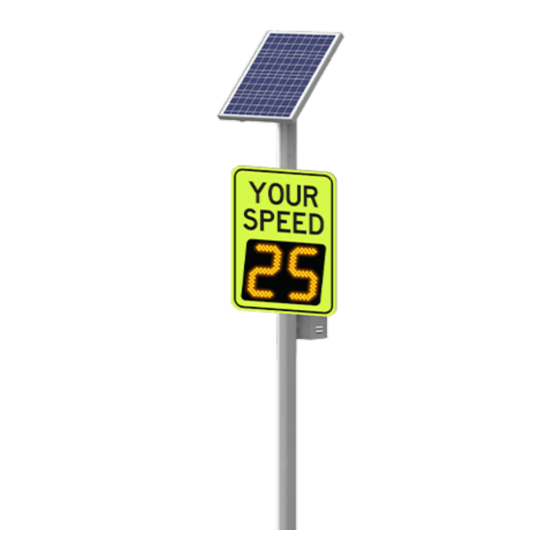
Radar speed sign
Hide thumbs
Also See for SpeedCheck-15:
- Install manual (39 pages) ,
- Manual (16 pages) ,
- Replacement manual (14 pages)
Table of Contents
Advertisement
Quick Links
Advertisement
Table of Contents

Subscribe to Our Youtube Channel
Related Manuals for Carmanah SpeedCheck-15


Summary of Contents for Carmanah SpeedCheck-15
- Page 1 SpeedCheck ® RADAR SPEED SIGN QUICK START GUIDE For the SPEEDCHECK-15/18 SPEEDCHECK-15/18 89157_QSG_TRA_SPEEDCHECK-15-18_RevD Carmanah Technologies Corp. | 250 Bay St, Victoria, BC V9A 3K5, Canada | 1.250.380.0052 | customersupport@carmanah.com carmanah.com...
- Page 2 SPEEDCHECK-15/18 QUICK START GUIDE This page left intentionally blank. Carmanah Technologies Corp. | 250 Bay St, Victoria, BC V9A 3K5, Canada | 1.250.380.0052 | customersupport@carmanah.com carmanah.com...
-
Page 3: Safety Precautions
This quick start guide is not a replacement for the complete product user manual. Visit support.carmanah.com to download the complete product user manual. Carmanah Technologies Corp. | 250 Bay St, Victoria, BC V9A 3K5, Canada | 1.250.380.0052 | customersupport@carmanah.com carmanah.com... - Page 4 Optional StreetHub™ remote monitoring prewired in the cabinet 3. SPEEDCHECK-15 or 18 with AC/DC power supply in cabinet a. SPEEDCHECK-15 – two conductor red/black DC power cable coiled up as it exits the junction box conduit fitting b. SPEEDCHECK-18 – two conductor red/black DC power cable coiled up as it exits the back panel conduit fitting c.
- Page 5 SPEEDCHECK-15/18 QUICK START GUIDE SPEEDCHECK-15/18 Solar Kit: SPEEDCHECK-15 Junction Box: SPEEDCHECK-18 Rear Panel: Carmanah Technologies Corp. | 250 Bay St, Victoria, BC V9A 3K5, Canada | 1.250.380.0052 | customersupport@carmanah.com carmanah.com...
-
Page 6: Components Supplied
Up to two 18 Ah, 12V non-spillable lead acid battery AC-powered systems include these components: • Pole-mounted AC cabinet (for configurations other than SPEEDCHECK-15 with internal AC power supply) Carmanah Technologies Corp. | 250 Bay St, Victoria, BC V9A 3K5, Canada | 1.250.380.0052 | customersupport@carmanah.com carmanah.com... -
Page 7: Other Components Required
The solar panel is securely mounted with hardware fully tightened. Ensure there is a green charging status LED showing on the charge controller to confirm solar charging is taking place. Carmanah Technologies Corp. | 250 Bay St, Victoria, BC V9A 3K5, Canada | 1.250.380.0052 | customersupport@carmanah.com carmanah.com... - Page 8 Solar Version Connections AC Version Connections DC Power from AC/DC power supply (pre-wired) DC out to radar sign (Load+/-) Solar and Battery Connections Carmanah Technologies Corp. | 250 Bay St, Victoria, BC V9A 3K5, Canada | 1.250.380.0052 | customersupport@carmanah.com carmanah.com...
- Page 9 4. Align the display sign to aim at the oncoming vehicles by installing two sets of nuts and bolts to both upper and lower plates. Carmanah Technologies Corp. | 250 Bay St, Victoria, BC V9A 3K5, Canada | 1.250.380.0052 | customersupport@carmanah.com...
- Page 10 8. Once the alignment has been validated, secure the brackets to the pole in a more permanent manner using stainless-steel banding (not provided) or U-bolts (an orderable option). 9. Complete installation wiring. Carmanah Technologies Corp. | 250 Bay St, Victoria, BC V9A 3K5, Canada | 1.250.380.0052 | customersupport@carmanah.com carmanah.com...
-
Page 11: Tilt Mount
Install tilt mounts following the same process used for round mounts. SPEEDCHECK-18 Lower Tilt Bracket SPEEDCEHCK-18 Upper SPEEDCHECK-15 SPEEDCHECK-15 Upper Tilt Brackets Lower Tilt Bracket Tilt Brackets (legacy angled top version shown) Carmanah Technologies Corp. | 250 Bay St, Victoria, BC V9A 3K5, Canada | 1.250.380.0052 | customersupport@carmanah.com carmanah.com... - Page 12 Removing the cabinet pipe nipple will allow the cabinet to sit closer to the pole or mounting surface. Contact Carmanah to obtain the optional hole plug kit that is required to seal the cabinet hole when the nipple is removed.
-
Page 13: Cabinet Installation
4. If desired, before tightening banding, brackets and banding can be adjusted inboard again. Tighten banding (up to ¾” wide) as per banding manufacturer’s instructions. Carmanah Technologies Corp. | 250 Bay St, Victoria, BC V9A 3K5, Canada | 1.250.380.0052 | customersupport@carmanah.com... - Page 14 Northern Hemisphere locations). 2. Route supplied solar panel wires down pole and through hole for cabinet conduit nipple. Hole drilled for cabinet nipple Carmanah Technologies Corp. | 250 Bay St, Victoria, BC V9A 3K5, Canada | 1.250.380.0052 | customersupport@carmanah.com carmanah.com...
- Page 15 1. Attach solar panel to top of pole mount using supplied ¼” bolts, washers and locknuts. Leave nuts finger tight. DO NOT FULLY TIGHTEN at this stage. 2. Insert cap into pole top and slide bracket onto the pole. Carmanah Technologies Corp. | 250 Bay St, Victoria, BC V9A 3K5, Canada | 1.250.380.0052 | customersupport@carmanah.com carmanah.com...
- Page 16 3. Make sure panel mount sits securely on the top of pole cap, as shown below (image shows solar panel removed for illustration purposes). Orient so panel faces South (in Northern Hemisphere). 4. Install and tighten supplied 5/8” bolts and washers. Carmanah Technologies Corp. | 250 Bay St, Victoria, BC V9A 3K5, Canada | 1.250.380.0052 | customersupport@carmanah.com carmanah.com...
- Page 17 6. Route supplied solar panel wires down pole and through hole for cabinet conduit nipple (side of pole shown). Hole drilled for cabinet nipple Carmanah Technologies Corp. | 250 Bay St, Victoria, BC V9A 3K5, Canada | 1.250.380.0052 | customersupport@carmanah.com carmanah.com...
- Page 18 2. Attach both sheet metal brackets to solar panel using supplied ¼” bolts, washers and locknuts. Install casting between brackets with supplied 3/8” bolts and washers. Tighten 3/8” bolts first. Carmanah Technologies Corp. | 250 Bay St, Victoria, BC V9A 3K5, Canada | 1.250.380.0052 | customersupport@carmanah.com...
- Page 19 4. Slide casting over top of pole and orient so panel faces South (in Northern Hemisphere). Tighten the 6x 3/8” bolts to secure casting to pole (image shows solar panel removed for illustration purposes). Carmanah Technologies Corp. | 250 Bay St, Victoria, BC V9A 3K5, Canada | 1.250.380.0052 | customersupport@carmanah.com...
- Page 20 6. Route supplied solar panel wires down pole and through hole for cabinet conduit nipple (side of pole shown). Hole drilled for cabinet nipple Carmanah Technologies Corp. | 250 Bay St, Victoria, BC V9A 3K5, Canada | 1.250.380.0052 | customersupport@carmanah.com carmanah.com...
- Page 21 Ensure cabinet door is fully closed and latched otherwise damage may occur. DC out to radar sign DC out to radar sign Cabinet DC input power (StreetHub™ equipped only) (Load +/- terminals) terminals Carmanah Technologies Corp. | 250 Bay St, Victoria, BC V9A 3K5, Canada | 1.250.380.0052 | customersupport@carmanah.com carmanah.com...
- Page 22 Failure to apply gaskets and sealant could result in water entry in the housing or conduit (if used) and cause damage to the product. Top of Pole gasket location Side of Pole gasket location Carmanah Technologies Corp. | 250 Bay St, Victoria, BC V9A 3K5, Canada | 1.250.380.0052 | customersupport@carmanah.com carmanah.com...
- Page 23 1. Install grommet in cover hole, ensuring it is fully seated against cover face. 2. Secure cover to solar panel using 3x supplied push-in rivets. Carmanah Technologies Corp. | 250 Bay St, Victoria, BC V9A 3K5, Canada | 1.250.380.0052 | customersupport@carmanah.com...
- Page 24 2. Fasten 45-degree wedge casting to housing using 4x supplied bolts. 3. Install on pole and orient solar panel to face South (or as per specific instructions provided by Carmanah) by rotating mount (round post) or 45-degree wedge casting thread (square pole).
- Page 25 6. Install supplied plug into top drain hole. Use only Carmanah supplied high-strength band clamp or commercial banding to secure hub plate to pole. Threaded Opening Carmanah Technologies Corp. | 250 Bay St, Victoria, BC V9A 3K5, Canada | 1.250.380.0052 | customersupport@carmanah.com carmanah.com...
- Page 26 4.18 Solar Kit – Power Harness 1. Fish sign power harness up through pole or conduit to solar kit. a. Power harness will be coiled up coming out of the junction box (SPEEDCHECK-15) or rear panel (SPEEDCHECK-18). See Section 2.1 for more information.
- Page 27 For a top of pole mount system, the lower battery will be the one farthest from the charge controller. For a side of pole mount system, the lower battery will be the one closest to the charge controller. Carmanah Technologies Corp. | 250 Bay St, Victoria, BC V9A 3K5, Canada | 1.250.380.0052 | customersupport@carmanah.com carmanah.com...
- Page 28 2. Lift other end of solar panel up and connect solar panel harness, ensuring connector is fully engaged. 3. Lower solar panel, taking care not to pinch solar panel harness, and install remaining bolts. Tighten all 4 bolts. Carmanah Technologies Corp. | 250 Bay St, Victoria, BC V9A 3K5, Canada | 1.250.380.0052 | customersupport@carmanah.com carmanah.com...
- Page 29 1. In-pole wiring: fish AC wiring from power source through hole in pole for cabinet nipple. For AC-in-the- sign versions of the SPEEDCHECK-15 wire to the junction box on the display sign. a. Optional cabinet entry points are available for external conduit runs for the power.
-
Page 30: Display Alignment
4.22 Display Alignment For the full display alignment instructions refer to Section 5 of the complete product user manual at support.carmanah.com. Aiming Guide and Cone Carmanah Technologies Corp. | 250 Bay St, Victoria, BC V9A 3K5, Canada | 1.250.380.0052 | customersupport@carmanah.com carmanah.com... - Page 31 (speed settings) as requested, otherwise the programming can easily be adjusted using SpeedCheck Manager. For more information on the SpeedCheck controllers refer to Sections 3.6 – 3.9 of the complete product user manual at support.carmanah.com. The legacy programmable controller is being phased out and replaced by the updated programmable board.
-
Page 32: System Configuration
Once your system has been installed and is operational, proceed with connecting to the sign via SpeedCheck Manager. This will require a PC with Bluetooth connectivity. Carmanah assigns default programming based on your system configuration and may require additional configuration based on your installation requirements. - Page 33 5. The sign is now paired and will be connected within SpeedCheck Manager. This process will need to be completed if you are connecting to a system for the first time or connect via another Carmanah Technologies Corp. | 250 Bay St, Victoria, BC V9A 3K5, Canada | 1.250.380.0052 | customersupport@carmanah.com...
-
Page 34: Troubleshooting
5. Test sequence is disabled. 6. Operating Modes settings set for “Display OFF”. 7. Timer or scheduler has scheduled the sign to be off. Carmanah Technologies Corp. | 250 Bay St, Victoria, BC V9A 3K5, Canada | 1.250.380.0052 | customersupport@carmanah.com carmanah.com... - Page 35 3. Make sure display date and time is set properly with the SpeedCheck Manager Device System tab setup menu. Carmanah Technologies Corp. | 250 Bay St, Victoria, BC V9A 3K5, Canada | 1.250.380.0052 | customersupport@carmanah.com carmanah.com...
- Page 36 SPEEDCHECK-15/18 QUICK START GUIDE © 2021 Carmanah Technologies Corporation Technical Support: Email: customersupport@carmanah.com Toll Free: 1.877.722.8877 (US & Canada) Worldwide: 1.250.380.0052 Fax: 1.250.380.0062 Web: carmanah.com Carmanah Technologies Corp. | 250 Bay St, Victoria, BC V9A 3K5, Canada | 1.250.380.0052 | customersupport@carmanah.com carmanah.com...
Need help?
Do you have a question about the SpeedCheck-15 and is the answer not in the manual?
Questions and answers