Carmanah SPEEDCHECK-15 Install Manual
Hide thumbs
Also See for SPEEDCHECK-15:
- Install manual (39 pages) ,
- Quick start manual (36 pages) ,
- Manual (16 pages)
Table of Contents
Advertisement
Quick Links
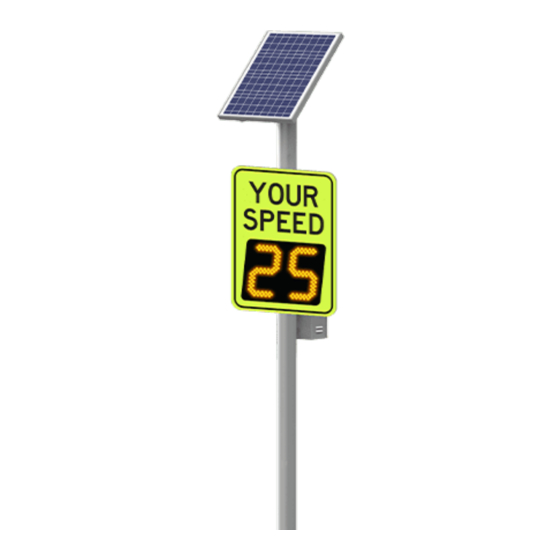
SpeedCheck
®
APPLIED INFORMATION (AI) INTEGRATION INSTALL GUIDE
For the SPEEDCHECK-15 and SPEEDCHECK-18
SpeedCheck
SpeedCheck
Solar Cabinet
AC Cabinet
88764_InstallGuide_TRA_SpeedCheck-AI-Integration-Kit_RevC
Carmanah Technologies Corp. | 250 Bay St, Victoria, BC V9A 3K5, Canada | 1.250.380.0052 |
customersupport@carmanah.com
|
carmanah.com
Advertisement
Table of Contents

Related Manuals for Carmanah SPEEDCHECK-15


Summary of Contents for Carmanah SPEEDCHECK-15
- Page 1 SpeedCheck ® APPLIED INFORMATION (AI) INTEGRATION INSTALL GUIDE For the SPEEDCHECK-15 and SPEEDCHECK-18 SpeedCheck SpeedCheck Solar Cabinet AC Cabinet 88764_InstallGuide_TRA_SpeedCheck-AI-Integration-Kit_RevC Carmanah Technologies Corp. | 250 Bay St, Victoria, BC V9A 3K5, Canada | 1.250.380.0052 | customersupport@carmanah.com carmanah.com...
-
Page 2: Table Of Contents
6.0 SPEEDCHECK-18 Installation ........................20 Serial Harness ............................20 7.0 SPEEDCHECK-15/18 Cabinet Final Instructions ..................23 Harness Routing ............................23 Testing AI FCU ............................24 Carmanah Technologies Corp. | 250 Bay St, Victoria, BC V9A 3K5, Canada | 1.250.380.0052 | customersupport@carmanah.com carmanah.com... -
Page 3: Warnings And Precautions
Installation may require more than one person. Ensure the equipment is not powered during installation and wiring of the system. Carmanah Technologies Corp. | 250 Bay St, Victoria, BC V9A 3K5, Canada | 1.250.380.0052 | customersupport@carmanah.com carmanah.com... -
Page 4: Applications
Product can have sharp edges. Accidental movement of hinged components can cause injury. Applications For Carmanah SPEEDCHECK-15/18 radar speed signs, the AI Integration Kit allows for remote system monitoring, scheduling and control. Carmanah Technologies Corp. | 250 Bay St, Victoria, BC V9A 3K5, Canada | 1.250.380.0052 | customersupport@carmanah.com... -
Page 5: System Components
11. Screw, machine, #8-32 x 3/8” Phillips (4) 22. Install guide, AI Integration Kit (1) 3.0 Tools and Materials Required The following tools and materials may be required to install the AI Integration Kit into your SPEEDCHECK-15/18 system: 1. Drill and ½” drill bit 2. -
Page 6: Speedcheck-15/18 Cabinet Installation
Ensure all metal chips are removed to prevent system damage caused by short circuits. Ensure that no burrs are present that would prevent the antenna from making a good seal with the top of the cabinet. Carmanah Technologies Corp. | 250 Bay St, Victoria, BC V9A 3K5, Canada | 1.250.380.0052 | customersupport@carmanah.com carmanah.com... - Page 7 Fasten coax to cable tie mount with one cable tie. Twist the cable so the connector ends exit to the right- hand side. Twist Carmanah Technologies Corp. | 250 Bay St, Victoria, BC V9A 3K5, Canada | 1.250.380.0052 | customersupport@carmanah.com carmanah.com...
-
Page 8: Door Switch Kit (Optional)
3. Deburr the holes on the outside and inside to remove all aluminum chips. Ensure all metal chips are removed to prevent system damage caused by short circuits. Carmanah Technologies Corp. | 250 Bay St, Victoria, BC V9A 3K5, Canada | 1.250.380.0052 | customersupport@carmanah.com... - Page 9 10. Install two cable tie bases as shown below. Fasten the long wire from door switch to the two cable tie bases. Leave loose/untrimmed for now. Carmanah Technologies Corp. | 250 Bay St, Victoria, BC V9A 3K5, Canada | 1.250.380.0052 | customersupport@carmanah.com...
-
Page 10: Ai 500-070 Field Control Unit (Fcu)
Keep coax cable away from sharp edges. 5. Mate 16-pin and 4-pin connectors to AI FCU connector. Clearance between coax and box edge Carmanah Technologies Corp. | 250 Bay St, Victoria, BC V9A 3K5, Canada | 1.250.380.0052 | customersupport@carmanah.com carmanah.com... -
Page 11: Solar Version Only
5. Install yellow ring terminal from 16-pin AI harness over existing Solar + ring terminal. 6. Route yellow wire alongside other harness wires. Install two ring terminals with crimp towards chassis to make terminal stacking easier. Carmanah Technologies Corp. | 250 Bay St, Victoria, BC V9A 3K5, Canada | 1.250.380.0052 | customersupport@carmanah.com carmanah.com... - Page 12 Stack the red and black terminals of the AI harness on top of the red and black terminals from the DC input power harness. Carmanah Technologies Corp. | 250 Bay St, Victoria, BC V9A 3K5, Canada | 1.250.380.0052 | customersupport@carmanah.com...
-
Page 13: Ac Version Only
6. Install DC input power harness to terminal block. 7. Fasten DC input power harness to cable tie mounts with three cable ties. Carmanah Technologies Corp. | 250 Bay St, Victoria, BC V9A 3K5, Canada | 1.250.380.0052 | customersupport@carmanah.com carmanah.com... - Page 14 DC input power harness. Yellow wire is for solar monitoring and is not use for AC configurations. Attach yellow wire to unused terminal position. Carmanah Technologies Corp. | 250 Bay St, Victoria, BC V9A 3K5, Canada | 1.250.380.0052 | customersupport@carmanah.com carmanah.com...
-
Page 15: Speedcheck-15 Installation
Legacy controller and serial cable (4 wire) with locking levers removed. Remove levers if present. • Updated controller and serial cable (4 wire) Controller Version Serial Cable Version Legacy Updated Carmanah Technologies Corp. | 250 Bay St, Victoria, BC V9A 3K5, Canada | 1.250.380.0052 | customersupport@carmanah.com carmanah.com... - Page 16 APPLIED INFORMATION (AI) INTEGRATION INSTALL GUIDE 1. See “Accessing Internal Components” section of the SPEEDCHECK-15 user manual to allow access to the SpeedCheck controller circuit board. This can be found at support.carmanah.com. 2. Remove the junction box lid. Route black connector end of serial harness and ground wire harness through conduit connector, into junction box and down into chassis.
- Page 17 90° to the control board. The connector is keyed and can only go in one way. Key facing down towards notch Carmanah Technologies Corp. | 250 Bay St, Victoria, BC V9A 3K5, Canada | 1.250.380.0052 | customersupport@carmanah.com carmanah.com...
- Page 18 Legacy controller with 3-pin serial cable 90° Ensure connector is vertical. Legacy controller with 4-pin serial cable Key facing outboard to the left Carmanah Technologies Corp. | 250 Bay St, Victoria, BC V9A 3K5, Canada | 1.250.380.0052 | customersupport@carmanah.com carmanah.com...
- Page 19 14. Install cable ties around input power harness and any other harnesses present. Tighten and trim cable ties. 15. Reinstall junction box cover and tighten its two screws. Carmanah Technologies Corp. | 250 Bay St, Victoria, BC V9A 3K5, Canada | 1.250.380.0052 | customersupport@carmanah.com carmanah.com...
-
Page 20: Speedcheck-18 Installation
Screw head Radar mounting Input power Screw’s captive washer screw Washer Serial Ground Ring terminal Radar bracket sheet metal Carmanah Technologies Corp. | 250 Bay St, Victoria, BC V9A 3K5, Canada | 1.250.380.0052 | customersupport@carmanah.com carmanah.com... - Page 21 6. Route serial harness alongside radar as shown. Fasten serial harness to radar harness with three cable ties. Before tightening/trimming cable ties, ensure serial connector is fully mated at 90° to control board. Carmanah Technologies Corp. | 250 Bay St, Victoria, BC V9A 3K5, Canada | 1.250.380.0052 | customersupport@carmanah.com...
- Page 22 Legacy controller with 3-pin serial cable 90° Ensure connector is vertical. Legacy controller with 4-pin serial cable Key facing outboard to the left Carmanah Technologies Corp. | 250 Bay St, Victoria, BC V9A 3K5, Canada | 1.250.380.0052 | customersupport@carmanah.com carmanah.com...
-
Page 23: Speedcheck-15/18 Cabinet Final Instructions
4. Route the ground harness from the sign to the stud and stack with the other ground terminals. 5. Install the new screw-mount cable tie holder and tighten around the two (or more) ground wires. Carmanah Technologies Corp. | 250 Bay St, Victoria, BC V9A 3K5, Canada | 1.250.380.0052 | customersupport@carmanah.com... -
Page 24: Testing Ai Fcu
7. On the upper left side of the browser, select the device name that matches the Device ID (the ID number labelled on the AI FCU). Ensure the equipment is not powering during installation. Recheck all wiring prior to energizing the system. Carmanah Technologies Corp. | 250 Bay St, Victoria, BC V9A 3K5, Canada | 1.250.380.0052 | customersupport@carmanah.com carmanah.com... - Page 25 11. Contact Applied Information to arrange the firmware in the AI unit to be programmed correctly, if this hasn’t already been done. c. Phone: 678.830.2170 d. Email: support@appinfoinc.com e. Web: appinfoinc.com Carmanah Technologies Corp. | 250 Bay St, Victoria, BC V9A 3K5, Canada | 1.250.380.0052 | customersupport@carmanah.com carmanah.com...
- Page 26 INSTALL GUIDE © 2021 Carmanah Technologies Corporation Technical Support: Email: customersupport@carmanah.com Toll Free: 1.877.722.8877 (US & Canada) Worldwide: 1.250.380.0052 Fax: 1.250.380.0062 Web: carmanah.com Carmanah Technologies Corp. | 250 Bay St, Victoria, BC V9A 3K5, Canada | 1.250.380.0052 | customersupport@carmanah.com carmanah.com...
Need help?
Do you have a question about the SPEEDCHECK-15 and is the answer not in the manual?
Questions and answers