Table of Contents
Advertisement
Quick Links
Installation Guide
安裝說明
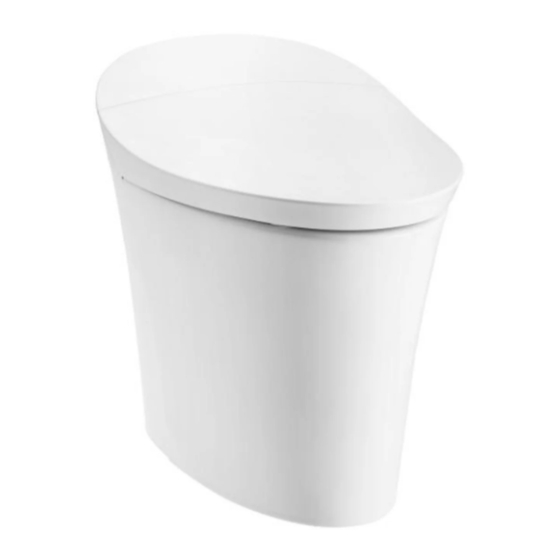
VEIL+ INTELLIGENT TOILET
Veil 全自動馬桶便座
K-5401TW-2-0
IMPORTER: KOHLER ASIA PACIFIC TAIWAN BRANCH, TEL.: +886-2-25818196
8F., No. 148, SONGJIANG Rd., ZHONGSHAN DIST., TAIPEI CITY 104,
TAIWAN (R.O.C.), POST CODE: 104492
進口商 : 香港商科勒亞洲有限公司台灣分公司 電話: +886-2-25818196
台灣台北市中山區松江路148號8樓 郵編: 104492
English page 2-15
16-29
1422537-TW01-A
Advertisement
Table of Contents

Subscribe to Our Youtube Channel
Related Manuals for Kohler K-5401TW-2-0


Summary of Contents for Kohler K-5401TW-2-0
- Page 1 Installation Guide 安裝說明 VEIL+ INTELLIGENT TOILET Veil 全自動馬桶便座 K-5401TW-2-0 IMPORTER: KOHLER ASIA PACIFIC TAIWAN BRANCH, TEL.: +886-2-25818196 8F., No. 148, SONGJIANG Rd., ZHONGSHAN DIST., TAIPEI CITY 104, TAIWAN (R.O.C.), POST CODE: 104492 進口商 : 香港商科勒亞洲有限公司台灣分公司 電話: +886-2-25818196 台灣台北市中山區松江路148號8樓 郵編: 104492...
-
Page 2: Before You Begin
These instructions contain important care, cleaning, and warranty information - please leave instructions for the consumer. We appreciate your commitment to Kohler quality. Pleas e take a few minutes to review this manual before installation. If you encounter any installation or performan ce problems, please don't hesitate to contact us.Thanks again for choosing Kohler Company. -
Page 3: Specifications
Remote control Unit: mm 15A Waterproof socket (grounding type) Water Inlet hose Fig.#3 Kohler reserves the right to change marked dimensions without prior notice. SPECIFICATIONS Water supply volume Average 4.0L, Full flush 6.0L, Flush ECO 3.0L 305mm Pit distance Min water pressure 0.07MPa (dynamic pressure) Water pressure Max water pressure 0.74MPa... -
Page 4: Preparations Before Installation
A. Hold the rim of the vitreous shell and take out the toilet. WARNING: Risk of personal injury and product damage!Please do not hold the rim of the bidet seat when lifting the the toilet. As the toilet is heavy, please seek help if necessary. Toilet Fig.#5 1422537-TW01-A Kohler Co. -
Page 5: Installation
(GFCI's) or Earth-Leakage Circuit-Breakers (ELCB's). Keep bath and shower away from electrical parts (such as remote controller, receptacle,etc). When the electrical supply is mounted on the wall, a GFCI or ELCB protected and water proof receptacle is required. Kohler Co. 1422537-TW01-A... - Page 6 Make sure the toilet side mark symbol is align to the drain hole centerline on the finished floor.Mark down the left and right holes. Hole(two sides) Mark symbol Fig.#9 D. Drill two holes and insert plastic inserts and T-bolts (Purchased by customer) 10mm Bolt Fig.#10 1422537-TW01-A Kohler Co.
- Page 7 Position the floor flange align the drain hole, and press it onto the finished floor . Silica gel Fig.#1 G. Remove side plates Unscrew the nut cap on the tee joint. Nut cap Side Plate Fig.#12 Kohler Co. 1422537-TW01-A...
- Page 8 CAUTION: Risk of product damage . Do not move the toilet after the trap way is properly seated to avoid the wax seal invalidated, Change the wax ring if it is needed to move. WARNING: Risk of personal injury or product damage. Overtightening may cause breakage or chipping. Fig.#14 1422537-TW01-A Kohler Co.
- Page 9 The supplied hose must be used for this installation. 1. Connect the water outlet. 2. Open the shut-off valve. NOTE:Please use the water supply hose accompanying with new machine. The old hose assembly shall not be used again. Fig.#16 Kohler Co. 1422537-TW01-A...
- Page 10 Apply one circle of silicone gel around toilet bottom to seal the gaps. Wipe the excessive silicone gel on the bottom of left/right plate. Projecting portion Coated with silica gel of silica gel are cu t Side plate (two sides) off (two sides) Fig.#1 1422537-TW01-A Kohler Co.
-
Page 11: Installation Steps
Install the screw so it is covered. Place the remote controller on the holder. Fig.#19 Installation Steps: Public Anti-loss Installation Screw Hook Expansion Remove the Expansion screw pipe silicome plug Remove the Hook plate silicome plug Remote control Dock Seat gasket Fig.#20 Kohler Co. 1422537-TW01-A... - Page 12 Water Pump: On (Press and hold flush and Spiral Wash: front wash button on toilet side panel, short Water Temperature: mid “beep” indicates water pump is on, long Water flow intensity: mid “beep” indicates water pump is off. ) Position: mid 1422537-TW01-A Kohler Co.
-
Page 13: Troubleshooting
D. Press Power button at the side. Wake up the product E. Wash mode is in progress completed 3. Emergency flush A. Contact Kohler service department to A. Spare battery pack is low is not working replace battery pack 4. Toilet is not clean A. - Page 14 If this toilet is to be repaired and maintained, firstly you have to: Disconnect the power plug of toilet. If necessary, turn off the water valve. 1422537-TW01-A Kohler Co.
-
Page 15: Important Consumer Information
Do not use abrasive cleaners or solvents. WARNING: Risk of property or product damage. Kohler Company shall not be responsible or liable for any damage to these fittings caused by the use of cleaners containing chlorine (calcium hypochlorite). WARNING: Do not use any hard setting material (cement mortar) while installing the toilet. - Page 16 VEIL+ 新維亞 INSTALLATION INSTRUCTIONS 安裝說明書 INTELLIGENT TOILET Veil 全自動馬桶便座 K-5401TW-2-0 安裝之前 請仔細詳閱本指引。以便熟悉所需工具、物料及安裝程式。請遵照適用的章節來安裝您的座便器,以避免由於安裝 失當而導致不必要的損失。除了有關正確的安裝方法之外,還務請詳閱所有操作及安全指引。 本指引所載之一切資料,均以印刷時所有之最新產品情況為基礎,科勒保留權利隨時更改產品特性、包裝或供應情 況,恕不另行通知。 我們感謝您對科勒品質的信任。在您開始安裝之前,請您花上幾分鐘時間來閱讀這本手冊。如果您在安裝或性能方 面遇到任何問題,務必請您與我們聯繫。 面遇到任何問題,務必請您與我們聯繫。 再次感謝您選擇科勒公司。 安裝前請確保座便器安裝所需要的空間,並不會影響到門的開關。 在安裝本產品的同一房間中,需要在觸手可及的位置安裝一個止水閥,用於緊急情況下,無需借助工具即可切斷本 產品的進水水路;否則本產品的意外故障可能會導致使用者損失。 確認排水坑距305mm,坑距需滿足292-350mm。如未滿足,可能會影響安裝。 確認出水接頭距離完工牆面凸出不超過3mm。沉入完工牆壁不超過5mm。如未滿足,可能會影響安裝。 推薦使用內徑DN15mm以上的主水管,以確保下述供水條件要求。 為了達到更好的沖洗效果,用戶在安裝進水管如PPR管的熱熔連接時,應儘量避免明顯的縮徑或熱熔擠出物堵塞部 分管道等現象,並確保連接後進水管內徑大於15mm。 請使用產品所配的軟管和角閥。 若供水管路中裝有減壓閥,請使用DN32mm以上的減壓閥。 注意 危險:存在觸電危險。操作前應切斷電源。 警告:存在觸電危險。只可連接至帶接地故障斷路器 (GFCI) 或 接地漏電斷路器 (ELCB) 保護的電路中。 謹慎: 存在有害氣體的危險。如果新座便器不能立即安裝,可在地面法蘭孔上臨時遮蓋一塊舊 布。...
- Page 17 尺寸圖 Unit: mm 遙控器(隨機配) 15A防水插座(帶接地) 完工牆面 接出水口 完工地面 坑距 角閥(带过滤器)(隨機配角閥及軟管) 缸體前端 底部視圖 Fig.#3 圖3 科勒公司保留隨時變更圖中標示尺寸的權利,無需另行通知。 規格 4.0L 6.0L 3.0L 最小進水壓力0.07MPa(動壓)最 大進水壓力0.74MPa 110V~, 60Hz 1100W 0.9m 43kg 注意:智慧蓋板規格詳見使用者手冊。 * 功率值測試條件:動壓0.2MPa,進水溫度15℃。 Kohler Co. 1422537-TW01-A...
- Page 18 整體簡圖 緩衝墊 × 4 蓋板(抗菌*) 座圈(抗菌*) 噴嘴 落座感應區 按下暖風鍵,啟動暖風功能 再按一次關閉 按下按鍵進入臀部沖洗, 按下關閉電源(長音提示) 再按一次關閉 再按下一次開啟電源(短音提示) power 光感應區 按下按鍵進入女性沖洗, 按下關閉夜燈功能(長音提示) 再次按下開啟夜燈功能(短音提示) 再按一次關閉 按下進行馬桶沖水(停電后長按,啟動應急沖水功能) Fig.#4 圖4 安裝前準備 A. 抓住陶瓷件的邊緣,從包裝箱中取出產品。 警告:人身和產品損害風險!向上提起座便器時,請勿抓住智能蓋板的邊緣。由於座便器較重,必要時請尋求他人幫 助。 Toilet 座便器 Fig.#5 圖5 1422537-TW01-A Kohler Co.
- Page 19 在地面上放置一塊800mmX800mm大小的軟墊,將座便器從包裝箱中取出放在軟墊上。 Fig.#6 圖6 安裝 A. 拆除舊座便器(如果有) 關掉供水源,給座便器沖水,用海綿吸去座便器內的剩餘水分,拆除供水管止水閥(如果有),移開舊水箱和座便器。 用塗油灰刀拆除地上的舊密封墊圈及座便器法蘭附件包,拆除及扔掉舊的T型螺栓。 注意:如果不能即時安裝新座便器,請用碎布暫將法蘭附件包堵住。 法蘭附件包 Fig.#7 圖7 B. 安裝尺寸 危險:存在觸電危險。安裝前應切斷電源。 注:本產品設計可安裝於牆上式電源和水路管。安裝方式在尺寸圖中有標示。 警告:存在觸電危險。只可連接至帶接地故障斷路器 (GFCI)或接地漏電斷路器(ELCB)保護的電路中。 浴缸與花灑位置請遠離帶電部件(如遙控器、電源插座等)。如果是牆上式電源,需要使用防水、防濺的插座。 Kohler Co. 1422537-TW01-A...
- Page 20 Unit: mm Fig.#8 圖8 C. 1. 確定排汙口中心點並垂直墻面劃上十字線 2. 側放座便器,按陶瓷排汙口找出前後左右中心標記,並記於陶瓷外側壁上 3. 座便器平穩對準地面上的中心線.記下左右地腳孔的位置 地腳孔(两側) 中心標記 Fig.#9 圖9 D. 鉆兩個地腳孔,安裝膨脹塑膠及地腳螺釘(由客戶自行購買) 10mm Fig.#10 地腳螺釘 圖10 1422537-TW01-A Kohler Co.
- Page 21 安裝電源 危險:存在觸點危險,操作前應切斷電源。 危險:存在觸電危險。僅適用於插入式安裝/牆面式電源,只可連接至帶接地故障斷路器(GFCI)保護的電路中。 勿取走接地插腳,或選擇使用接地適配器。 警告:產品存在電擊的危險。本產品只可連接到良好接地,電路要求為110V~,15A,60Hz的電路中,此電 路必須帶接地故障斷路器或接地漏電斷路器。 警告:不允許使用延長線。 警告:不允許使用不帶接地線的插座。 注意:本產品設計可安裝於牆上式電源。安裝方式在尺寸圖中有標示。 安裝硬電線電源時應嚴格遵守尺寸圖上的資訊操作。 F. 安裝法蘭盤 將法蘭盤反面塗滿矽膠 將法蘭盤對正下水孔插入 並壓貼住地面 矽膠 Fig.#11 圖11 G G . . 拆下左右側板 卸下供水三通上的螺紋帽。 側板 螺紋帽 Fig.#1 圖12 Kohler Co. 1422537-TW01-A...
- Page 22 安裝蠟封 將蠟封安裝在法蘭附件包上。 Fig.#13 圖13 I. 安裝陶瓷外殼 警告:存在人員受傷的危險。陶瓷外殼重達35千克。搬運陶瓷外殼時,應使用適當的提升工具。 謹慎:存在產品損壞的危險。向下放置陶瓷外殼時不要用力過大。如果外殼未能放置到位,應輕輕提起和移 動。如果操作粗糙,外殼可能被壓碎或開裂。 小心地抬起座便器。 確保排汙通道完全置於排污口內。如果陶瓷外殼不能均勻置於地面上,則排汙通道不能正確到位。 參考地面排汙口中心線及陶瓷上前後左右中心標記,輕輕地進行各種調節,直至排汙通道正確到位。 用螺母及墊片擰緊兩顆地腳螺絲固定座便器。 謹慎:存在產品損壞的危險。安裝到位後,不能再次搬動座便器,以免蠟封失效。如需搬動,需更換蠟封。 警告:提防身體受傷或產品破裂。螺母不可上得太緊,否則會導致釉面陶瓷損壞及崩裂。 螺母 Fig.#14 圖14 1422537-TW01-A Kohler Co.
- Page 23 J. 安裝角閥 Unit: mm 重要提示如下 1. 圖中尺寸為角閥建議安裝尺寸 2. 安裝前,角閥必須裝上裝飾蓋 注意:請勿重複使用舊角閥。 把手順時針關閉,逆時針打開 角閥把手 250 10 裝飾蓋 角閥 Fig.#15 圖15 K. 連接水管 重要提示 安裝時必須使用產品所配的軟管。 1. 連接水管。 2. 打開角閥。 注 意:必須使用隨器具附帶的新軟管元件,舊軟管組件不能重複使用。 Fig.#16 圖16 Kohler Co. 1422537-TW01-A...
- Page 24 L. 測試應急沖水按鍵,斷電後,長按本體上輔助鍵盤沖水按鍵啟動應急沖水功能。 power Fig.#17 圖17 M. 打矽膠後,安裝左右側板,插上電源插頭,接通電源。 注意: 在座便器底部周圍打上一圈矽膠,填堵座便器底部四周的縫隙。 座便器安裝左右側板的底部矽膠凸出部分抹掉。 矽膠凸出部分 打矽膠 側板(兩側) 抹掉(兩側) Fig.#1 圖18 1422537-TW01-A Kohler Co.
- Page 25 安裝遙控器支架 注意:如果安裝牆面是特定材料(比如木板、密制板等)時,使用合適的固定方法。 注意:遙控器的安裝位置應該是不易被水淋到的地方。 選擇一個合適地方安裝遙控器支架,這個地方應該是當你坐在座便器上時很容易用手容易操作遙控器。 根據遙控器支架螺釘孔的位置,用直徑6mm的鑽頭在牆上鑽兩個深度大於45mm的孔。在孔中裝入膨脹管。 將安裝支架在放置固定孔上。 將支架背面雙面膠離型紙撕掉。 用螺釘固定安裝支架。 把螺釘蓋裝在螺釘上。 把遙控器放在支架上。 Fig.#19 圖19 公共場所防遺失功能安裝方式 安裝步驟: 螺絲 掛鉤板 膨脹管 膨脹螺釘 取下矽膠塞 取下矽膠塞 掛鉤 遙控器 充電座 密封墊片 Fig.#20 圖20 Kohler Co. 1422537-TW01-A...
- Page 26 初次使用前準備 Fig.#21 圖21 確認進水閥是否已打開。 確認遙控器充電座內已正確裝入電池。 確認產品正前方沒有障礙物。 等待主機完成自檢。期間可聽到電機的轉動聲和流水聲,均屬正常。當夜燈閃爍時,自檢結束. 初次使用時為出廠設置狀態: 女性沖洗: 臀部沖洗: 旋轉沖洗: 圈溫:中檔 水溫:中檔 水溫:中檔 水溫:中檔 風溫:中檔 水流強度:中檔 水流強度:中檔 水流強度:中檔 夜燈:開 沖洗位置:中檔 沖洗位置:中檔 沖洗位置:中檔 節能模式:關 自動UV功能:開 除臭:開 自動翻蓋功能:開.距離中 自動沖水功能:開 水泵:開(同時長按本體側鍵盤上的沖水 除菌水功能:開 鍵和女性沖洗鍵,短音“滴”聲表示水泵 開啟,長音“滴”聲表示水泵關閉。) 1422537-TW01-A Kohler Co.
- Page 27 可能原因 3 應急沖水不工作 A.後備電池包電量低 A.聯繫科勒售後服務,更換電池包 C. 確認水泵是打開的 5.沖 Kohler Co. 1422537-TW01-A...
- Page 28 14.遙控器無顯示 A.電池電量耗盡 A.更換新電池 B.電池極性裝反 B.重新正確安裝 C.遙控器未被喚醒 C.觸摸遙控器螢幕 靠近座便器或落座 按遙控器喚醒鍵 5 遙控器無法遙控座 電池電量不足 查看「遙控器電池的使用及更換」部分來更換電 便器 池 遙控器離座便器太遠 查看「遙控器與本機的通訊」部分並靠近座便器 座便器本機沒有上電 請給本體上電 座便器本體處於待機狀態 按一下側面power按鍵,喚醒產品 座便器與遙控器未連接 查看「遙控器與本機的通訊」部分,連接座便器 與遙控器 如要檢修此座便器,您必須首先: 拔下座便器電源插頭。 如有需要,關閉供水閥。 1422537-TW01-A Kohler Co.
- Page 29 用戶須知 用戶責任 如果你居住地方的水質是硬性,你必須保持沖水孔清潔,令座便器沖水正常。每星期應最少使用座便器清潔劑清潔一 次,用長把手的刷子清潔沖水孔,並儘量伸入排汙管洗刷,防止礦物質積聚。 大部分廁所清潔劑都不會損壞座便器表面的釉面陶瓷,但煩請遵照座便器清潔劑生產商指引小心進行。 請勿使用腐蝕性清潔劑或溶劑。 警告:提防樓宇受損或損壞產品。 科勒公司對此類因使用氯(次氯酸鈣)而引致的沖水裝置損毀,概不負責。 警告:在安裝本座便器時切勿使用任何凝膠材料(水泥砂漿)。因為凝膠材料(水泥砂漿)的熱膨脹可能使座 便器的腳部擠破或損壞。科勒對所有因為凝膠材料(水泥砂漿)安裝而引起的座便器破裂恕不負責。 警告: 提防損壞產品。 請不要向便器內沖入新聞紙、紙尿墊、婦用衛生巾等容塞的物品。請不要用重力撞擊陶瓷,以防止破損漏水。 不要在0°C以下的水環境中使用。 注意:智慧蓋板的清洗和維護詳見用戶手冊。 注意:一定要先徹底沖洗供水管以清除管道中的雜質,使用水源為自來水或可供飲用水。 Kohler Co. 1422537-TW01-A...
Need help?
Do you have a question about the K-5401TW-2-0 and is the answer not in the manual?
Questions and answers