
Related Manuals for Kohler VEIL K-5401T-3-0


Summary of Contents for Kohler VEIL K-5401T-3-0
- Page 1 Homeowners Guide VEIL INTELLIGENT TOILET 新维亚智能座便器 K-5401T-3-0 K-5401T-XP3-0 科勒(中国)投资有限公司 静安 制造商: 中国上海市宝山区丰翔路1955号 邮编: 200444 2-23 English page 24-45 中 文 页 码 1332624-T01-H...
-
Page 2: Table Of Contents
Contents Cautions and warning………………………………………………………………………………... 3 Specification………………………………………………………………………………………………… Thank you for choosing Kohler Company……………………………………………………………….. Overall diagram…………………………………………………………………………………………….. Guide on usage of remote controller…………………………………………………………………….. Guide on setting of remote controller…………………………………………………………………….. Preparations before initial use……………………………………………………………………………... Function for opening/closing of cover/seat…………………………………………………………….… Flushing of toilet…………………………………………………………………………………………..12 Auxiliary keyboard function …………………………... -
Page 3: Cautions And Warning
Warning: Do not use any hard setting material (cement mortar) while installing the toilet. Thermal expansion of hard setting material (cement mortar) will damage or crash the feet of toilet. Kohler will not be responsible for any damage because of using hard setting material (cement mortar) for toilet installation. - Page 4 □ recommended by Kohler Co. such as angle valve etc. Do not lean on cover when use this appliance to prevent product from damage.
-
Page 5: Specification
* The description of water efficiency label marked on intelligent toilet: water efficiency label represents a compliance mark of the water efficiency grade etc. performance of intelligent toilet. * Power value testing condition: dynamic pressure 0.2MPa, inlet water temp 15°C. Kohler Co. 1332624-T01-H... -
Page 6: Thank You For Choosing Kohler Company
Thank you for choosing Kohler. Kohler technology provides reliable performance and elegant life, satisfying your demand now and into the future. Aesthetics and reliability of Kohler products will surely satisfy your personal style. We are very proud of Kohler products and you will be as well. -
Page 7: Guide On Usage Of Remote Controller
During the operation under Rear mode, press this key to flush water in a spiral shape. The icon of Spiral mode flickers. Press it again to exit (or press “Stop” to turn it off). The icon of Spiral mode will then stop flickering. Kohler Co. 1332624-T01-H... -
Page 8: Guide On Setting Of Remote Controller
(indicating a searching the signal for the Then the icon will stop flickering it is connected successfully. Poweroff function ●Press and hold the key at any time, the remote controller will enter Power off mode. Remote Setup Guideline 1332624-T01-H Kohler Co. - Page 9 After usage of remote control, put it back into the remote holder mounted on wall. □ Prevent dropping the remote control during usage. □ Anti-loss function: lock remote on docking station by screws. Specific method refers to installation instruction. □ Kohler Co. 1332624-T01-H...
-
Page 10: Preparations Before Initial Use
Water pump: On (press and hold flush and front Spiral: wash button on toilet side panel, short “beep” Water temp: mid ● indicates water pump is on, long “beep” Water flow intensity: mid ● indicates water pump is off.) Position: dial 3 ● 1332624-T01-H Kohler Co. -
Page 11: Function For Opening/Closing Of Cover/Seat
Under unseated status, press Seat Open/Close key on the remote controller to execute corresponding opening and closing function (details are shown in the diagram of the remote control). Under seating status, the key of remote control will not respond. Kohler Co. 1332624-T01-H... -
Page 12: Flushing Of Toilet
Flushing of toilet A.Auto-flushing function a) Usage of seat When seat is OPEN and toilet is in use. Toilet will auto flush after unseated for a certain time. Close seat within a period of time. 11 12 1332624-T01-H Kohler Co. - Page 13 Notes: The action of flush will not be done twice until the flushing with the remote controller finishes. C. Emergency flush When power is off, please press and hold flush button on toilet side panel to activate emergency flush function. power Kohler Co. 1332624-T01-H...
- Page 14 D.Manual flushing by basin When emergency flush key is invalid, the cover and the seat will open, flush away the sewage by using a container of water. 1332624-T01-H Kohler Co.
-
Page 15: Auxiliary Keyboard Function
99%. (Measured after one UV working cycle, it was measured within 18mm×8mm irradiation area. Perform test in accordance with GB /T 23131 requirements, UV radiation zone was shown in the diagram, UV working cycle activation mode refers to users guide. Testing lab: China household electrical appliances testing institute.) Kohler Co. 1332624-T01-H... -
Page 16: Sterilization By Sterilized Water
Maintenance and cleaning A. Normal cleaning For the best effect, remember the following rules during maintenance of your Kohler product: Important! Do not flush the cover directly by water (including remote controller) FiTesting - apply cleaning solution at an inconspicuous place on lid for testing. Make sure the cleaning solution will not damage the outer surface of cover, and then apply it to the entire surface. - Page 17 Remove nozzle along the arrow direction as shown. Immerse nozzle into cleaning solution for 2 hours. Clean with soft brush. Mount nozzle back to original position along the dismantle direction. Check nozzle clean function after power is ON. Kohler Co. 1332624-T01-H...
- Page 18 The steps to replace filter are the same as the above steps. Filter cover Notes: If filter is found broken or serious blocked, please replace it in time. The filter mesh shall be no less than 80. 1332624-T01-H Kohler Co.
- Page 19 After removing the deodorization block, do not put your hands or other substances into holding cavity of deodorization block as doing so will damage the fan and other parts. Scan the QR code to order the replaced part with the part number 22761T-NA. Kohler Co. 1332624-T01-H...
- Page 20 6.In case of long term idle status, remove the batteries in the charging block of remote control. b) Open cover or add water inside the toilet might avoi the plastic parts yellowing problem caused by backflow air from discharge pipe after residual toilet water evaporated during long-term idle status. 1332624-T01-H Kohler Co.
-
Page 21: Trouble Shooting
Trouble shooting This guide of trouble shooting is for general help only. Authorised representatives or qualified electricians of Kohler Company shall be able to solve all electrical failures. If you want to know about the service of warranty, please contact local dealers or wholesalers. - Page 22 If this toilet is to be repaired and maintained, you have to: Disconnect the power plug of toilet If necessary, turn on the water valve. 1332624-T01-H Kohler Co.
-
Page 23: Description Of Content Of Hazardous Substances In Product
GB/T 26572. * : Indicate only partial product series contains this substance. Note: the information provided is based on the supplier data and Kohler inspection results. The product is designed not to hurt the environment. Under current technology, all hazardous materials have been used in the smallest amounts possible. - Page 24 安全注意事项............................25 规格 ................................27 谢谢您选择科勒公司..........................28 整机简图..............................28 遥控器使用指南............................29 遥控器设置指南............................30 初次使用前准备............................32 开、关盖/开、关圈 ........................... 33 便器冲水..............................34 辅助键盘功能............................37 待机模式..............................37 智感除菌功能 ............................37 除菌水功能............................... 38 自动节能功能............................38 维护清洗..............................38 常见问题..............................43 产品中有害物质含量的说明........................45 1332624-T01-H Kohler Co.
-
Page 25: 安全注意事项
安全注意事项 保存这些说明 220V~ , 50 H z, 10A 警告:触电、火灾或人身伤害的危险。 警告:触电或产品损伤的危险。 警 告 : 在安装本座便器时切勿使用任何凝胶材料(水泥砂浆)。因为凝胶材料(水泥砂浆)的热膨胀可能 使座便器的脚部挤破或损坏。科勒对所有因为凝胶材料(水泥砂浆)安装而引起的座便器破裂恕不负责。 警告:提防损坏产品。 不要在0℃以下的环境中使用。 重要!产品损伤的危险。不要安装在水可能溅到的地方。 重要!产品损伤的危险. 重要! 重要! 重要! 重要! 注意: 危险-降低触电的危险: 警告-避免低温灼伤、触电、火灾或人身损伤 常识 待 Kohler Co. 1332624-T01-H... - Page 26 安全注意事项(续) 件,如角阀等。 在安装本产品的同一房间中,需要在触手可及的位置安装一个止水阀,用于紧急情况下,无需借助工具 即可切断本产品的进水水路;否则本产品的意外故障可能会导致用户损失。 必须 如须再次接通电源, 1332624-T01-H Kohler Co.
- Page 27 额定电压 1090W 约1600W 约1.3m 约670mm x 438mm x 533mm 4 kg 进水温度 有,档位可调 有,档位可调 有,档位可调 出水流量(水压0.2MPa时) 臀部冲洗最大档不小于500mL/min 关、五档可调 (室温、约31-39℃) 清洗 清洗 约300s 关、五档可调 暖风功能 有 除臭功能 30-31 UV除菌 其它安全装置 漏电保护器 落座感应 位于座圈内部 手动冲洗 * 智能座便器加施的水效标识的说明:水效标识表示智能座便器水效等级等性能的一种符合性标志。 * 功率值测试条件:动压0.2MPa,进水温度15℃。 Kohler Co. 1332624-T01-H...
-
Page 28: 谢谢您选择科勒公司
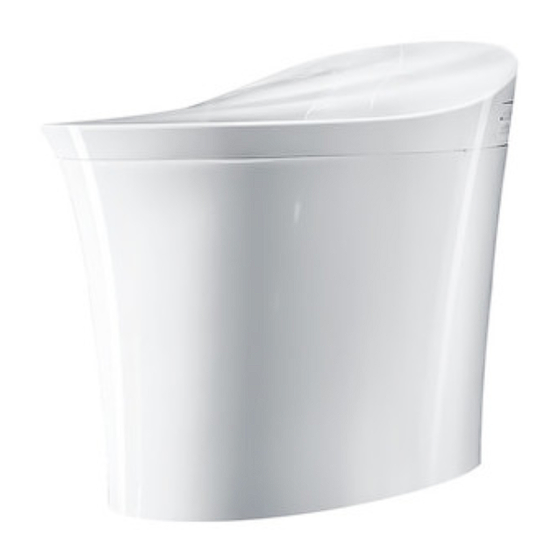
谢谢您选择科勒公司 整体简图 × 喷嘴 * 抗菌:含无机系抗菌材料的座圈、盖板长期抗细菌,抑制产品表面的细菌生长,这一加工处理不代表防霉等附带效果。抗菌率大于90%(依据GB21551.2-2010进行试验。测试机构:中国家 用电器检测所、上海出入境检验检疫局机电产品检测技术中心) 1332624-T01-H Kohler Co. -
Page 29: 遥控器使用指南
遥控器使用指南 警告:为避免掉落的风险, 请从充电座上 取下遥控器再按开机键。 冲水 对座便器 按+/- 键(Q+/Q -) 约5 约5 本机附带宽幅清洁功能,如想使用宽幅清洁,请同时长按侧键盘上的臀部冲洗键和电源键约2秒,然后启动臀部 冲洗的移动模式。 J - 水温 按此键再按+/-键(Q+/Q- ) 。 K - 按摩 ,旋转冲洗图标闪动 Kohler Co. 1332624-T01-H... -
Page 30: 遥控器设置指南
在开启女性冲洗或臀部冲洗后,按此键再按+/-键(Q+/Q-)调节喷管移动位置。 约4分钟后自动停止或按停止键立即关闭。 O - 智感除菌 态, 按此键再按+/-键(Q+/Q-) Q - 参数调节按键Q+/Q-: J/F/P/M 只有触发 功能时,才会激活“+/-”按键进行相应的参数调节。 低电压报警 注意: 键闪 烁 时 停止 配对 注意: 闪烁 遥控器与本机的通讯 遥控器被移动 连接成功后 关机功能 停止 遥控器设置指南 1332624-T01-H Kohler Co. - Page 31 按住本体侧键盘 键, 直到听到一声短音, 同时夜灯闪烁三次后 , 放开按键, 随后可按照以下B/C/E/F/O变更设置. 开/关 感应距的设置 开/关 除臭功能设置 冲水 自动冲水设置 节能设置 智感除菌设置 一定时间不进行B/C/E/F/O设置变更后, 下次变更前需要重新用按住本体侧键盘 键, 直到听到一声短音, 同时 夜灯闪烁三次. M - 位置 喷管清洁设置 充电座 防遗失功能:遥控器可通过螺丝与底座锁定,具体方法参见安装说明书。 Kohler Co. 1332624-T01-H...
-
Page 32: 初次使用前准备
初次使用前准备 接上角阀 确认进水阀是否已打开。 确认”遥控器“内已正确装入电池。 确认产品正前方没有障碍物。 产品通电后,等待主机完成自检。期间可听到电机的转动声和流水声,夜灯闪烁,均属正常。当夜灯停止 闪烁时,自检结束。 初次使用时为出厂设置状态: 女性冲洗: 圈温:中档 水温:中档 夜灯:开 水流强度:中档 节能模式:关 冲洗位置:第3档 自动翻盖功能:开,距离中 臀部冲洗: 自动冲水功能:开 水温:中档 智感除菌功能:开 水流强度:中档 除菌水功能:开 冲洗位置:第 3档 除臭:开 旋转冲洗: 水泵:开(同时长按本体侧 水温:中档 键盘上的冲水键和女性冲洗 水流强度:中档 键,短音“滴”声表示水泵 冲洗位置:第 3档 开启,长音“滴”声表示水 泵关闭。) 1332624-T01-H Kohler Co. -
Page 33: 开、关盖/开、关圈
便盖/座圈开关功能 A 便盖开/关 自动开、关盖 关盖状态下,当用户进入感应区域时,盖板自动打开。 开盖状态下,当用户离开感应区域后,一段时间后自动关闭。 遥控器开、关盖 无效 按遥 手动开、关盖 用户可以用手直接开、关盖。当用户有正常手动 开、关盖的趋势时, 盖子能够根据这个运动趋势而自动打开或关闭,不需要一直在盖板 上 保持用力。盖板在运动过程中遇阻碍会自动停下。 注意: 当用户缓慢进入感应区域时,开、关盖感应距离可能变短。如仍无反应, 请使用遥控器或手动开、关盖。 只有在遥控器中的“开/关盖设置 ” 设置为“开”时,自动开、关盖功能才有 效(设置方法见第31页)。 避免在座便器前端40cm内设置可移动的障碍物,若有可移动的障碍物, 盖板可能会自动打开;若需要取消“自动开、关盖” 功能,请见31页。 B 座圈开/关 遥控器开、关圈 用户没有落座时,按下遥控器上的圈开/关键,则执行相应的开合功 能 (详见遥控 器按钮简图)。用户落座时, 遥控器 的 按键无效。 Kohler Co. 1332624-T01-H... -
Page 34: 便器冲水
手动翻圈 用户可以用手直接开、关圈。当用户正常手动开、关圈时,座圈 能够根据这个运动趋势而自动打开或关闭,不需要一 直在座圈 上 保持用力。座圈在运动过程中遇阻碍会自动停下。 注: 在盖板及座圈自动开合过程中,严禁强行、大幅度用力等人为因素干扰盖 板及座圈的开合。 便器冲水 A. 自动冲水功能的使用 a) 使用座圈情况 盖板打开状态下,用户落座使用,当离开座圈一定时间后,便器自动冲水,一段时间后自动关闭。 1332624-T01-H Kohler Co. - Page 35 男士小便情况 开盖状态下,用户手动或者使用遥控器翻起座圈,使用后,座便器自动冲水,一段时间后,盖板、座圈自动关闭。 注: 如果自动冲水功能关闭,用户可以用遥控器控制冲水, 或手动按键冲水, 或手工用盆冲水。 2. 只有在遥控器中的“冲水设置”设置为“开”时,自动冲水功能才有效(设置方法见第31页)。 B. 遥控器控制冲水 用户通过按遥控器上的冲水键,执行座便器冲水功能。 注: 遥控器冲水功能在冲水完成前,不会执行第二次。 C. 应急冲水 当停电时,请长按本体上辅助键盘冲水按键, 启动应急冲水功能。 Kohler Co. 1332624-T01-H...
- Page 36 D. 手工用盆冲水 当应急冲水功能失效时, 盖和圈翻起,用盆盛水冲走座便器中的污物。 1332624-T01-H Kohler Co.
-
Page 37: 辅助键盘功能
再次按下开启夜灯功能(短音提示) 再按一次关闭 按下进行马桶冲水(停电后长按,启动应急冲水功能) UV照射范围 喷嘴 注: 1. 各功能均按出厂设置运行。 2. 在使用女性冲洗、臀部冲洗功能时,再按一次,关闭该功能,否则5分钟后自动关闭。 3. 在使用暖风功能时,再按一次,关闭该功能,否则4分钟后自动关闭。 模式 1. 按辅助键盘上的电源按键,听到“嘀”一声后,进入待机模式。此时,自动感应及遥控功能关闭,座圈加热功能 将被停止,以最大限度降低能耗。 2. 当再次按辅助键盘上的电源按键后,退出待机模式,所有功能恢复。 智感除菌功能* 智感除菌是通过UV紫外线对喷管进行消毒来实现的。 自动UV 除菌 UV 除菌 除菌。除菌 能。 座便器 自动UV除菌功能设置请参见第31页。 手动 除菌 在关闭座便盖的情况下,短按遥控器UV按键将立即执行UV除菌功能。 UV除菌过程中,如果有用户来打开盖子落座使用座便器,或者按下遥控器上的停止键,UV除菌功能将关闭。 * UV除菌(是指UV灯产生紫外线除菌):在UV工作周期内通过照射对喷嘴表面进行除细菌。除菌率大于99%(在UV的一个工作周期后于18mm×8mm的照射区域内依据GB /T 23131进行试 验,UV照射区域见示意图,UV工作周期开启方式见操作说明。测试机构:中国家用电器检测所) Kohler Co. 1332624-T01-H... -
Page 38: 除菌水功能
* 除菌水(是指水电解装置电离自来水中的氯离子生成含次氯酸的水):在电解水工作周期内产生的除菌水对喷嘴表面进行除细菌。除菌率大于96%(在自来水中氯离子含量大于24ppm时 依据GB /T 23131进行试验,各地水质不同可能导致除菌效果不同,电解水工作周期开启方式见操作说明。测试机构:中国家用电器检测所) 自动节能功能 在节能设置为开的情况下, 产品会自动检测到使用频率低的时间带,并将便座加热温度下降以达到节电的目的。 自动节能设置参见第31页。 维护和清洗 A. 常规清洗 为了达到最好的效果,在维护您的科勒产品时记住下列几条: 重要!不要用水直接冲洗座便盖(包括遥控器) 首先用清洗液在座便盖不显眼的地方测试,如果确认清洗液不会 对座便盖外表造成损坏然后再应用于整个表面。 不要让清洁剂浸泡 不要让清洁剂浸泡产品。 避免表面粗糙的材料-使用柔软、潮湿的海绵或棉质布,不要用表面粗糙的材料 来清洗表面,诸如刷子、冲刷垫等。 擦洗 加上清洁剂后,立即用湿布擦洗表面,擦除喷到表面的清洁剂和脏物。 清洗座圈 在用于清洗的气雾罐中避免使用具有研磨的清洁剂和消毒剂。 维护提示:用洗涤剂和水的混合液体或任何列为可用于座圈清洁的 产品清洗座圈,用柔软湿润的海绵或者布。用软毛巾擦干,在空气 中让座圈自然干燥。 不允许带腐蚀的化学品或化妆品(诸如指甲油或须后水)和座圈接触,避免破坏表面。 清洗不锈钢外观件 以中性肥皂水清洗表面,再以干净的软布彻底擦干整个表面。许多清洁剂,比如氨水、 去污粉及洁厕灵等,会对表面造成伤害,切忌使用。 注意:不遵守这些清洗说明可能使科勒的保修义务无效。 注意:清洗程序的成功取决于诸如水的硬度和温度,使用成分的精确数量,清洗 规则的改变和被清洗产品的状态等因素。因为这些因素会有变化,科勒不 能保证所提到的规则的有效性。 注意:清洁翻起的圈盖时,不能过度用力,以免损坏产品。 清洁铰链臂 定期用柔软抹布擦拭铰链臂,以防止铰链臂沾有污垢,导致光亮度降低。 1332624-T01-H Kohler Co. - Page 39 B. 喷嘴的清洗 用户使用软毛刷清洁臀部/女性喷嘴的方法: 在离座状态下,长按“遥控器”上的“移动冲洗“按键2秒钟以上,或长按侧键盘的前冲或后冲键,喷管会 伸出。 用户可以使用软毛刷沾水对喷嘴进行清洗。 再按一次上述按键之一或遥控器上的停止键,喷管缩回,或两分钟后喷管自动缩回。 用户拆除喷头的清洗方法: 在离座状态下,长按“遥控器”上的“移动冲洗“按键2秒钟以上,或长按侧键盘的前冲或后冲键,喷管会 伸出。 在两分钟之内断掉马桶电源。 沿图示箭头方向拔掉喷嘴。 将喷嘴浸没在除垢剂溶液中2个小时。 用软毛刷清洗干净。 按拆除方向把喷嘴装回到初始位置。 上电检查喷管冲洗功能。 Kohler Co. 1332624-T01-H...
- Page 40 C. 滤网的清洗或更换 用户发现冲洗水量变小或出现不出水现象,请及时清洗或更换滤网。 座便器滤网清洗 拔掉电源,关闭角阀,取下滤网塞。 取下侧板 角阀 拔掉电源 关闭止水阀 取出滤网,清洗滤网。 清洗滤网 重新装好滤网,接上软管接头,打开角阀。 检查连接处,无任何水渗漏后,插上电源。 将侧板装回原位。 角阀滤网清洗 拔掉电源 关闭角阀,取下过滤盖 取出滤网 清洗滤网 滤网 更换滤网 步骤同上。 过滤盖 注: 如果发现滤网已损坏或者堵塞很严重,请及时更换, 滤网目数不得低于80目。 1332624-T01-H Kohler Co.
- Page 41 D. 除臭块的更换 用户发现除臭效果不明显,感觉有异味时,请及时更换除臭块。 更换除臭块步骤: 取出除臭百叶窗及除臭块。 百叶窗 更换新除臭块后,重新放回机体即可。 除臭块 除臭块支架 注: 取出除臭块后,请勿将手和其他物体伸入除臭块容纳腔内,以防损坏风机和其他部件。 扫码查看替换装,型号:22761T-NA。 Kohler Co. 1332624-T01-H...
- Page 42 E. 长期放置不用时的维护 a) 冲水。 请关闭角阀,并对马桶进行一次冲水 b)长期放置不用时,可能会由于马桶里面水分挥发完毕后,下水道的气体溢出导致塑料件变黄风险,打开上盖 或往马桶里面加水可有效避免该问题。 1332624-T01-H Kohler Co.
-
Page 43: 常见问题
A.连续使用暖风功能4分钟,风机自动停止 A.如需要,请再次按下暖风按键 机停止工作 B.座圈未感应到人体 B.变换坐姿或者重新入座 9.除臭风机不工作 A.座圈未感应到人体 A.变换坐姿或者重新入座 B.使用过程中误按停止键 B.如需要,请离座2S后重新入座 C.自动除臭功能被禁止 B.查看“遥控器设置指南”部分 10.不能开关盖 A.座圈上有异物覆盖或者座圈是湿的 A.移除异物或者擦干座圈 B.便盖在先前开关过程中受到人为干扰 B.使用遥控器开关便盖或手动打开便盖直至正常, 便盖开关过程中不阻挡其开关 11.不能自动开关盖 A.用户没有进入或离开感应区域 A.请进入或离开感应区域 B.遥控器“自动翻盖”功能被关闭 B.查看“遥控器设置指南”部分 C.座便器正在冲水中 C.等待座便器冲水结束 12.夜灯不亮 A.夜灯功能被关闭 A.查看“辅助键盘功能”中的夜灯部分来打开夜灯 功能 B.室内光线太亮 B.请关闭室内灯光并拉上窗帘 A.有人坐在座便器上 关闭盖子再 智感除菌 关闭 13.智感除菌不工作 B.座圈上有异物覆盖或者座圈是湿的 Kohler Co. 1332624-T01-H... - Page 44 如要检修此座便器,您必须首先: 1332624-T01-H Kohler Co.
-
Page 45: 产品中有害物质含量的说明
○ ○ ○ ○ ○ * 电池 ○ ○ ○ ○ * 陶瓷类组件 ○ ○ ○ ○ ○ ○ ○ * 水箱组件 ○ ○:表示该有害物质在该部件所有均质材料中的含量均在GB/T 26572现行 有效版本规定的限量要求以下。 ×:表示有害物质至少在该部件的某一均质材料中的含量超出GB/T 26572 现行有效版本规定的限量要求。 *:表示部分机型含有该部件。 注:本表格提供的信息是基于供应商提供的数据及科勒公司的检测结果。 本产品应用环保设计理念,在当前技术水平下,所有有害物质或元素的使 用已经控制到了最低程度,科勒公司会继续努力通过改善现有技术来减少 这些物质的使用。 本产品的“环保使用期限”为10年,科勒公司根据产品设计特性 指定该期限。只有在本产品使用说明书所述的正常情况下使用本 产品时,“环保使用期限”才有效。 Kohler Co. 1332624-T01-H...
Need help?
Do you have a question about the VEIL K-5401T-3-0 and is the answer not in the manual?
Questions and answers
The front washes and rear washes can't use it.
The front and rear washes may not function on the Kohler VEIL K-5401T-3-0 due to the following reasons:
1. Water Supply Issue – If there is no water supply, the wash functions will not work. Wait until the water supply is restored.
2. Power Failure – If there is no power, the wash functions will be disabled. Check the power connection and restore power if needed.
3. Standby Mode – If the product is in standby mode, press the power button on the side to wake it up.
4. Wash Mode in Progress – If another wash mode is currently running, wait for it to complete before using the front or rear wash.
5. Auto-Flushing Deactivated – If auto-flushing is turned off, it may affect wash functionality.
Checking and addressing these issues should restore the front and rear wash functions.
This answer is automatically generated
Front and rear function can't use. How to do it?
To fix the front and rear wash functions on the Kohler VEIL K-5401T-3-0, follow these steps:
1. Check Power Supply
- Ensure the bidet seat is plugged in and receiving power.
- If the power is off, wait for it to be restored or press the reset button on the power plug.
- If the unit is in standby mode, press the power button on the side to wake it up.
2. Check Water Supply
- Make sure the water supply is turned on.
- Verify that the supply valve is open.
3. Adjust Water Pressure and Wand Position
- Use the remote control to press +/- (Q+/Q-) to adjust the wand position when front or rear wash is activated.
- Adjust water pressure using the +/- buttons under Front or Rear mode.
4. Ensure No Other Functions Are Active
- If cleaning functions are already running, wait until they finish before activating front or rear wash.
5. Check for Blockages
- If water is not spraying, inspect the water filter and clean it if necessary.
6. Restart the Unit
- Unplug the unit, wait a few minutes, and plug it back in to reset the system.
If the issue persists, contacting Kohler customer support may be necessary.
This answer is automatically generated
Front and rear can;t use