
Related Manuals for Kohler VEIL K-5401T


Summary of Contents for Kohler VEIL K-5401T
- Page 1 Installation Guide 安装说明 VEIL INTELLIGENT TOILET K-5401T 上海科勒电子科技有限公司 上海市浦东新区金滇路18号E幢 邮编:201206 中文简体页码 2-16 中文繁體頁碼 17-31 English page 32-46 한글 페이지 47-61 1226974-T01-A...
- Page 2 VEIL 维亚 INSTALLATION INSTRUCTIONS INTELLIGENT TOILET K-5401T 305mm, 坑距需满足292-350mm 。 如未满足, 可能会影响安装。 确认出水接头距离完工墙面凸出不超过3mm 。沉入完工墙壁 不超过5mm 。如未满足,可能会影响安装。 推 荐 使 用 管 路 内 径 DN15mm 以上的主水管,以确保下述供水条件要求。 水压 。 。 产品配管 产品角阀 Fig.#1 图1 螺丝(与10mm膨胀塑料匹配) 膨胀塑料 1226974-T01-A...
- Page 3 水压 二 注意:必须使用专用的供水能力检测装置 球阀打开后, 先冲洗三次, 再测量。 检测装置动压最低要求 推荐达 到0.046Mpa 以上 。 (6.7 psi) 球阀 Fig.#2 .......................K-5401T 维亚 ........................1106433 GFCI ELCB 220V/220V-240V~, 10A , 50Hz/60Hz 1226974-T01-A...
- Page 4 遥控器(随机配) Unit: mm 防水插座(带接地) 坑距 (随机配角阀及软管) Fig.#3 图3 Kohler reserves the right to change marked dimensions without prior notice. 3L/4.8L 305mm 最低供水条件(推荐) 0.1Mpa(动压),21L/min (流量) 0.74Mpa 最高供水条件 220V /220V-240V~ , 50/60Hz 960W/1000W 1.3m 670mm X 438mmX 533mm 46kg 1-40 1226974-T01-A...
- Page 5 × 4 Fig.#4 图4 Toilet Fig.#5 1226974-T01-A...
- Page 6 800mmX800mm Fig.#6 法兰附件包,拆除及扔掉旧的T型螺栓。 法兰附件包堵住。 Closet Floor Flange 法兰附件包 Fig.#7 (GFCI) (ELCB) 1226974-T01-A...
- Page 7 Unit: mm Fig.#8 C. 1.确定排污口中心点并垂直墙面划上十字线 2.侧放坐便器,按陶瓷排污口找出前后左右中心标记,并记于陶瓷外侧壁上 3.座便器平稳对准地面上的中心线。记下左右地脚孔的位置 Fig.#9 中心标记 地脚孔(两侧) D. 钻两个地脚孔,安装膨胀塑料及地脚螺丝 10mm Fig.#10 地脚螺丝 1226974-T01-A...
- Page 8 (GFCI) 220V/220V-240~ 10A 50Hz/60Hz 不允许使用不带接地线的插座。 F.安装法兰附件包 将法兰附件包反面涂满硅胶 将法兰附件包对正下水孔插入 并压贴住地面 硅胶 Fig.#1 G. 拆下左右侧板 卸下供水三通上的螺纹帽 侧板 螺纹帽 Fig.#1 1226974-T01-A...
- Page 9 将蜡封安装在法兰附件包上。 Fig.#1 座便器。 参考地面排污口中心线及陶瓷上前后左右中心标记, 用螺母及垫片拧紧 座便器 安装到位后,不能再次搬动座便器,以免蜡封失效。如需搬动,需更换蜡封。 警告 提防身体受伤或产品破裂 螺母不可上得太紧,否则会导致釉面陶瓷损坏及崩裂。 螺母 Fig.#14 图14 1226974-T01-A...
- Page 10 J. 安装角阀 重要提示如下 Unit: mm 图中尺寸为角阀建议安装尺寸 . 安装前, 角阀必须装上装饰盖 角阀 把手顺时针关闭,逆时针打开 角阀把手 250 10 装饰盖 Fig.#15 Fig.#16 1226974-T01-A -10-...
- Page 11 左按键 右按键 Fig.#17 打硅胶后, 安装左右侧板, 插上电源插头, 接通电源。 注意: 在座便器底部周围打上一圈硅胶,填堵座便器底部四周的缝隙。 座便器安装左右侧板的底部硅胶凸出部分抹掉。 硅胶凸出部分 打硅胶 抹掉(两侧) 侧板(两侧) Fig.#1 图18 1226974-T01-A -11-...
- Page 12 45mm Fig.#19 图 19 公共场所防盗安装方式 取下硅胶塞 取下硅胶塞 遥控器 充电座 Fig.#20 图20 1226974-T01-A -12-...
- Page 13 Fig.#21 确认遥控器充电座内已正确装入电池。 女性冲洗: 臀部冲洗: 旋转冲洗: 圈温:中档 水温:中档 水温:中档 水温:中档 风温:中档 水流强度:中档 水流强度:中档 水流强度:中档 夜灯:开 冲洗位置:第 3档 冲洗位置:第 3档 冲洗位置:第3档 节能模式:关 自动翻盖功能:开,距离中 自动UV功能:开 除臭:开 自动冲水功能:开 除菌水功能:开 1226974-T01-A -13-...
- Page 14 故障检修 故障现象 可能原因 建议措施 1.座便器不工作 A.停电 A.等到电力恢复 B.插头未插或者插座无电 B.插上插头或者检测电源插座 C.电源线插头上漏电保护开关未复位 C.按下插头上的复位按钮 D.产品处于待机状态 D.按一下侧面power按键,唤醒产品 2.座便器不冲水 A.停水 A.等到恢复供水 B.供水角阀关闭 B.打开供水角阀 C.等待恢复电力或者查看“手动冲洗”部分进行手 C.停电 动冲洗或者用盆盛水冲洗。 D.产品处于待机状态 D.按一下侧面power按键,唤醒产品 E.待清洗功能完成再进行 E.清洗功能正在使用中 F.自动冲水功能被禁止 F.查看“遥控器设置指南”部分 座便器冲不干净 A.过滤网阻塞 A.查看”清洗过滤网”部分 B.供水水压不足 B.检查角阀是否全部打开, 如未全部打开, 请打开 C.检查进水软管是否折弯过急,如折弯过急, 请 调整软管 4.清洗功能无法正常 A.停水 A.等到恢复供水 使用...
- Page 15 如要检修此座便器,您必须首先: 关闭 1226974-T01-A -15-...
- Page 16 1226974-T01-A -16-...
- Page 17 VEIL 維 亞 安裝說明書 INSTALLATION INSTRUCTIONS 一體超感座便器 INTELLIGENT TOILET K-5401T 安裝之前 請仔細詳閱本指引。以便熟悉所需工具、物料及安裝程序。請遵照適用的章節來安裝您的座便器,以避免由於安裝失 當而導致不必要的損失。除了有關正確的安裝方法之夕蔔,還務請詳閱所有操作及安全指引。 本指引所載之一切資料,均以印刷時所有之最新產品情況為基礎,科勒保留權利隨時更改產品特性、包裝或供應情 況,恕不另行通知。 本指引也包含了有關護理、清潔及保養等重要資料-請交予用戶保存。 我們感謝您對科勒品質的信任。在您開始安裝之前,請您花上幾分鐘時間來閱讀這本手冊。如果您在安裝或性能方 面遇到任何問題,務 必請您與我們聯繫。再次感謝您選擇 科勒公司。 面遇到任何問題,務必請您與我們聯繫。 安裝前請確保座便器安裝所需要的空間,並不會影響到門的開關。 確認排水坑距305mm,坑距需滿足292-350mm。如未滿足,可能會影響安裝。 確認出水接頭距離完工牆面凸出不超過3mm。沉入完工牆壁不超過5mm。如未滿足,可能會影響安裝。 推薦使用管路內徑DN15mm以上的主水管,以確保下述供水條件要求。 購買產品前.請先測量供水條件。見如下兩種測試方法。 說明 如果與盥洗室或者浴室內等其他龍頭同時使用時,確保達到下面供水條件要求。 請使用產品所配的軟管和角閥。 安裝前需確保達到下面供水條件要求。 水壓簡易測量方法一: 請準備輔助用水桶.角閥全部打開後,先沖洗三次,再測量。 將水注入水桶10秒,最低水量要求推薦達到5.7L以上。 產品配管 產品角閥 Fig.#1 圖1 所需工具及材料 (不隨貨供應) 254mm活動板鉗 各種螺絲刀...
- Page 18 水壓簡易測量方法二: 注意:必須使用專用的供水能力檢測裝置。球閥打開後,先沖洗三次,再測量。檢測裝置動壓最低要求。 推薦達到0.046Mpa(6.7 psi)以上。 壓力計 球閥 軟管 產品配管 產品角閥 Fig.#2 圖2 訂購資料 .......................K-5401T 維亞一體超感座便器 ........................1106433 含遙控器組件 注意 危險:存在觸電危險。操作前應切斷電源。 警告:存在觸電危險。只可連接至帶接地故障斷路器 (GFCI) 或 接地漏電斷路器 (ELCB) 保護的電路中。 謹慎: 存在有害氣體的危險。如果新座便器不能立即安裝,可在地面法蘭孔上臨時遮蓋一塊舊 布。 注意:遵守所有的本地管道安裝和電氣規程。 注意:安裝在浴室內的插座位置距離浴缸或淋浴噴頭至少應為一米。 遵守所有的本地管道安裝規程和建築規範。 仔細檢查新座便器有無損壞。 電源和水管應採用牆式安裝方式。 警告:產品存在電擊的危險。本產品只可連接到良好接地,電路要求為220V/220V-240V~, 10A,50Hz/60Hz電路必須帶接地故障斷路器或接地漏電斷路器。 警告:必須使用10A的插座。 1226974-T01-A -18-...
- Page 19 Unit: mm 遙控器(隨機配) 防水插座(帶接地) 完工牆面 接出水口 完工地面 坑距 角閥(带过滤器)(隨機配角閥及軟管) 缸體前端 底部視圖 Fig.#3 圖3 科勒公司保留隨時變更圖中標示尺寸的權利,無需另行通知。 Kohler reserves the right to change marked dimensions without prior notice. 規格 沖水量 3L/4.8L 305mm 最小使用坑距 0.1Mpa(動壓),達到21L/min(流量) 最低供水條件(推薦) 最高供水條件 0.74Mpa 靜壓 220V / 220V-240V~ , 50Hz/60Hz 960W/1000W 規格...
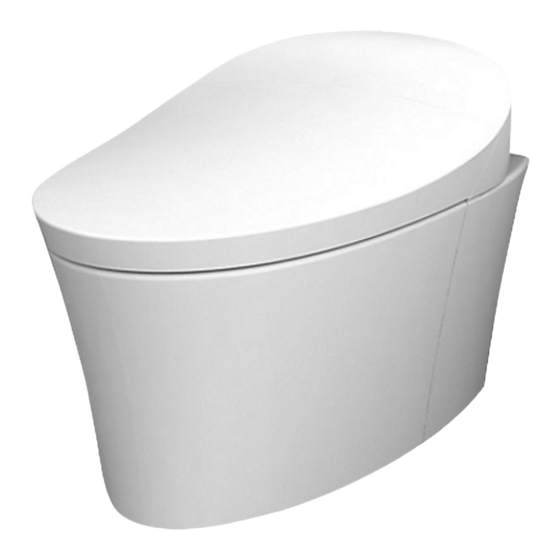
- Page 20 整體簡圖 緩衝墊 × 4 座圈(抗菌) 落座感應區 按下暖風鍵,啟動暖風功能 再按一次關閉 按下按鍵進入臀部沖洗, 按下關閉電源(長音提示) 再按一次關閉 光感應區 按下按鍵進入女性沖洗, 按下關閉夜燈功能(長音提示) 再按一次關閉 再次按下開啟夜燈功能(短音提示) Fig.#4 按下進行馬桶沖水 圖4 安裝前準備 抓住陶瓷件的邊緣,從包裝箱中取出產品。 警告:人身和產品損害風險!向上提起座便器時,請勿抓住智能蓋板的邊緣。由於座便器較重,必要時請尋求他人幫 助。 Toilet Fig.#5 圖5 1226974-T01-A -20-...
- Page 21 在地面上放置一塊800mmX800mm大小的軟墊,將座便器從包裝箱中取出放在軟墊上。 Fig.#6 圖6 安裝 拆除舊座便器(如果有) 關掉供水源 , 給座便器沖水,用海綿吸去座便器內的剩餘水份,拆除供水管止水閥(如果有),移開舊水箱和座便器。 用塗油灰刀拆除地上的舊密封墊圈及座便器法蘭附件包,拆除及扔掉舊的T型螺栓。 注意: 如果不能即時安裝新座便器,請用碎布暫將法蘭附件包堵住。 Closet Floor Flange 法蘭附件包 Fig.#7 圖7 安裝尺寸 危險:存在觸電危險。安裝前應切斷電源。 注:本產品設計可安裝於牆上式電源和水路管。安裝方式在尺寸圖中有標示。 警告:存在觸電危險。只可連接至帶接地故障斷路器 (GFCI)或接地漏電斷路器(ELCB)保護的電路中。 浴缸與花灑位置請遠離帶電部件(如遙控器、電源插座等)。如果是牆上式電源,需要使用防水、防濺的插座。 1226974-T01-A -21 -...
- Page 22 Unit: mm Fig.#8 圖8 C. 1. 確定排汙口中心點並垂直墻面劃上十字線 2.側放坐便器,按陶瓷排汙口找出前後左右中心標記,並記於陶瓷外側壁上 3. 座便器平穩對準地面上的中心線.記下左右地腳孔的位置 中心標記 Fig.#9 地腳孔(两側) 圖9 D. 鉆兩個地腳孔,安裝膨脹塑料及地腳螺絲 10mm Fig.#10 地腳螺絲 圖10 1226974-T01-A -22-...
- Page 23 安裝電源 危險:存在觸點危險,操作前應切斷電源。 危險:存在觸電危險。僅適用於插入式安裝/牆面式電源,只可連接至帶接地故障斷路器(GFCI)保護的電路中。 勿取走接地插腳,或選擇使用接地適配器。 警告:產品存在電擊的危險。本產品只可連接到良好接地,電路要求為 220V/220V-240V~,10A,50Hz/60Hz 的電路中,此電路必須帶接地故障斷路器或接地漏電斷路器。 警告:不允許使用延長線。 警告:不允許使用不帶接地線的插座。 注意:本產品設計可安裝於牆上式電源。安裝方式在尺寸圖中有標示。 安裝硬電線電源時應嚴格遵守尺寸圖上的資訊操作。 F.安裝法蘭附件包 將法蘭附件包反面塗滿矽膠 將法蘭附件包對正下水孔插入 並壓貼住地面 矽膠 Fig.#11 圖11 G G . . 拆下左右側板 卸下供水三通上的螺紋帽。 側板 螺紋帽 Fig.#1 圖12 1226974-T01-A -23-...
- Page 24 安裝蠟封 將蠟封安裝在法蘭附件包上。 Fig.#1 圖13 安裝陶瓷外殼 警告:存在人員受傷的危險。陶瓷外殼重達35千克。搬運陶瓷外殼時,應使用適當的提升工具。 謹慎:存在產品損壞的危險。向下放置陶瓷外殼時不要用力過大。如果外殼未能放置到位,應輕輕提起和移 動。如果操作粗糙,外殼可能被壓碎或開裂。 小心地抬起座便器。 確保排汙通道完全置於排污口內。如果陶瓷外殼不能均勻置於地面上,則排汙通道不能正確到位。 參考地面排汙口中心線及陶瓷上前後左右中心標記,輕輕地進行各種調節,直至排汙通道正確到位。 用螺母及墊片擰緊兩顆地腳螺絲固定座便器。 謹慎:存在產品損壞的危險。安裝到位後,不能再次搬動座便器,以免蠟封失效。如需搬動,需更換蠟封。 警告:提防身體受傷或產品破裂。螺母不可上得太緊,否則會導致釉面陶瓷損壞及崩裂。 螺母 Fig.#14 圖14 1226974-T01-A -24-...
- Page 25 安裝角閥 重要提示如下 Unit: mm 圖中尺寸為角閥建議安裝尺寸 安裝前,角閥必須裝上裝飾蓋 注意:請勿重複使用舊角閥。 把手順時針關閉,逆時針打開 角閥把手 250 10 裝飾蓋 角閥 Fig.#15 圖15 連接水管 重要提示 安裝時必須使用產品所配的軟管。 連接水管。 打開角閥。 注意:請勿重複使用舊軟管。 Fig.#16 圖16 1226974-T01-A -25-...
- Page 26 測試手動按鍵. 按下左側按鍵至少2秒,按下右側按鍵至少3秒,按下左側按鍵至少6秒,沖水循 環結束。 左按鍵 右按鍵 Fig.#17 圖17 M. 打矽膠後,安裝左右側板,插上電源插頭,接通電源。 注意: 在座便器底部周圍打上一圈矽膠,填堵座便器底部四周的縫隙。 座便器安裝左右側板的底部矽膠凸出部分抹掉。 矽膠凸出部分 打矽膠 側板(兩側) 抹掉(兩側) Fig.#1 圖18 1226974-T01-A -26-...
- Page 27 安裝遙控器支架 注意:如果安裝牆面是特定材料(比如木板、密制板等)時,使用合適的固定方法。 注意:遙控器的安裝位置應該是不易被水淋到的地方。 選擇一個合適地方安裝遙控器支架,這個地方應該是當你坐在坐便器上時很容易用手容易操作遙控器。 根據遙控器支架螺釘孔的位置,用直徑6mm的鑽頭在牆上鑽兩個深度大於45mm的孔。在孔中裝入膨脹管。 將安裝支架在放置固定孔上。 將支架背面雙面膠離型紙撕掉。 用螺釘固定安裝支架。 把螺釘蓋裝在螺釘上。 把遙控器放在支架上。 Fig.#19 圖19 公共場所防盜安裝方式 安裝步驟: 螺絲 掛鉤板 膨脹管 膨脹螺釘 取下矽膠塞 取下矽膠塞 掛鉤 遙控器 充電座 密封墊片 Fig.#20 圖20 1226974-T01-A -27-...
- Page 28 初次使用前準備 Fig.#21 圖21 確認遙控器充電座內已正確裝入電池。 確認產品正前方沒有障礙物。 等待主機完成自檢。期間可聽到電機的轉動聲和流水聲,均屬正常。當夜燈閃爍時,自檢結束. 初次使用時為出廠設置狀態: 女性沖洗: 臀部沖洗: 旋轉沖洗: 圈溫:中檔 水溫:中檔 水溫:中檔 水溫:中檔 風溫:中檔 水流強度:中檔 水流強度:中檔 水流強度:中檔 夜燈:開 沖洗位置:第3檔 沖洗位置:第3檔 沖洗位置:第3檔 節能模式:關 自動翻蓋功能:開.距離中 自動UV功能:開 除臭:開 自動沖水功能:開 除菌水功能:開 1226974-T01-A -28-...
- Page 29 故障檢修 本故障檢修指南僅作一般説明之用。科勒公司授權的服務代表或者合格電工應當能夠解決所有的電氣故障。如需瞭 解擔保服務,請聯繫您當地的經銷商或批發商。 故障現象 建議措施 可能原因 1.座便器不工作 A.停電 A.等到電力恢復 B.插頭未插或者插座無電 B.插上插頭或者檢測電源插座 C.電源線插頭上漏電保護開關未重定 C.按下插頭上的重定按鈕 D.產品處於待機狀態 D.按一下側面power按鍵,喚醒產品 2.座便器不沖水 A.停水 A.等到恢復供水 B.供水角閥關閉 B.打開供水角閥 等待恢復電力或者查看「手動沖洗」部分進行手 C.停電 動沖洗或者用盆盛水沖洗。 D.產品處於待機狀態 D.按一下側面power按鍵,喚醒產品 E.清洗功能正在使用中 E.待清洗功能完成再進行 F.自動沖水功能被禁止 F.查看「遙控器設置指南」部分 座便器沖不乾淨 A.過濾網阻塞 A.查看「清洗過濾網」部分 B.供水水壓不足 B.檢查角閥是否全部打開,如未全部打開,請打開 C.檢查進水軟管是否折彎過急,如折彎過急,請 調整軟管 4.清洗功能無法正常 A.停水 A.等到恢復供水 使用 B.供水角閥關閉或者未完全打開...
- Page 30 遙控器無法遙控座 電池電量不足 查看「遙控器電池的使用及更換」部分來更換電 便器 查看「遙控器與本機的通訊」部分並靠近座便器 遙控器離座便器太遠 座便器本機沒有上電 請給本體上電 座便器本體處於待機狀態 按一下側面power按鍵,喚醒產品 座便器與遙控器未連接 查看「遙控器與本機的通訊」部分,連接座便器 與遙控器 如要檢修此座便器,您必須首先: 拔下座便器插頭。 如有需要,關閉供水閥。 1226974-T01-A -30-...
- Page 31 用戶須知 用戶責任 如果你居住地方的水質是硬性,你必須保持沖水孔清潔,令坐便器沖水正常。每星期應最少使用座便器清潔劑清潔一 次,用長把手的刷子清潔沖水孔,並儘量伸入排汙管洗刷,防止礦物質積聚。 大部分廁所清潔劑都不會損壞坐便器表面的釉面陶瓷,但煩請遵照座便器清潔劑生產商指引小心進行。 請勿使用腐蝕性清潔劑或溶劑。 警告:提防樓宇受損或損壞產品。 科勒公司對此類因使用氯(次氯酸鈣)而引致的沖水裝置損毀,概不負責。 警告:在安裝本座便器時切勿使用任何水泥。因為水泥的熱膨脹可能使座便器的腳部擠破或損壞。科勒對所有 因為水泥安裝而引起的座便器破裂恕不負責。 警告:提防損壞產品。 請不要向便器內沖入新聞紙、紙尿墊、婦用衛生巾等容塞的物品。請不要用重力撞擊陶瓷,以防止破損漏水。 不要在1°C以下的水環境中使用。 注意:智慧蓋板的清洗和維護詳見用戶手冊。 注意:一定要先徹底沖洗供水管以清除管道中的雜質,使用水源為自來水或可供飲用水。 1226974-T01-A -31-...
- Page 32 These instructions contain important care, cleaning, and warranty information - please leave instructions for the consumer. We appreciate your commitment to Kohler quality. Pleas e take a few minutes to review this manual before installation. If you encounter any installation or performan ce problems, please don't hesitate to contact us.Thanks 面遇到任何問題,務必請您與我們聯繫。...
- Page 33 Simple way to measure water volume 2: y t i y l t flush three times and test. The minimum dynamic pressure for the testing device is advised to be above 0.046Mpa(6.7 psi). Pressure gauge Ball valve Hose Product inlet Hose Product tee valve Fig.#2 ORDERING INFORMATION...
-
Page 34: Specifications
Unit: mm Remote control Waterproof socket (grounding type) Water Inlet hose Fig.#3 Kohler reserves the right to change marked dimensions without prior notice. SPECIFICATIONS Flushing Volume 3L/4.8L Minimum Distance from Hole to Wall 305mm 0.1Mpa(Dynamic Pre ssure), above 21L/min (Flow Rate) -
Page 35: Preparations Before Installation
Overall Sketch Crash pad × 4 Seat (anti-microbial) Nozzle Seating sensing area Press Warm Wind button to start the warm wind function. Press it again to turn it off. Press the button to enter Rear Wash mode. Press the button to turn off the power (long tone hint) Press it again to turn it off. -
Page 36: Installation
Place an 800mmX800mm cushion on the floor, take out the toilet from the carton then put the toilet on it. Fig.#6 INSTALLATION To Remove Existing Toilet Turn off the water supply. Flush the toilet, and use a sponge to remove the remaining water from the tank and bowl. - Page 37 Unit: mm Fig.#8 C. 1.Confirm the drain hole center and mark down the“+”centerline perpendicular to the finished wall. Confirm the toilet drain hole center and mark down the centerline on Front , back , left and right outside of toilet. Make sure the toilet side mark symbol is align to the drain hole centerline on the finished floor.Mark down the left and right holes.
- Page 38 Install the Electrical Service and Water Supply. DANGER: Risk of electric shock. Disconnect power before servicing. DANGER: Risk of electrical shock. For plug-in installations/wall-mounted electrical supply: connect only to a properly-grounded, grounding-type receptacle protected by a Ground-Fault Circuit-Interrupter (GFCI). Do not remove the grounding pin or use a grounding adapter. DANGER: Risk of electrical shock.
- Page 39 Fix Wax Ring Place the wax ring on the waste outlet. Fig.#1 Install the Vitreous Shell WARNING: Risk of personal injury. The vitreous shell weighs 35 kg. Use proper lifting technique when handling the vitreous shell. CAUTION: Risk of product damage. Do not set the shell down hard. Gently lift and move the shell if it is not placed correctly.
- Page 40 Install Tee Valve. IMPORTANT! Unit: mm Dimensions in the pictures are for reference only. Install Deco Cover. Close by rotating the handle clockwise and open counterclockwise Handle of tee valve 250 10 Decorative cover Tee valve Fig.#15 Connect the Water IMPORTANT! The supplied hose must be used for this installation.
- Page 41 Test manual flush button. Press down left button for about 2 seconds, then press down right button for about 3 seconds and again press down left button for about 6 seconds to complete water flushing. Left button Right button Fig.#17 M.
-
Page 42: Installation Steps
INSTALLATION OF REMOTE CONTROLLER HOLDER NOTE: If the installation wall is made of special material (such as wood board, density board and etc.), suitable fixing methods shall be adopted. NOTE: The place to install the remote control where it will not easily be splashed by water. Choose a mounting location for the remote holder that is easily accessible while sitting on the seat. - Page 43 PREPARATIONS FORE THE FIRST USE Fig.#21 Confirm that the battery has been correctly installed in the "remote controller". Confirm that there is no obstacle in front of the product. Wait for the host to finish the self-checking. During that time, it is normal to hear rotating sound of the motor and bicker.
-
Page 44: Troubleshooting
Trouble shooting This guide of trouble shooting is for general help only. Authorised representatives or qualified electricians of Kohler Company shall be able to solve all electrical failures. If you want to know about the service of warranty, please contact local dealers or wholesalers. - Page 45 A. Remove the foreign matters or dry the seat A. The seat is covered by foreign matters or the seat 9. Cover fails to be is wet B. Use the remote controller to open/close the toilet closed/opened cover or do it manually until it works normally. B.
-
Page 46: Important Consumer Information
Do not use abrasive cleaners or solvents. WARNING: Risk of property or product damage. Kohler Company shall not be responsible or liable for any damage to these fittings caused by the use of cleaners containing chlorine (calcium hypochlorite). CAUTION: Do not use any cement while installing the toilet. Heat expansion of the toilet may damage the feet of the toilet. - Page 47 VEIL 베일 설치 매뉴얼 INSTALLATION INSTRUCTIONS 일체형 양변기 INTELLIGENT TOILET K-5401T 설치 전 필요한 공구, 물건, 설치절차를 숙지하기 위해 본 매뉴얼을 자세히 읽어주십시오. 부적절한 설치방법으로 인한 불필요한 손실을 방지하기 위해 적절한 부분을 참조하여 변기를F 설치하십시오. 정확한 설치방법 외에 모든 조작 및 안전 지침을 자세히 읽어주십시오. 본...
- Page 48 수압 간이 테스트 방법2: 주의: 반드시 전용 급수 측정 장치를 사용해야 합니다 볼 밸브를 열고 3회 세척한 후 측정하십시오. 측정장치 압력은0.046Mpa (6.7 psi)이상으로 권장합니다. 압력계 볼 밸브 호스 제품의 배관 제품의 앵글밸브 Fig.#2 그림 2 구입자료 .......................K-5401KR-0 베일 일체형 양변기 ........................1106433 리모콘...
- Page 49 기계와 같이 제공) 변기 전면 변기 바닥 도면 Fig.#3 그림 3 콜러회사에서 도면에 표시된 사이즈의 변경권한을 보유하고 있으며 변경 시, 별도 통지를 하지 않습니다. Kohler reserves the right to change marked dimensions without prior notice. 사양 3L/4.8L 세척유량 305mm 시공 거리...
- Page 50 제품 구성도 × 완충패드 커버(항균) 변기 시트(항균) 노즐 착좌센서 감지구역 온풍버튼을 눌러 온풍기능을 가동합니다. 다시 한번 눌러 정지합니다. 세척버튼을 눌러 둔부세척기능을 가동합니다. 전원버튼을 클릭(긴 경고음이 본 제품의 수동기계버튼을 다시 한번 눌러 정지합니다. 사용할 수 없음을 알려주는 경우는 제외)하여 전원을 끕니다. 다시...
- Page 51 바닥에 800mm×800mm 크기의 시트를 펴고 비데를 포장박스에서 꺼내 시트에 놓습니다. Fig.#6 그림 6 설치 A. 기존 양변기를 철거합니다. 급수관을 닫고 물을 내린 후, 스폰지 혹은 휴지로 변기 내에 남은 물기를 닦아냅니다. 급수관과 급수 밸브(설치 되어 있는 경우)를 제거하고 낡은 변기를 철거합니다. 커터칼로...
- Page 52 Unit: mm Fig.#8 그림 8 C. 1. 배수구의 중심을 확인하고 벽면과 수직으로 중심선 "+" 를 표시하십시오. 변기 배수구의 중심을 확인 하고 , 앞·뒤 양 옆면의 중심선을 표시 합니다. 변기 옆면의 중심선 표시와 바닥의 배수구 중심선이 맞춰지는지 확인 하십시오.왼 쪽과 오른 쪽 구멍을 표시하십시오. 표식을...
- Page 53 전원과 수도를 연결합니다. 위험: 감전 가능성이 있기에 조작 전, 전원을 차단합니다. 위험: 감전위험. 플러그식 설치/벽배전 전원에만 설치가 가능하며, 접지고장 회로차단기(GFCI)기능이 구비된 회로에만 연결할 수 있습니다. 접지핀을 제거하거나 접지 어댑터를 사용하지 말아야 합니다. 경고: 제품에 감전위험성이 존재합니다. 본 제품은 양호한 접지에만 설치해야 합니다. 회로 요구: 220V/220V-240V~, 10A, 50Hz/60Hz, 해당...
- Page 54 T자형 급I 연결 관의 너트를 해체합니다. Fig.#1 그림 13 도기를 설치합니다. 경고: 다칠 우려가 있습니다. 도기는 무게가 35kg에 달합니다. 도기 이동 시, 적절한 도구를 사용하십시오. 조심: 제품이 파손될 우려가 있습니다. 도기를 가볍게 내려놓도록 합니다. 도기를 적절한 위치에 맞물리지 않은 경우, 가볍게 들어 조정합니다. 거칠게 움직일 경우, 도기가 손상되거나 균열이 발생할 우려가 있습니다.
- Page 55 앵글밸브를 설치합니다. 주의사항은 다음과 같습니다. Unit: mm 도면의 사이즈는 앵글밸브 설치 권장 사이즈입니다. 설치 전에 앵글밸브에 반드시 장식커버를 장착해야 합니다. 핸들을 시계 방향으로 돌려 닫아 주십시오. 그리고 반 시계 방향으로 열어 주십시오. 앵글밸브 핸들 250 10 장식용 덮개 앵글밸브 Fig.#15 그림...
- Page 56 수동버튼 테스트, 좌측 버튼을 2초간, 우측 버튼을 3초간, 좌측 버튼을 6초간 누릅니다. 세척과 정 완료. 왼쪽 버튼 오른쪽 버튼 Fig.#17 그림 17 M. 좌우 측 판을 설치, 설치 완료 후, 일체형 양변기 밑부분의 틈 새 (좌우 측 판의 밑부분 틈새는 제외) 를...
- Page 57 리모콘 거치대를 설치합니다. 주의: 설치한 벽면이 특수재질(‘예’하면, 목판, 합판인 경우 등)인 경우 적절한 고정 방법을 사용합니다. 주의:리모콘은 물이 쉽게 튕기지 않는 위치에 설치해야 합니다. 적절한 위치에 리모콘 거치대를 설치해야 하며, 비데에 앉아서 쉽게 리모콘을 조작할 수 있는 위치여야 합니다. 리모콘 거치대 볼트 홀의 위치에 따라 직경6mm의 드릴로 벽에 두개 깊이가45mm이상인 구멍을 냅니다. 구멍에 앙카를...
- Page 58 최초 사용 전 준비 Fig.#21 그림 21 리모콘에 정확히 배터리를 장착 했는지 확인합니다. 제품 앞에 장애물이 없는지 확인합니다. 본체 자체 검사를 기다립니다. 과정 중 모터 작동소리와 물 흐르는 소리를 들을 수 있고, 야간 조명등이 점멸합니다. 야간 조명등이 점멸하지 않으면 자체 검사가 종료된 것입니다. 커버...
- Page 59 고장 검사와 수리 본 고장 검사 수리 지침은 일반적인 문제에 한해 지원합니다. 콜러사가 지정한 서비스 제공자 혹은 검증된 전기수리공은 모든 전기적인 고장을 해결할 수 있습니다. 품질보증 서비스는 현지 대리점 혹은 구매점에 연락하기 바랍니다. 고장 현상 가능한 원인 건의 조치 A. 배선 고장 A.
- Page 60 電 A. 착석 센서가 이물에 가려졌거나, A. 착석 센서 구역의 물 혹은 이물을 제거함 8. 작동 정지 상태에서 청소 버턴을 눌러 청소 변좌 시트가 젖었음 가동됨 A. 현재 앉은 자세로 착석 센서에서 A. 앉은 자세를 바꿈 9.착석 상태에서 물내림 기능이 작동되지 않음 사용자가...
- Page 61 사용자 주의사항 사용자 책임 거주 환경의 수질 경도가 높은 경우, 배수구의 청결을 유지하여 좌변기 물내림을 정상적으로 해야 한다. 매주 최소 한번 비데 청결 세제를 사용하여 긴 손잡이가 있는 브러쉬로 배수구를 청결해야 하며, 가급적 오수 배출관까지 청결하여 광물질 침적을 방지해야 합니다. 대부분...
Need help?
Do you have a question about the VEIL K-5401T and is the answer not in the manual?
Questions and answers