Subscribe to Our Youtube Channel
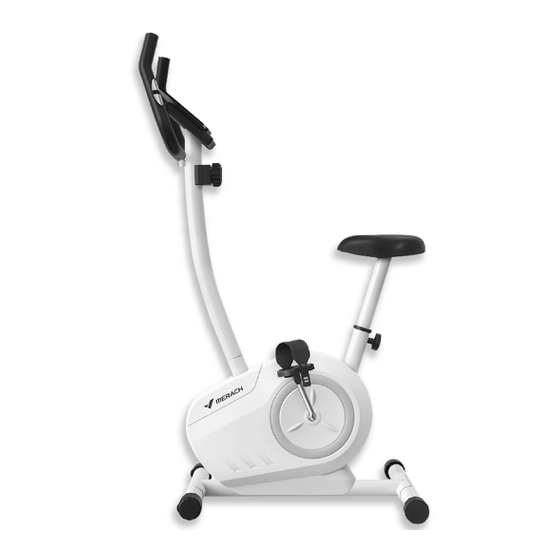
Summary of Contents for Merach MR-632
- Page 1 User ’ s Guide 用户说明书 MR-632 动感单车 全 国 热 线 : 400-189-1969 官 方 网 站 : w w w . merach.com 公 司 名 称 : 麦瑞克(杭州)健康科技有限公司...
- Page 2 110公斤...
- Page 3 58 62...
- Page 4 M8 x 16mm M8 x 65mm M8 x 30mm M5 x 45mm M3 x 12mm M4 x 20mm M4 x 20mm M6 x 100mm M8 x 60mm M8 x 16mm M6 x 45mm M5 x 12mm M8 x 65mm M4 x 16mm –...
- Page 5 (14)–7 (45)–5 (46)–4 (61)–11 (60)–5 M5 x 12mm M4 x 16mm M8 x 16mm M8 x 30mm (62)–2 (47)–3 (13)–2 (69)–2 M8 x 65mm M8 x 65mm (48)–4 (68)–2...
- Page 10 用三颗M8防松螺母(45)和三个M8垫圈(60) 将车座(10)连接至坐杆(11);...
- Page 12 Calories Total Distance Pulse DIST SCAN TIME SCAN MODE MODE TIME Time SCAN Speed Distance...
- Page 13 Safety Information Before you undertake any programme of exercise that will increase cardiovascular activity please be sure to consult with your doctor. Frequent strenuous exercise should be approved by your doctor and proper use of your product is essential. Please read this manual carefully before commencing assembly of your product or starting to exercise.
-
Page 14: Exploded View
EXPLODED VIEW 58 62 Page2... -
Page 15: Part List
PART LIST . y t Frame Handgrip Upright Crank Nut Front Stabilizer Pulse Sensor/Wire Rear Stabilizer Upright Wire Console Flywheel Axle Handlebar Flywheel Bearing Reed Switch/Wire Snap Ring Clamp Star Washer Spiral Nut M8 Locknut Seat M8 Acorn Nut Seat Post M8 x 16mm Screw Sleeve M8 x 65mm Carriage Bolt... -
Page 16: Part Identification Chart
PART IDENTIFICATION CHART Use the drawings below to identify the small parts needed for assembly. The number in parentheses below each drawing is the key number of the part, from the PART LIST near the end of this manual. The number following the key number is the quantity needed for assembly. -
Page 17: Assembly Instruction
ASSEMBLY INSTRUCTION Attach the Rear Stabilizer (4) to the Frame (1) with two M8 x 65mm Carriage Bolts (48), two M8 Curved Washers (61), and two M8 Acorn Nuts (46); insert both Carriage Bolts, and then tighten the Acorn Nuts. Attach the Rear Stabilizer (3) to the Frame (1) with two M8 x 65mm Carriage Bolts (48), two M8 Curved Washers (61), and two M8 Acorn... - Page 18 ASSEMBLY INSRUCTION Connect the Upright Wire (40) to the Reed Switch Wire (7). Next, connect the Resistance Cable (20) to the Lower Resistance Cable (21) in the following way: See drawing A: Pull upward on the metal bracket (A) on the Lower Resistance Cable (21), and insert the tip of the Resistance Cable (20) into the wire clip inside the metal bracket.
- Page 19 ASSEMBLY INSTRUCTION Tip: Avoid pinching the wires and the cables. Slide the Upright(2) onto the Frame(1). Avoid pinching the wires and the cables See the upper drawing. Attach the Upright (2) with three M8x 16mm Screws (47), three M8 Split Washers (14), and three M8 Curved Washers (61);...
- Page 20 ASSEMBLY INSTRUCTION Attach the Water Bottle Holder (36) to the Upright (2) with two M4 x 16mm Flange Screws (69); start both Flange Screws, and then tighten them. Tip: Avoid pinching the wire. Attach the Handlebar(6) to the Upright(2) with two M8x30mm Screws(13), two M8 Split Washers(14), and two M8 Washers(60);...
- Page 21 ASSEMBLY INSTRUCTION Tip: The M8 Locknuts (45) and the M8 Washers(60) may be preattached to the Seat(10). Attach the Seat(10) to the Seat Post(11) with three M8 Locknuts(45) and three M8 Washers (60); start all the Locknuts, and then tighten them. Insert the Seat Post (11) into the Frame (1), and then insert the Seat Knob (15) into the Frame and into one of the adjustment holes (D) in the...
- Page 22 ASSEMBLY INSTRUCTION Identify the Right Pedal (33). Using an adjustable wrench, firmly tighten the Right Pedal clock-wise into the right arm of the Crank (18). Firmly tighten the Left Pedal (not shown) counter- clockwise into the left arm of the Crank (18). IMPORTANT: You must turn the Left Pedal counterclockwise to attach it.
- Page 23 HOW TO USE THE CONSOLE CONSOLE DIAGRAM FEATURES OF THE CONSOLE The easy-to-use console features seven modes that provide instant exercise feedback during your workouts. Time (TIME) —This mode displays the elapsed time. Note: If you set a time goal , this display will show the time remaining in your workout.


Need help?
Do you have a question about the MR-632 and is the answer not in the manual?
Questions and answers