
Related Manuals for Jaypro Sports FIELDPRO FN-15


Summary of Contents for Jaypro Sports FIELDPRO FN-15
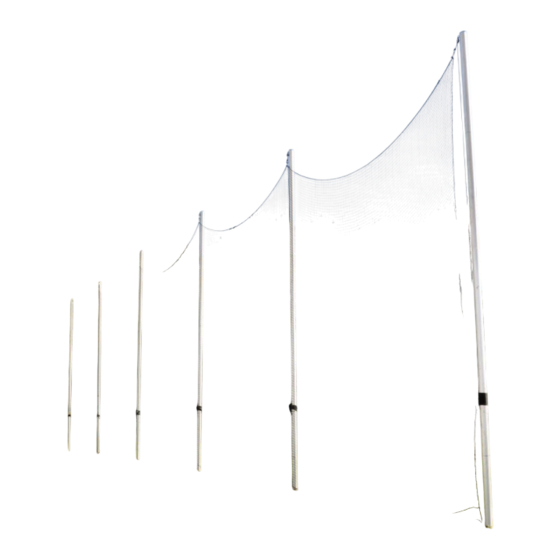
- Page 1 -- FN-15 -- (15 FT FIELDPRO NETTING SYSTEMS) Installation Instructions Call Jaypro Sports Equipment at 1-800-243-0533 during regular business hours for technical support. www.jaypro.com Rev: C Page 1 of 8...
- Page 2 3) ALTERATION OR MODIFICATION OF THIS EQUIPMENT MAY BE HAZARDOUS AND RESULT IN INJURY. FOR REPAIR OR REPLACEMENT, CONTACT YOUR DEALER OR JAYPRO SPORTS. 4) * HARDWARE FOR IS FOR BOTH END POLES AND INTERMEDIATE POLES (NOT ALL HARDWARE WILL BE USED).
- Page 3 TOOLS REQUIRED: (1) 3/8” Socket Wrench and Box Wrench (1) 7/16” Nut Driver (1) 9/16” Socket Wrench and Box Wrench (1) Cable Cutters SPECIAL NOTES: • Max spacing between poles should not exceed 20 ft. • The net may be broken up into sections to reduce weight and make handling more manageable.
- Page 4 Install Sleeves: Dig footing holes and install the ground sleeves as shown in Figure 2. Pour 6” concrete footing and allow fully curing, or use two concrete blocks or crushed stone, to rest sleeve on. Wait 24 hours before inserting poles. Note these are suggested dimensions for average soil conditions, consult local building codes.
- Page 5 Slide the cord loops onto the poles and place them just above the cleat so they will be held in place while installing the poles. POLE ~ BACK SIDE ~ 1/4"-20 NYLON LOCK NUT 1/4" FLAT WASHER 1/4"-20 x 5 1/2" HEX HD SCREW 5/16”...
- Page 6 Net: Lay the net out lengthwise and cut the 3/16” coated aircraft cable to length, extending each end enough to make up the loop. Make up a loop, as shown in Figure 6, on both ends of the cable. Attach a cable to both the top and bottom edges of the net using the cable ties.
- Page 7 Install Net: Lay the net sections out lengthwise along the base of the poles. Attach D-Rings to the net at each intermediate pole location. Attach the hoisting ropes to each cable end and D- Ring. Slowly raise the net up, attaching the sliding cable loops to the net approximately every 5 ft.
- Page 8 MAINTENANCE: • Before and after each season, thoroughly inspect the net for wear. Repair any holes to prevent them from getting wider. • Remove and store the net after the seasons use. • Remove and or lower and secure all netting if a major storm or extreme winds, more than 50 mph, are forecasted.
Need help?
Do you have a question about the FIELDPRO FN-15 and is the answer not in the manual?
Questions and answers