BLUM AVENTOS HF Manual
Wood/wide aluminum frame door application
Hide thumbs
Also See for AVENTOS HF:
- Quick start manual (12 pages) ,
- Manual (12 pages) ,
- Assembly instructions manual (11 pages)
Advertisement
Quick Links
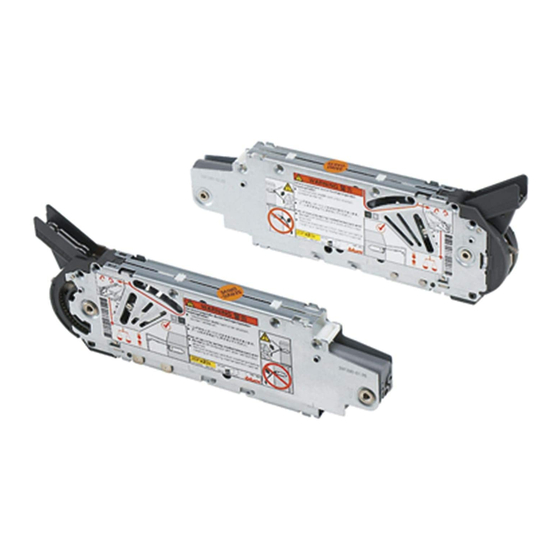
AVENTOS HF
Lift mechanism set
Cover set
Telescopic arm set
Wood or wide alum door hardware set
CLIP top 120° hinge (qty 2)
▀
COMPACT 33° hinge (qty 2)
▀
CLIP top bottom door hinge (qty 2)
▀
COMPACT mounting plate (qty 2)
▀
Face frame adapter (qty 4)
▀
Telescopic arm mounting plate (qty 2)
▀
Three hinges and mounting plates required
NOTE:
for cabinet widths over 1219 (48").
Hardware set
Inst. screw for wood doors
Inst. screw for wide alum doors
Wood/wide aluminum
frame door application
Lift mechanism (qty 2)
▀
#7 x 35 mm (1-3/8") wood screw (qty 8)
▀
Power factor
85 - 230 (1 lift mechanism req.)
231 - 470
471 - 880
780 - 1440
1401 - 2300 (3 lift mechanisms req.)
Right and left cover plate
▀
Non-handed cover cap (qty 2)
▀
Colors: Light Gray, Dark Gray and Silk White
▀
Cover set
Telescopic arm (qty 2)
▀
Cabinet heights
479 (18-7/8") - 558 (22")
558 (22") - 686 (27")
686 (27") - 889 (35")
889 (35") - 1067 (42")
Mounting plate with bracket set
Part no.
78Z5530TA8
606N or 606P
Mounting plate w/ bracket set
7072A
Dimensions in millimeters (inch equivalents as noted)
Left and right mounting plate with bracket
▀
For large overlay five-piece doors
▀
Part no.
20F2200.N5
20F2200.N5
20F2500.N5
20F2800.N5
20F2800.N5
Part no.
20F8020.NA
Part no.
20F3200.01
20F3500.01
20F3800.01
20F3900.01
Part no.
175H3F00
1
© 2021
Advertisement

Related Manuals for BLUM AVENTOS HF


Summary of Contents for BLUM AVENTOS HF
- Page 1 AVENTOS HF Wood/wide aluminum frame door application Lift mechanism set Lift mechanism (qty 2) ▀ #7 x 35 mm (1-3/8”) wood screw (qty 8) ▀ Power factor Part no. 85 - 230 (1 lift mechanism req.) 20F2200.N5 231 - 470 20F2200.N5 20F2500.N5 471 - 880 780 - 1440 20F2800.N5 1401 - 2300 (3 lift mechanisms req.) 20F2800.N5 Cover set Right and left cover plate ▀ Non-handed cover cap (qty 2) ▀ Colors: Light Gray, Dark Gray and Silk White ▀ Part no.
- Page 2 Assembly WARNING Risk of injury from spring-loaded arm Do not push arm assembly down or leave in the down position. ▀ Remove mechanism before installing or removing cabinet. ▀ Locating pin locations Frameless Ø5 Top door height (TDH) TDH x .6 - 28 + TR 231 to 271 TDH x .6 - 57 + TR 272 to 531 TR = Top reveal TDH = Top door height Face frame Ø5...
- Page 3 Assembly Attaching the lift mechanism Align the two locating pins on the lift mechanism with the two Ø5 x 5 holes bored in the side of cabinet, and attach the mechanism with the five wood screws provided. min 5 #7 x 35 mm (1-3/8") wood screws (qty 4) Attach the telescopic arms Attach telescopic arms by clipping them on in the fully upright position. WARNING: Risk of injury from spring loaded arm. Dimensions in millimeters (inch equivalents as noted) © 2021...
- Page 4 Assembly Small overlay top door hinge planning CLIP top hinges overlay Overlay table B Bore distance * Bore at 3 then adjust 1 Part no. CLIP top hinge 70T5580.TL Mounting plate 175H6000 Large overlay top door hinge planning COMPACT hinges Overlay table 1-1/4” Bore distance Part no. COMPACT hinge 32.4630 Mounting plate 130.1130.02 Subject to technical modifications without notice.
- Page 5 Assembly Bottom door hinge planning Reveal table 6 5 B Bore distance 12.7 Part no. CLIP top hinge 78Z5530T Mounting plate 175H6000 Attaching the telescopic arm mounting plates Top door height (TDH) 231 to 271 TDH x .5 + 70 272 to 531 TDH x .5 + 47 NOTE: For five-piece door mounting specifications, see page 6. 12.5 + Overlay Part no. ...
- Page 6 Assembly Attaching the telescopic arm mounting plate with bracket for five-piece doors Standard mounting plate works. ü 12.5 more than 6 Standard mounting plate does not work. 12.5 less than 6 ü Use mounting plate with bracket when 12.5 panel is < 6 from screw. Part no. Telescopic arm mounting plate with bracket 175H3F00 Subject to technical modifications without notice. © 2021...
- Page 7 Assembly Attach the top door to the cabinet Attach the bottom door Attach bottom door to the top door and attach the telescopic arms. Dimensions in millimeters (inch equivalents as noted) © 2021...
- Page 8 Assembly Adjust tension of the mechanism 1. Close and flush doors to cabinet. Open 2. Open door and adjust tension screws on and close door to test closing force. both lift mechanisms with a power drill. Test door again and repeat until desired function is achieved. Tension adjustment should be the same on both lift mechanisms. Use #2x2 POZI bit Finalizing the door adjustments 1. Adjust each top door hinge and 2. Adjust each bottom door hinge and mounting plate to properly align the top mounting plate to properly align doors to door to the cabinet. the cabinet and to the top door. ± 3 mm ± 2 mm + 3/- 2 mm ± 2.5 mm ± 2 mm ± 2 mm NOTE: Although not illustrated here, telescopic arm mounting plates can also be adjusted horizontally ± 2 mm if needed.
- Page 9 Assembly Adjust and lock telescopic arms 2. Slightly open door and lock the telescopic 1. Close and flush doors to cabinet. While arms into position using the levers as shown. pressing on the top door, pull the bottom door open one inch. Open door enough to lock levers. Attach covers Attach the left and right cover plates to each lift mechanism. Dimensions in millimeters (inch equivalents as noted) © 2021...
- Page 10 Removal WARNING Risk of injury from spring-loaded arm Do not push arm assembly down or leave in the down position. ▀ Remove mechanism before installing or removing cabinet. ▀ Remove covers Remove left and right cover plates. Detaching the telescopic arms Warning: Risk of injury from spring-loaded telescopic arm! Maintain control of telescopic arm while releasing the CLIP mechanism. Release both arms and gently rest the top door on the loose arms. The tension will hold the doors up for the next step. Subject to technical modifications without notice. © 2021...
- Page 11 Removal Removing the doors 1. Hold the bottom door while unclipping the bottom hinges. 2. Hold the top door while detaching the top hinges. Simply unclip them if using the CLIP top hinges or loosen them if using COMPACT. Removing the telescopic arms Using a screwdriver, depress the release tabs to remove telescopic arms. If transporting the cabinet to the jobsite, stop here. Lift mechanisms stay inside the cabinet for easy transport. Dimensions in millimeters (inch equivalents as noted) © 2021...
-
Page 12: Other Information
Z = TDH x .44 + 38 .063 .094 .125 .156 .188 .219 .281 .313 .344 .375 .406 .438 .469 2 .531 13.5 .563 .594 .625 .656 .688 17.5 .719 .781 .813 20.5 .844 .875 .906 .938 Blum, Inc. .969 24.5 800-438-6788 sales.us@blum.com 25.4 blum.com INST-AVT07.21...
Need help?
Do you have a question about the AVENTOS HF and is the answer not in the manual?
Questions and answers