Table of Contents
Advertisement
Quick Links
MANTECATORI ORIZZONTALI ELETTRONICI
ELECTRONIC HORIZONTAL BATCH FREEZER
TURBINES ÉLECTRONIQUES HORIZONTALES
ELEKTRONISCHE WAAGRECHTE SPEISEEISBEREITER
MANTECADORAS HORIZONTALES ELECTRÓNICAS
MANUALE D'USO E
MANUTENZIONE
MANUAL OF USE AND
MAINTENANCE
MANUEL D'UTILISATION
ET D'ENTRETIEN
GEBRAUCHSANWEISUNG
UND
WARTUNGSHANDBUCH
MANUAL DE USO Y
MANUTENCION
Serie-Series-Série-Serie
C119 05
C122 02
All manuals and user guides at all-guides.com
Azienda Certificata
ISO 9000-2000
Numero Certificato T 27543
Advertisement
Table of Contents

Related Manuals for Frigomat Taylor C122


Summary of Contents for Frigomat Taylor C122
- Page 1 All manuals and user guides at all-guides.com MANTECATORI ORIZZONTALI ELETTRONICI ELECTRONIC HORIZONTAL BATCH FREEZER TURBINES ÉLECTRONIQUES HORIZONTALES ELEKTRONISCHE WAAGRECHTE SPEISEEISBEREITER MANTECADORAS HORIZONTALES ELECTRÓNICAS MANUALE D’USO E MANUTENZIONE MANUAL OF USE AND MAINTENANCE MANUEL D’UTILISATION ET D’ENTRETIEN GEBRAUCHSANWEISUNG WARTUNGSHANDBUCH MANUAL DE USO Y MANUTENCION Serie-Series-Série-Serie C119 05...
- Page 2 All manuals and user guides at all-guides.com 1 - ENGLISH...
- Page 3 “GUARANTEE CARD “ enclosed to the machine, which shall be duly filled up and sent back to: FRIGOMAT s.r.l., via 1° Maggio 26862 GUARDAMIGLIO (LODI) – ITALIA In the following field, please write your machine serial number in capital letters Serial number Distributor’s stamp...
-
Page 4: Table Of Contents
All manuals and user guides at all-guides.com Congratulations on purchasing a machine TAYLOR. The present manual, enclosed to the machine, is integrant and essential part of the machine and shall be delivered to the final user. Before performing any kind of operation, it is recommended to carefully study the reported instructions, as only a careful reading allows you getting the highest performance from your machine. -
Page 5: Transport, Handling And Storage
All manuals and user guides at all-guides.com 1 TRANSPORT, HANDLING AND STORAGE. 1.1 PRELIMINARY INSPECTION The machine travels at the customer’s risk. In case packing is damaged, immediately inform the carrier. Immediately inform the carrier also in case of damage to the machine, even if you open the packing a few days after the delivery. -
Page 6: Marking And Graphics
All manuals and user guides at all-guides.com 2. MARKINGS AND GRAPHICS Never touch the machine with hands and tools during production or maintenance and cleaning operations, without making sure that the machine is in STOP position, the master switch is off and/or the multipolar plug disconnected. TAYLOR declines any liability for accidents deriving from an improper use of the machine due to the non-compliance with the above-mentioned recommendations. - Page 7 All manuals and user guides at all-guides.com Warning! Do not touch with hands. The following plate placed on the back of air-cooled machines shows that cleaning operations on the heat exchanger shall be carried out only by means of a brush or an exhauster.
-
Page 8: Installation
All manuals and user guides at all-guides.com 3. INSTALLATION 3.1 FIELD OF USE The batch freezers SERIES C are espressly designed and engineered for ice-cream batch freezing cycles. 3.2 LIMITS OF USE Never use the machine with variable supply voltage and/or more than +/- 10% of the value showed in the nameplate or when the feeder is damaged;... - Page 9 All manuals and user guides at all-guides.com attempts and far from liquids, water and heat sources. It shall not be damaged, otherwise make it be replaced by qualified personnel with another section and type 5G4 H07RN-F (for version 400 V), 4G4 H07RN-F (for version 230/3 V) or 3G4 H07RN- F (for version 230/1 V) before connecting the machine to the mains.
- Page 10 All manuals and user guides at all-guides.com • For three-phase versions only, check the correct direction of rotation of the agitator motor: apply voltage machine, press DELIVERY pushbutton and check that the agitator direction of rotation is counterclockwise through the hopper grid.
-
Page 11: Safety Devices
All manuals and user guides at all-guides.com 4. SAFETY DEVICES Shearing prevention system: realized by means of a NO micro-switch in conformity with the European standard; it stops the machine when the door is opened and/or the grid on the hopper is lifted and visualize EME on the display. Beater motor safety system: it consists of overload relays with automatic reset. -
Page 12: Operations
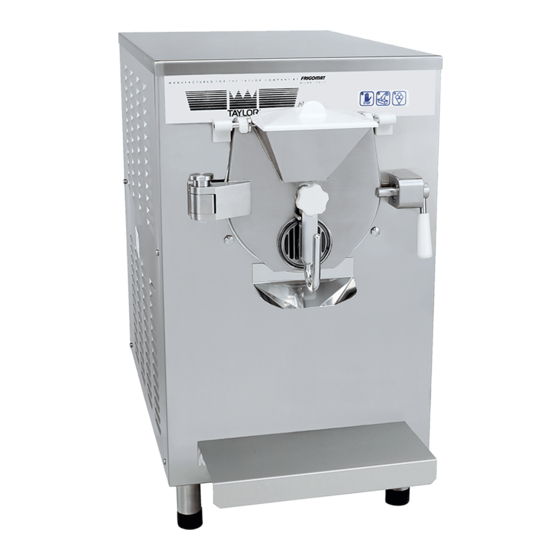
All manuals and user guides at all-guides.com 5. OPERATION 5.1 CONTROLS 1. Door It hermetically seals the cylinder during the working cycles. It can be easily removed for cleaning purpose. 2. Safety grid – hopper cover It allows the operator to charge the product under safe conditions. -
Page 13: Control Panel
All manuals and user guides at all-guides.com 5.2 CONTROL PANEL 1. DISPLAY It displays all information about the working processes and the allowed settings. 2. TER LED It warns about any malfunction in the system 3. STOP Whatever working cycle is in progress, it stops the machine and cancels any function in progress. - Page 14 All manuals and user guides at all-guides.com 5.3 GELATO AND GRANITA PRODUCTION After the machine has been installed according to the instructions reported in chapter 3 and carefully cleaned and sanitized according to the instructions reported in chapter 6, proceed as follows to start up the ice-cream production: Check that the master switch is closed, the STOP pushbutton is lighted up and the water supply...
- Page 15 All manuals and user guides at all-guides.com 5.3.1 GELATO PRODUCTION WITH CONSISTENCY CONTROL pressing SEMI-AUTOMATIC PRODUCTION pushbutton, the display lightens indicating last consistency setting. Pushbuttons UP – ENTER – DOWN lighten as well. Now the machine is ready to enter a new gelato consistency setting.
- Page 16 All manuals and user guides at all-guides.com 5.3.2 GELATO PRODUCTION WITH TIME CONTROL By pressing the TIME PRODUCTION pushbutton the display lightens, indicating the last time setting. Pushbuttons UP – ENTER – DOWN lighten as well. Now the machine is ready to enter a new duration time of the freezing cycle.
- Page 17 All manuals and user guides at all-guides.com 5.3.3 GRANITA PRODUCTION GR1 GRANITA CYCLE Here it is possible to set and program the consistency values, exactly as the ice cream semi-automatic production cycle. By the press of the GRANITA pushbutton both the display – showing GR1 – and UP- ENTER-DOWN pushbuttons lighten.
-
Page 18: Maintenance
All manuals and user guides at all-guides.com 6. MAINTENANCE 6.1 ROUTINE MAINTENANCE (ADDRESSED TO THE USER) During production, cleaning and maintenance operations, never touch the machine with hands or tools without making sure that the machine has been disconnected from mains. In case of troubles, make sure that they are not caused by a lack of servicing. - Page 19 All manuals and user guides at all-guides.com 6. For models modello C122 turn the two knobs outwards, seize the bent lever and pull it to remove the door. 7. Dismantle the door into pieces: • Unscrew the handle adjusting knob •...
-
Page 20: Maintenance Of Agitator And Gaskets
All manuals and user guides at all-guides.com 6.1.2 MAINTENANCE OF AGITATOR AND GASKETS The agitator blades are equipped with scraping pads made of atoxic plastic materials suitable for food industry. These components are subject to wear according to the characteristics of the employed mixture: with high sugar content and low fat percentage a remarkable wear of pads can be the detected. -
Page 21: Extraordinary Maintenance
All manuals and user guides at all-guides.com 6.2 EXTRAORDINARY MAINTENANCE (FOR QUALIFIED PERSONNEL) These operations shall be carried out by qualified and authorized personnel only. TAYLOR declines any liability for damages to things or persons deriving from the non-observance of the above-mentioned prescription. -
Page 22: Consistency Calibration On Meb-New Card
250, which are directly proportional to the ice-cream hardness. Each machine is tested and calibrated by FRIGOMAT with standard mixtures and with an agitator motor power input referring to a hardness value of 240. Such value is reported on the test sheet supplied with the machine (see: AGITATOR AMPERE @SET240 on the test sheet);... - Page 23 All manuals and user guides at all-guides.com Follow the instructions below to perform the consistency calibration: 1. Make sure that the master switch is off and/or the multipolar plug is disconnected. 2. Remove the right side panel (C119) or back panel (C122) and the electrical box cover. 3.
-
Page 24: Trouble-Shooting
All manuals and user guides at all-guides.com 7 TROUBLE-SHOOTING 7.1 ALARMS MANAGEMENT The “MEB-NEW” electronic card is a powerful control logic unit which signals possible machine troubles by means of alphanumeric messages visualized on the display; the technician shall understand them to quickly find the reason of this trouble. MESSAGE DESCRIPTION REMEDIES... -
Page 25: Troubleshooting
All manuals and user guides at all-guides.com 7.2 TROUBLESHOOTING TROUBLE POSSIBLE CAUSES REMEDIES The machine does not start up Electric trouble or failed safety Call a qualified technician (STOP pushbutton ON without micro switch active alarms) Incorrect power supply Check the phases. Master switch OFF or incorrect Close the switch and check the power supply...
Need help?
Do you have a question about the Taylor C122 and is the answer not in the manual?
Questions and answers