Table of Contents
Advertisement
Quick Links
Advertisement
Table of Contents

Subscribe to Our Youtube Channel
Related Manuals for Frigomat AGG.2014 Series


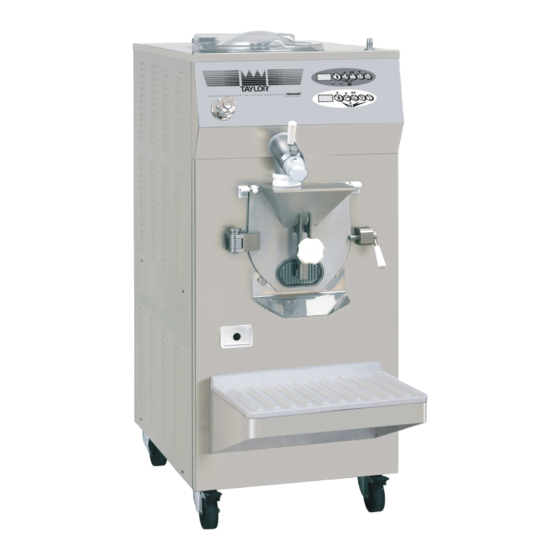
Summary of Contents for Frigomat AGG.2014 Series
- Page 1 USE AND MAINTENANCE MANUAL -Series AGG.2014 C 136 C137 C138...
- Page 2 IMPORTANT We recommend that you read this manual fully and carefully before using your appliance. It is in your interest to pay special attention to the warnings marked as follows: Failure to comply with this signal causes very serious risks for health, death, and medium and long term permanent damage.
- Page 3 The following pages carry all of the indications required to perform installation, operation, adjustments and routine maintenance correctly. FRIGOMAT S.r.l. reserves the right to carry out the modifications it deems necessary to improve its product or the technical manual without prior warning, inserting the variations in the subsequent editions.
-
Page 4: Table Of Contents
INDEX 1. TRANSPORTATION, HANDLING AND STORAGE ………………………..…….. 4 Preliminary inspection and storage ………………………………. 4 Dimensions and weights of packaged machines ……………… 4 Indications for decommissioning ………………………. 4 2. MARKING AND GRAPHIC SIGNS ………………………………………………… 5 3. GENERAL SAFETY STANDARDS ……………………………………….. 6 4. -
Page 5: Transportation, Handling And Storage
1. TRANSPORTATION, HANDLING AND STORAGE. 1.1 PRELIMINARY INSPECTION AND STORAGE The machine is transported at the risk and peril of the customer. If you notice any damage to the packaging, immediately inform the carrier. Inform the carrier immediately after opening the package if the machine is damaged even if a few days after delivery. -
Page 6: Marking And Graphic Signs
2. MARKING AND GRAPHIC SIGNS The machine is provided with an identification plate and several pictograms. They must be known along with the manual to guarantee safe use. Machine data plate The adhesive plate applied on the rear enables to identify the model. -
Page 7: General Safety Standards
Use only FRIGOMAT original spare parts when performing maintenance. The manufacturer will not be held liable for damage caused by use of non-original spare parts. Use of non-original spare parts entails automatic termination of the warranty. -
Page 8: Installation
< = 68 dB (A) C138 < = 68 dB (A) 4.4 SUPPLIED WITH MACHINE Ice cream extraction spatula Rubber seal Complete scrapers FRIGOMAT lubricant Centring pin for beater Use and maintenance manual Brush Declaration of conformity Gasket extractor Warranty certificate... -
Page 9: Activation
4.5 ACTIVATION (INTENDED FOR QUALIFIED PERSONNEL) FRIGOMAT declines all and any liability for damage caused by failure to comply with the following indications. This lack of compliance causes the warranty to terminate. Connection of the machine to the water mains must be performed in compliance with national regulations of the Country where the machine is installed. - Page 10 • If needed, carry out an equipotential bonding, using the screw placed on the rear of the machine below the frame and marked with the symbol shown to the left. • Make sure that the cold water supply line intended for condensation has pressure values between 1 and 3 BAR and temperature between 13°...
- Page 11 • Operating temperature should be between 15° and C136°C. • Humidity should be between 30 and 60%. FRIGOMAT s.r.l. will not be held liable for personal harm and/or damage to objects deriving from incorrect installation and/or by failure to comply with work Accident- prevention Standards.
-
Page 12: Safety Devices
5. SAFETY DEVICES Limbs shearing-prevention safety device (batch freezer): Implemented by means of a safety circuit compliant with the European directive, it intervenes when the door is opened and/or when the safety grid on the hopper is lifted, temporarily switching the machine to STOP mode. -
Page 13: Operation
6. OPERATION 6.1 MACHINE 1. Tank lid Closes the tank during the processing phases. It can be easily removed for cleaning. 2. Tap Allows removing the product from the heater with the possibility of pouring it straight into the underlying batch freezing cylinder. - Page 14 ASSEMBLY AND ADJUSTMENT OF THE TUB SUPPORT (optional) Assemble the two steel shelves on the support as described in figure. Pay attention to the up-down direction referring to the fixing slots on the back of the support. Position the rubber buffers on the seats as shown in figure.
- Page 15 HEATER BEATER ASSEMBLY Attach the mobile scrapers to the steel structure of the beater. Make sure they are orientated correctly, perfectly mobile and that the thrust springs are positioned correctly in their seats. Insert the complete beater into the tank and carefully check that every part is correctly positioned as illustrated in the figure.
- Page 16 TAP ASSEMBLY Insert the O-ring gasket into the plastic bottom and lubricate it using the Frigomat lubricant supplied. Insert the piston into the bottom as illustrated in the figure. Position the piston knob onto the rod and tighten the steel pin. Check that the piston runs easily in the seat (fig.
-
Page 17: Heater Control Panel
6.2 HEATER CONTROL PANEL 1. DISPLAY Displays the information relative to work programs and allowed adjustments. 2. STOP In whatever operating phase the machine is in, pressing the STOP key stops the machine and cancels the function in progress. 3. AGITAZIONE (MIXING)/UP (▲) This button has 2 functions: 1. - Page 18 4. SEMI-AUTOMATIC/CONFIRM (◄►) This button has 4 functions: 1. Whatever the function in progress, the pressing the SEMI-AUTOMATIC key, access is gained to the programming of the semi-automatic thermal processing cycle, were it possible to program the maximum temperature of the product in tank and time for which said temperature will be kept constant.
-
Page 19: Batch Freezer Control Panel
6.3 BATCH FREEZER CONTROL PANEL 1. DISPLAY Displays the information relative to work programs and allowed adjustments. 2. SLUSH LED The LED switches on when a slush production program is selected. 3. STOP/DOWN (▼) This button has 2 functions: 1. In whatever operating phase the machine is in, pressing the STOP key stops the machine and cancels the function in progress. - Page 20 4. MIXING/UP (▲) This button has 2 functions: 1. With the machine at STOP, pressing the MIXING key only starts the beater motor at low speed. During any other operative phase, pressing the MIXING key keeps the beater motor running at low speed and stops the compressor.
- Page 21 NORMAL SLUSH (GR1) With the machine at STOP, pressing the STOP and SEMI- AUTOMATIC keys at the same time one accesses the normal slush cycle with consistency control, which enables the operator to manually select the desired level of consistency, in relation to the type of mixture used.
-
Page 22: Thermal Processing Of Mixtures
6.4 THERMAL PROCESSING OF MIXTURES After having installed the machine in compliance with the instructions of chapter 3 and having accurately washed and sanitised it, according to the instructions contained in chapter 7, proceed as follows to start thermal processing: - Make sure the master switch is closed and that the machine is powered correctly. -
Page 23: Automatic Cycle 85
6.4.1 AUTOMATIC CYCLE 85°C - Press the 85° AUTOMATIC key to start the Fig.1 automatic heating cycle at 85°C. The key LED such as on and the instantaneous temperature of the product in tank during the entire processing cycle is shown on display (fig.1-2). -
Page 24: Semi-Automatic
6.4.2 SEMI-AUTOMATIC CYCLE Press the SEMI-AUTOMATIC key to select Fig.1 the semi-automatic thermal treatment cycle with temperature and stand-by time control (Fig. 1). The LEDs of the UP (▲),Confirm (◄►) and DOWN (▼) keys start flashing and numbers relative to the set of temperature to be configured, between 30 and 105°C, appear on the display: press the “UP (▲)”... - Page 25 Fig.1 By selecting heating temperatures between 65° and 85°C, the machine automatically calculates the stand- by time required to guarantee absolute product hygiene. This time value can be modified at any time, but it is strongly advised against as products with excessively high bacterial loads may be obtained.
-
Page 26: Chocolate Cycle
6.4.3 CHOCOLATE CYCLE Simultaneously press the STOP and SEMI- Fig.1 AUTOMATIC select semi- automatic cycle, optimised for mounting the chocolate pieces (Fig. 1). The LEDs of the UP (▲), Confirm (◄►) and DOWN (▼) keys start flashing, the Chocolate LED switches on and the numbers relative to the set of temperature to be configured, between 20 and 61℃, appear on the display: press the “UP (▲)”... - Page 27 - Once the programmed temperature is reached and any standby time has passed, the display Fig.1 flashes and the buzzer sounds intermittently, to inform the operator that it is possible to extract the product (Fig.1). If this is not possible right away, the beater will keep on mixing and the electrical heat element will hold the product at the correct temperature, thus starting the PRESERVATION...
-
Page 28: Slow Flame
This technology consists in yielding heat to the mixture in the tank indirectly through an exchange fluid (glycol). The fluid temperature of the bain-marie system (glycol) is programmed by Frigomat at 120°C. This temperature value is adequate for the treating most of the mixtures and also guarantees short heating times with maximum cooking temperature of the product up to 105°C. - Page 29 Fig.4 If the temperature selected by the user during programming exceeds 93°C, the SLOW FLAME function will not be accepted: the maximum admitted temperature in slow flame running (93°) will flash on the display, alternative display of 3 horizontal dashes (---) and after a few seconds, will automatically disable the SLOW FLAME function (Fig.5-6).
-
Page 30: Extraction Of Boiling Mixtures
6.5 EXTRACTION OF BOILING MIXTURES 6.5.1 TRANSFER INTO BATCH FREEZING CYLINDER To transfer the mixture from the upper heater vessel directly into the underlying batch freezing cylinder, Fig.1 refer to the following procedure: Make sure that the amount of product you wish to pour from into the batch freezing cylinder respects the prescribed maximum and minimum values for each model (see chap. - Page 31 Fig.4 Check that the plastic sleeve is correctly lowered and perfectly in contact with the metal hopper lid (Fig.4). If the product to be poured is fluid (e.g.: ice cream mixture), ensure to have mounted the flow reducer ring inside the tap (Fig.5). In the presence of liquid mixtures, always use the flow reducer ring to avoid that, during transfer operation, the product completely floods the hopper...
-
Page 32: Transfer Into Separate Container
6.5.2 TRANSFER INTO SEPARATE CONTAINER Fig.1 If you wish to transfer the product from the heater vessel to an external container, do as follows: Ensure amount product transferred is compatible with the useful capacity of the container of destination. Make sure the heater tap is in the diagonal position to allow the product to flow directly into the container you wish to use. -
Page 33: Slush And Ice Cream Production
6.6 ICE CREAM AND SLUSH PRODUCTION After having installed the machine in compliance with the instructions of chapter 3 and having accurately washed and sanitised it, according to the instructions contained in chapter 7, proceed as follows to start ice cream making: Fig.1 - Make sure that the gate valve of cold water for condensation is open. -
Page 34: Automatic Cycle
6.6.1 AUTOMATIC CYCLE Fig.1 - Press the AUTOMATIC key to start the automatic batch freezing cycle (Fig. 1). - The AUT message is viewed on the display for a few seconds to confirm the automatic cycle has been selected (Fig. 2); subsequently, during batch freezing, the instantaneous consistency numerical value is displayed.(Fig. -
Page 35: Semi-Automatic Cycle With Consistency Control
6.6.2 SEMI – AUTOMATIC CYCLE WITH CONSISTENCY CONTROL. (only for experts) Press the SEMI-AUTOMATIC key to select Fig.1 the semi-automatic batch freezing cycle with consistency control (Fig. 1). The LEDs of the UP (▲), Confirm (◄►) and DOWN (▼) keys light up and the numbers relative to the consistency setting to be configured, expressed by a numerical value... - Page 36 During the maintenance phases of the reached consistency setting, the indicator of Fig.7 the SEMI-AUTOMATIC key flashes (Fig.7). It is possible to go to the product extraction phase at any time. In order to correct any initial programming errors, during the execution of the semi- automatic cycle it is always possible to vary the consistency setting via the following Fig.8...
-
Page 37: Normal Slush
6.6.3 SLUSH Fig.1 With the machine at STOP, press the STOP and SEMI-AUTOMATIC keys at the same time to access the slush production program with consistency control and continuous mixing (Fig. The SLUSH LED switches on to signal that one has accessed the SLUSH mode. - Page 38 It is possible to go to the product extraction Fig.7 phase at any time. In order to correct any initial programming errors, during the execution of the SLUSH cycle it is always possible to vary the consistency setting via the following procedure: Fig.8 With the cycle in progress, press the STOP and - AUTOMATIC keys again (Fig.
-
Page 39: Coffee Slush
6.6.4 COFFEE SLUSH Fig.1 With the machine at STOP, press the STOP and AUTOMATIC keys at the same time to access the slush production program with time control and cyclical mixing (Fig. 1). The SLUSH LED switches on to signal that one has accessed the SLUSH mode. - Page 40 Fig.5 In order to correct any initial programming errors, during the execution of the COFFEE SLUSH cycle it is always possible to vary the time setting via the following procedure: With the cycle in progress, press the STOP and AUTOMATIC keys again (Fig. 5). The LEDs of the UP (▲), CONFIRM (◄►) and DOWN (▼) keys light up and the numbers...
-
Page 41: Extraction
6.7 EXTRACTION To extract the product at the end of a productive cycle, refer to the following instructions: - Position a cold and clean tub of adequate capacity on the front shelf of the machine. - Check that the production cycle has ended. - Unscrew the plastic knob at the centre of the door by about half a turn. -
Page 42: Maintenance
However this is not enough to prevent the formation of mould and bacteria caused by insufficient or incorrect cleaning. FRIGOMAT recommends thoroughly washing and sanitizing the parts in direct contact with the product after each work shift and in compliance with hygienic standards in force in the Country where the machine is installed. - Page 43 • Pour the maximum admitted load of cold drinking water into the tub to rinse the surfaces which were just treated with the sanitizer. • Drain the rinse water and turn the machine off. • When pre-washing is over, all the removable parts in contact with the product must be disassembled and sanitized in a separate tub.
- Page 44 REMOVING AND CLEANING BEATER • Turn the beater a few degrees anti-clockwise by hand until the release position and then pull it upwards. Remove the O-ring remaining on the transmission shaft of the heater vessel. • Remove the scrapers, the thrust springs and pull the bottom bushing downwards.
- Page 45 • Turn the knob of the piston to unblock it and pull it towards you. • Turn the bottom of the tap a few degrees to release it and pull it towards you. Unscrew the steel piston pin and disassemble all the parts of the piston. Remove all the O-rings.
- Page 46 Never use any type of solvents and/or thinners to preserve the plastic parts and gaskets during washing. Chemical sanitizing products must be used in compliance with standards in force and with the utmost caution. During sanitizing operations, do not touch parts with tissues, sponges, rags or any other non-sterile material.
-
Page 47: Batch Freezer Washing
7.1.2 BATCH FREEZER WASHING PREWASHING • Pour maximum admitted load warm (approximately 50°C) drinking water into machine. • Press the MIXING button to start the beater motor. Let it run for about 3 min: Open the dispenser disk to drain all the wash water. Repeat the procedure until the water coming out is clear and clean. - Page 48 SANITIZING REMOVABLE PARTS PREPARATION OF WASHING TUB • Wash your hands well and/or wear disposable gloves. • Fill a clean tub with a sufficient amount of drinking water at approximately 50°C and the sanitizer. • Prepare the supplied brush and the OR disassembly We suggest using the following sanitising solution: Ecolab P3 Topax-san...
- Page 49 • Pull the beater towards you to remove it from the batch freezing cylinder. • Recover the seal gasket placed on the back of the beater. • Remove the scrapers from the beater by pressing firmly on the small fixing tooth. •...
- Page 50 RINSING AND DRYING • Wash your hands well and/or wear disposable latex gloves. • Remove from the sanitising tank all the components which were previously disassembled, brushed and immersed. • Rinse them with plenty of cold drinking water, making sure to remove all possible leftover sanitising solution. •...
-
Page 51: Extraordinary Maintenance
7.2 EXTRAORDINARY MAINTENANCE (INTENDED FOR QUALIFIED PERSONNEL) These operations are reserved exclusively for authorised qualified personnel. FRIGOMAT S.r.l. will not be held liable for damage to objects or harm to persons which occur due to failure to comply with the above. - Page 52 “MEB²” BOARD PROGRAMMING TABLE (**) DESCRIPTION C136-37-38 STEP 1= C136-37-38 Model Selection 2= MIX 8 Tank probe correction (TEV) -10° +10° 0,5°C Probe correction -10° +10° 0,5°C fluid (TEF) Tank overtemperature -10° +10° 0,5°C compensation when TEV>40°C TEF Control Lim. in SEMI- 30°...
-
Page 53: Batch Freezer Omega² Board Programming
“EXTRACTION” (◄►)” keys simultaneously to type in the password and then confirm it.(Fig. 2). If you do not know the password, contact the Frigomat assistance service. 5. When the password has been accepted, the screen accesses the list of programming steps directly. - Page 54 “OMEGA²” BOARD PROGRAMMING TABLE(**) DESCRIPTION STEP C136 C137 C138 Machine model Slush coefficient Consistency hysteresis (%of setting) 0= 115-230/50-60/1 Voltage and frequency 1= 400-440/50-60/3 selection 2= 220/230/50-60/3 (without neutral) Sampling 1 SET OK (AUTO cycle minimum threshold) Sampling 1 Time 4,5,6,7,8,9,10,11,12,13,1 (AUTO cycle) 4,15,16,17,18,20,22 sec.
- Page 55 30 to 250, directly proportional to the hardness of ice cream. Each machine is tested and calibrated by FRIGOMAT with a mixture with standard features at an absorption value of the beater motor referred to 240 numbers of hardness. This value is shown on the test sheet that accompanies the machine (see test sheet at the following entry: BEATER AMPERE @SET240);...
- Page 56 2. Locate the cable that passes through the current transformer (identified with L1 - see electrical diagram) and connect the clamp-type ammeter. This way you can measure the absorption of the beater motor. 3. Fill the cylinder with ice cream mixture in the maximum amounts admitted for each model.
-
Page 57: Instructions For Identifying Faults
8. TROUBLESHOOTING INSTRUCTIONS 8.1 MANAGEMENT OF HEATER ALARMS MESSAGE DESCRIPTION REMEDIES Absent or lifted. Make sure that the lid is The buzzer emits an intermittent acoustic assembled lowered signal. properly. Wait a few minutes and then A motor circuit breaker or the transformer press STOP to restore machine fuse has intervened. -
Page 58: Alarm Management Batch Freezer
8.2 MANAGEMENT OF BATCH FREEZER ALARMS MESSAGE DESCRIPTION REMEDIES The door is open and/or the safety grid is Make sure that the door is lifted. assembled closed The led flashes and the buzzer emits an properly. Check that the safety intermittent acoustic signal. -
Page 59: Heater Troubleshooting
8.3 HEATER TROUBLESHOOTING PROBLEM PROBABLE CAUSES REMEDIES Master switch open. Close the switch. The machine does not start Electrical anomaly. Contact the technician. (STOP button off). Fuses blown. Contact the technician. Verify that the Slow Flame SLOW FLAME function active. function is disabled (key LED off). -
Page 60: Batch Freezer Troubleshooting
8.4 BATCH FREEZER TROUBLESHOOTING PROBLEM PROBABLE CAUSES REMEDIES Master switch open. Close the switch. The machine does not start Electrical anomaly. Contact the technician. (STOP button off). Fuses blown. Contact the technician. Clean the condenser with a brush, Air-cooled machines: air condenser check functioning of the fan and dirty or fan faulty. - Page 61 ENGLISH - 60...
- Page 62 9 APPENDICI / APPENDICES / ANNEXES / ANHANG / APENDICES 9.1 Dati tecnici / Machine specifications / Caractéristiques techniques / Technische Daten / Datos Tecnicos Larghezz Modello Alimentazione Condensazione Potenza Altezza Profondità Peso Model Current Cooling Power R404 Height Dept Weight Width Modell...
- Page 63 9.2 Refrigerant circuit diagram APPENDICI - 2...
- Page 64 9.3 IMPIANTO ELETTRICO / ELECTRIC SYSTEM / GROUPE ELECTRIQUE / ELEKTRISCHE ANLAGE / INSTALACION ELECTRICA Lo schema elettrico funzionale ed il lay-out del box elettrico, specifico per ogni modello, è collocato sulla parte esterna del coperchio del box stesso. The functional wiring diagram and the electric box lay-out, different for each model are located on the box cover.
- Page 65 In case it is necessary to replace a component, always ask a distributor or an authorized retailer for ORIGINAL spare parts. FRIGOMAT declines any liability for damages to people and/or things due to employment of non-original spare parts.
- Page 66 C136-37-38 s04 Tav.1 5 - APPENDICI...
- Page 67 C136-37-38 s04 Tav.1 COD. Mod. DESCRIZIONE DESCRIPTION DESCRIPTION BESCHREIBUNG DESCRIPTION A02.38175 C136 Pannello laterale Side panel Panneau lat. Seitenblechl Panel lateral A02.38176 C137-C138 Pannello laterale Side panel Panneau lat. Seitenblechl Panel lateral A01.38945 C136 Telaio Frame Châssis Gestell Armazón A01.38941 C137-C138 Telaio Frame...
- Page 68 C136-37-38 s04 (OPTIONAL) Tav.2 7 - APPENDICI...
- Page 69 C136-37-38 s04 (OPTIONAL) Tav.2 COD. DESCRIZIONE DESCRIPTION DESCRIPTION BESCHREIBUNG DESCRIPTION Assieme completo Becken-Abstellsystem Apoyo cubeta Z22.38835 Pan holding assy Appuie bac compl. mensole kompl. completo B50.38828 Supporto mensole Pan support Support bac Beckenhalter Apoyo cubeta P01.38833 Fermo vasca “A” Pan fixing “A” Ferme-bac ”A”...
- Page 70 C136-37-38 s04 Tav.3 9 - APPENDICI...
- Page 71 C136-37-38 s04 Tav.3 COD. Mod. DESCRIZIONE DESCRIPTION DESCRIPTION BESCHREIBUNG DESCRIPTION Valvola Soupape Thermostatisches Válvula A02.193 C136-37-38 Thermostatic valve termostatica thermostatique Ventil termostática Orificio per valvola Orifice for Orifice suopape Öffnung für Orificio válvula A02.169 C136 termostatica thermostatic valve thermostatique thermost. Ventil termostática Orificio per valvola Orifice for...
- Page 72 C136-37-38 s04 Tav.4 11 - APPENDICI...
- Page 73 C136-37-38 s04 Tav.4 COD. DESCRIZIONE DESCRIPTION DESCRIPTION DESCRIPTION BESCHREIBUNG A10.007 Rubinetto Cock Robinet Grifo Ausgabehahn P06.085 Guarnizione Basket Joint Guarnición Dichtung A10.013 Tubo doccia Shower hose Tuyau douchette Tubo ducha Duschschlauch Terminale per A10.003 Shower terminal Terminal de douche Terminal ducha Duschendteil doccetta Guarnizione per...
- Page 74 C136-37-38 s04 400/50/3 Tav.5 13 - APPENDICI...
- Page 75 C136-37-38 s04 400/50/3 Tav.5 COD. Mod. DESCRIZIONE DESCRIPTION DESCRIPTION BESCHREIBUNG DESCRIPTION Arandela de P11.043 C136-37-38 Anello di tenuta Seal Ring Joint Dichtung sujeccion B04.120 C136-37-38 Corpo supporto Body Corp du support Gehäuse Cuerpo suporte B14.007 C136-37-38 Cuscinetto Bearing Galet Kugellager Cojinete B04.106 C136-37-38...
- Page 76 C136-37-38 s04 220/60/3 Tav.6 15 - APPENDICI...
- Page 77 C136-37-38 s04 220/60/3 Tav.6 COD. Mod. DESCRIZIONE DESCRIPTION DESCRIPTION BESCHREIBUNG DESCRIPTION Arandela de P11.043 C136-37-38 Anello di tenuta Seal Ring Joint Dichtung sujeccion B04.120 C136-37-38 Corpo supporto Body Corp du support Gehäuse Cuerpo suporte B14.007 C136-37-38 Cuscinetto Bearing Galet Kugellager Cojinete B04.106 C136-37-38...
- Page 78 C136-37-38 s04 Tav.7 17 - APPENDICI...
- Page 79 C136-37-38 s04 Tav.7 COD. Mod. DESCRIZIONE DESCRIPTION DESCRIPTION BESCHREIBUNG DESCRIPTION Testa di Tête L21.38086 C136-37-38 Entraining head Drehkopf Cabeza de arrastro trascinamento d’entraînement P10.037 C136-37-38 OR 2106 OR 2106 OR 2106 OR 2106 OR 2106 A11.38184 C136-37-38 Bussola Bush/sleeve Douille Buchse/Huelse Aguja Sleeve -...
- Page 80 C136-37-38 s04 Tav.8 19 - APPENDICI...
- Page 81 C136-37-38 s04 Tav.8 COD. DESCRIZIONE DESCRIPTION DESCRIPTION BESCHREIBUNG DESCRIPTION B11.38505 Pressostato Pressure switch Pressostat Druckwächter Presóstato Assieme tubo Pressure switch Groupe tuyau Rohr u. Druckwächter Grupo tubo Z96.35507 pressostato pipe assembly pressostat zusammen presóstato B11.37013 Termostato Thermostat Thermostat Thermostat Termostato Heizung - Z78.39054 Riscaldatore...
- Page 82 C138 s04 Tav.9 21 - APPENDICI...
- Page 83 C138 s04 Tav.9 COD. DESCRIZIONE DESCRIPTION DESCRIPTION BESCHREIBUNG DESCRIPTION B65.38563 Coperchio Cover Couvercle Deckel Tapa Tassello Magnet holding Tampon porte- P20.38398 Magnethaltedübel Espiga portaimán portamagnete boss aimant E07.37991 Magnete Magnet Aimant Magnet Imán Bewegliches B15.038 Cerniera mobile Moving hinge Fermoir mobile Bisagra móvil Scharnier B15.037...
- Page 84 C136-C137 s04 Tav.10 23 - APPENDICI...
- Page 85 C136-C137 s04 Tav.10 COD. DESCRIZIONE DESCRIPTION DESCRIPTION BESCHREIBUNG DESCRIPTION B65.38564 Coperchio Cover Couvercle Deckel Tapa E07.37991 Magnete Magnet Aimant Magnet Imán Tassello Magnet holding Tampon porte- P20.38398 Magnethaltedübel Espiga portaimán portamagnete boss aimant Bewegliches B15.038 Cerniera mobile Moving hinge Fermoir mobile Bisagra móvil Scharnier B15.037...
- Page 86 C136-37-38 s04 Tav.11 25 - APPENDICI...
- Page 87 C136-37-38 s04 Tav.11 COD. Mod. DESCRIZIONE DESCRIPTION DESCRIPTION BESCHREIBUNG DESCRIPTION Vorderes- P03.120.01 C136-37-38 Isolante anteriore Front insulator Isolant antérieur Aslante anterior Isolationselement P18.37146 C136-37-38 Tappo centratura Centering boss Centrage Duebel Tapon de cierre P18.37144 C136-37-38 Inserto centrale Central insert Bouchon Einsatz Injerto central A10.38854...
- Page 88 C136-37-38 s04 Tav.12 27 - APPENDICI...
- Page 89 C136-37-38 s04 Tav.12 COD. DESCRIZIONE DESCRIPTION DESCRIPTION BESCHREIBUNG DESCRIPTION L19.38015 Spina per rubinetto Bondon Stift Colada P10.017 OR 2018 OR 2018 OR 2018 OR 2018 OR 2018 P02.155 Maniglia Lever Poignée Griff Manija P02.38195 OR 3237 OR 3237 OR 3237 OR 3237 OR 3237 Z82.38951...
- Page 90 C136-37-38 s04 400/50/3 Tav.13 29 - APPENDICI...
- Page 91 C136-37-38 s04 400/50/3 Tav.13 COD. Mod. DESCRIZIONE DESCRIPTION DESCRIPTION BESCHREIBUNG DESCRIPTION Etichetta M02.40538 C136 Front label Etiquette antérieure Frontkleber Etiqueta anterior anteriore Etichetta C137-C138 Front label Etiquette antérieure Frontkleber Etiqueta anterior anteriore Scheda Pushbutton card Carte du tableau Tastenfeldkarte tarjeta pulsadores E15.40826 C136-37-38 pulsantiera...
- Page 92 C136-37-38 s04 220/60/3 Tav.14 31 - APPENDICI...
- Page 93 C136-37-38 s04 220/60/3 Tav.14 COD. Mod. DESCRIZIONE DESCRIPTION DESCRIPTION BESCHREIBUNG DESCRIPTION Etichetta M02.40538 C136 Front label Etiquette antérieure Frontkleber Etiqueta anterior anteriore Etichetta C137-C138 Front label Etiquette antérieure Frontkleber Etiqueta anterior anteriore Scheda Pushbutton card Carte du tableau Tastenfeldkarte tarjeta pulsadores E15.40826 C136-37-38 pulsantiera...
- Page 94 NOTE / NOTES / NOTES / BEMERKUNG / NOTA...
- Page 96 FRIGOMAT s.r.l., via 1° Maggio 26862 GUARDAMIGLIO (LO) – ITALIA tel. 0377.415011 – Fax. 0377.451079 www.frigomat.com info@frigomat.com 2014 cod. M04.40846...
Need help?
Do you have a question about the AGG.2014 Series and is the answer not in the manual?
Questions and answers