
Related Manuals for Nu-Vu QB-3/9


Summary of Contents for Nu-Vu QB-3/9
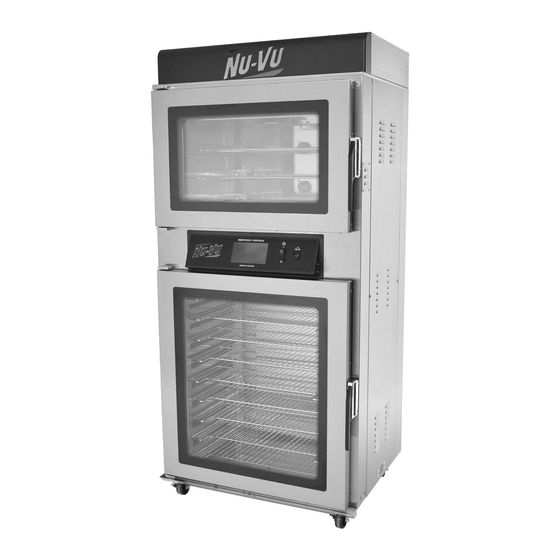
- Page 1 ® NU-VU Model: QB-3/9 Oven / Proofer A Quality Product Made in the U.S.A. ® NU-VU Food Service Systems 5600 13 STREET MENOMINEE, MICHIGAN 49858-1029 (800) 338-9886 FAX (906) 863-5889...
- Page 2 (This page is intentionally left blank)
- Page 3 (800) 338-9886. You can also fax your question or comment to our Service Department at (906) 863-6322. You can even e-mail us at service@nu-vu.com. One of our service technicians will be glad to assist you. Please remember to ®...
- Page 4 (This page is intentionally left blank)
-
Page 5: Table Of Contents
TABLE OF CONTENTS ABOUT YOUR QB-3/9 ....................1 QB-3/9 Specifications ..................... 2 RECEIPT, INSTALLATION AND START-UP Receipt ........................3 Installation ......................4 Connection of Electrical Supply ............... 4 Connection of Optional Water Supply ............. 5 Start-Up Oven ........................ 6 Standard Manual-Fill Proofer ................7 Optional AUTOMIST Proofer ................ - Page 6 * * * NOTICE * * * Record the Model Number and Serial Number from the nameplate on the side of your unit on page 22 in the WARRANTY section for future reference. Please be ready to give these numbers to our Service Department when ordering replacement parts or requesting service.
- Page 7 (This page is intentionally left blank)
-
Page 9: About Your Qb-3/9
® vary from country to country, state to state, and even from locality to locality. For this reason, NU-VU cannot give specific detailed information regarding your individual application. Your local building inspector, licensed contractor, or installer is best qualified to determine your specific needs. -
Page 10: Qb-3/9 Specifications
ABOUT YOUR QB-3/9 QB-3/9 OWNER’S MANUAL QB-3/9 SPECIFICATIONS: Exterior Dimensions Height = 78¾" Width = 36½" Depth = 29" Interior Dimensions (usable space) Oven Height = 14½" Width = 26" Depth = 18½" Proofer Height = 32" Width = 26"... -
Page 11: Receipt, Installation And Start-Up
Gaskets seal firmly (refer to the DOOR TEST PROCEDURE in the SERVICE AND ® REPLACEMENT GUIDE). If they do not close or seal properly please contact the NU-VU Service Department for instructions and assistance in any required adjustments. G. Count the number of Shelves included. There should be a total of twelve (12) Shelves (nine for ®... -
Page 12: Installation
Check to determine that the power source is the same voltage and phase as that indicated on the label on the ® side of the unit. If the voltage or phase is not the same, please call NU-VU service department at 800-338- 9886. -
Page 13: Connection Of Optional Water Supply
Check the voltage at the terminals on the Power Terminal Block with a voltmeter and compare the readings with the label listings on the side of the unit. If the readings match, the unit is ready ® for its initial START-UP. If the readings DO NOT coincide you must call the NU-VU Service Department. -
Page 14: Start-Up
START–UP: Prior to starting up the QB-3/9 for the first time it is advisable to set all the controls and switches to their OFF positions. Oven - - (refer to Fig. -
Page 15: Standard Manual-Fill Proofer
GUIDE under VII - The Oven or Proofer Timer does not run or VIII -The Buzzer Alarm does not sound. Return all Proofer controls and switches to their OFF positions. Your manual fill QB-3/9 is now ready to operate! ® NU-VU... -
Page 16: Optional Automist Proofer
Check the thermometer reading against the Temperature Control setting when the Temperature Control Indicator Light goes out. If the readings differ by more than 5 the Temperature Control ® may need a simple adjustment. Please call the NU-VU Service Department BEFORE attempting calibration or adjustment of the control. -
Page 17: Operating Instructions
For the Standard Manual Fill Proofer - - Begin to pre-heat the Proofer section of the QB-3/9 about 20 to 30 minutes before its scheduled use. A. Set out the desired product for thawing. Be sure to allow sufficient time in your schedule for both the product and your equipment to reach the correct conditions. -
Page 18: For The Optional Automist Proofer
For the Optional AUTOMIST Proofer - - Begin to pre-heat the Proofer section of the QB-3/9 about 20 to 30 minutes before its scheduled use. A. Set out the desired product for thawing. Be sure to allow sufficient time in your schedule for both the product and your equipment to reach the correct conditions. - Page 19 Proofer Door you are probably proofing with too much humidity. Decrease the Humidity ® Control setting. If water on the floor is a constant problem for you please call the NU-VU Service Department at (800) 338-9886. G. Load the Oven when your product is fully proofed. Yeast products should be 65% to 75% of the desired finished size at the end of the proof cycle.
-
Page 20: Oven
MAINTENANCE AND CLEANING GUIDE QB-3/9 OWNER'S MANUAL OVEN: Fig. #5 – Oven Controls At the beginning of each day you may want to preheat your Oven about 25 higher than the required baking temperature. Since your Oven requires time to reach the proper temperature, you must plan ahead so your Oven and product are ready at the same time. -
Page 21: 99-Minute Digital Timer (Optional)
QB-3/9 OWNER'S MANUAL MAINTENANCE AND CLEANING GUIDE As soon as the product is finished baking, open the Oven Door and remove the product quickly. You can load more product into the Oven immediately, or close the Oven Door and allow the Oven to recover to the set baking temperature. -
Page 22: Maintenance And Cleaning Guide
MAINTENANCE AND CLEANING GUIDE QB-3/9 OWNER'S MANUAL MAINTENANCE AND CLEANING GUIDE MAINTENANCE: ® NU-VU equipment is designed to last for years of useful service. Careful consideration is given in selecting components for durability, performance and ease of maintenance. For example, both the Oven Motor and Proofer Motor have sealed bearings and never need to be lubricated. -
Page 23: Cleaning
CLEANING: Your QB-3/9 should be cleaned daily and as soon as possible after a spill has occurred. It is essential to maintain a clean unit, especially if the public views the unit in your place of business. The following should be used for cleaning: A. -
Page 24: Service And Replacement Guide
QB-3/9 OWNER'S MANUAL SERVICE AND REPLACEMENT GUIDE Your QB-3/9 has been designed to be serviced quickly and easily. In fact, any individual who has average mechanical ability can do the work. Our Service Department is also available to you Monday through Friday from 7:00 a.m. -
Page 25: Door Latch, How To Adjust
Gently tighten the dial screws and install the Control Knob. Check the Control setting against the test instrument and repeat this procedure if necessary. ® D. If this procedure fails to bring the temperature reading within the desired specs call NU-VU service department at 800-338-9886. -
Page 26: Door Gasket, How To Replace
Fig. #8 – Door Gasket replace your Door Gasket with minimal problems. If ® you have any problems or questions please call the NU-VU Service Department at (800) 338-9886 Monday through Friday from 7:00 a.m. until 5:00 p.m. for assistance. -
Page 27: Replacing The Proofer Door Gasket
A small roller tool will aid in fully seating the Gasket in the mounting slot. D. The replacement Gasket requires nothing further. You may begin using your Proofer as soon as the Gasket has been installed. ® NU-VU FOOD SERVICE SYSTEMS MENOMINEE MICHIGAN 49858-0035 Sales Fax (906) 863-5889 ♦ Service Fax (906) 863-6322... -
Page 28: Nu-Vu ® Equipment Warranty
The return of defective parts is required. The return of a defective part or component must be made prior to ® the issuance of a credit on an open account. If a part that is returned tests satisfactory in the NU-VU ®... -
Page 29: Warranty Limitations
IMPORTANT: NU-VU WILL NOT PAY FOR ANY SERVICE CALLS AS WARRANTY WORK ®... -
Page 30: Parts Return Procedure And Conditions
ELECTRICAL SCHEMATICS QB-3/9 OWNER'S MANUAL ® Products must be installed and maintained in accordance with NU-VU instructions. Users are responsible for the suitability of the products to their application. There is no warranty against damage resulting from accident, abuse, alteration, misapplication, inadequate storage prior to installation, or improper specification or other operating conditions beyond our immediate control.
Need help?
Do you have a question about the QB-3/9 and is the answer not in the manual?
Questions and answers