Advertisement
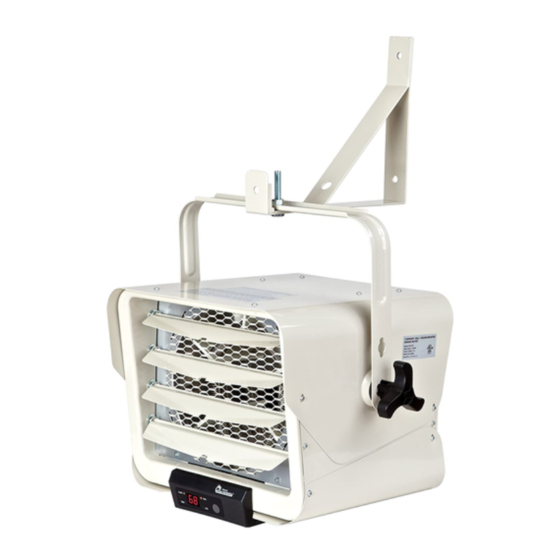
7,500W/240V WALL / CEILING MOUNTED GARAGE HEATER
WITH ELECTRONIC CONTROLLER AND REMOTE
OWNER'S MANUAL
Model: PH-960XNR
IMPORTANT INSTRUCTIONS
READ & SAVE
PET OWNERS WARNING:
The health of some small pets including birds are extremely sensitive
to the fumes produced during the first-time use of many appliances.
These fumes are not harmful to humans but we recommended that
you do not use your heater around birds and small pets during its
initial use until the manufacturing corrosion coatings burn off.
Technical support: 1-866-206-0888
Service email: info@mecanair.net
1
Advertisement

Summary of Contents for ProFusion PH-960XNR
- Page 1 7,500W/240V WALL / CEILING MOUNTED GARAGE HEATER WITH ELECTRONIC CONTROLLER AND REMOTE OWNER’S MANUAL Model: PH-960XNR IMPORTANT INSTRUCTIONS READ & SAVE PET OWNERS WARNING: The health of some small pets including birds are extremely sensitive to the fumes produced during the first-time use of many appliances.
-
Page 2: Table Of Contents
TABLE OF CONTENTS Important Instructions………………………………………. 3-4 Installation Instructions………………………. ……………..5-7 Specifications and Wiring Diagram …………………………8 Parts of the heater……………………….…………..…………9 Operating Instructions……………………….………..……10 Maintenance and Cleaning…………………………………12 Troubleshooting……………………………………………. -
Page 3: Important Instructions
IMPORTANT INSTRUCTIONS PLEASE READ ALL INSTRUCTIONS BEFORE USING THIS HEATER NOTE: There may be a trace of smoke or odor when unit is first operated. Don’t be alarmed. This indicates that a drop of oil fell on the heating coil during the manufacturing process. It will quickly evaporate and should not re-occur. - Page 4 from the back wall (with or without using the wall hanging mounting bracket). 9) Do not insert or allow foreign objects to enter any ventilation or exhaust opening as this may cause an electric shock or fire, or damage the heater. 10) To prevent a possible fire, do not block air intakes or exhaust in any manner.
-
Page 5: Installation Instructions
INSTALLATION INSTRUCTIONS WARNING: All wiring must be installed by a certified electrician according to the electrical safety. The ceiling heater must be grounded in accordance with all national and local building codes. WARNING : To reduce the risk of fire, do not store or use gasoline or other flammable vapors and liquids in the vicinity of the heater. - Page 6 without using the wall hanging mounting bracket). 4. Mark the drill-hole positions in the wall or ceiling for the mounting bracket. 5. Drill the required holes with diameter fit for the anchor provided for positioning the mounting bracket. 6. Insert the anchors. 7.
- Page 7 10. Loosen the screw to remove the wiring compartment/connection cover in the rear of the heater. 11. Run the electrical power supply cable in flexible conduit and connect to the wiring compartment via the knock-out at back side of the unit. 12.
-
Page 8: Specifications And Wiring Diagram
SPECIFICATIONS 7,500W/240V WALL / CEILING MOUNTED GARAGE HEATER WITH ELECTRONIC CONTROLLER AND REMOTE Model: PH-960XNR Volt: 240 V Watts: 7500 W Frequency: 60 Hz BTU/h: 25597 Recommended Heating Capacity: 1.25 watts / ft³ (0.03m³) Wiring diagram:... -
Page 9: Parts Of The Heater
PARTS OF THE HEATER A. Upper Enclosure G. Power Indicator B. Tilt adjustable knob H. Timer Indicator C. Front Exhaust Grill I. Low Indicator D. Louver for air direction J. High Indicator E. Control panel K. Inside/Wall Thermostat F. Alarm LED Switch L. -
Page 10: Operating Instructions
OPERATING INSTRUCTIONS WARNING - The heater must be properly installed before it is used. HAZARD OF ELECTRIC SHOCK, EXPLOSION, OR ARC FLASH: Apply appropriate personal protective equipment (PPE) and follow safe electrical work practices. See NFPA 70. A circuit breaker must be installed and serviced only by qualified electrical personnel. - Page 11 TURNING THE HEATER ON To turn the heater ON, press the ON/OFF rock switch to ON position, the power Indicator will turn on and display the room temperature. The factory setting temperature is 70℉, If you set the thermostat switch to Inside Thermostat, and the room temperature is lower or equal to 68℉, the heater will turn to High mode and will turn off when the room temperature is higher or equal to 72℉.
-
Page 12: Maintenance And Cleaning
To turn off the heater, switch off the circuit breaker. The circuit breaker serves as the power disconnection means. This heater includes a visual alarm to warn that parts of the heater are getting excessively hot. If the alarm flashes, immediately turn the heater OFF and inspect for any objects, on or adjacent to the heater that may cause high temperatures. -
Page 13: Troubleshooting
TROUBLESHOOTING If your heater fails to operate, please follow these procedures: This heater is intended to be a ceiling-mounted heater. It has a thermal cut-off protection. If the thermal cut-off protection trips, then, switch off the power. Switch off the circuit breaker.The unit should reset automatically after 10 minutes. - Page 14 PLEASE DO NOT ATTEMPT TO OPEN OR REPAIR THE HEATER YOURSELF. DOING SO COULD CAUSE DAMAGE OR PERSONAL INJURY.


Need help?
Do you have a question about the PH-960XNR and is the answer not in the manual?
Questions and answers