Table of Contents
Advertisement
Quick Links
Advertisement
Table of Contents

Subscribe to Our Youtube Channel
Related Manuals for pro user BRILJANT


Summary of Contents for pro user BRILJANT
- Page 1 NL: Montagehandleiding en Veiligheidsvoorschriften DE: Montageanleitung und Sicherheitsvorschriften UK: Assembly instruction and safety regulations FR: Notice d’assemblage et de sécurité Fietsdrager/Fahrradträger/Bike carrier/Porte-vélos BRILJANT...
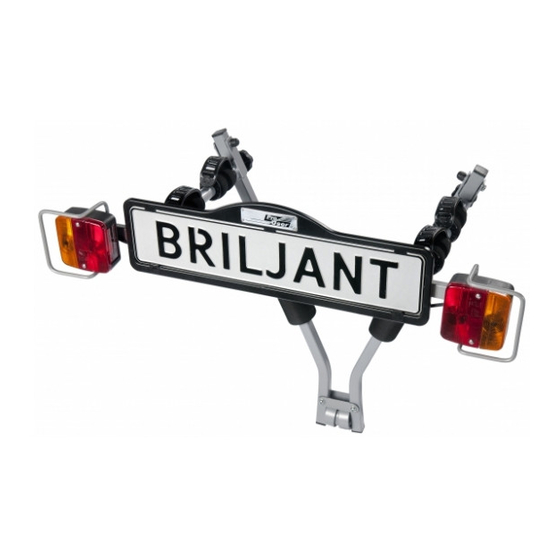
- Page 2 INTRODUCTION The Pro-User BRILJANT bike carrier is part of the family of bike carriers manufactured by Tradekar Benelux BV. Safe and reliable bike carrier for the transportation of 2 bicycles Universal fitting on the tow ball Easy fitting without the use of tools ...
- Page 3 IMPORTANT INFORMATION Read these instructions carefully before using the product for the first time. Do not use this product until the manual and safety regulations are read and are entirely clear. The assembly and installation of the bike carrier can only be done according this instruction manual.
-
Page 4: Mounting The Bike Carrier
MOUNTING THE BIKE CARRIER The bike carrier is already assembled in part. Remove all parts from packaging and arrange them in a well-organized way. The instructions will clearly describe and show the parts that you need for further assembly of the bike carrier and mounting of the bikes. - Page 5 Step 2 Parts: Assembly: The light frame is a loose part of the bike carrier that can be mounted on the far ends of the unfolded arms. However, it must be assembled first. Slide the two rear light holders (incl. lights) onto the light holder rail (make sure that the lamp with an "R"...
- Page 6 MOUNTING OF THE BIKE CARRIER ON THE CAR When mounting the bike carrier to the car, it is best that the car is parked straight, the engine is turned off and the parking brake is activated. Make sure that the tow ball is undamaged, clean and not greasy! Put the bike carrier on the tow ball.
- Page 7 HOW TO TAKE THE BIKE CARRIER OF THE TOW BAR When you want to put the carrier away, you follow the mounting instruction in reverse order: NOTE: the bike carrier can only be taken from the tow ball when the lamp holder frame is not mounted! (situation as shown on the picture) To release the bike carrier from the hitch...
-
Page 8: Mounting Of The Bikes On The Bike Carrier
MOUNTING OF THE BIKES ON THE BIKE CARRIER NOTE: The number plate and lights can only be mounted after having mounted the bikes. The bikes are well protected by several foam rubber accessories. It is possible to move these foam rubber accessories, to provide optimum protection for your bike. - Page 9 Place the second bike in opposite direction in the second foam holders and secure it with the integrated, flexible rubber strap. Now secure the bikes using the long safety belt (supplied). Run the safety belt through the bike frame and around the bike carrier mainframe and tighten firmly.
- Page 10 THE LICENSEPLATEHOLDER The clips (2) to mount the license plate can be pressed out and are in the license plate holder (see picture). clips Inserts for clips LIGHTING This bike carrier is equipped with a lighting system. This system can be connected to the tow bar power socket of your car.
-
Page 11: Safety Regulations
SAFETY REGULATIONS Keep the tow ball clean and free of grease. Check the bike carrier before use if there is any damage. Damaged or worn parts need to be replaced immediately. Only use original replacement parts. Do not make any modifications on the bike carrier (mechanical or electronic) This can be very dangerous. -
Page 12: Maintenance
After use, the carrier can be easily stored in the boot of your car or at home, in the shed or garage. A practical carrier bag is supplied with the bike carrier, so everything can be stored away neatly. In case of defects or problems please contact your Pro-User supplier. MAINTENANCE Always store the bike carrier clean and dry after use. -
Page 13: Part List
PART LIST Description Number Size Plastic knob Spring washer Washer Hex head screw M6x40 Self-locking nut Washer Mainframe Washer Hex head screw M8x40 Hinged arm Flexible rubber strap Foam rubber Plastic clip for rubber strap Rectangular foam rubber Safety pin Right rear light Light holder real (R/L) Washer... -
Page 14: Exploded View
EXPLODED VIEW... - Page 15 © Tradekar 91533/15A Tradekar Benelux BV Staalweg 8 +31 (0)345-470990 4104 AT CULEMBORG info@tradekar.nl The Netherlands www.pro-user.eu...
Need help?
Do you have a question about the BRILJANT and is the answer not in the manual?
Questions and answers