
Subscribe to Our Youtube Channel
Related Manuals for Tait TM9356


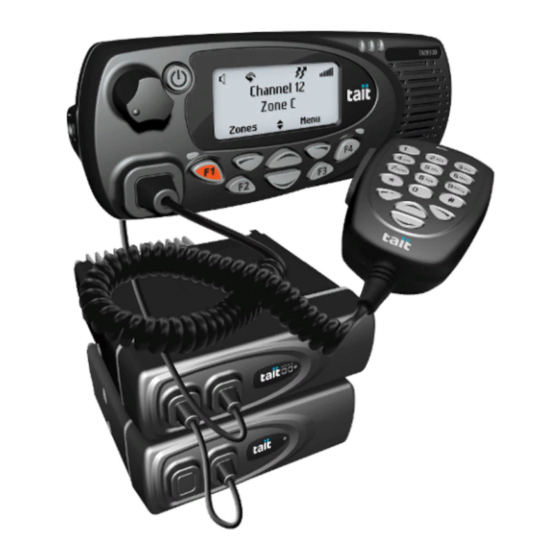
Summary of Contents for Tait TM9356
- Page 1 TM9356/TM9456 Mobile Radios Dual Body User’s Guide MMB-00037-01 · Issue 1 · March 2021...
-
Page 2: Table Of Contents
Monitoring more than one radio (dual receive) .......... 26 Dual transmit mode .................. 27 Repeater mode ..................27 About the lone worker feature ..............29 Troubleshooting .................34 When your radio won’t turn on ..............34 Tait Software Licence Agreement ..........35... - Page 3 Tait International Limited. The word TAIT and the TAIT logo are trademarks of Tait International Limited. All trade names referenced are the service mark, trademark or registered trademark of the respective manufacturers.
- Page 4 Tait office. Updates of manual and equipment In the interests of improving the performance, reliability or servicing of the equipment, Tait International Limited reserves the right to update the equipment or this document or both without prior notice.
- Page 5 Intellectual property rights This product may be protected by one or more patents or designs of Tait International Limited together with their international equivalents, pending patent or design applications, and registered trade marks: NZ409837, NZ409838, NZ415277, NZ415278, NZ508806, NZ530819, NZ534475, NZ547713, NZ577009, NZ579051,...
- Page 6 For more information about how to dispose of your unwanted Tait product, visit the Tait WEEE website at www.taitradio.com/weee. Please be environmentally responsible and dispose through the original supplier, or contact Tait International Limited.
- Page 7 About this guide This user’s guide provides information about the TM9356 and TM9456 dual body mobile radios. The radio behavior described in this guide applies to radios with firmware version TM9356 v2.27.00 and TM9456 v2.18.00 and higher. If you need further assistance or your radio does not operate as you expect, contact your radio provider.
-
Page 8: For Your Safety
For your safety Before using your radio, please read the following important safety and compliance information. Safety warnings used in this guide Please follow exactly any instruction that appears in the text as an ‘alert’. An alert provides necessary safety information as well as instruction in the proper use of the product. -
Page 9: Radio Frequency Exposure Information
Radio frequency exposure information For your own safety and to ensure you comply with the radio frequency (RF) exposure guidelines of the United States Federal Communication Commission’s (FCC), Industry Canada, and those from other administrations, please read the following information before using this radio. Using this radio You should use this radio only for work-related purposes (it is not authorized for any other use) - Page 10 Warning RF exposure hazard! To comply with FCC and Industry Canada RF exposure limits, mount the antenna at a location such that no person or persons can come closer than 35 inches (0.9m) to the antenna: For radios with a transmit power >25W: VHF radios must be installed using an antenna mounted centrally on the vehicle roof, with a gain of 2.15dBi or 5.15dBi.
-
Page 11: Radio Frequency Emissions Limits In The Usa
Use the radio only with Tait-approved antennas ■ and attachments, and make only authorized modifications to the antenna otherwise you could damage the radio and violate FCC regulations. For more information on what RF energy is and how to control your exposure to it, visit the FCC website at www.fcc.gov/oet/rfsafety/rf-faqs.html. -
Page 12: Frequency Band Reserved For Distress Beacons
Frequency band reserved for distress beacons Frequency band 406 to 406.1MHz is reserved for use by distress beacons. Transmissions should not be made within this frequency band. Australia and New Zealand citizens band (476.4 to 477.4MHz) AS/NZS 4365 deals with the use of frequencies in the 476.425 to 477.400MHz band. -
Page 13: Health, Safety, And Electromagnetic Compatibility In Europe
Health, safety, and electromagnetic compatibility in Europe In the European Community, radio and telecommunications equipment is regulated by Directive 2014/53/EU, also known as the Radio and Telecommunications Terminal Equipment (R&TTE) directive. The requirements of this directive include protection of health and safety of users, as well as electromagnetic compatibility. -
Page 14: Interference With Electronic Devices
Interference with electronic devices Warning Some electronic devices may be prone to malfunction due to a lack of protection from the RF energy that is present when your radio is transmitting. Examples of electronic devices that may be affected by RF energy are: aircraft electronic systems ■... -
Page 15: Potentially Explosive Atmospheres And Blasting Areas
Potentially explosive atmospheres and blasting areas Warning Warning the radio is specifically certified for use in a potentially explosive atmosphere, turn off the radio before entering such an atmosphere. An explosion could cause serious injury or death. Examples of potentially explosive atmospheres include filling stations, and any environment where there are flammable liquids, gases, or dusts. -
Page 16: Radio Protection When Charging The Vehicle Battery
The radio is designed to satisfy the applicable compliance regulations. Do not make modifications or changes to the radio that are not expressly approved by Tait International Limited. Failure to do so could invalidate compliance requirements and void the user’s authority to... -
Page 17: High Radio Surface Temperatures
Caution Operation outside these limits may cause the external temperature of the radio to rise higher than this standard permits. GNSS operation Tait International Limited is not responsible for the operation or failure of operation of GNSS satellites or the availability of GNSS satellite signals. -
Page 19: Your Radio's Settings
Your radio’s settings Use the following table to list your radio’s programmed settings. Function key settings Conventional Trunked quick access menus: Frequently used channels and groups ID/Number Description ID/Number Description... -
Page 20: Scope
For information related to radio controls, microphone, control head, radio display (symbols, indicators), tones, menus and settings, please see the applicable user’s guide. For further information, please see the Tait Support Website: http://support.taitradio.com or contact your local Tait provider. -
Page 21: Dual Radio Operation
Dual radio operation The TM9456/9356 can be installed and programmed as two radios, with one user- interface. This enables you to switch between the radios, and access different features and channels on those radios (for example, channels that operate on different frequency bands). You can also toggle modes that enable you to receive and transmit on both radios at the same time. -
Page 22: Dual Radio Display States And Descriptions
Dual radio display states and descriptions The following table lists various states of the radio display, and the implications for transmitting and receiving. Display Description Single Tx/Rx Mode The radio system will R1:Channel 12 receive and transmit on the Menu foreground radio only. -
Page 23: Radio Controls In A Dual Radio System
Radio controls in a dual radio system Certain radio controls and functions are global and apply to the radio system as a whole. The on- off key turns the entire radio system on or off. The volume control adjusts the volume of all received audio and indicators. - Page 24 You can switch between the various dual receive and transmit states using one or two function keys programmed for dual body mode and single body mode. If programmed for a single key, dual body mode is assigned to a short press and single body mode is assigned to a long press.
-
Page 25: About The Foreground And Background Radio
About the foreground and background radio The TM9456/TM9356 is installed and programmed as two radios, that can be accessed via the user-interface. In such a dual-radio system, one radio is always at the foreground, and one at the background. If monitoring both... -
Page 26: Switching Between Radios (Changing The Foreground Radio)
Switching between radios (changing the foreground radio) In a dual-radio system, one radio is always at the foreground and one at the background. For more information, see “About the foreground and background radio” on page To change the foreground radio, press the function key R1:Channel 12 programmed for switching the Menu... -
Page 27: Dual Transmit Mode
Activity on the foreground radio will be louder than activity on the background radio. Press the function key programmed for single Dual receive deactivated body mode to return to receiving on the foreground radio only. Dual transmit mode Dual transmit mode operates as dual receive mode, but also allows a user to initiate PTT-based group calls on both radio bodies simultaneously to transmit on two different bands or channels. - Page 28 Activating repeater mode by using a function Press the function key programmed for repeater. While on, the symbol appears in the display. R1:Channel 12 R2: Channel 3 Press the function key Menu again to turn repeater mode off. If the repeater mode function is in a non- supported state (one or both of the currently selected channels not set to analog) the icon will flash and the repeat operation will not activate...
-
Page 29: About The Lone Worker Feature
About the lone worker feature The ‘lone worker’ emergency feature is designed for people who work alone in potentially hazardous environments. Your radio may be programmed so that lone worker monitoring is active as soon as your radio is turned on, or you may be able to turn lone worker on and off. - Page 30 Lone worker operation Lone worker monitoring is made up of three stages. The way the radio behaves and the duration of each stage depends on how the radio is programmed. Stage 1: Lone worker is activated and the user ■ timer begins to count down.
- Page 31 Lone worker has been turned off. Lone worker is active and the user activity is counting down. timer The radio sounds a There has been no low-pitched beep. user activity and the user activity time has expired. timer user response is counting down.
- Page 32 The radio sounds three The radio has sent an short beeps, rising in emergency call and is pitch and the message now in emergency Emergency mode mode. appears. When utilizing dual body, lone worker can only be activated on one body at a time.
- Page 33 Responding to a lone worker prompt When the lone worker timer expires, user activity the message Loneworker awaiting appears on the display and you hear a low-pitched beep. Alternatively, there may not be any visible or audible indication that the timer has user activity expired.
-
Page 34: Troubleshooting
Troubleshooting When your radio won’t turn on If the red, green and amber LEDs on the control head do not light up when the radio is turned on, it is likely that no power is reaching the radio. Check the following: Is the power connector firmly plugged into the ■... -
Page 35: Tait Software Licence Agreement
“Confidential Information” means all or any works from, the Software or Documentation, information supplied to or received by whether made by Tait or another party, or any Licensee from Tait, whether before or after improvements that result from Tait processes installation or use and whether directly or indi- or, provision of information services. - Page 36 Tait for the Software or certain functions or enhancements or other functions or features features of the Software. The Licensee may to the Software provided by Tait; and (iv) may only access, enable and use such Software or contain one or more items of software owned functions or features of the Software with by a third-party supplier.
- Page 37 Software by, during the course of the inspection will be any third party or on any machine except as kept in strict confidence by Tait and used solely expressly authorized by this Agreement; or for the purpose of verifying Licensee's compli- (viii) use, or permit the use of, the Software in ance with the terms of this Agreement.
- Page 38 Software warranty will be a period of implied warranties of condition, title, non- one (1) year from Tait shipment of the Soft- infringement, merchantability, or fitness for a ware. If Licensee is not in breach of any obli-...
- Page 39 Software and Documentation and total liability for any such claim shall be may be terminated immediately upon notice limited at the option of Tait to the repair or by Tait. replacement of the Software or the refund of 8.2.
- Page 40 Agree- and exclusive statement of the Agreement ment, this Agreement prevails. between it and Tait in relation to the Soft- ware. This Agreement supersedes any 11.8 SECURITY. Tait uses reasonable means proposal or prior agreement, oral or written,...
- Page 41 Tait general software licence agreement 41...
- Page 42 42 Tait general software licence agreement...
Need help?
Do you have a question about the TM9356 and is the answer not in the manual?
Questions and answers