Table of Contents
Advertisement
Quick Links
Advertisement
Table of Contents

Related Manuals for Tenda W303R


Summary of Contents for Tenda W303R
- Page 2 All photos and product specifications mentioned in this manual are for references only. Upgrades of software and hardware may occur; Tenda reserves the right to revise this publication and to make changes in the content hereof without obligation to notify any person or organization of such revisions or changes.
-
Page 3: Table Of Contents
Wireless N300 Home Router Table of Contents TABLE OF CONTENTS…………………………………………......3 CHAPTER 1 PRODUCT OVERVIEW……………………………………………………1 1.1 P ………………………………………………………………………………………………1 ACKAGE ONTENTS 1.2 G ……………………………………………………………………………1 ETTING TO KNOW YOUR ROUTER CHAPTER 2 INSTALLATION AND QUICK SETUP GUIDE…………………………6 2.1 P ………………………………………………………………………………………………………6 ... - Page 4 Wireless N300 Home Router 6.2 DMZ H ………………………………………………………………………………………………………54 6.3 DDNS………………………………………………………………………………………………………………55 6.4 UPNP………………………………………………………………………………………………………………56 6.5 S …………………………………………………………………………………………………57 TATIC OUTING 6.6 R …………………………………………………………………………………………………58 OUTING ABLE CHAPTER 7 SECURITY…………………………………………………………………59 7.1 URL F ………………………………………………………………………………………………………59 ILTER 7.2 MAC F ………………………………………………………………………………………………………60 ...
-
Page 5: Chapter 1 Product Overview
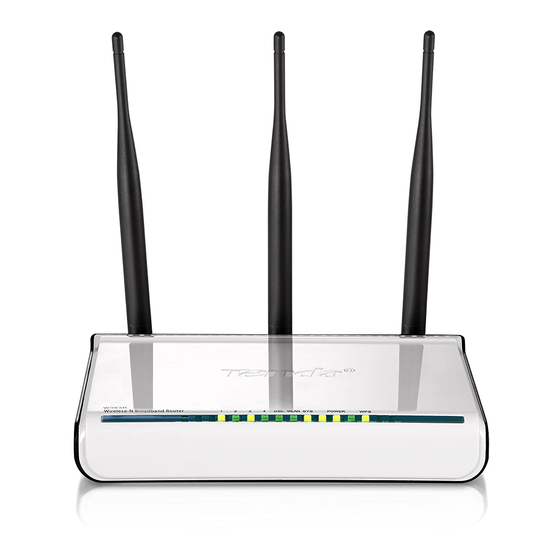
Ethernet Cable If any of the above items is incorrect, missing, or damaged, please contact your Tenda reseller for immediate replacement. 1.2 Getting to know your router Before you cable your router, take a moment to become familiar with the front and back panels and the label. - Page 6 Wireless N300 Home Router Front LED Overview Status Description...
-
Page 7: Table Of Contents
Wireless N300 Home Router Indicates a proper connection to the power Solid supply Power Indicates an improper connection to the power adapter Blinking Indicates system is functioning properly Solid WPS is enabled Device is performing WPS authentication on a Blinking client device WPS is disabled or WPS negotiation is finished Solid... - Page 8 Wireless N300 Home Router Back Panel Back LED Overview Port Description Usually for connecting DSL MODEM、 CABLE MODEM、 ISP to the Internet. LAN(1/2/3) Usually for connecting computers, switches .etc. The power adapter is connected and you can use the provided POWER adapter to supply power.
- Page 9 Wireless N300 Home Router operating range of your wireless network. However, the operating distance or range of your wireless connection can vary significantly depending on the physical placement of your router. For example, the thickness and number of walls the wireless signal passes through can limit the range. For best results, place your router: •...
-
Page 10: Chapter 2 Installation And Quick Setup Guide
Wireless N300 Home Router Chapter 2 Installation and Quick Setup Guide 2.1 Preparation Before connecting Ethernet cables,please verify the following items: Item Description Wireless Router Used with the provided power supply Installed with IE8 or other better web browsers. Ethenet Cable Used for linking the PC to the router Broadband Service Provided by ISP... - Page 11 Wireless N300 Home Router 2. Connect one of the LAN ports on the Device to the NIC port on your PC using an Ethernet cable.
-
Page 12: Internet Connection Setup
Wireless N300 Home Router 3. Connect the Ethernet cable from Internet side to the WAN port on the Device. 4. When connected, log in to Web manager to set up Internet connection. 2.3 Internet Connection Setup Before you start the setup process, get your ISP information and make sure the computers and devices in the network have the settings described here. -
Page 13: Quick Internet Connection Setup
Wireless N300 Home Router 2. Now you may access the device’s home page for quickly setting up Internet connection and wireless security. 2.3.3 Quick Internet Connection Setup 2 common Internet connection types are available on the home page: PPPoE and DHCP. DHCP: Select DHCP (Dynamic IP) if you can access Internet as soon as your computer directly connects to an Internet-enabled ADSL/Cable modem;... - Page 14 Wireless N300 Home Router PPPoE: Select PPPoE (Point to Point Protocol over Ethernet) if you used to connect to the Internet using a broadband connection that requires a username and a password. Enter the user name and password provided by your ISP;...
- Page 15 Wireless N300 Home Router shown below), you have got a wired internet access now. 2. If connection status displays "Disconnected" and there is no WAN IP address displayed seen below), connection between Internet-enabled modem and your device may have failed. Please double check or re-connect all involved devices and cables properly and then refresh the page.
-
Page 16: Wireless Settings
Wireless N300 Home Router Note: Below diagnostic info will be displayed on particular occasions for your reference: 1). You have connected to Internet successfully. 2). You might have entered a wrong user name and/or a wrong password. Please contact your ISP for the correct user name and password and enter them again. -
Page 17: Connect To Device Wirelessly
Wireless N300 Home Router Wireless Security Settings If you want to encrypt your wireless network, click Wireless Security, disable WPS, specify a security key of down to 8 characters, and then click 2.3.6 Connect to Device Wirelessly Having finished above settings, you can search the device's wireless network (SSID) from your wireless devices (notebook, iPad, iPhone, etc) and enter a security key to connect to it wirelessly. - Page 18 Wireless N300 Home Router 2) Click Network Connections. 3) Right click Wireless Network Connection and then select View Available Wireless Networks.
- Page 19 Wireless N300 Home Router 4) Select the desired wireless network, click Connect, enter the security key and then click OK. 5) You can access Internet via the device when "Connected" appears next to the wireless network name you selected.
- Page 20 Wireless N300 Home Router 2. If you are using Windows 7 OS, do as follows: 1) Click Start and select Control Panel. 2) Click Network and Internet.
- Page 21 Wireless N300 Home Router 3) Click Network and Sharing Center. 4) Click Change adapter settings.
- Page 22 Wireless N300 Home Router 5) Select a desired wireless connection and click Connect/Disconnect. Select the wireless network you wish to connect and click Connect. 7) Enter the security key and click OK.
- Page 23 Wireless N300 Home Router 8) You can access Internet via the device when "Connected" appears next to the wireless network name you selected.
-
Page 24: Chapter 3 Advanced Settings
Wireless N300 Home Router Chapter 3 Advanced Settings 3.1 Status Here you can see at a glance the operating status of the device. 1. Connection Status: Displays WAN connection status: Disconnected, Connecting or Connected. 2. Disconnected: Indicates that the Ethernet cable from your ISP side is not correctly connected to device's WAN port or the router is not logically connected to your ISP. -
Page 25: Internet Connection Setup
Wireless N300 Home Router 1. LAN MAC Address: Displays device’s LAN MAC address. 2. WAN MAC Address: Displays device’s WAN MAC address. 3. System Time: Displays device’s system time either customized or obtained from Internet. 4. Up Time: Displays device's uptime. 5. -
Page 26: Static Ip
Wireless N300 Home Router 1. Internet connection Type: Select PPPoE. 2. PPPoE User Name: Enter the User Name provided by your ISP. 3. PPPoE Password: Enter the password provided by your ISP. 4. MTU: Maximum Transmission Unit. DO NOT change it from the factory default of 1492 unless necessary. -
Page 27: Dhcp
Wireless N300 Home Router address(es) in corresponding fields. 1. Internet connection Type: Select Static IP. 2. IP Address: Enter the IP address provided by your ISP. Consult your ISP if you are not clear. 3. Subnet mask: Enter the subnet mask provided by your ISP. Gateway: Enter the WAN Gateway provided by your ISP. -
Page 28: Pptp
Wireless N300 Home Router 1. Internet connection Type: Select DHCP. 2. MTU: Maximum Transmission Unit. DO NOT change it from the factory default of 1500 unless instructed by your ISP. You may need to change it for optimal performance with some specific websites or application software that cannot be opened or enabled;... -
Page 29: L2Tp
Wireless N300 Home Router 1. Internet connection Type: Displays the current Internet connection type. 2. PPTP Server Address: Enter the IP address of a PPTP server. 3. User Name: Enter your PPTP User Name. 4. Password: Enter the password. 5. MTU: Maximum Transmission Unit. DO NOT change it from the factory default of 1492 unless instructed by your ISP. -
Page 30: Mac Clone
Wireless N300 Home Router type. 2. L2TP Server Address: Enter the IP address of a L2TP server. 3. User Name: Enter your L2TP username. 4. Password: Enter the password. 5. MTU: Maximum Transmission Unit. DO NOT change it from the factory default of 1492 unless instructed by your ISP. -
Page 31: Wan Speed
Wireless N300 Home Router 2. Clone MAC Address: Click to copy your PC's MAC address to the device as a new WAN MAC address. 3. Restore Default MAC: Reset device’s WAN MAC to factory default. 3.4 WAN Speed Here you can set the speed and duplex mode for WAN port. It is advisable to keep the default Auto setting to get the best speed. - Page 32 Wireless N300 Home Router 2. Select the wireless network you wish to connect, say, Tenda_office, and click OK. Then close scan. 3. 1). Verify that SSID and channel on this page are exactly the same as they are on the uplink wireless network you just selected. 2).
- Page 33 Wireless N300 Home Router Channel: The channel used by the uplink wireless device. Security Mode: The security mode used by the uplink wireless device. WPA Algorithms (or Cipher Type): The WPA Algorithm (or Cipher Type) used by the uplink wireless device. Key (or Security Key): The security key used by the uplink wireless device.
-
Page 34: Lan Settings
Wireless N300 Home Router 3.6 LAN Settings Click Advanced -> LAN Settings to enter the screen below. 1. LAN MAC Address: Displays device's LAN MAC address, which is NOT changeable. 2. IP Address: Device's LAN IP address. The default is 192.168.0.1. You can change it according to your need. -
Page 35: Dhcp
Wireless N300 Home Router 1. Enable Manual DNS Assignment: Check to activate DNS settings. 2. Primary DNS Server:Enter the primary DNS address provided by your IPS. 3. Alternate DNS Server:Enter the other DNS address if your ISP provides 2 such addresses (optional). 4. -
Page 36: Dhcp Client List
Wireless N300 Home Router 3.9 DHCP Client List DHCP Client List displays information of devices that have obtained IP addresses from the device’s DHCP Server. If you would like some devices on your network to always get the same IP addresses, you can manually add a static DHCP reservation entry for each such device. - Page 37 Wireless N300 Home Router Note: If the IP address you have reserved for your PC is currently used by another client, then you will not be able to obtain a new IP address from the device's DHCP server, instead, you must manually specify a different IP address for your PC to access Internet.
-
Page 38: Chapter 4 Wireless Settings
Wireless N300 Home Router Chapter 4 Wireless Settings 4.1 Wireless Basic Settings Here you can expand your wireless coverage with the following modes: Wireless AP (default mode) and WDS. Wireless Access Point (AP): Select this mode if you want to convert an existing wired network to a wireless network so as to extend Internet access to wireless clients. - Page 39 Wireless N300 Home Router 3. OK: Click to save your settings. Note: It is advisable to keep other items unchanged from factory default settings. For more details of other features, see Appendix 1. The device supports two SSIDs: primary SSID and secondary SSID. The secondary SSID is optional, left blank and disabled by default.
-
Page 40: Wds Bridge Mode
Wireless N300 Home Router 4.1.2 WDS Bridge Mode WDS Bridge Mode: wireless distribution system (WDS) is a system enabling the wireless interconnection of access points in an IEEE 802.11 network. It allows a wireless network to be expanded using multiple access points without the traditional requirement for a wired backbone to link them. - Page 41 Wireless N300 Home Router 2. Verify that DHCP server is enabled on Router 1. 3. Set the LAN IP address of Router 2 to a different address yet on the same net segment as Router 1. As shown below: Router 1: LAN IP: 192.168.0.1;...
- Page 42 Wireless N300 Home Router Select the wireless network to connect and click OK. Verify that the SSID, channel, and AP MAC address on the page match those of the added wireless network. If not, manually correct them.
- Page 43 Wireless N300 Home Router 5) Close Scan and click OK to save your settings.
- Page 44 Wireless N300 Home Router 6) Go to Wireless Security page and set the wireless security settings exactly as they are on the link partner (Router 1). 7) Go to DHCP Server to disable the DHCP on Router 2. Now you have finished all settings on Router 2 required for WDS.
- Page 45 Wireless N300 Home Router : 3. Configure PC3 and PC4 1) Set PC3 and PC4 to Obtain an IP address automatically.
- Page 46 Wireless N300 Home Router 2) When the two PCs get IP addresses,...
- Page 47 Wireless N300 Home Router try below steps to verify the WDS connection: Click Start-> Run on PC3, input cmd on the appearing window and then click OK. Input ping 192.168.0.1 and press Enter. If you get a screen as seen below, you have successfully implemented WDS.
-
Page 48: Wireless Security
Wireless N300 Home Router Note: 1. WDS feature can only be implemented between 2 WDS-capable wireless devices. Plus, SSID, channel, security settings and security key must be exactly the same on both such devices. 2. To ensure a proper wireless connection, do not change any settings on the two devices after WDS is successfully implemented. - Page 49 Wireless N300 Home Router Wi-Fi Protected Setup makes it easy for home users who know little of wireless security to establish a home network, as well as to add new devices to an existing network without entering long passphrases or configuring complicated settings.
- Page 50 Wireless N300 Home Router 8-digit PIN code from network adapter; then, within 2 minutes, enable WPS/PIN on the client device; Note: 1. With WPS successfully enabled, the WPS LED on the router keeps blinking for about 2 minutes, and during this time, you can enable WPS on a wireless adapter;...
-
Page 51: Wireless Access Control
Wireless N300 Home Router Note: 1. To use the WPS security, the wireless client must be also WPS-capable. 2. Before you press the hardware WPS button on the device for WPS/PBC connection, making sure the WPS feature has been enabled on the device. -
Page 52: Wireless Client
Wireless N300 Home Router wireless network; all other wireless devices will forbidden. Step1. Select the wireless network (SSID) you wish to enable Access Control Step2. Select Permit from the corresponding drop-down menu. Step3. Enter the MAC address you wish to permit in the MAC address box and click Add. - Page 53 Wireless N300 Home Router Note: The bandwidth here refers to the channel bandwidth instead of wireless connection rate.
-
Page 54: Chapter 5 Bandwidth Control
Wireless N300 Home Router Chapter 5 Bandwidth Control 5.1 Bandwidth Control Use this section to manage bandwidth allocation to devices on your LAN. If there are multiple PCs behind your router competing for limited bandwidth resource, then you can use this feature to specify a reasonable amount of bandwidth for each such PC, so that no one will be over stuffed or starved to death. -
Page 55: Traffic Statistics
Wireless N300 Home Router If you are sharing a 4M broadband connection with a neighbor, who always exhausts the bandwidth resource downloading data, this feature will help. Simply specify half of the 4M bandwidth for your neighbor's PC (say, 192.168.0.100) and you will no longer need to struggle for bandwidth and your neighbor will only get up to 2M bandwidth. - Page 56 Wireless N300 Home Router the device since Statistics is enabled. The unit is MByte. Received Message: Displays the number of packets received by a corresponding PC via the device since Statistics is enabled. Received Bytes: Displays the number of Bytes received by a corresponding PC via the device since Statistics is enabled.
-
Page 57: Chapter 6 Special Applications
Wireless N300 Home Router Chapter 6 Special Applications 6.1 Port Range Forwarding Port range forwarding is useful for web servers, ftp servers, e-mail servers, gaming and other specialized Internet applications. When you enable port forwarding, the communication requests from the Internet to your router’s WAN port will be forwarded to the specified LAN IP address. -
Page 58: Dmz Host
Wireless N300 Home Router for FTP). Contact corresponding service provider if you don't know the port number of the service to use. 2. LAN IP: Specify the internal host’s IP address. Be sure to statically assign the host’s IP address to make this function constant. 3. -
Page 59: Ddns
Wireless N300 Home Router 1. DMZ Host IP Address: The IP Address of the device for which the router’s firewall will be disabled. Be sure to statically set the IP Address of that device for this function to be consistent. 2. -
Page 60: Upnp
Configure necessary settings on port forwarding interface and enter the information provided by your DDNS service provider on the DDNS screen. Others can access your web server by simply entering http://tenda.dyndns.org in their browser address bar. 6.4 UPNP... -
Page 61: Static Routing
Wireless N300 Home Router Enable UPnP: Check/uncheck to enable/disable the UPnP feature. OK: Click to complete your settings. 6.5 Static Routing When there are several routers in the network, you may want to set up static routing. Static routing determines the path of the data in your network. You can use this feature to allow users on different IP domains to access the Internet via this device. -
Page 62: Routing Table
Wireless N300 Home Router subnet mask of 255.0.0.0. 6.6 Routing Table This page displays the device core routing table which lists destination IP, subnet mask, gateway, hop count and interface. The principal task for a router is to look for an optimal transfer path for each data packet passing through it, and transfer it to the specified destination. -
Page 63: Chapter 7 Security
Wireless N300 Home Router Chapter 7 Security 7.1 URL Filter To better control LAN PCs, you can use the URL filter functionality to allow or disallow such PCs to access certain websites within a specified time range. 1. Filter Mode: Select a proper filter mode, say, Forbid Only (or Forbid/Deny). -
Page 64: Mac Filter
Wireless N300 Home Router 1. Filter Mode: Select Forbid Only. 2. Access Policy: Select an access policy number, say, 1, from the drop-down list. 3. Policy Name: Briefly describe the current rule, say, youtube, (It can only consist of numbers, letters, or underscore). 4. - Page 65 Wireless N300 Home Router 1. Filter Mode: Select a proper filter mode, say, Forbid Only (or Forbid/Deny). 2. Access Policy: Select an access policy number, say, 1, from the drop-down list. 3. Policy Name: Briefly describe the current rule (It can only consist of numbers, letters, or underscore).
-
Page 66: Client Filter
Wireless N300 Home Router 1. Filter Mode: Select Permit Only. 2. Access Policy: Select an access policy number, say, 1, from the drop-down list. 3. Policy Name: Briefly describe the current rule, say, Permit only, (It can only consist of numbers, letters, or underscore). 4. - Page 67 Wireless N300 Home Router 5. Port: Specify TCP/UDP protocol port number (s), say, 80. 6. Type (or Protocol): Select Both. 7. Time: Specify a time period for a current rule to take effect. If the field is set to 0:00-0:00, the rule will be applied 24hrs/day. 8.
-
Page 68: Chapter 8 Tools
Wireless N300 Home Router Chapter 8 Tools 8.1 Reboot Reboot the device to activate your settings. WAN connection will be disconnected during reboot. 8.2. Restore to Factory Default Settings Click the Restore to Factory Default button to reset device to factory default settings. - Page 69 Wireless N300 Home Router 1. Click the Backup button and specify a directory to save settings on your local hardware. 2. Click Save to save the configuration file. To restore previous settings, do as follows: Click the Browse button to locate and select a configuration file that is saved previously to your local hard drive.
-
Page 70: Syslog
Wireless N300 Home Router 8.4 Syslog Here you can view the history of the device’s actions. After 150 entries, the earliest logs will clear automatically. 8.5 Remote Web-based Management The Remote management allows the device to be configured and managed remotely from the Internet via a web browser. -
Page 71: Time
Wireless N300 Home Router 2. Port: This is the management port to be open to outside access. The default setting is 8080. Do NOT change it unless instructed by your ISP. 3. IP Address: Here you can specify the IP Address Range for remote management (When set to 0.0.0.0, the device becomes remotely accessible to all the PCs on Internet or other external networks). -
Page 72: Login Password
Wireless N300 Home Router 8.7 Login Password This section allows you to change login password for accessing device’s Web-based interface for better security. 1. New Password: Enter a new password, say, 12345 (Note that the password can only be alphanumeric). 2. - Page 73 Wireless N300 Home Router 1. Browse: Click to locate and select the firmware. 2. Upgrade (or Update): Click to update firmware. Device will restart automatically when update completes. Note: 1. Before you upgrade the firmware, making sure you are having a correct firmware.
-
Page 74: Appendix 1 How To Configure Ip
Wireless N300 Home Router Appendix 1 How to Configure IP WIN7 OS Configuration 1. Click Start>Control Panel; 2. Enter Control Panel and click Network and Internet;... - Page 75 Wireless N300 Home Router 3. Click Network and Sharing Center; 4. Click Change adapter settings; 5. Right click Local Area Connection and select Properties; 6. Select Internet Protocol Version 4(TCP/IPv4) and click Properties;...
- Page 76 Wireless N300 Home Router 7. Select Obtain an IP address automatically and click OK to save the configurations.
-
Page 77: Xp Os Configuration
Wireless N300 Home Router XP OS Configuration 1. Right click My Network Places and select Properties;... - Page 78 Wireless N300 Home Router 2. Right click Local and select Properties; 3. Select Internet Protocol(TCP/IP) and click Properties;...
- Page 79 Wireless N300 Home Router 4. Select Obtain an IP address automatically and click OK to save the settings.
- Page 80 Wireless N300 Home Router...
-
Page 81: Appendix 2 Glossary
Wireless N300 Home Router Appendix 2 Glossary Channel A communication channel, also known as channel, refers either to a physical transmission medium such as a wire or to a logical connection over a multiplexed medium such as a radio channel. It is used to transfer an information signal, such as a digital bit stream, from one or more transmitters to one or more receivers. - Page 82 Wireless N300 Home Router supplicant, an authenticator, and an authentication server. The supplicant is a client device (such as a laptop) that wishes to attach to the LAN/WLAN - though the term 'supplicant' is also used interchangeably to refer to the software running on the client that provides credentials to the authenticator.
- Page 83 Wireless N300 Home Router A wireless distribution system (WDS) is a system enabling the wireless interconnection of access points in an IEEE 802.11 network. It allows a wireless network to be expanded using multiple access points without the traditional requirement for a wired backbone to link them. All base stations in a wireless distribution system must be configured to use the same radio channel, method of encryption (none, WEP, or WPA) and the same encryption keys.
-
Page 84: Appendix 3 Faqs
If your problem is not covered here, please feel free to go to www.tendacn.com to find a solution or email your problems to: . We will be more support@tenda.com.cn support02@tenda.com.cn than happy to help you out as soon as possible. - Page 85 Wireless N300 Home Router Internet connection type. You need to change the MTU size (1492 by default). In this case, go to “WAN Settings” to change the MTU value from default 1480 to 1450 or 1400, etc. 5. Q: How do I share resources on my computer with users on Internet through the device? To let Internet users access internal servers on your LAN such as e-mail server, Web, FTP, via the device, use the "Virtual Server"...
-
Page 86: Appendix 4 Remove Wireless Network From Your Pc
Wireless N300 Home Router Appendix 4 Remove Wireless Network from Your If you change wireless settings on your wireless device, you must remove them accordingly your PC; otherwise, you may not be able to wirelessly connect to the device. Below describes how to do remove a wireless network from your PC. - Page 87 Wireless N300 Home Router and then click the Remove button. If you are using Windows 7, do as follows: Click Network from your desktop and select Properties. Select Manage Wireless Networks.
- Page 88 Wireless N300 Home Router 3. Click the wireless connection and select Remove network.
-
Page 89: Appendix 5 Safety And Emission Statement
Wireless N300 Home Router Appendix 5 Safety and Emission Statement CE Mark Warning This is a Class B product In a domestic environment, this product may cause radio interference, in which case the user may be required to take adequate measures. This device complies with EU 1999/5/EC. FCC Statement This device complies with Part 15 of the FCC Rules. - Page 90 Wireless N300 Home Router uncontrolled environment. This equipment should be installed and operated with minimum distance 20cm between the radiator & your body. Note: The manufacturer is not responsible for any radio or TV interference caused by unauthorized modifications to this equipment. To avoid unnecessary radiation interference, it is recommended to use a shielded RJ45 cable.
- Page 91 Wireless N300 Home Router but de réduire les risques de brouillage radioélectrique à l'intention des autres utilisateurs, il faut choisir le type d'antenne et son gain de sorte que la puissance isotrope rayonnée équivalente (p.i.r.e.) ne dépasse pas l'intensité nécessaire à l'établissement d'une communication satisfaisante.
- Page 92 Antenna types not included in this list, having a gain greater than the maximum gain indicated for that type, are strictly prohibited for use with this device.Antenna listed as below: Manufacturer : SHENZHEN TENDA TECHNOLOGY CO.,LTD.
Need help?
Do you have a question about the W303R and is the answer not in the manual?
Questions and answers