Table of Contents
Advertisement
Quick Links
Advertisement
Table of Contents

Related Manuals for Westomatic EASY 6000


Summary of Contents for Westomatic EASY 6000
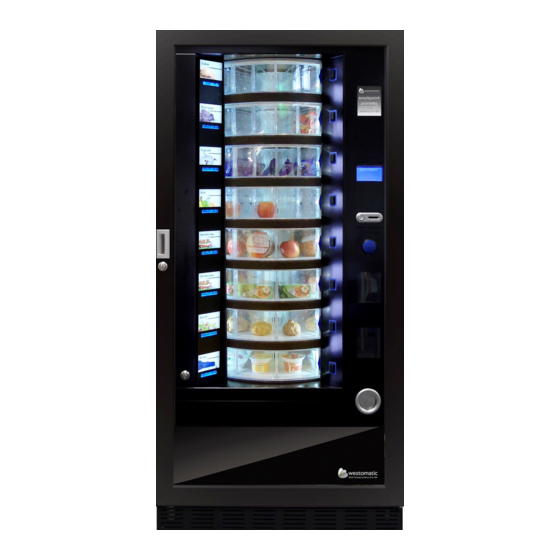
- Page 1 Technical Manual Part Number: 350090...
-
Page 2: Receiving Your Machine
Receiving your Machine Westomatic will deliver your machine and assist with the initial installation and training. Westomatic distribute the Easy 6000 on behalf of FAS International. Your machine will already be set up to your specifications - taken from your order. -
Page 3: External Features
2. External Features S E L E C T I O N BU T T O N DI S PL A Y C O I N R E T U R N BU T T O N C O I N S L O T S H O PPE R BU T T O N DO O R L O C K DE L I V E R Y DO O R... -
Page 4: Internal Features
3. Internal Features C O M PL E T E I DE N T I F I C A T I O N PL A T E I N T E R N A L K E Y PA D PC B BO A R DS / C O I N M E C H DO O R M O T O R T R A Y S L I DE... -
Page 5: Installation
4. Installation IMPORTANT: The Easy 6000 must be installed on a surface suitable to hold over 300kgs. It should not be installed where pressure jets/water may be used. It it suitable for ambient temperatures ranging from 3°C to 32°C. It is not suitable for external installation. - Page 6 5. Installation 2 . L E V E L L I N G Locate the machine on a stable, level surface. You will need 2 spanners - a 19mm and 13mm & a spirit level. Incorrect levelling can lead to misalignment and drum rotation issues.
- Page 7 3 . F I T T I N G T H E F R O N T PL I N T H The Easy 6000 has a front plinth/kick plate which is packed up securely and supplied with the machine for delivery.
- Page 8 5. Installation F I T F R O N T PL I N T H S Remove the screws. Fit front plinth in place. Replace screws on both sides. Remove screw Replace screws x2 Remove screw Plinth fitted on front...
- Page 9 (taken during the order process). If ordered - the machine will already be branded. The Easy 6000 is ready to be plugged in and filled. When first plugged in wait approx 12 hours for the machine to reach the operating temperature - below +4°C.
- Page 10 7. Product Filling / Refilling 1 . G U I DE L I N E S After the machine is switched on for the first time - wait 12 hours for the machine to reach the operating temperature. For refrigerated products this must be below +4°C. If the "refrigeration unit safety device"...
- Page 11 7. Product Filling / Refilling 2 . N O R M A L R E F I L L I N G Command 51 Open the door Pull out one drawer at a time (as far as stop tab will permit) Load products until all selections are filled.
- Page 12 7. Product Filling / Refilling 3 . S M A R T R E F I L L I N G Command 51 The product filling date is sorted in this mode. The machine is therefore able to recognise an expired product. To operate this correctly - the date/time/no.
- Page 13 7. Product Filling / Refilling 4. PR O DU C T S A L E S O PE R A T I O N S After Filling: Ensure sale prices are set Ensure change tubes are filled Check the machine message - "Machine Ready - make a selection"...
- Page 14 8. Setting Prices/Discounts MUST BE DONE IN THE CORRECT ORDER: Command 3 - Set prices for each drum Command 4 - Set discounts for each drum Command 2 - Set Clock and Timers for discount S E T T I N G PR I C E S COMMAND 3: Select Drum Enter Price...
- Page 15 8. Setting Prices/Discounts COMMAND 2: Set correct Date, Time & Day Display Clock? Y or N (ENTER) Weekly Timers (2) Discount Time Slots Enable - 1 Select Day of Week using button 2 (ENTER) Input Start time Input End time OPTIONS: Copy on the next day - copies the...
- Page 16 9. Ready? C H E C K L I S T : IMPORTANT TO ENSURE MACHINE IS READY TO DISPENSE: MACHINE IN LOCATION & LEVELLED FRONT PLINTH FITTED POWER ON - TEMP REACHED +4°C COIN MECH FITTED? COIN MECH FILLED? CARD READER FITTED? DRUMS CONFIGURED SHOPPER BUTTON TEST...
- Page 17 1 . DR U M R E M O V A L To remove the drum from the drawer: Open the main door of the Easy 6000 - disconnect the power supply by turning the main switch off. Remove the drawer by pulling gently to overcome the positioning spring locking action.
- Page 18 To remove dividers - use 8mm socket wrench for the rods 'A' - and undo screws 'C' with a Phillips screwdriver. Keep nuts 'B' safe when removing rods/screws. For the 4 compartment kit - contact Westomatic to purchase retro-fit kit. Do NOT remove divider that contains the magnet.
- Page 19 To change the dimensions of the compartments: Options: 4, 6, 8, 12, 16, 24, 48 Do NOT remove divider next to the magnet support (*) The 4 compartment configuration requires a special retrofit kit - please contact Westomatic. Useful dimensions of product compartment Spaces (mm):...
- Page 20 10. Adjustments 4. A DJ U S T I N G O PE N I N G O F T H E DE L I V E R Y DO O R S To change the delivery door opening: After changing the dimensions of the compartments - the delivery door opening must be modified.
- Page 21 10. Adjustments 5 . A DJ U S T I N G B E L T T E N S I O N If delivery doors do not close correctly - it may be necessary to check and tighten the toothed belt which moves delivery doors. Power to the machine must be switched OFF.
- Page 22 11. Refrigeration 1 . A C C E S S T H E R E F R I G E R A T I O N U N I T The Power boards, and the refrigeration unit are located at the bottom of the machine - To access: Power to the machine must be switched OFF.
- Page 23 2 . R E F R I G E R A T I O N M A I N T E N A N C E Once the Refrigeration unit has been removed from the machine, there are some maintenance tips to keep it functioning optimally: Power to the machine must be switched OFF.
- Page 24 12. Intelligent Health Control R E S E T T I N G T H E H E A L T H C O N T R O L If the internal temperature rises above +8°C for longer than 60 minutes a warning appears that must be reset before the Easy 6000 will vend again: TI = Internal Temperature;...
-
Page 25: Pcb Boards
13. PCB Boards A C C E S S I N G T H E B O A R D PCB: Main Board (New Style 2016 onwards) PN: 1021729 PCB: Main Board (Old Style Pre - 2016) DOOR PN: 1021134 PCB: Graphic Display with... - Page 26 13. PCB Boards A C C E S S I N G T H E B O A R D PCB: PCB: Powerboard Powerboard (Old Style Pre 2016) (New Style 2016 onwards) White 2 way connector on new board PN: 1021111 PN: 1021751 PCB: LED Power...
-
Page 27: Cleaning Instructions
14. Cleaning Instructions Ensure machine is switched OFF. Do NOT use high pressure washers - or direct water jets. Carefully clean the stainless steel and painted surfaces to avoid oxidation/damage - Do NOT use abrasive materials. Do NOT use toxic detergents. Do NOT use spray lubricants. -
Page 28: Programming Procedure
15. Programming Procedure U S I N G T H E I N T E R N A L K E Y PA DS 1 - 8... -
Page 29: Command Codes
16. Command Codes C O M M A N D S T O A C C E S S T O S U B - M E N U S T e s t d e l i v e r y d o o r s / d r u m s M A C H I N E T E S T + r e s e t m o t o r s E n t e r s s u b - m e n u f o r s e t t i n g t h e c l o c k /... - Page 30 16. Command Codes C O M M A N D S T O S E T M A C H I N E P A R A M E T E R S S E T D E L I V E R Y P r e s e t V a l u e i s 6 0 % # 5 0 D O O R S P E E D &...
-
Page 31: Error Codes
17. Error Codes E R R O R C O D E M E A N I N G D O O R N U M B E R D o o r d o e s n o t o p e n d u r i n g s a l e D o o r d o e s n o t c l o s e ( o n l y c o m m a n d 0 1 D O O R N U M B E R M a c h i n e t e s t ) - Page 32 17. Error Codes E R R O R C O D E M E A N I N G P o w e r b o a r d r e s e t o r t h e d r u m c o n t r o l D R U M N U M B E R c a r d F r i d g e s a f e t y i n t e r v e n t i o n...
- Page 33 18. Setting Payment Systems 1 . S E T T I N G U P C O I N M E C H The coin mechanism must be connected and disconnected with the machine turned off. The connectors required to connect the coin mechanism are located next to the main board.
- Page 34 18. Setting Payment Systems 1 . S E T T I N G U P C O I N M E C H To fit the coin mech: Replace the mechanism and ensure the coin chute is correctly positioned. Make sure the yellow clip is clicked into place.
- Page 35 18. Setting Payment Systems 2 . F I L L I N G T H E C O I N M E C H Example used shows MEI/CPI Coin Mechanism The coin mechanism must be connected and disconnected with the machine turned off. When the coin mech is connected to the machine, its very simple to fill.
- Page 36 18. Setting Payment Systems 4. F I T T I N G A C A R D R E A DE R The Easy 6000 is compatible with a wide range of card readers - this example uses a Nayax.
- Page 37 18. Setting Payment Systems 4. F I T T I N G A C A R D R E A DE R To fit a card reader: Fit the reader to the machine (the reader fits from inside the machine) - & replace the nuts.
- Page 38 18. Setting Payment Systems 4. F I T T I N G A C A R D R E A DE R To fit a card reader: Plug aerial in and find a spot to attach it - it may need moving until you find a signal.
- Page 39 18. Setting Payment Systems 5 . U S E O F PA Y M E N T S Y S T E M S M DB The coin mechanism must be connected and disconnected with the machine turned off. Connect payment system, and switch on machine - enter programming and set Command 69 and program to value 5.
- Page 40 18. Setting Payment Systems Command 30: Purchase obligation before return By setting this command to 1 the customer is obliged to purchase before receiving back the return - this avoids using the coin mech as a coin changer. Command 31: Setting Max card or cash credit accepted The max credit accepted by the coin mech by either key/card or cash is set - if this amount is exceeded - no more coins or notes are accepted.
- Page 41 18. Setting Payment Systems Command 35: Resetting coin meters in change giving tubes Use this command when replacing token meter/emptying the change tubes with machine off to synchronise with content of change tubes. Command 35 - press ENTER - display views Code 0000 - enter 6203 - press ENTER Command 36: Condition exact amount (no coins available for change)
- Page 42 18. Setting Payment Systems Command 39: Filling in of the change giving tubes Important - if procedure is not correctly carried out - the wrong values can be found in command 09-10. Proceed as follows: Command 39 and press ENTER Enter the coin mechanism Fill Mode (this will vary dependent on the coin mech type you are using).
- Page 43 18. Setting Payment Systems 6 . A DD A M E S S A G E T O T H E C A R D R E A DE R Its possible to add a personal message to the LCD Screen: Enter Service mode 1.
- Page 44 19. Command Codes EXPLANED C O M M A N D S T O A C C E S S T O S U B - M E N U S Command 1: Machine Test There are 3 options. Test 1 - consists of opening & closing the delivery doors in sequence followed by rotation of the drums where applicable.
- Page 45 19. Command Codes EXPLANED MULTIPRICE: If Command 58 is set - 2 or 3 prices per drum, the machine works by price line. When you set 2 or 3 prices per drum, each drum will be divided into 2 or 3 equal sections. Products sold at 2 or 3 different prices can be inserted into the same drum.
- Page 46 19. Command Codes EXPLANED "Drum Number 00" will appear on the display. Enter the code for the selection you want to know the sales figures for and press ENTER. By pressing ESC you return to the submenu to select another selection. Pressing ESC a second time returns to the main menu.
- Page 47 19. Command Codes EXPLANED C O M M A N D S T O S E T R E F R I G E R A T I O N P A R A M E T E R S Command 41: Sets cabinet temperature Sets the lower internal cabinet temperature.
- Page 48 19. Command Codes EXPLANED above which the vending machine goes out of service - will show a warning message. This control is inhibited when turned on and after closing the door for the time set in Command 45. The preset value is +8°c but can vary from +8°C to +25°C. To reset the fridge safety device - with the door open, the vending mchine display shows that the device has tripped.
- Page 49 19. Command Codes EXPLANED Command 54: Setting the delivery door opening time This command makes it possible to set the time the delivery door stays open - preset to 5 seconds - can vary from 1 to 60 seconds. Command 55: Programming the product expiry time It is possible to program the time, in reference to the expiry day.
- Page 50 19. Command Codes EXPLANED Command 63: Set the mono/multivend If command is set to 0 - the machine operates in single-vend mode , and in cash mode the surplus credit is returned. If the command is set to 1 - the machine operates in multivend mode and the amount which exceeds the cost, after sale, is displayed once again and can be recovered by simply pressing the coin return button or used for a new selection.
- Page 51 19. Command Codes EXPLANED Command 80: Cloning This command makes it possible to transfer all parameters of the machine to a "USB" so other machines can be set up to the same specification. DO NOT enter the USB stick before entering the programming mode.
- Page 52 19. Command Codes EXPLANED Command 94: Displays the last 10 power-offs This command displays the last 10 periods in which the machine has switched off. Command 95: Enter user message Makes it possible to enable and enter to editable messages (See section 8 for details) Command 99: View Error Events This command displays the last 20 error events, press ENTER to...
- Page 53 19. Command Codes EXPLANED C O M M A N D S M B D C O I N S Y S T E M S A N D D R U M S E T U P Command 69: Chooses functioning mode of coin mechanismThis command chooses the type and mode of functioning of the coin mechanism.
- Page 54 19. Command Codes EXPLANED The sale of products that have not been sold within the programmed date is blocked. For example: to programme drum 5 with 16 compartments in shopper mode for products with a 7 day expiry period: Command 75 ENTER button to display of no.
-
Page 55: Spare Parts
20. Spare Parts U S E F U L S PA R E PA R T S ORDER DIRECT FROM WESTOMATIC: +44 (0) 1626 323100 support@westomatic.com... -
Page 56: Liability And Warranty
Liability & Warranty LIABILITY All details and indications for the operation, maintenance and cleaning of this Easy 6000 food vendor have been made under consideration of our knowledge and experiences collected up to now. Westomatic Vending Services Ltd. on behalf of FAS International, reserves the right to make technical changes to this machine type without notice as a result of continuous product development. -
Page 57: Technical Specifications
Technical Specifications MACHINE SPECIFICATIONS GENERAL: WEIGHT: 315 kg DIMENSIONS: (H)1830 x (W)910 x (D)795 mm/ 1670 (inc Door open) NOISE: 70dB (will not exceed) ELECTRICAL: VOLTAGE: 240 Volts AC CURRENT: POWER: 0.7 Kilowatts FREQUENCY: 50Hz DELIVERY DOORS: VEND: MAX WEIGHT PER DRUM: VENDING MODE: FIFO / SHOPPER REFRIGERANT TYPE:... - Page 58 Certification EASY 6000 Food Vendor...
Need help?
Do you have a question about the EASY 6000 and is the answer not in the manual?
Questions and answers