Table of Contents
Advertisement
Quick Links
Advertisement
Table of Contents

Related Manuals for Westomatic ELEVATE QUARTZ


Summary of Contents for Westomatic ELEVATE QUARTZ
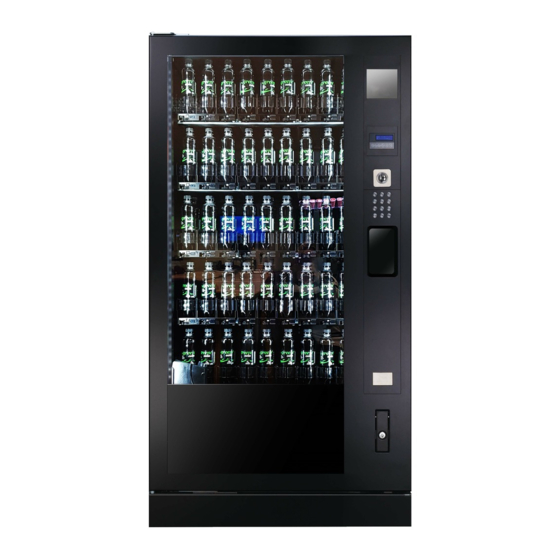
- Page 1 ELEVATE QUARTZ OPERATING INSTRUCTIONS...
- Page 2 GF Robimat XL GF Robimat XM GF Robimat XL-EC GF Robimat XM-EC GF Robimat XL-EW Cold drinks vending machine Original Operating Instructions 21.01.19 704 67 020 00 _ 111...
-
Page 3: Table Of Contents
Contents GF Robimat XL / XM OPERATING INSTRUCTIONS 1 General ......................5 1.1 Introduction ........................5 1.1.1 Copyright ........................5 1.1.2 Modifications ........................5 1.1.3 Complete document ......................5 1.1.4 Software ........................... 5 1.1.5 Availability of instructions ....................5 1.1.6 Alternative source of reference ..................5 1.1.7 Third party documentation .................... - Page 4 GF Robimat XL / XM OPERATING INSTRUCTIONS 3.10 Installing the coin mechanism ................23 3.10.1 Mounting the coin mechanism ..................23 3.10.2 Electrical connection - coin mechanism to vending machine ........24 3.10.3 Setting the machine protocol ..................25 3.10.4 Adjust motorised coin return ..................25 3.10.5 Filling the coin mechanism ..................
- Page 5 GF Robimat XL / XM OPERATING INSTRUCTIONS 6 Machine control board, Software ..............35 6.1 Programming keys .....................35 6.2 Menu selection ......................35 6.3 Structure of the main menu ..................36 6.4 Sub-menus .........................37 6.4.1 [CHECK] M0 ........................37 6.4.2 [PROGRAMMING MODE] M1 ..................38 6.4.3 [COOLING PROGR.] M2 ....................
-
Page 6: General
GF Robimat XL / XM OPERATING INSTRUCTIONS General 1 General 1.1 Introduction 1.1.1 Copyright © SIELAFF GmbH & Co. KG Automatenbau This documentation is protected by copyright. No parts of this manual may be used or reproduced or amended in any manner whatsoever without written permission from the Copyright Holder. -
Page 7: Robimat Features
General GF Robimat XL / XM OPERATING INSTRUCTIONS 1.2 Robimat features Robimat is a machine for vending cooled drinks in cans, PET and glass bottles. The drinks do not fall into the dispense outlet but are transported using a lift system. This means that fragile products can also be vended. Specifications for the products that are suitable for vending are listed in "Product Specifications"... -
Page 8: Technical Data
GF Robimat XL / XM OPERATING INSTRUCTIONS General 1.5 Technical data Machine Type (Standard specification for climate Robimat XL Robimat XM class N) Selections max. 72 (9 products; 8 shelves) max. 56 (7 products; 8 shelves) Product compartments max. 24 (3 product compartments max. -
Page 9: Safety Information
General GF Robimat XL / XM OPERATING INSTRUCTIONS 1.6 Safety Information • Before commissioning the machine, the operating instructions should be read and understood. • When transporting, setting up, servicing and repairing the vending machine, strict adherence to the following rules and guidelines - in their latest version - is required: EU guidelines, VDE regulations (Association of German Electro-technical Engineers), Country-specific regulations, Accident prevention regulations, Industrial code, Trade association guide-lines, Regulations of the utility company responsible. -
Page 10: Explanation Of Signs And Symbols
GF Robimat XL / XM OPERATING INSTRUCTIONS General 1.7 Explanation of signs and symbols This vending machine was manufactured in accordance with state-of-the-art technology standards. Nevertheless, even the most expertly designed machine, cannot be without risks. In order to ensure the highest possible level of operator safety, additional safety guidelines are highlighted by using the following symbols with accompanying detailed definitions. -
Page 11: Construction And Features
Construction and Features GF Robimat XL / XM OPERATING INSTRUCTIONS 2 Construction and Features 2.1 Machine diagrams 2.1.1 Internal view Product container 10 Product basket POS (Point of Sale) 11 Vertical track Sliding door unit 12 Glass door Display Coin insert Selection keypad Product delivery unit (delivery unit flap, shutter) -
Page 12: Sliding Door Unit -Telescopic Slide-Out Unit
GF Robimat XL / XM OPERATING INSTRUCTIONS Construction and Features 2.1.2 Sliding door unit -Telescopic slide-out unit Control board (VMC) 11 Coin refund motor Power supply unit 12 Machine mains plug Coin insert channel 13 Chiller unit plug Service keypad Product delivery unit Cashbox Cashbox holder... -
Page 13: High-Security Version
Construction and Features GF Robimat XL / XM OPERATING INSTRUCTIONS 2.1.3 High-Security Version Components on the high-security version Theft protection Coin insert Selection keypad Side lock Coin return Locking lever Anti-vandalism panel 2.1.4 High-Security V��������� 704 67 020 00 _ 111... -
Page 14: Ec-Version
GF Robimat XL / XM OPERATING INSTRUCTIONS Construction and Features 2.1.5 EC-Version The EC-version is differentiated by its segmented stainless steel panel. The panel can be adapted to suit customer requirements at little expense. Stainless steel 2.1.6 ��������������� and XM 9 compartments per shelf 7 compartments per shelf 113 cm... -
Page 15: Vending Process
Construction and Features GF Robimat XL / XM OPERATING INSTRUCTIONS 2.2 Vending process The vending process is as follows: 1. The customer selects product; the compartment number is read; money is inserted. 2. Compartment number is entered (selection keypad). 3. The basket is moved by the lift system to the compartment. 4. - Page 16 GF Robimat XL / XM OPERATING INSTRUCTIONS Construction and Features 2.3 ����������� �������������������������������� ▪ Do not fill with inflammable or explosive products • The machine should only be filled with cans, glass and PET bottles. • Products must comply with the requirements outlined in the following "Specifications" list. •...
-
Page 17: Installation And Commissioning
Installation and commissioning GF Robimat XL / XM OPERATING INSTRUCTIONS 3 Installation and commissioning 3.1 Choosing the location When you choose the location for the machine please observe the following criteria: • The machine may not be installed outdoors (except for Outdoor-machines and High- Security-Variants located under a canopy). -
Page 18: Kickplate
GF Robimat XL / XM OPERATING INSTRUCTIONS Installation and commissioning 3.4 Kickplate Only when the machine is free-standing: • hook the (optional) side kickplates into the rear feet (A) and fix them with the securing screws (B). • fit the front kickplate from the top and secure (C). •... -
Page 19: Levelling The Machine
Installation and commissioning GF Robimat XL / XM OPERATING INSTRUCTIONS 3.5 Levelling the machine The vending machine must be levelled, and it is essential that the following criteria is adhered to: • Horizontal, stable position. • Correct height adjustment if part of a vending machine station. •... - Page 20 GF Robimat XL / XM OPERATING INSTRUCTIONS Installation and commissioning The following fine adjustment must still be made once the machine has been levelled: • Screw adjustable foot A inwards until the machine rocks over axis B - C. Press several times on the corner at F2 to check if the machine rocks.
-
Page 21: Removing Transportation Locks
Installation and commissioning GF Robimat XL / XM OPERATING INSTRUCTIONS 3.6 Removing transportation locks Remove transportation locks. When the machine is connected, it carries out a reference run. The machine will be damaged if the transportation locks have not been removed. Remove the cable tie in the upper left corner. -
Page 22: Wall Spacer Brackets/W
GF Robimat XL / XM OPERATING INSTRUCTIONS Installation and commissioning 3.7 Wall spacer brackets/W��������� CAUTION! Risk of tipping! Risk to life! Fix vending machines to the wall or floor: How to proceed The wall brackets supplied must be used to fix the machine to the wall. They must be fastened to the machine using the screws provided. -
Page 23: Electrical Connection
Installation and commissioning GF Robimat XL / XM OPERATING INSTRUCTIONS 3.9 Electrical connection NOTE! The mains plug should be connected only after the transportation locks have been removed. • The machine is delivered ready for connection, with cable and shock-proof plug for a single-phase AC supply of 230 V/50 Hz. -
Page 24: Installing The Coin Mechanism
GF Robimat XL / XM OPERATING INSTRUCTIONS Installation and commissioning 3.10 Installing the coin mechanism The machine is prepared to operate with a coin mechanism. As there are many different coin mechanisms, the appropriate adapter set for the connection to the M32 control board control board must be available when installing. -
Page 25: Electrical Connection - Coin Mechanism To Vending Machine
Installation and commissioning GF Robimat XL / XM OPERATING INSTRUCTIONS 3.10.2 Electrical connection - coin mechanism to vending machine Depending on the type of coin mechanism different adapters, cables or junction boxes to the connector may be required: Kit for Executive: 704 01 558 00 Kit for BDV: 310 02 530 00... -
Page 26: Setting The Machine Protocol
GF Robimat XL / XM OPERATING INSTRUCTIONS Installation and commissioning 3.10.3 Setting the machine protocol Refer to chapt. 6.1 for information relating to the software • Open the door and insert the service key. • Access the main menu [INSTALLING MODE] M7: [ M ] - [ 7 ] - [ E ]. •... -
Page 27: Configuring The Machine To Products
Installation and commissioning GF Robimat XL / XM OPERATING INSTRUCTIONS 3.10.6 ����������������� When the machine leaves the factory it is manufactured, tested and despatched to factory settings. Transport, storage, installation and products can affect mechanical features. These are beyond the control of the manufacturer. Therefore in order to ensure trouble-free everyday operation, it is essential that adjustments and test vends are carried out. -
Page 28: Daily Use
GF Robimat XL / XM OPERATING INSTRUCTIONS Daily use 4 Daily use 4.1 Door contact switch with service key CAUTION! Risk to life! When the door contact switch is activated with the service key, all machine functions are active even though the machine door is open. -
Page 29: Product Compartments/ Product Compartment
Daily use GF Robimat XL / XM OPERATING INSTRUCTIONS 4.2 Product compartments/ Product compartment Pusher Toothed belt Tilt mechanism Gear wheel Retaining spring for drive How the product container works The bottles are placed in a row in each compartment. When a bottle is to be dispensed from a compartment, the respective gear wheel at the front of the compartment must be powered by the drive in the product basket. -
Page 30: Pushing Back The Product Container
GF Robimat XL / XM OPERATING INSTRUCTIONS Daily use 4.3 ����������������������� Lift the product container slightly at the front edge and pull it out until it stops. When it is completely pulled forward, the mechanism should lock. It can now be filled with products. Pull out the product container ATTENTION! It is important that you ONLY press... -
Page 31: Filling The Product Containers
Daily use GF Robimat XL / XM OPERATING INSTRUCTIONS 4.5 Filling the product containers NOTE! • The machine may only be filled by trained personnel. • Products can fall out of the product containers during the filling process. For this reason please handle carefully and always hold the front product securely. -
Page 32: Cleaning And Maintenance
GF Robimat XL / XM OPERATING INSTRUCTIONS Cleaning and maintenance 5 Cleaning and maintenance 5.1 Cleaning list In addition to the standard cleaning procedures maintenance work should also be carried out on the machine. An overview of the maintenance work to be carried out is to be found in the maintenance plan in your machine's technical manual. -
Page 33: Product Basket
Cleaning and maintenance GF Robimat XL / XM OPERATING INSTRUCTIONS 5.3 Product basket The product basket can be removed for cleaning. It can be cleaned in the dishwasher at max. 65°C. 5.3.1 Removing the product basket Release the two unlocking hooks and pull the basket slightly towards the right. - Page 34 GF Robimat XL / XM OPERATING INSTRUCTIONS Cleaning and maintenance 5.4 ������������ NOTE Risk of damage to the chiller unit Insufficient cleaning of the lint filter may cause the chiller unit to fail! For this reason make sure to check and clean the lint filter regularly.
-
Page 35: Cleaning The Intermediate Panel (High Security Version Only)
Cleaning and maintenance GF Robimat XL / XM OPERATING INSTRUCTIONS 5.5 Cleaning the intermediate panel (High Security version only) Stud bolts 8x ATTENTION! Risk of damage! The use of abrasive, acidic or alkaline cleaning agents may cause stress cracks in the polycarbonate window. The high-security version features an anti-vandalism panel. -
Page 36: Machine Control Board, Software
GF Robimat XL / XM OPERATING INSTRUCTIONS Machine control board, Software 6 Machine control board, Software ATTENTION! Electro-statically sensitive components and modules (ESD) Risk of damage to components! Do not touch printed circuit boards and pins on the control board! The machine control board can be accessed by pulling out the drawer. -
Page 37: Structure Of The Main Menu
Machine control board, Software GF Robimat XL / XM OPERATING INSTRUCTIONS 6.3 Structure of the main menu NOTE If security codes A and B have been installed in the [INSTALLING MODE] menu, the respective menus are locked and can only be accessed after the relevant code has been entered. M Display message Function Code... -
Page 38: Sub-Menus
GF Robimat XL / XM OPERATING INSTRUCTIONS Machine control board, Software 6.4 Sub-menus 6.4.1 [CHECK] M0 Deleting errors Current machine errors are displayed as text in the [CHECK] menu. An actual counter reading is displayed with each malfunction. CHECK ←L SEL. M→ Error counter ERROR C#001... -
Page 39: Programming Mode] M1
Machine control board, Software GF Robimat XL / XM OPERATING INSTRUCTIONS 6.4.2 [PROGRAMMING MODE] M1 You can assign up to three different prices to each selection: • [PRICE CASH] The normal cash selling price of the product. • [HAPPY HOUR] price: To use this price, the [HAPPY HOUR] function in the [INSTALLING MODE] menu, sub-menu [CREDIT SYSTEM] must be set to [on]. - Page 40 GF Robimat XL / XM OPERATING INSTRUCTIONS Machine control board, Software 6.4.2.1 Set prices CHECK ←L SEL. M→ PROGRAMMING MODE only if [PRICELIST] is activated only if [HAPPY HOUR] ←L SEL. M→ is activated and [PRICELIST] deactivated PROGRAMMING MODE PROGRAMMING MODE PROGRAMMING MODE PROGRAMMING MODE PRICE CASH...
- Page 41 Machine control board, Software GF Robimat XL / XM OPERATING INSTRUCTIONS When setting [AGE VERIFICATION] function to [active] in [INSTALLING MODE] - [MACHINE], you can additionally assign one of the following settings to each selection. The current setting is changed by pressing [ R ]. Age verification SEL 10:£...
- Page 42 GF Robimat XL / XM OPERATING INSTRUCTIONS Machine control board, Software 6.4.2.4 Copy all prices With this function all prices entered can be copied. Here you have the following options: • Copy [PRICE CASH] to [PRICE LIST 1] • Copy [PRICE CASH] to [PRICE LIST 2] •...
-
Page 43: Cooling Progr.] M2
Machine control board, Software GF Robimat XL / XM OPERATING INSTRUCTIONS 6.4.3 [COOLING PROGR.] M2 CHECK ←L SEL. M→ COOLING PROGR. COOLING ←L SEL. M→ FROM TU TO from ... to weekday yes=1, no=0 COOLING EL. COOLING ? FROM TU TO yes=1, no=0 COOLING AUTO SET? -
Page 44: Test Vend Mode] M3
GF Robimat XL / XM OPERATING INSTRUCTIONS Machine control board, Software 6.4.4 [TEST VEND MODE] M3 In [TEST VEND MODE] the vending process can be checked. The selected product is dispensed free of charge and recorded in the statistics memory as a test vend. CHECK ←L SEL. -
Page 45: Show Statistics] M4
Machine control board, Software GF Robimat XL / XM OPERATING INSTRUCTIONS 6.4.5 [SHOW STATISTICS] M4 The menu [SHOW STATISTICS] displays sales statistics. Specific product stock information can be accessed via the sales statistics. If a [SECURITY CODE] has been entered, the statistics may be deleted by the operator via [CODE A]. CHECK ←L SEL. -
Page 46: Prog.time/Locks] M6
GF Robimat XL / XM OPERATING INSTRUCTIONS Machine control board, Software 6.4.7 [PROG.TIME/LOCKS] M6 In the menu [PROG.TIME/LOCKS] the [HOUR] as well as the [DATE] is entered. This information is entered in the current input field using the selection keypad. The control board automatically calculates the [DAY OF WEEK]. - Page 47 Machine control board, Software GF Robimat XL / XM OPERATING INSTRUCTIONS 6.4.7.1 Illumination [ILLUMINATION] off/on/time=0-2 off/on/time=0-2 Illumination off off/on/time=0-2 ILLUMINATION? ILLUMINATION? ILLUMINATION? Illumination always on Illumination controlled by timer. ILLUMINATION ILLUMINATION ILLUMINATION The times when the illumination is switched on is FROM 18.00 FROM...
-
Page 48: Installing Mode] M7
GF Robimat XL / XM OPERATING INSTRUCTIONS Machine control board, Software 6.4.8 [INSTALLING MODE] M7 Machine parameters are programmed in the [INSTALLING MODE ] menu. There are 6 sub-menus. Sub-menu Note [MACHINE] Basic machine settings, which affect the dialogue with the user, e.g. language, age verification, security codes etc. - Page 49 Machine control board, Software GF Robimat XL / XM OPERATING INSTRUCTIONS 6.4.8.1 [MACHINE] [INSTALLING MODE] M7 > [MACHINE] In the sub-menu [MACHINE] you can set the required [LANGUAGE], [CURRENCY], [SECURITY CODE]s etc. The security code requires a password to enter the main menus. CHECK ←L SEL.
- Page 50 GF Robimat XL / XM OPERATING INSTRUCTIONS Machine control board, Software [INSTALLING MODE] M7 > [MACHINE] [VARIANT (1)] Setting the machine type. [FS40] (default) [FS40] relates to Robimat XL, XM. [FREE VEND MO. (1)] To programme free vend mode for time-restricted dispense of products. [FREE VEND DURAT.] To programme the time for goods to be dispensed once the free vend code has been entered.
- Page 51 USE PROFILE PCB-SERIALNUMBER Machine control board, Software GF Robimat XL / XM OPERATING INSTRUCTIONS EXPERT 2735460 AGE VERIFICATION SECURITY [INSTALLING MODE] M7 > [MACHINE] active DEF. CODE A: [Tel. No. DC] DC stands for data centre SPACE TO SALE(1) SECURITY +49 xxxxx Using the number keys, the data centre telephone number can be programmed if the FS40...
- Page 52 GF Robimat XL / XM OPERATING INSTRUCTIONS Machine control board, Software [INSTALLING MODE] M7 > [CREDIT SYSTEM] 6.4.8.2 [CREDIT SYSTEM] CHECK ←L SEL. M→ INSTALLING MODE ←L SEL. M→ INSTALLING MODE INSTALLING MODE > CREDIT SYSTEM > MACHINE CREDIT SYSTEM(1) CLEAR CREDIT after 180s...
- Page 53 Machine control board, Software GF Robimat XL / XM OPERATING INSTRUCTIONS [INSTALLING MODE] M7 > [CREDIT SYSTEM] [ESCROW AUTOM.] Refers to change given in coins [on] Requirement: [CHANGE + MULTI] or [NO CHANGE + MULTI] is set in [VEND MODE]. Change is automatically dispensed (without pressing the refund button) as soon as the credit is lower than the amount set under [max.
- Page 54 GF Robimat XL / XM OPERATING INSTRUCTIONS Machine control board, Software 6.4.8.3 [DOWNLOAD] [INSTALLING MODE] M7 > [READOUT] IRDA max.RATE CHECK 19200 ←L SEL. M→ INSTALLING MODE EXT. SERIAL ←L SEL. M→ INSTALLING MODE INSTALLING MODE EXT.READOUT PROT > MACHINE >...
- Page 55 Machine control board, Software GF Robimat XL / XM OPERATING INSTRUCTIONS [INSTALLING MODE] M7 > [READOUT] [IRDA max. RATE] IRDA = Infrared-interface [19,200] (default) Infrared-interface (IRDA) data transfer rate is between 19,200 Bit/s and 57,600 Bit/s. The display installed as standard has a data transfer rate of 19,200 Bit/s. [EXT.
- Page 56 GF Robimat XL / XM OPERATING INSTRUCTIONS Machine control board, Software 6.4.8.4 [COIN MECHANISM] [INSTALLING MODE] M7 > [COIN MECHANISM] CHECK ←L SEL. M→ INSTALLING MODE ←L SEL. M→ INSTALLING MODE INSTALLING MODE TOKEN 1 VALUE CHANGE BLOCKED > MACHINE >...
- Page 57 TUBE COUNT Machine control board, Software GF Robimat XL / XM OPERATING INSTRUCTIONS by COINMECH [INSTALLING MODE] M7 > [COIN MECHANISM] ALT. PAYOUT [COIN 1 dis.: GA] The coin can be disabled by linking keys 0 and 1. Its value (0.05 corresponds to 5 cents) and the number of ..
- Page 58 GF Robimat XL / XM OPERATING INSTRUCTIONS Machine control board, Software 6.4.8.5 [CARD READER] [INSTALLING MODE] M7> [CARDREADER] Settings in this sub-menu are only valid if a cashless credit system is fitted. CHECK ←L SEL. M→ INSTALLING MODE ←L SEL. M→ INSTALLING MODE INSTALLING MODE P.LIST / READER...
- Page 59 Machine control board, Software GF Robimat XL / XM OPERATING INSTRUCTIONS [INSTALLING MODE] M7> [CARDREADER] [MDB CARD 2] [on] Activate if a second card reader is connected. [off] If no second card reader is connected. [P.LIST / READER] [L1+L2 -> all] Both price lists are valid for card 1 and card 2.
- Page 60 GF Robimat XL / XM OPERATING INSTRUCTIONS Machine control board, Software 6.4.8.6 [BILLVAL] [INSTALLING MODE] M7 > [BILLVAL] CHECK ←L SEL. M→ INSTALLATION ←L SEL. M→ INSTALLING MODE INSTALLING MODE > BILL VALIDATOR > MACHINE ESCROW(1) stack BILL 1 dis.:HG 5.00 1 : 00 BILL...
-
Page 61: Service Mode] M8
Machine control board, Software GF Robimat XL / XM OPERATING INSTRUCTIONS 6.4.9 [SERVICE MODE] M8 In the [SERVICE MODE] menu all important machine parameters are displayed. This menu provides support for locating errors and machine maintenance. Various functions can be tested and the coin mechanism emptied. 6.4.9.1 Service functions Service numbers are divided into categories, M, double M, and L functions. - Page 62 GF Robimat XL / XM OPERATING INSTRUCTIONS Machine control board, Software 6.4.9.2 Empty tubes [SERVICE MODE] M8 > [EMPTY TUBES] This service number is only applicable if the coin mechanism has this function. CHECK all coins one coin ←L SEL. M→ Tube 1 111M 101M...
- Page 63 Machine control board, Software GF Robimat XL / XM OPERATING INSTRUCTIONS 6.4.9.3 Patch Menu SERVICE MODE [M8] > PATCH MENU CHECK CARD REMOVAL CARD REMOVAL ←L SEL. M→ after VEND before VEND SERVICE MODE HELIX STOP HELIX STOP ←L SEL. M→ by MotSW or LB only by MotorSW.
- Page 64 GF Robimat XL / XM OPERATING INSTRUCTIONS Machine control board, Software SERVICE MODE [M8] > PATCH MENU Menu text Explanation Possible settings [MODEL standard [AGE VERIFICATION] see Menu M7/ [MACHINE] none, active [BILL ESCROW] see Menu M7/ [BILLVAL] stack immediate, enabled [COOLING CONTROL] activates 2nd Temperature sensor in temperature only, second sensor...
-
Page 65: Tube Invent.] M9
Machine control board, Software GF Robimat XL / XM OPERATING INSTRUCTIONS 6.4.10 [TUBE INVENT.] M9 In the [TUBE INVENT.] menu the individual tubes of the coin mechanism can be filled in accordance with the minimum number of coins set in [INSTALLING MODE] M7. In addition the coin mechanism can be emptied completely. -
Page 66: Robimat] M10
GF Robimat XL / XM OPERATING INSTRUCTIONS Machine control board, Software 6.4.11 [ROBIMAT] M10 CHECK ←L SEL. M→ ROBIMAT ←L SEL. M→ HardwareTest AutoConfig MasterOffset ResetXY HWAutomat: ROBXL ShowConfig E:Change E:Start E:Start E:Enter E:Edit E=Show ResetXY Light HWAUTOMAT: ROBXL S S S S L L L L XMOffset: 00.0mm AutoConfig E:Change... - Page 67 Machine control board, Software GF Robimat XL / XM OPERATING INSTRUCTIONS [������] Offset is the difference to 0 caused by mechanical tolerances. X and Y directions can be set separately. The maximum displacement of the X and Y directions are influenced by scale due to the belt expanding (i.e.
-
Page 68: Transportation, Storage, Decommissioning, Disposal
GF Robimat XL / XM OPERATING INSTRUCTIONS Transportation, Storage, Decommissioning, Disposal 7 Transportation, Storage, Decommissioning, Disposal 7.1 Transportation instructions ATTENTION! Risk of damage! Incorrect transportation can damage the machine. When moving with a pallet truck: unsteady lowering can damage the machine. DANGER! Risk to life! Incorrect transportation can result in the machine tilting. - Page 69 Transportation, Storage, Decommissioning, Disposal GF Robimat XL / XM OPERATING INSTRUCTIONS Reinforcement Cut-out showing the base of the machine The base of the vending machine comprises two reinforcing plates to provide the necessary stability. View from below The forklift forks must be placed under the complete machine base. 704 67 020 00 _ 111...
-
Page 70: Machine's Centre Of Gravity
GF Robimat XL / XM OPERATING INSTRUCTIONS Transportation, Storage, Decommissioning, Disposal 7.3 Machine's centre of gravity Centre of gravity 7.4 Storage The vending machine should be stored in a clean and dry location. Use a suitable cover to protect it from dirt, humidity and damage. -
Page 71: Index
Index GF Robimat XL / XM OPERATING INSTRUCTIONS 8 Index Age verification ............. 39 Machine control board .......... 35 Alternative source of reference....... 5 Machine identification plate ........6 Machine (Menu M7)..........48 Main menu overview..........36 Bank notes............59 Making the machine door move smoothly .... -
Page 72: Appendix: Maintenance Schedule
GF Robimat XL / XM OPERATING INSTRUCTIONS Appendix: Maintenance schedule 9 Appendix: Maintenance schedule ATTENTION! Risk of injury! Maintenance work may be carried out only by a service engineer or specially trained personnel. This maintenance schedule is purely to inform the machine operator about maintenance work and intervals (refer to Technical manual). - Page 73 Index GF Robimat XL / XM OPERATING INSTRUCTIONS Action/Frequency 1 = clean 2 = test/ check Resources Illumination 3 = lubricate Spare part number 4 = replace/ exchange 12 Months or 24 Months or 36 Months or 30,000 60,000 90000 LED functioning Folding mechanism, light strip left Cable routing top left...
- Page 74 GF Robimat XL / XM OPERATING INSTRUCTIONS Index Action/Frequency 1 = clean 2 = test/ check Resources Product container 3 = lubricate Spare part number 4 = replace/ exchange 12 Months or 24 Months or 36 Months or 30,000 60,000 90000 Front drive wheel Multi-function lubricant...
- Page 75 Index GF Robimat XL / XM OPERATING INSTRUCTIONS Action/Frequency 1 = clean 2 = test/ check Resources Product basket 3 = lubricate Spare part number 4 = replace/ exchange 12 Months or 24 Months or 36 Months or 30,000 60,000 90,000 Upper part of basket Rinsing water...
-
Page 76: Ec-Declaration Of Conformity
GF Robimat XL / XM OPERATING INSTRUCTIONS EU/EC Declaration of Conformity for Machines Sielaff GmbH & Co. KG Automatenbau Münchener Str. 20 D-91567 Herrieden We, the manufacturer, hereby confirm that the vending machine type specified below complies to the EC directive for machinery and the EU directive to electromagnetic compatibility in its design and manufacture relating to health and safety requirements as well as in conformity on the restriction of the use of certain hazardous substances in electrical and electronic equipment. - Page 77 © Copyright Westomatic Vending Services Limited 2020 All rights reserved. No part of this publication may be reproduced, stored in a retrieval system, or transmitted, in any form or by any means, electrical, mechanical, photocopying, recording or otherwise, without prior permission from Westomatic Vending Services Limited.
Need help?
Do you have a question about the ELEVATE QUARTZ and is the answer not in the manual?
Questions and answers