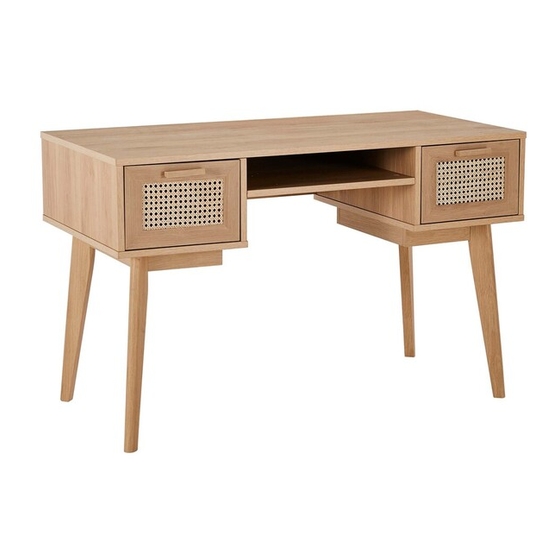
fantastic furniture Java Manual
Desk 2 drawer
Hide thumbs
Also See for Java:
- Manual (18 pages) ,
- Quick start manual (13 pages) ,
- Assembly instructions manual (7 pages)
Advertisement
Quick Links
Advertisement

Subscribe to Our Youtube Channel
Summary of Contents for fantastic furniture Java
- Page 1 Version 1.0 Java Two People Desk 2 Drawer fantasticfurniture.com.au Required...
- Page 2 We’re thrilled you’ve chosen Fantastic Furniture to help create a home you’ll love! Love it? Share it! Fantastic buy! Share how it looks at home on Instagram for your chance to win a $250 Fantastic Furniture Gift Card! @fantasticfurniture fantasticfurniture.com.au Page 2...
-
Page 3: Assembly Checklist
Assembly Checklist Read through the instructions carefully Make sure you have all the required tools. before you begin. Never use power tools unless instructed. Unless instructed, do not fully tighten Identify and lay out all of the screws until the item is fully assembled. components before you begin assembly. -
Page 4: What You Need
What you need to assemble the product Other tools you need Phillips Head Screwdriver Top Panel (P1) Metal Rail (P15) Side Panel Side Panel (P4) Back Panel (P8) (P4) Shelf (P7) Right Divider Panel (P6) Left Divider Right Bottom Panel (P5) Panel (P3) Left Bottom Panel (P2) - Page 5 Hardware Pack 33 x Large 4 x Felt Pads 2 x Handles 37 x Large Cam 29 x Large Cam Dowels (H3) (H5) (H4) Bolts (H1) Nuts (H2) 8 x Bolts 8 x Spring 4 x Handle 1 x Allen Key 8 x Flat Washers (H6) Washers (H8)
- Page 6 Step 1 Separate 4 x Slides (H15) into Slide Tracks (H15-1) and Slide Runners (H15-2) as shown below: You will need (H15) 4 x Slides (H15) Press down on the plastic release lever to extend the Slide Runner (H15-2) from Slide Track (H15-1) and then separate the two pieces completely.
- Page 7 Step 3 (H14) Ensure the rubber stopper (H3) (H3) (H14) on Slide Track (H15-1) is You will need (H14) placed correctly (H3) on side panel as shown. (P6) (H15-1) (H15-1) 6 x Slide 2 x Slide Screws (H14) Tracks (H15-1) (H3) (H3) (H14)
- Page 8 Step 5 (H3) You will need (H3) (H3) 5 x Large Dowels (H3) (P7) (H3) (H3) Insert 5 x Large Dowels (H3) into Shelf (P7) as shown. Step 6 Ensure all raw edges on the divider panels and shelf are at the back of the desk You will need (H2) 4 x Large Cam...
- Page 9 Step 7 (H3) (H3) You will need (H3) (H3) 10 x Large Dowels (H3) (H3) (H3) (P8) (H3) (H3) (H3) (H3) Insert 10 x Large Dowels (H3) into Back Panel (P8) as shown. Step 8 Ensure the cam nut hole in the middle of back panel is aligned on the same side as the grooves in left &...
- Page 10 Step 9 You will need (P4) Phillips Head 4 x Large Cam Screwdriver Nuts (H2) (H2) (H2) (P8) (P4) (H2) Insert 4 x Large Cam Nuts (H2) into Back Panel (P8) as shown and rotate the cam nuts so the arrows point towards the incoming cam bolts.
- Page 11 Step 11 You will need (H2) (H2) (P6) 8 x Large Cam Phillips Head Nuts (H2) Screwdriver (P4) (H2) (H2) (P3) (H2) (P4) (P5) (H2) Right Side (P2) (H2) Left Side Insert 8 x Large Cam Nuts into Side Panels (P4x2) and Left & Right Divider Panels (P5&P6) as shown and rotate the cam nuts so the arrows point towards the incoming cam bolts.
- Page 12 Step 13 (H1) (H1) (H16) You will need (H1) (P15) (H1) (H16) (H1) 11 x Cam Bolts 4 x Rail Bolts (H1) (H1) (H16) (H1) (H16) (H1) (H1) (H16) (P1) Phillips Head (H1) Screwdriver (H1) Attach 11 x Cam Bolts (H1) to Top Panel (P1) by tightening with the Phillips Head Screwdriver. Secure Rail (P15) to Top Panel (P1) with 4 x Rail Bolts (H16) by tightening with the Phillips Head Screwdriver.
- Page 13 Step 15 (P14) You will need 4 x Felt Pads (H5) Attach 4 x Felt Pads (H5) to the bottom of Legs (P14x4) (H5) by removing the adhesive backing and pressing firmly. Step 16 Two People (P14) You will need (P2) Required 8 x Bolts...
- Page 14 Step 17 You will need (P11) (P10) 4 x Small Dowels (H12) (H12) (H12) Insert 4 x Small Dowels (H12) into Drawer Left & Right Sides (P10x2 & P11x2). (H1) Step 18 (H1) You will need (H1) (H1) 8 x Cam Bolts Phillips Head (H1) Screwdriver...
- Page 15 Step 20 (P13) (P11) (P10) Slide the Drawer Base (P13) into the grooves of Drawer Left & Right Sides (P10&P11) and Drawer Front (P9). (P9) Repeat for the second Drawer Base (P13). Step 21 (H13) (H13) You will need (P12) 8 x Long Phillips Head Screws (H13)
- Page 16 Step 22 Use the holes shown below on the Slide Runner (H15-2) to secure the screws You will need (H15-2) 12 x Slide 4 x Slide (H15-2) (H15-2) (H14) Runners (H15-2) Screws (H14) (H14) Phillips Head (P11) Screwdriver (H14) (P10) (H14) (H15-2) (H14)
- Page 17 Step 24 (H15-1) (H15-1) Before inserting the assembled drawers into the desk, adjust 4 x Slide Tracks (H15-1) on Side Panels (P4x2) and Left & Right Divider Panels (P5&P6) to bring the slide to the front. (H15-2) (H15-1) Gently insert the assembled drawers into the desk by aligning the 2 x Slide Runners (H15-2) with the 2 x Slide Tracks (H15-1).
-
Page 18: Job Complete
Job complete! In the interest of our environment please dispose of all packaging thoughtfully. fantasticfurniture.com.au Page 18...


Need help?
Do you have a question about the Java and is the answer not in the manual?
Questions and answers