
Related Manuals for fantastic furniture Jordan


Summary of Contents for fantastic furniture Jordan
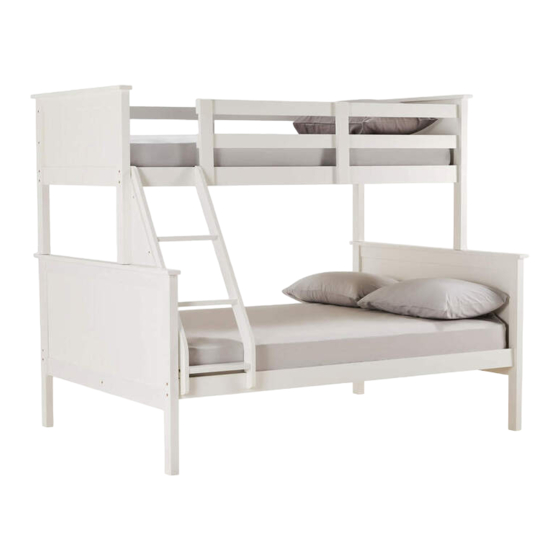
- Page 1 , � � Fantastic Furniture Version 1.2 Two People Jordan Triple Bunk Required fantasticfurniture.com.au...
- Page 2 Fantastic Furniture Love it? Share it! Fantastic buy! Share how it looks at home on Instagram for your chance to win a $250 Fantastic Furniture Gift Card! @fa ntasticfu rn itu re Fantastic Furniture Page2...
-
Page 3: Assembly Checklist
Assembly Checklist Read through the instructions carefully Make sure you have all the required tools. before you begin. Never use power tools unless instructed. Identify and lay out all of the components Unless instructed, do not fully tighten screws before you begin assembly. until the item is fully assembled. -
Page 4: What You Need
What You Need to assemble the product Other tools you need Phillips head screwdriver; Soft headed mallet. Upper Footboard (P4) Upper Rear Side Rail Upper Slats (P9) (P17) Front Guard Rails Guard Rail Supports (P12) X 2 (P10) X 3 Upper Front �-- Rear Guard Rails Side Rail... - Page 5 Part list Box 1: Lower Set of Slats (P16); Upper Set of Slats (P17). Box 2: Upper Headboard (P3); Upper Footboard (P4). Box 3: Lower Headboard (P1); Lower Footboard (P2). Box 4: Lower Front Side Rail (P5); Lower Rear Side Rail (P6); Centre Rail (P7);...
- Page 6 Step1 You will need � � ,---� �o Wood Dowels Soft Headed Mallet I (),,/ (H6) 7----_J Lower Front Side Rail (P5) ,�- • L __ J Ladder Steps , - - (P15)x3 _ _J � / L __ _J Upper Front Side Rail (PB)
- Page 7 TWO PEOPLE Step2 will need REQUIRED Lower Headboard Cushion Pads (P1) (H9) " " _.,/\ " " __ _J; ____ ------- '- (H9) ) Take out 4 x cushion pads (H9). Remove cushion pads from adhesive stickers and paste them underneath the headboard & footboard (P1 & P2). Keep the remaining 4 x cushion pads (H9) for future use.
- Page 8 TWO PEOPLE Step3 bolt (H1) from will need ,----t---------- outside (!!!!mmmmmmmm1111(® � " REQUIRED 70mm Bolts Barrel Nuts (H8) � (H1) (H5) (H1) \ >�----- , � '1 Remark: � >- - - -- _ / please push in � &...
- Page 9 TWO PEOPLE Step4 You will need Remark: please push in mmmnmm11m1mmm1(® barrel nuts (H5) � while fixing REQUIRED bolts to avoid 12 x 70mm Bolts 12 x Barrel Nuts protrusion. --------7 (H1) (H5) ::::_, "::::: � (H5) 1 xAllen Key (H8) �...
- Page 10 TWO PEOPLE Step5 Make sure upper edge of (P10 and P11) are flush. You will need mmmnmm11m1mmm1(® «««««««I REQUIRED 2 x 70mm Bolts 6 x 30mm Bolts (H1) (H2) (H3) � (P11) � 12 x Large Wood 12 x Barrel Nuts Screws (H5) (H3)
- Page 11 TWO PEOPLE Step6 You will need � REQUIRED 26 x Large Wood Phillips Head Screws Screwdriver (H3) (H3) Align the end screw to the ----- pre-drilled holes on slat support rail. strap facing down Upper Rear Side Rail (P9) Upper Front Side Rail (P 8 ) Fix upper slats {P17) to upper front &...
- Page 12 TWO PEOPLE Step7 You will need REQUIRED 4 x Metal Pins (H7) ,-([J- -, (H7) �-� Insert 4 metal pins {H7) into the holes of the lower bed headboard & footboard. Carefully position the upper bed above the lower bed. Put the upper bed into position. BE CAREFUL TO NOT JAM YOUR FINGERS DURING THIS ASSEMBLY STEP.
- Page 13 TWO PEOPLE Step8 You will need Remark: please push in (® 1(1(({111({(1(({((1(1(((1((1(({(( barrel nuts (H5) while fixing REQUIRED 2 x Large Wood bolts to avoid 6 x70mm Bolt Screws protrusion. (H1) (H3) Ensure correct position of ladder rail 6 x Barrel Nuts 1 x Allen Key (P13 and P14) with metal hook at the (H5)
- Page 14 lWO PEOPLE Step9 will need «lllllll REQUIRED 2 x 30mm Bolt 1 x Allen Key (H8) (H2) Lower Front Side Rail (P5) From inside view __ l._7 1"4, : (H2) �----_J (H2) � (H8) Remove plastic cover from the metal hook of left & right ladder rails (P13 &...
- Page 15 lWO PEOPLE Step 10 You will need � � REQUIRED 1 x Large Wood 2xSmall Wood ---- Screw Screw (H3) (H4) ---- ---- Phillips H ead Screwdriver (H4) (P18) Fix triangle panel (P18) to upper footboard post (P4) using large wood screw (H3) from inside, tightening with the phillips head screwdriver.
- Page 16 lWO PEOPLE Step 11 You will need � � REQUIRED 26 x Large Wood Phillips Head Screws Screwdriver (H3) Lower ____...,-,---- Rear Side Rail (P6) Lower Front Side Rail (P5) strap facing down Fix lower slats {P16) to lower front & rear side rail {P5 &...
- Page 17 lWOPEOPLE Step 12 You will need REQUIRED 3 x Stickers (H10) from inside view " ---- (H10) " ' , I ,,,..->/ from outside view Cover all screw holes on triangle panel (P18) with 3 x stickers (H10). � Fantastic Furniture Page17 fantasticfurniture.com.au...
-
Page 18: Job Complete
Step 13 Job Complete! In the interest of our environment please dispose of all packaging thoughtfully. � Fantastic Furniture Page18 fantasticfurniture.com.au...
Need help?
Do you have a question about the Jordan and is the answer not in the manual?
Questions and answers