Table of Contents
Advertisement
Available languages
Available languages
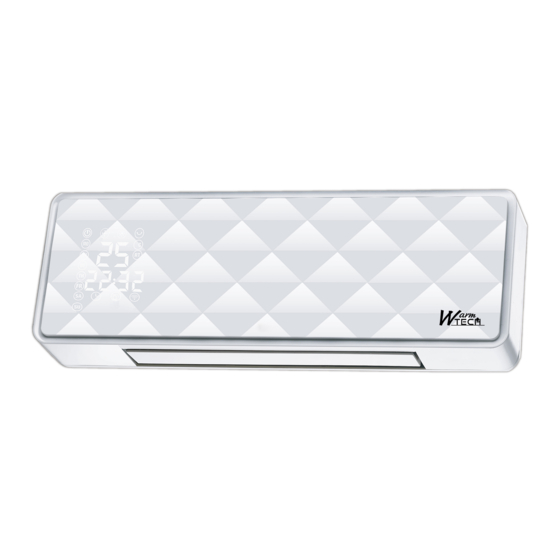
WTCHMO2003TL-WI
220-240V~ 50-60Hz
FR RADIATEUR CERAMIQUE - MURAL
TRADUCTION DES INSTRUCTIONS D'ORIGINE
NL
KERAMISCHE VERWARMING - WAND
VERTALING VAN DE ORIGINELE INSTRUCTIES
GB CERAMIC HEATER - WALL
ORIGINAL INSTRUCTIONS
Ce produit est seulement
approprié aux espaces
bien isolés ou à l'usage occasionnel.
Dit product is alleen geschikt voor
goed geïsoleerde ruimtes of
This product is only suitable for well
insulated spaces or occasional use.
IP 22
incidenteel gebruik.
2000W
1
Advertisement
Table of Contents

Subscribe to Our Youtube Channel
Related Manuals for Warm Tech WTCHMO2003TL-WI


Summary of Contents for Warm Tech WTCHMO2003TL-WI
- Page 1 à l'usage occasionnel. Dit product is alleen geschikt voor goed geïsoleerde ruimtes of incidenteel gebruik. This product is only suitable for well insulated spaces or occasional use. WTCHMO2003TL-WI 220-240V~ 50-60Hz 2000W IP 22 FR RADIATEUR CERAMIQUE - MURAL TRADUCTION DES INSTRUCTIONS D’ORIGINE...
- Page 2 Y2021 FR RADIATEUR CERAMIQUE - MURAL Ne couvrez pas l’appareil quand il fonctionne pour éviter les risques de surchauffe. INTRODUCTION • Avant d’utiliser votre nouveau radiateur, veuillez lire attentivement les instructions suivantes. CONSERVEZ CE LIVRET DANS UN ENDROIT SÛR AFIN DE POUVOIR LE CONSULTER ULTÉRIEUREMENT.
- Page 3 • 19. ATTENTION — certaines parties de cet appareil peuvent devenir très chaudes et provoquer des brûlures. Soyez particulièrement attentif lorsque des enfants et des personnes vulnérables sont présents. SPECIFICATIONS Nom du modèle Tension Puissance WTCHMO2003TL-WI 220-240V~ 50-60Hz 2000W...
-
Page 4: Installation De L'appareil
INSTALLATION DE L’APPAREIL Le radiateur doit être installé et utilisé conformément aux normes de sécurité. Pour ne courir aucun risque, suivez les instructions en matière de sécurité. - L’installation doit être effectuée par l’agent de service ou par des personnes ayant les mêmes qualifications afin d’éviter tout danger. - Page 5 UTILISATION DU RADIATEUR CHAUFFANT 1. Avant d'insérer la fiche dans une prise électrique, assurez-vous que l'alimentation électrique de votre région correspond à celle indiquée sur l'étiquette signalétique de l'appareil. 2. Retirez délicatement le radiateur du sac en plastique et du carton. 3.
- Page 6 4) INSTRUCTIONS DU THERMOSTAT 1. Pour régler la température, appuyez sur « » pour régler la température désirée et la température réglée de 10 ℃ à 49 ℃ 2. Lorsque la température de l'air chute de 2 degrés en dessous de la température réglée, le chauffe-eau commence à...
- Page 7 7) FONCTION WIFI Connexion par WIFI 1.Utilisez votre téléphone pour scanner le code QR ci-dessus ou recherchez «Tuya Smart» dans Application sur le marché pour télécharger et installer l'application. 2.Sélectionnez votre code de pays, entrez le numéro de téléphone portable et appuyez sur «Obtenir»...
- Page 8 A) Appuyez sur "Ajouter un appareil", comme indiqué sur l'image pic 2 B) Choisissez «Tous les appareils» comme indiqué sur l'image pic 3 C) Appuyez sur le "voyant de confirmation clignote rapidement" lorsque le voyant lumineux sur l'appareil clignote rapidement, comme indiqué sur la photo pic 4 D) Entrez le mot de passe du WIFI, puis confirmez, comme indiqué...
- Page 10 Fonctionnement par WIFI 1.U peut utiliser l'appareil par mobile dans un environnement WIFI ou 4G LTE, comme indiqué sur l'image Pic 8,...
- Page 11 2.Sélectionnez le bouton «Minuterie hebdomadaire» pour le fonctionnement: A) Appuyez sur "Ajouter un horaire", comme indiqué sur l'image Pic9 B) U peut choisir l'hebdomadaire et la minuterie ce que vous voulez, veuillez noter que vous devez maintenir la température de consigne plus élevée que la température actuelle lorsque vous êtes allumé, comme indiqué...
- Page 12 VUE DU PANNEAU DE CONTROLE : On / Off Interrupteur On/Off Low heat Basse température High heat Haute température Swing function Fonction swing Semaine : MO = lundi / TU = Mardi / WE = Week mercredi / TH = jeudi / FR = vendredi / SA = samedi / SU = dimanche Celsius Température Celsius...
-
Page 13: Nettoyage & Maintenance
TÉLÉCOMMANDE 1. Pour la télécommande, veuillez utiliser une pile au lithium CR2025 3V. 2. La signification des indications figurant sur les boutons de la télécommande est la suivante: 1.”ON/OFF” commande principale 2.“24H” réglage de la minuterie de 1-24 heures 3.“MODE” 3 positions de sélection COLD (froid), WARM (chaud), HOT (très chaud) 4.“Swing”... -
Page 14: Garantie
Livrez la pile comme un déchet chimique à la station de recyclage de votre commune. GARANTIE Pour les clauses de garantie, reportez-vous aux conditions de garantie ci-jointes. WARM TECH 81, rue de gozée 6110 Montigny-le-Tilleul Belgique Tél : 0032 (0) 71 29 70 70... -
Page 15: Belangrijke Veiligheidsinformatie
KERAMISCHE VERWARMING - WAND Bedek niet het toestel wanneer het loopt oververhittende risico’s te vermijden. INLEIDING • Vooraleer u het nieuwe verwarmingstoestel in gebruik neemt, moet u de volgende instructies zorgvuldig lezen. BEWAAR DIT BOEKJE OP EEN VEILIGE PLAATS VOOR EVENTUELE RAADPLEGING ACHTERAF. •... - Page 16 • 19. OPGEPAST – Sommige onderdelen van dit product kunnen heel heet worden en brandwonden veroorzaken. Bijzondere aandacht moet worden geschonken wanneer kinderen en kwetsbare personen aanwezig zijn. SPECIFICATIES Modelnamen Voltage Vermogen WTCHMO2003TL-WI 220-240V~ 50-60Hz 2000W...
-
Page 17: Het Toestel Installeren
HET TOESTEL INSTALLEREN Het verwarmingstoestel moet worden geïnstalleerd en gebruikt volgens de veiligheidsstandaarden. Om alle gevaren te vermijden moet u de veiligheidsinstructies opvolgen. - De installatie moet dit worden uitgevoerd door de dealer of een vergelijkbare ervaren persoon om eventuele gevaren te voorkomen. - Belangrijk! Zorg dat er geen elektrische kabels of andere installaties (bijvoorbeeld waterleidingbuizen) in de buurt van de boorgaten zijn. - Page 18 BEDIENINGSINSTRUCTIES 1. Voordat u de stekker in een stopcontact steekt, moet u ervoor zorgen dat de stroomvoorziening in uw omgeving overeenkomt met die op het typeplaatje op het apparaat. 2. Haal de verwarmer voorzichtig uit de plastic zak en de doos. 3.
- Page 19 3) 24-uurs timerFUNCTIE 1. Druk op de toets " ", stel de timer in op 24 uur, houd de toets " " ingedrukt om de uren te verhogen van 00 naar 24 (00 = gesloten, 01 = 1 uur, 02 = 2 uur ... 24 = 24 uur ect .) en de indicator "...
- Page 20 7) WIFI-FUNCTIE wifi verbinding 1.Gebruik uw telefoon om de bovenstaande QR-code te scannen of zoek naar “Tuya Smart” in Applicatie op de markt om de applicatie te downloaden en te installeren. 2. Selecteer uw landcode, voer het mobiele telefoonnummer in en druk op "Get" om een bericht te krijgen met de codeverificatie.
- Page 21 A) Tik op "Apparaat toevoegen" zoals weergegeven in foto 2 afbeelding B) Kies "Alle apparaten" zoals weergegeven in foto 3 afbeelding C) Druk op het "Bevestigingslampje knippert snel" wanneer het indicatielampje op het apparaat snel knippert, zoals weergegeven in foto 4 foto D) Voer het wachtwoord van de WIFI in en bevestig, zoals weergegeven op de foto 5 E) Wacht tot de app verbinding heeft gemaakt met het apparaat totdat het succesvol is verbonden.
- Page 22 WIFI-bediening 1.U kunt het apparaat mobiel gebruiken in een WIFI- of 4G LTE-omgeving, zoals weergegeven in de afbeelding van Pic 8,...
- Page 23 2.Selecteer de knop "Wekelijkse timer" voor bediening: A) Druk op "Schema toevoegen" zoals weergegeven in afbeelding van Pic9 B) U kunt de wekelijkse en timer kiezen wat u wilt, houd er rekening mee dat u de ingestelde temperatuur hoger moet houden dan de huidige temperatuur wanneer u het apparaat inschakelt, zoals weergegeven op de foto Pic 10 C) Druk op de "Opslaan"...
- Page 24 BEDIENINGSPANEEL AANZICHT Aan / uit knop On / Off Lage temperatuur Low heat Hoge temperatuur High heat Swing function Swing-functie Week: MO = maandag / TU = dinsdag / Week WE = woensdag / TH = donderdag / FR = vrijdag / SA = zaterdag / SU = zondag Celsius temperatuur Celsius Temerature display...
-
Page 25: Reiniging & Onderhoud
AFSTANDSBEDIENING AFBEELDING: 1. Afstandsbediening, gebruik steeds lithiumbatterij CR2025 3V. 2. De aan/uit-knop (ON/OFF) van de afstandsbediening is aldus aangegeven 1.”ON/OFF” Aan/Uit-knop 2.“24H” Timer instellen 1-24 uren 3.“MODE” KOUD, WARM, HEET keuze uit 3 instellingen 4.“Swing” Draaibare sluiter van boven naar beneden“ 5.LOCK”... - Page 26 Ontlaad het accupakket door de machine leeg te laten draaien totdat de motor stopt. Breng de batterij als chemisch afval naar het recyclingstation van uw gemeente. WARM TECH 81, rue de gozée 6110 Montigny-le-Tilleul Belgique Tél : 0032 (0) 71 29 70 70...
-
Page 27: Important Safety Information
GB CERAMIC HEATER - WALL Make sure that the air inlet and outlet openings are not blocked. To avoid any risk of fire, do not cover the heater (ex. With clothes) INTRODUCTION • Before using your new heater, please carefully read through the following instructions. -
Page 28: Specifications
• 19. CAUTION —some parts of this product can become very hot and cause burns. Particular attention has to be given where children and vulnerable people are present. SPECIFICATIONS WTCHMO2003TL-WI 220-240V~ 50-60Hz 2000W INSTALLING THE DEVICE The heater shall be installed and used according to the safe standard. - Page 29 Before inserting the plug into an electrical outlet, make sure that the electrical supply in your area matches that on the rating label on the unit. Carefully remove the heater from the plastic bag and the carton. Place the heater on a firm level surface ,setting the master button to “-”position.plug the cord set into a AC220-240V electrical outlet,with “BEE”...
-
Page 30: Child Lock Function
1.Press “ ” button, the “ ” light is on.The appliance is working as smart saving energy models.(In this function,the appliance is check and record environment temperature in immediately.It will stop working,when the appliance check the environment are drop ≧3 ℃ within minute.The user should restart the appliance with “ON/OFF”... - Page 31 Connection by WIFI 1.Use your phone to scan the QR code below or search “Tuya Smart” in Application on market to download and install the App. 2.Select your country code, enter the cellphone number and tap “Get” to get a message containing verification on code.
- Page 32 B) Choose “All Devices”as shown in pic 3 C) Press the “confirm indicator rapidly blinks” when the indicating light on device rapidly blinks,as shown in pic 4 D) Input password of WIFI and then confirm,as shown in pic 5 E) Wait for the APP to connect with the device until it is connected succesfully .as shown in pic 6...
- Page 33 Operation by WIFI 1.U can operate the device by mobile under WIFI or 4G LTE environment, as shown in the picture...
- Page 34 2.Select “Weekly timer” button to operation: A) Press the “Add schedule”,as shown in pic 9 B) U can choose the weekly and timer what u want,pls note that u must keep the set temperature higher the currently temperate when ON the power ,as shown in pic 10 C) Press the “Save”button in top right corner,to save this during “stop or start”...
-
Page 35: Control Panel View
CONTROL PANEL VIEW... -
Page 36: Remote Control View
REMOTE CONTROL VIEW 1.Remote control, please use Lithium battery CR2025 3V. 2.The remote control power button is labeled as such 1.”ON/OFF” Main power button 2.“24H” Setting timer from 1-24 hours 3.“MODE” COLD,WARM,HOT 3 setting for selection 4.“Swing” Louver swing up and down 5.“LOCK”... - Page 37 Discharge the battery by letting the machine run at no load speed until the motor stops. Hand in the machine as chemical waste with the recycling station in your municipality. WARM TECH 81, rue de gozée 6110 Montigny-le-Tilleul Belgique Tél : 0032 (0) 71 29 70 70 Fax : 0032 (0) 71 29 70 86...
- Page 47 SN : 2021.04 :0001~1000 16.03.13632 Date d’arrivée – Aankomstdatum - Arrival date – Ankunftsdatum: 20/07/2021 Année de production - Productiejaar - Production year - Fertigungsjahr : 2021 WTCHMO2003TL-WI Regulation(EU) 2015/1188 EN 60335-1 :2012+A11+A13+A1+A14+A2 EN 60335-2-30 :2009+A11 EN 62233 :2008 AfPS GS 2019 :01 PAK EN 300328 V 2.2.2 :2019...
- Page 48 81, rue de Gozée 6110 Montigny-le-Tilleul Belgique Tél : 0032 71 29 70 70 Fax : 0032 71 29 70 86 S.A.V sav@eco-repa.com Service Parts separated 32 / 71 / 29 . 70 . 83 32 / 71 / 29 . 70 . 86 Fabriqué...
Need help?
Do you have a question about the WTCHMO2003TL-WI and is the answer not in the manual?
Questions and answers