Table of Contents
Advertisement
Available languages
Available languages
Quick Links
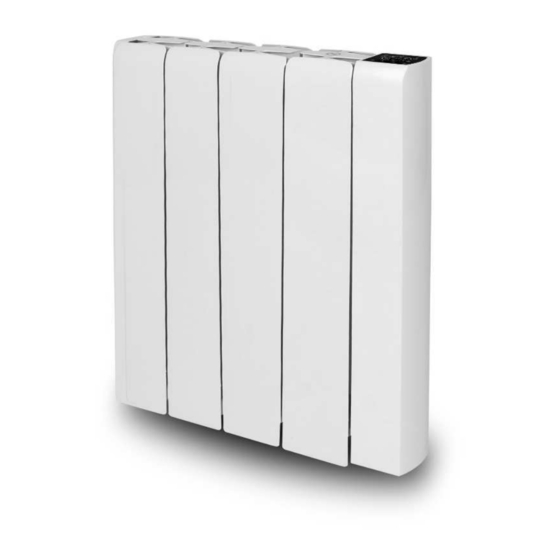
WTRIC1000-4
WTRIC1500-5
WTRIC2000-7
FR
RADIATEUR INERTIE CERAMIQUE
TRADUCTION DES INSTRUCTIONS D'ORIGINE
NL
KERAMISCHE INERTIERADIATOR
VERTALING VAN DE ORIGINELE INSTRUCTIES
GB
CERAMIC INERTIA RADIATOR
ORIGINAL INSTRUCTIONS
Ce produit est seulement
approprié aux espaces
bien isolés ou à l'usage occasionnel.
Dit product is alleen geschikt voor goed
geïsoleerde ruimtes of incidenteel gebruik.
This product is only suitable for well
insulated spaces or occasional use.
Y2023
Advertisement
Table of Contents

Related Manuals for Warm Tech WTRIC1000-4


Summary of Contents for Warm Tech WTRIC1000-4
- Page 1 WTRIC1000-4 Ce produit est seulement approprié aux espaces WTRIC1500-5 bien isolés ou à l'usage occasionnel. WTRIC2000-7 Dit product is alleen geschikt voor goed geïsoleerde ruimtes of incidenteel gebruik. This product is only suitable for well insulated spaces or occasional use.
-
Page 2: Consignes De Securite Importantes
RADIATEUR INERTIE CERAMIQUE VEUILLEZ LIRE ET SAUVEGARDER CES INSTRUCTIONS. CONSIGNES DE SECURITE IMPORTANTES : • Cet appareil peut être utilisé par des enfants âgés de 8 ans et plus et des personnes avec des aptitudes physiques, sensorielles ou mentales réduites, ou ayant un manque d'expérience et de connaissances appropriées, à... - Page 3 • AVERTISSEMENT : Afin d'éviter une surchauffe, ne pas couvrir l'appareil de chauffage. • Maintenez l'appareil à une distance minimale d'un mètre des objets inflammables tels que des rideaux, textiles ... • ATTENTION : Afin d'éviter un danger dû à un réarmement intempestif du dispositif de coupure thermique, cet appareil ne doit pas être alimenté...
- Page 4 I / RACCORDEMENT ÉLECTRIQUE • Votre radiateur doit uniquement être installé dans une position fixe conformément aux règles d'installation nationales (pour la France, NFC 15100) • POUR USAGE INTÉRIEUR UNIQUEMENT • Cette installation doit être faite par un électricien qualifié afin d'éviter tout danger. ...
-
Page 5: Montage Mural
Montage mural Pour installer votre radiateur : - Utilisez les vis, chevilles et consoles fournies par le fabricant. - Dimensions de perçage, voir gabarit de perçage. - Lisez les instructions des étapes d'installation ci-dessous et vérifiez que le radiateur est bien positionné... -
Page 7: Spécification Technique
II / SPÉCIFICATION TECHNIQUE Alimentation électrique 230V ~ 50Hz Modèles WTRIC1000-4 = 1000W WTRIC1500-5 = 1500W WTRIC2000-7 = 2000W Classe d'isolation Classe II Classe de protection contre IPX0 l'eau Plage de réglage de 7~30 C° température Mode minuterie Système 24 heures... - Page 8 2 / Descriptif des opérations Avant la première utilisation, le radiateur doit être allumé au niveau de l'interrupteur mécanique à l'arrière de l'appareil Appuyez sur pour allumer l'appareil, appuyez sur la touche pour basculer entre les modes, en parcourant Confort , ECO , Antigel , Minuterie...
- Page 9 2.2 Mode Éco Appuyez sur pour basculer en mode Eco, puis appuyez sur et sur la touche pour régler le réglage de la température, par pas de 0,5 ℃. Le défaut est 15.5℃ Maintenez enfoncé pour accélérer. Lorsque l'appareil chauffe, l'icône de chauffage s'affiche à...
- Page 10 Réglage des minutes: Appuyez sur la touche pour régler. La plage réglable est de 0 à 59 min, par pas de 1 min Maintenez enfoncé pour accélérer. Réglage du jour de la semaine Appuyez pour ajuster de 1 à 7, en pas de 1 jour, maintenez enfoncé...
- Page 11 Mode capteur Lorsque l'appareil passe en mode capteur, si aucun être humain ou objet en mouvement n'est détecté, l'appareil passe automatiquement à un mode plus économe en énergie. S'il détecte des humains ou des objets en mouvement, il passe automatiquement à l'interface SENSOR MODE.
- Page 12 Verrouillage enfant Maintenez enfoncées les touches pendant 3S pour verrouiller l'affichage. L'icône apparaîtra et toutes les touches seront verrouillées sauf la clé Appuyez et maintenez enfoncées les touches pour 3S pour déverrouiller et l'icône disparaîtra. 3. Paramètres internes En état OFF, appuyez sur la touche pendant 5S pour démarrer les paramètres internes, appuyez sur la touche pour changer de mode - compensation de température (F0) →...
- Page 13 Fonction Ouvrir Fenêtre (F2) Appuyez sur les touches pour régler. Choisissez "OF" pour désactiver la détection, et choisissez "60" ou "90" pour l'activer. S'il est réglé sur "60", affiché comme Dans des conditions de chauffage, lorsque la température ambiante chute soudainement de 2 ℃ en 5 minutes, cela signifie que la fenêtre est ouverte dans cette pièce, l'appareil passe en mode antigel, il arrête de chauffer, se réchauffera après 60 minutes,...
-
Page 14: Maintenance
V / Maintenance : Toujours déconnecter l'appareil et le laisser complètement refroidir avant toute maintenance. 1. Utilisez un aspirateur pour retirer la poussière sur l'appareil. 2. Nettoyez l'extérieur de l'appareil avec un chiffon doux humidifié et séchez ensuite avec un chiffon sec. -
Page 15: Service Après-Vente Et Assistance
Vous trouverez des vues éclatées ainsi que des informations concernant les pièces de rechange également sous : www.eco-repa.com Les conseillers techniques et assistants WARM TECH sont à votre disposition pour répondre à vos questions concernant nos produits et leurs accessoires : sav@eco-repa.com... - Page 21 WARM TECH 81, rue de gozée 6110 Montigny-le-TilleulBelgique Tél : 0032 (0) 71 29 70 70 2023 Fabriqué en Chine...
- Page 22 KERAMISCHE INERTIERADIATOR GELIEVE DEZE INSTRUCTIES TE LEZEN EN TE BEWAREN BELANGRIJKE VEILIGHEIDSINSTRUCTIES: Dit toestel mag worden gebruikt door kinderen vanaf 8 jaar oud en • personen met verminderde fysische, zintuiglijke of mentale mogelijkheden of gebrek aan ervaring en kennis, als ze voldoende toezicht of instructies hebben gekregen betreffende het gebruik van het toestel op een veilige manier en de hierbij horende gevaren begrijpen.
- Page 23 ontvlambare objecten zoals gordijnen, textiel enz. WAARSCHUWING: Om een gevaar in gevolge een onachtzame reset • van de thermische onderbreker te voorkomen mag dit toestel niet worden geleverd met een externe schakelinrichting zoals een timer, of worden aangesloten op een stroomkring die regelmatig wordt aan- en uitgeschakeld door de utiliteit.
- Page 24 I / ELEKTRISCHE AANSLUITING • Uw olieradiator mag alleen worden geïnstalleerd in een vaste positie volgens de nationale installatieregels (voor Frankrijk, NFC 15100) • UITSLUITEND VOOR BINNENGEBRUIK BESTEMD • Deze installatie moet plaatsvinden door een erkende elektricien om eventueel gevaar te voorkomen.
- Page 25 Wandmontage Om uw olieradiator te installeren: - Gebruik de door de fabrikant meegeleverde schroeven, pluggen en beugels. - Voor de uitboorafmetingen moet u de boorsjabloon gebruiken. - Lees de onderstaande installatiestappeninstructies en zorg dat de radiator goed staat opgesteld in het huis.
-
Page 28: Technische Specificaties
II / TECHNISCHE SPECIFICATIES Voeding 230V~ 50Hz Modellen WTRIC1000-4 = 1000W WTRIC1500-5 = 1500W WTRIC2000-7 = 2000W Isolatieklasse klasse II Waterbeschermingsklasse IPX0 Temperatuurbereikinstelling 7~35 C° Timingmodus 24-urensysteem Weekmodus Man ~ Zon III / BEDIENING 1 / Beschrijving van het bedieningspaneel... - Page 29 2 / Beschrijving van operaties Voor het eerste gebruik moet de verwarming worden ingeschakeld met de mechanische schakelaar aan de achterkant van het apparaat Druk op om het apparaat in te schakelen, druk op de toets om tussen modi te schakelen, door te bladeren door Comfort , ECO , Antifreeze...
- Page 30 2.5 Eco-modus Druk op om over te schakelen naar de Eco- modus en druk vervolgens op en om de temperatuurinstelling aan te passen, in stappen van 0,5℃. Standaard is 15,5 ℃ Houd ingedrukt om te versnellen. Wanneer het apparaat aan het opwarmen is, verschijnt het verwarmingspictogram op het scherm;...
- Page 31 Tijd instelling: Druk op de toets om aan te passen. Het instelbereik is 0~23H, 1H stappen Houd ingedrukt om te versnellen. Minuut instelling: Druk op de toets om aan te passen. Het instelbare bereik is 0 tot 59 min, in stappen van 1 min.
- Page 32 Stel de tijd in terwijl de verwarming werkt. brandt 3s en gaat 1s uit in Comfort-modus; de gaat 3s uit en gaat 1s aan in Eco-modus. Bijvoorbeeld: de huidige tijd is 12:00 uur en de modus is Comfort-modus, pictogramweergave de tijdschaal (rood), de brandt gedurende 3S en gaat uit gedurende 1S, het (groene) pictogram...
- Page 33 Als er gedurende de derde 15 minuten niemand wordt gedetecteerd, daalt de temperatuur tot 2°C onder de instelling van de Economy-modus. Als er na 24 uur niemand thuis is, gaat de temperatuur in de vorstpreventiemodus. Zodra iemand wordt gedetecteerd, verandert de temperatuur in Economy-modus -18°C. ...
- Page 34 Sensormodus (F1) Druk de om de tijd in te stellen. Er zijn 4 opties - 15,30,45,60 minuten. Indien ingesteld op 30 minuten, weergegeven als Open Window-functie (F2) Druk op de toetsen om aan te passen. Kies "OF" om detectie uit te schakelen, en kies "60"...
- Page 35 IV / Resetten naar standaardwaarden Wanneer de stekker in het stopcontact zit, drukt u op de gedurende 10S om de fabrieksconfiguratie te resetten. Weergave op volledig scherm voor 3S aan en uit. druk op nogmaals om het apparaat in te schakelen, met weergave van comforttemperatuur - 19 ℃, ecotemperatuur - 15,5 ℃, tijd "0000", weekdag "1", P1-P7 is standaard Eco, temperatuurcompensatie - "0", open raamfunctie - "OF ", sensorfunctie - "15", limietfunctie - "OF", wifi - "ON", tijdsynchronisatie - "ON"...
- Page 36 Onze klantenservice beantwoordt uw vragen over reparatie en onderhoud van uw product en over vervangingsonderdelen. Explosietekeningen en informatie over vervangingsonderdelen vindt u ook op :www.eco-repa.com Het WARM TECH-team voor gebruiksadviezen helpt u graag bij vragen over onze producten en toebehoren : sav@eco-repa.com VII / GARANTIE...
- Page 42 WARM TECH 81, rue de gozée 6110 Montigny-le-Tilleul Belgique Tél : 0032 (0) 71 29 70 70 2023 Vervaardigd in China...
-
Page 43: Important Safety Instructions
CERAMIC INERTIA RADIATOR PLASE READ AND SAVE THESE INSTRUCTIONS IMPORTANT SAFETY INSTRUCTIONS: • This appliance can be used by children aged from 8 years and above and persons with reduced physical, sensory or mental capabilities or lack of experience and knowledge if they have been given supervision or instruction concerning use of the appliance in a safe way and understand the hazards involved. - Page 44 the thermal cut-out, this appliance must not be supplied through an external switching device, such as a timer, or connected to a circuit that is regularly switched on and off by the utility. • This heater is filled with a precise quantity of special oil. Repairs requiring opening of the oil container are only to be made by the manufacturer or his service agent who should be contacted if there is an oil leak.
- Page 45 I / ELECTRICAL CONNECTION • Your heater must only be installed in a fixed position in accordance with national installation rules (for France, NFC 15100) • INDOORS USE ONLY • This installation must be done by a qualified electrician to avoid any danger. ...
- Page 46 Wall Mounting To install your heater: - Use the screws, plugs and brackets supplied by the manufacturer. - Drilling dimensions see the drilling template. - Read the installation step instruction below and make sure the heater is well positioned in the house.
-
Page 47: Technical Specification
II / TECHNICAL SPECIFICATION Power supply 230V ~ 50Hz Models WTRIC1000-4 = 1000W WTRIC1500-5 = 1500W WTRIC2000-7 = 2000W Insulation class Class II Water protection class IPX0 Temperature range setting 7~35 C° Timing Mode 24-hours system Week mode Mon~ Sun... -
Page 48: Operation
III / OPERATION 1 / Description of the control panel Operation descriptions to turn on the device, press key to switch between modes, browsing through Comfort , ECO , Anti-freeze , Timer and Sensor 2.1 Comfort Mode to start Comfort mode, and tap key to adjust the temperature setting, stepping by 0.5 ℃. - Page 49 2.2 Eco Mode to switch Eco mode, and tap key to adjust the temperature setting, stepping by 0.5 ℃. Default is 15.5℃ Hold and down to speed it up. When the device is heating, heating icon will display on the screen; if not heating, the icon will disappear 2.3 Anti-freeze Mode to switch Anti-freeze mode.
- Page 50 Minute setting: key to adjust. Adjustable range is 0~59min, stepping by 1min Hold and down to speed it up. Day of week setting : to adjust from 1 to 7, stepping by 1 day Hold and down to speed it up Day programming setting: P1-P7 is defaulted Eco mode, shown as In the picture,1—day of the week, range 1~7;...
- Page 51 Sensor Mode When the device switches to sensor mode, if no human or moving objects are detected, the device will automatically shift to a more energy- efficient mode. If detecting human or moving objects, it automatically jumps to the SENSOR MODE interface.
- Page 52 Then in the next 15 minutes if somebody is detected – the temperature will change to 1°c below the Comfort mode setting. And the next 15 minutes after this if somebody is detected – the temperature will change back to the Comfort mode setting.
-
Page 53: Reset To Defaults
Open Window function (F2) keys to adjust. Choose “OF” to disable detection, and choose “60” or“90” to enable it. If set “60”, shown Under heating condition, when ambient temperature suddenly drops 2 ℃ in 5 minutes, it means the window is open in this room, the device switches to Anti-freeze mode, it stops heating, will re-heat after 60 minutes, if temperature keeps dropping, the device will stop heating again, and repeat the cycle. - Page 54 IV / Maintenance: Always disconnect the appliance and let it completely cool before any maintenance. 1. Use a vacuum cleaner to remove dust on the unit. 2. Clean the outside of the unit with a soft damp cloth and then dry it with a dry cloth. 3.
-
Page 55: Service Department
Our after-sales service responds to your questions concerning maintenance and repair of your product as well as spare parts. Exploded views and information on spare parts can also be found under:www.eco-repa.com WARM TECH application service team will gladly answer questions concerning our products and their accessories : sav@eco-repa.com VII / GUARANTEE Refer to the enclosed guarantee conditions for the terms and conditions of guarantee. - Page 63 Carte d'alimentation / Voedingskaart / Power Board Panneau d'affichage / Aanplakbord / Display board...
- Page 64 WTRIC1000-4 SN : 2023.05:001~200 WTRIC1500-5 SN : 2023.05:001~250 WTRIC2000-7 SN : 2023.05:001~300 20.04.14522 Date d’arrivée – Aankomstdatum - Arrival date – Ankunftsdatum: 21/08/2023 Année de production - Productiejaar - Production year - Fertigungsjahr : 2023 Regulation (EU) 2015/1188 EN IEC 62311 :2020...
- Page 65 81, rue de Gozée 6110 Montigny-le-Tilleul Belgique Tél : 0032 71 29 70 70 S.A.V sav@eco-repa.com Fabriqué en Chine - Vervaardigd in China - Made in China 2023 Importé par / Imported by : ELEM 81, rue de gozée 6110 Montigny-le-Tilleul BELGIQUE info@eco-repa.com...
Need help?
Do you have a question about the WTRIC1000-4 and is the answer not in the manual?
Questions and answers