
Related Manuals for Siemens VG011DBR0M


Summary of Contents for Siemens VG011DBR0M
- Page 1 Built-in oven اﻟﻔﺮن اﻟﻤﺪﻣﺞ VG011DBR0M Instruction manual ..Built-in oven [en] اﻟﻔﺮن اﻟﻤﺪﻣﺞ......دﻟﻴﻞ اﻻﺳﺘﻌﻤﺎل [ar]...
-
Page 3: Table Of Contents
Environmental protection ....7 www.siemens-home.bsh-group.com and in the online Saving energy ....... 7 shop www.siemens-home.bsh-group.com/eshops... -
Page 4: Intended Use
Intended use 8Intended use (Important safety information R ead these instructions carefully. Only then I n t e n d e d u s e will you be able to operate your appliance Warning – WHAT TO DO IF YOU SMELL safely and correctly. -
Page 5: General Information
Important safety information General information Warning – Risk of scalding! The accessible parts become hot during ■ Warning – Risk of fire! operation. Never touch the hot parts. Keep Combustible objects that are left in the children at a safe distance. ■... -
Page 6: Causes Of Damage
Causes of damage Warning – Risk of electric shock! ]Causes of damage Incorrect repairs are dangerous. Repairs ■ may only be carried out and damaged G eneral information power cables replaced by one of our C a u s e s o f d a m a g e trained after-sales technicians. -
Page 7: Environmental Protection
Environmental protection Open the appliance door as infrequently as possible 7Environmental protection ■ when the appliance is in use. Y our new appliance is particularly energy-efficient. E n v i r o n m e n t a l p r o t e c t i o n Here you can find tips on how to save even more energy when using the appliance, and how to dispose of your appliance properly. -
Page 8: Getting To Know Your Appliance
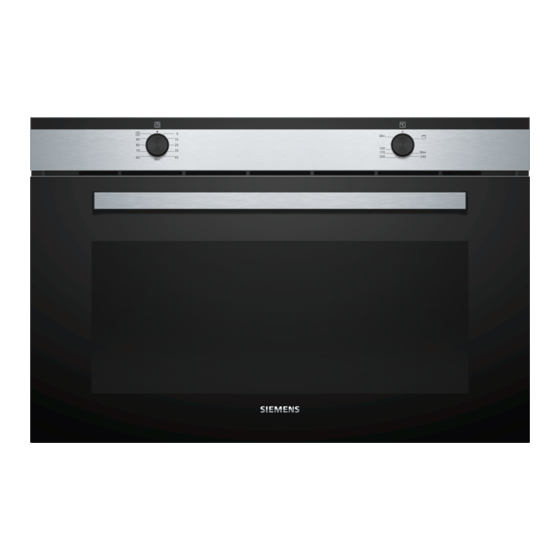
Getting to know your appliance Depending on the appliance model, individual Note: *Getting to know your details and colours may differ. appliance Control panel I n this section, we will explain the indicators and You can set your appliance's various functions on the G e t t i n g t o k n o w y o u r a p p l i a n c e controls. -
Page 9: Temperature Selector
Getting to know your appliance Temperature selector Use the temperature selector to set the temperature or grill setting. Operating mode "Off" position In this position, the oven is switched off. Þ Min. - max. Temperature Oven on, temperature in the cooking compartment in °C Full-surface grill For grilling flat items, such as steaks or sausages, for making toast, and for browning food. -
Page 10: Accessories
Accessories Locking function _Accessories The accessories can be pulled out approximately halfway before they lock in place.The locking function Y our appliance is accompanied by a range of prevents the accessories from tilting when they are A c c e s s o r i e s accessories. -
Page 11: Before Using For The First Time
Before using for the first time KBefore using for the first 1Operating the appliance time S witching the oven on and off O p e r a t i n g t h e a p p l i a n c e I n this section, you can find out what you must do Switching on the oven B e f o r e u s i n g f o r t h e f i r s t t i m e... -
Page 12: Time-Setting Options
Time-setting options OTime-setting options DCleaning S etting the timer W ith good care and cleaning, your appliance will retain T i m e - s e t t i n g o p t i o n s C l e a n i n g its appearance and remain fully functioning for a long The short-term timer has no effect on how the oven time to come. -
Page 13: Surfaces In The Cooking Compartment
Cleaning Cleaning enamel surfaces Appliance interior Clean the smooth enamel surfaces with a dish cloth Glass cover for Hot soapy water: and hot soapy water or a vinegar solution. Then dry them with a soft cloth. the interior light- Clean with a dish cloth and then dry with a soft cloth. -
Page 14: Rails
Rails qAppliance door pRails D etaching the shelf supports W ith good care and cleaning, your appliance will retain R a i l s A p p l i a n c e d o o r its appearance and remain fully functional for a long The shelf supports are each fixed to the side panels of time to come. -
Page 15: Removing And Fitting The Appliance Door
Appliance door Remove the middle panel. Removing and fitting the appliance door If the oven is very heavily soiled, the oven door can be removed for easier cleaning. Normally, however, this is not necessary. Removing the appliance door Open the oven door fully. Lock the two hinges on the left and right using the locking pin (a). -
Page 16: Trouble Shooting
Trouble shooting 3Trouble shooting T r o u b l e s h o o t i n g Fault Possible cause Notes/remedy The appliance does not work The plug is not plugged into the mains Connect the appliance to the power supply Power cut Check whether other kitchen appliances are working The circuit breaker is faulty... -
Page 17: Customer Service
Customer service 4Customer service O ur after-sales service is there for you if your appliance C u s t o m e r s e r v i c e needs to be repaired. We will always find an appropriate solution, also in order to avoid after-sales personnel having to make unnecessary visits. -
Page 18: Tested For You In Our Cooking Studio
Tested for you in our cooking studio Tips for using your appliance JTested for you in our Here you will find a selection of tips on ovenware and cooking studio preparation methods. Notes A lot of steam can build up in the cooking N ote: Use the accessories provided. - Page 19 Tested for you in our cooking studio Tips for Roasting and Braising The roast is too dark and the crack- Check the shelf position and temperature. Select a lower temperature the next time and reduce the roasting ling is burned in places, and/or the time if necessary.
- Page 20 اﻷﻃﺒﺎق اﻟﺘﻲ ﺗﻢ اﺧﺘﺒﺎرهﺎ ﻓﻲ ﺳﺘﻮدﻳﻮ اﻟﻄﻬﻲ اﻟﺨﺎص ﺑﻨﺎ ﻧﺼﺎﺋﺢ ﺑﺨﺼﻮص اﻟﺘﺤﻤﻴﺮ واﻟﻄﻬﻲ ﻋﻠﻰ ﻧﺎر هﺎدﺋﺔ ﺗﺤﻘﻖ ﻣﻦ ﻣﺴﺘﻮى اﻹدﺧﺎل ودرﺟﺔ اﻟﺤﺮارة. ﻗﻢ ﻓﻲ اﻟﻤﺮة اﻟﻘﺎدﻣﺔ ﺑﺎﺧﺘﻴﺎر درﺟﺔ ﺣﺮارة أﻗﻞ ﻧﺴﺒﻴﺎ وﺗﻘﺼﻴﺮ ﻣﺪة اﻟﺘﺤﻤﻴﺮ اآﺘﺴﺐ اﻟﻠﺤﻢ ﻟﻮ ﻧ ًﺎ ﺑﻨ ﻴ ًﺎ ﻗﺎﺗ ﻤ ًﺎ ﻟﻠﻐﺎﻳﺔ .ﻋﻨﺪ...
- Page 21 اﻷﻃﺒﺎق اﻟﺘﻲ ﺗﻢ اﺧﺘﺒﺎرهﺎ ﻓﻲ ﺳﺘﻮدﻳﻮ اﻟﻄﻬﻲ اﻟﺨﺎص ﺑﻨﺎ ﻧﺼﺎﺋﺢ اﻻﺳﺘﺨﺪام اﻷﻃﺒﺎق اﻟﺘﻲ ﺗﻢ اﺧﺘﺒﺎرهﺎ ﻓﻲ ﺳﺘﻮدﻳﻮ .ﺗﺠﺪ هﻨﺎ ﻣﺠﻤﻮﻋﺔ ﻣﻦ اﻟﻨﺼﺎﺋﺢ ﺣﻮل أواﻧﻲ اﻟﻄﻬﻲ وﻃﺮق اﻟﺘﺤﻀﻴﺮ اﻟﻄﻬﻲ اﻟﺨﺎص ﺑﻨﺎ ﻣﻼﺣﻈﺎت اﺳﺘﺨﺪم اﻟﻜﻤﺎﻟﻴﺎت اﻟﻤﻮردة ﻣﻊ اﻟﺠﻬﺎز. وﻳﻤﻜﻨﻚ اﻟﺤﺼﻮل ﻋﻠﻰ اﻟﻜﻤﺎﻟﻴﺎت ■...
- Page 22 ﺧﺪﻣﺔ اﻟﻌﻤﻼء ﺧﺪﻣﺔ اﻟﻌﻤﻼء .إذا اﺣﺘﺎج ﺟﻬﺎزك ﻟﻺﺻﻼح، ﻓﻤﺮآﺰﻧﺎ ﻟﺨﺪﻣﺔ اﻟﻌﻤﻼء هﻮ وﺟﻬﺘﻚ اﻟﻤﻨﺎﺳﺒﺔ ﺧ ﺪ ﻣ ﺔ ا ﻟ ﻌ ﻤ ﻼ ء ﻧﺤﻦ ﻧﺒﺤﺚ داﺋ ﻤ ًﺎ ﻋﻦ اﻟﺤﻞ اﻟﻤﻨﺎﺳﺐ ﻟﻨﺠﻨﺒﻚ أﻳﺔ زﻳﺎرات ﻏﻴﺮ ﺿﺮورﻳﺔ ﻣﻦ .ﻓﻨﻲ ﺧﺪﻣﺔ اﻟﻌﻤﻼء ورﻗﻢ...
- Page 23 اﻻﺧﺘﻼﻻت، ﻣﺎ اﻟﻌﻤﻞ؟ اﻻﺧﺘﻼﻻت، ﻣﺎ اﻟﻌﻤﻞ؟ ا ﻻ ﺧ ﺘ ﻼ ﻻ ت ، ﻣ ﺎ ا ﻟ ﻌ ﻤ ﻞ ؟ إرﺷﺎدات/ﺣﻠﻮل اﻟﺴﺒﺐ اﻟﻤﺤﺘﻤﻞ اﻟﺨﻠﻞ ﻗﻢ ﺑﺘﻮﺻﻴﻞ اﻟﺠﻬﺎز ﺑﺎﻟﺸﺒﻜﺔ اﻟﻜﻬﺮﺑﺎﺋﻴﺔ اﻟﻘﺎﺑﺲ ﻏﻴﺮ ﻣﻮﺿﻮع ﻓﻲ اﻟﻤﻘﺒﺲ اﻟﻜﻬﺮﺑﺎﺋﻲ اﻟﺠﻬﺎز ﻻ ﻳﻌﻤﻞ ﺗﺤﻘﻖ...
- Page 24 ﺑﺎب اﻟﺠﻬﺎز ﻓﻚ وﺗﺮآﻴﺐ ﺑﺎب اﻟﺠﻬﺎز .اﺧﻠﻊ اﻟﺰﺟﺎج اﻷوﺳﻂ .ﻳﻤﻜﻦ ﺧﻠﻊ ﺑﺎب اﻟﻔﺮن ﻓﻲ ﺣﺎﻟﺔ اﻻﺗﺴﺎﺧﺎت اﻟﻌﻨﻴﺪة ﻟﻀﻤﺎن ﻣﺴﺘﻮى ﺗﻨﻈﻴﻒ أﻓﻀﻞ .وﻻ ﻧﻨﺼﺢ ﺑﺬﻟﻚ ﻣﻊ اﻻﺗﺴﺎﺧﺎت اﻟﻌﺎدﻳﺔ ﻓﻚ ﺑﺎب اﻟﺠﻬﺎز .اﻓﺘﺢ ﺑﺎب اﻟﻔﺮن ﺗﻤﺎﻣﺎ ﻗﻢ ﺑﺘﺜﺒﻴﺖ اﻟﻤﻔﺼﻠﺘﻴﻦ اﻟﻴﺴﺮى واﻟﻴﻤﻨﻰ ﺑﺨﺎﺑﻮر اﻟﺘﺄﻣﻴﻦ .ﻳﺠﺐ...
- Page 25 اﻟﻘﻀﺒﺎن ﺑﺎب اﻟﺠﻬﺎز اﻟﻘﻀﺒﺎن ﻓﻚ اﻟﻘﻀﺒﺎن اﻟﻌﻨﺎﻳﺔ اﻟﺠﻴﺪة ﺑﺠﻬﺎزك وﺗﻨﻈﻴﻔﻪ ﺑﺎهﺘﻤﺎم ﻳﺤﺎﻓﻆ ﻋﻠﻰ ﺟﻤﺎﻟﻪ وآﻔﺎءﺗﻪ اﻟﻮﻇﻴﻔﻴﻪ ﺑ ﺎ ب ا ﻟ ﺠ ﻬ ﺎ ز ا ﻟ ﻘ ﻀ ﺒ ﺎ ن .ﻟﻔﺘﺮة ﻃﻮﻳﻠﺔ. ﺗﺘﻌﺮف هﻨﺎ ﻋﻠﻰ آﻴﻔﻴﺔ ﺗﻨﻈﻴﻒ ﺑﺎب اﻟﺠﻬﺎز آﻞ...
- Page 26 اﻟﺘﻨﻈﻴﻒ أﺳﻄﺢ ﺣﻴﺰ اﻟﻄﻬﻲ اﻟﺠﻬﺎز ﻣﻦ اﻟﺪاﺧﻞ اﻟﺠﺪار اﻟﺨﻠﻔﻲ واﻷﺟﺰاء اﻟﺠﺎﻧﺒﻴﺔ ﻓﻲ ﺣﻴﺰ اﻟﻄﻬﻲ ذاﺗﻴﺔ اﻟﺘﻨﻈﻴﻒ. وﻳﻤﻜﻨﻚ :ﻣﺤﻠﻮل ﺻﺎﺑﻮﻧﻲ ﺳﺎﺧﻦ اﻟﻐﻄﺎء اﻟﺰﺟﺎﺟﻲ .ﻣﻌﺮﻓﺔ ذﻟﻚ ﻣﻦ ﺧﻼل ﺧﺸﻮﻧﺔ اﻟﺴﻄﺢ ﻗﻢ ﺑﺎﻟﺘﻨﻈﻴﻒ ﺑﻔﻮﻃﺔ ﺗﻨﻈﻴﻒ، ﺛﻢ ﻗﻢ ﺑﺎﻟﺘﺠﻔﻴﻒ ﺑﻌﺪ ذﻟﻚ ﻹﺿﺎءة ﺣﻴﺰ .أرﺿﻴﺔ ﺣﻴﺰ اﻟﻄﻬﻲ واﻟﺴﻘﻒ ﻣﻄﻠﻴﺎن ﺑﻄﺒﻘﺔ ﻣﻴﻨﺎ، وﻟﻬﺎ أﺳﻄﺢ ﻣﻠﺴﺎء .ﺑﺎﺳﺘﺨﺪام...
- Page 27 وﻇﺎﺋﻒ اﻟﻮﻗﺖ اﻟﺘﻨﻈﻴﻒ وﻇﺎﺋﻒ اﻟﻮﻗﺖ ﺿﺒﻂ ﻣﻴﻘﺎﺗﻲ اﻟﻮﻗﺖ اﻟﻘﺼﻴﺮ اﻟﻌﻨﺎﻳﺔ اﻟﺠﻴﺪة ﺑﺠﻬﺎزك وﺗﻨﻈﻴﻔﻪ ﺑﺎهﺘﻤﺎم ﻳﺤﺎﻓﻆ ﻋﻠﻰ ﺟﻤﺎﻟﻪ وآﻔﺎءﺗﻪ اﻟﻮﻇﻴﻔﻴﻪ ا ﻟ ﺘ ﻨ ﻈ ﻴ ﻒ و ﻇ ﺎ ﺋ ﻒ ا ﻟ ﻮ ﻗ ﺖ ﻟﻔﺘﺮة ﻃﻮﻳﻠﺔ. وﻧﻮﺿﺢ ﻟﻚ ﻓﻴﻤﺎ ﻳﻠﻲ آﻴﻔﻴﺔ اﻟﻌﻨﺎﻳﺔ ﺑﺠﻬﺎزك وﺗﻨﻈﻴﻔﻪ ﺑﻄﺮﻳﻘﺔ ﻻ...
- Page 28 ﻗﺒﻞ اﻻﺳﺘﺨﺪام ﻷول ﻣﺮة اﺳﺘﻌﻤﺎل اﻟﺠﻬﺎز ﻗﺒﻞ اﻻﺳﺘﺨﺪام ﻷول ﻣﺮة ﺗﺸﻐﻴﻞ وإﻳﻘﺎف اﻟﻔﺮن ﺳﺘﺘﻌﺮف ﻣﻦ ﺧﻼل هﺬا اﻟﺠﺰء ﻋﻠﻰ ﻣﺎ ﻳﺠﺐ اﻟﻘﻴﺎم ﺑﻪ ﻗﺒﻞ اﺳﺘﺨﺪام اﻟﻔﺮن ﻓﻲ ا ﺳ ﺘ ﻌ ﻤ ﺎ ل ا ﻟ ﺠ ﻬ ﺎ ز ﻗ...
- Page 29 اﻟﻜﻤﺎﻟﻴﺎت وﻇﻴﻔﺔ اﻟﺘﺜﺒﻴﺖ اﻟﻜﻤﺎﻟﻴﺎت .ﻣﻦ اﻟﻤﻤﻜﻦ إﺧﺮاج اﻟﻜﻤﺎﻟﻴﺎت إﻟﻰ ﻧﺼﻒ اﻟﻤﺴﺎﻓﺔ ﺗﻘﺮﻳﺒﺎ ﺣﺘﻰ ﺗﺜﺒﺖ ﻓﻲ ﻣﻜﺎﻧﻬﺎ ﺗﻤﻨﻊ وﻇﻴﻔﺔ اﻟﺘﺜﺒﻴﺖ اﻧﻘﻼب اﻟﻜﻤﺎﻟﻴﺎت ﻋﻨﺪ ﺳﺤﺒﻬﺎ ﻟﻠﺨﺎرج. وﻳﺠﺐ إدﺧﺎل ﻣﺮﻓﻖ ﺑﺠﻬﺎزك آﻤﺎﻟﻴﺎت ﻣﺘﻌﺪدة. ﺗﺤﺼﻞ هﻨﺎ ﻋﻠﻰ ﻧﻈﺮة ﻋﺎﻣﺔ ﻋﻦ اﻟﻜﻤﺎﻟﻴﺎت اﻟﻜﻤﺎﻟﻴﺎت ﻓﻲ ﺣﻴﺰ اﻟﻄﻬﻲ ﺑﻄﺮﻳﻘﺔ ﺻﺤﻴﺤﺔ ﺣﺘﻰ ﺗﻌﻤﻞ ﺧﺎﺻﻴﺔ اﻟﺤﻤﺎﻳﺔ ا...
- Page 30 اﻟﺘﻌﺮف ﻋﻠﻰ اﻟﺠﻬﺎز ﻣﻔﺘﺎح اﺧﺘﻴﺎر درﺟﺔ اﻟﺤﺮارة ﻳﻤﻜﻦ ﺑﺎﺳﺘﺨﺪام ﻣﻔﺘﺎح اﺧﺘﻴﺎر درﺟﺔ اﻟﺤﺮارة ﺿﺒﻂ درﺟﺔ اﻟﺤﺮارة أو درﺟﺔ .اﻟﺸﻮاء اﻻﺳﺘﺨﺪام ﻃﺮﻳﻘﺔ اﻟﺘﺸﻐﻴﻞ .اﻟﻔﺮن ﻣﺘﻮﻗﻒ وﺿﻊ اﻟﺼﻔﺮ Þ م اﻟﻔﺮن ﻣﺸﻐﻞ، درﺟﺔ اﻟﺤﺮارة ﻓﻲ ﺣﻴﺰ اﻟﻄﻬﻲ ﺑﺎﻟﺪرﺟﺔ اﻟﻤﺌﻮﻳﺔ درﺟﺔ اﻟﺤﺮارة - اﻟﺤﺪ اﻷدﻧﻰ °...
- Page 31 اﻟﺘﻌﺮف ﻋﻠﻰ اﻟﺠﻬﺎز ﻧﻄﺎق اﻻﺳﺘﻌﻤﺎل اﻟﺘﻌﺮف ﻋﻠﻰ اﻟﺠﻬﺎز ﻳﻤﻜﻨﻚ ﻋﻦ ﻃﺮﻳﻖ ﻧﻄﺎق اﻻﺳﺘﻌﻤﺎل ﺿﺒﻂ اﻟﻮﻇﺎﺋﻒ اﻟﻤﺨﺘﻠﻔﺔ ﻟﺠﻬﺎزك. ﺗﺮى .هﻨﺎ ﻋﺮ ﺿ ًﺎ ﻋﺎ ﻣ ًﺎ ﻟﻨﻄﺎق اﻻﺳﺘﻌﻤﺎل ووﺿﻌﻴﺔ ﻋﻨﺎﺻﺮ اﻻﺳﺘﻌﻤﺎل ﻧﺸﺮح ﻟﻚ ﻓﻲ هﺬا اﻟﻔﺼﻞ اﻟﺒﻴﺎﻧﺎت وﻋﻨﺎﺻﺮ اﻻﺳﺘﻌﻤﺎل. آﻤﺎ ﺗﺘﻌﺮف أﻳﻀﺎ ا...
- Page 32 ﺣﻤﺎﻳﺔ اﻟﺒﻴﺌﺔ .ﻻ ﺗﻔﺘﺢ ﺑﺎب اﻟﺠﻬﺎز ﻗﺪر اﻹﻣﻜﺎن أﺛﻨﺎء اﻟﺘﺸﻐﻴﻞ ■ ﺣﻤﺎﻳﺔ اﻟﺒﻴﺌﺔ ﺟﻬﺎزك اﻟﺠﺪﻳﺪ ذو ﻓﻌﺎﻟﻴﺔ وآﻔﺎءة ﺧﺎﺻﺔ ﻓﻲ اﺳﺘﻬﻼك اﻟﻄﺎﻗﺔ. ﺗﺠﺪ هﻨﺎ ﻧﺼﺎﺋﺢ ﺣ ﻤ ﺎ ﻳ ﺔ ا ﻟ ﺒ ﻴ ﺌ ﺔ ﺣﻮل آﻴﻔﻴﺔ اﻟﺘﻌﺎﻣﻞ ﻣﻊ ﺟﻬﺎزك واﻟﺘﻮﻓﻴﺮ ﻓﻲ اﻟﻄﺎﻗﺔ وآﻴﻔﻴﺔ اﻟﺘﺨﻠﺺ ﻣﻦ .اﻟﺠﻬﺎز...
- Page 33 أﺳﺒﺎب اﻷﺿﺮار !ﺧﻄﺮ اﻟﺼﻌﻖ اﻟﻜﻬﺮﺑﺎﺋﻲ – ﺗﺤﺬﻳﺮ أﺳﺒﺎب اﻷﺿﺮار .ﺗﻨﻄﻮي أﻋﻤﺎل اﻹﺻﻼح ﻏﻴﺮ اﻟﺴﻠﻴﻤﺔ ﻓﻨﻴﺎ ﻋﻠﻰ أﺧﻄﺎر ■ ﻳﺠﻮز ﺗﻨﻔﻴﺬ أﻋﻤﺎل اﻹﺻﻼح وﺗﻐﻴﻴﺮ ﺗﻮﺻﻴﻼت اﻟﻜﻬﺮﺑﺎء ﻻ ﻧﻘﺎط ﻋﺎﻣﺔ أ ﺳ ﺒ ﺎ ب ا ﻷ ﺿ ﺮ ا ر اﻟﻤﺘﻀﺮرة إﻻ ﺑﻤﻌﺮﻓﺔ ﻓﻨﻲ ﺧﺪﻣﺔ ﻋﻤﻼء ﻣﺪرب ﻣﻦ ﻗ ِﺒﻠﻨﺎ. إذا !ﺗﻨﺒﻴﻪ...
- Page 34 إرﺷﺎدات اﻷﻣﺎن اﻟﻤﻬﻤﺔ ﻧﻘﺎط ﻋﺎﻣﺔ !ﺧﻄﺮ اﻹﺻﺎﺑﺔ ﺑﺤﺮوق – ﺗﺤﺬﻳﺮ .اﻷﺟﺰاء اﻟﺘﻲ ﻳﻤﻜﻦ اﻟﻮﺻﻮل إﻟﻴﻬﺎ ﺗﺴﺨﻦ أﺛﻨﺎء اﻟﺘﺸﻐﻴﻞ ■ !ﺧﻄﺮ اﻟﺤﺮﻳﻖ – ﺗﺤﺬﻳﺮ .ﺗﻠﻤﺲ أﺑﺪا اﻷﺟﺰاء اﻟﺴﺎﺧﻨﺔ. وأﺑﻌﺪ اﻷﻃﻔﺎل ﻋﻦ اﻟﺠﻬﺎز ﻻ اﻟﻤﻮاد اﻟﻘﺎﺑﻠﺔ ﻟﻼﺷﺘﻌﺎل اﻟﺘﻲ ﻳﺘﻢ ﺗﺨﺰﻳﻨﻬﺎ ﻓﻲ ﺣﻴﺰ اﻟﻄﻬﻲ ■...
- Page 35 اﻻﺳﺘﻌﻤﺎل اﻟﻤﻄﺎﺑﻖ ﻟﻠﺘﻌﻠﻴﻤﺎت إرﺷﺎدات اﻷﻣﺎن اﻟﻤﻬﻤﺔ اﻻﺳﺘﻌﻤﺎل اﻟﻤﻄﺎﺑﻖ ﻟﻠﺘﻌﻠﻴﻤﺎت اﻟﺘﺼﺮف ﻓﻲ ﺣﺎﻟﺔ ﺷﻢ راﺋﺤﺔ ﻏﺎز – ﺗﺤﺬﻳﺮ اﻗﺮأ هﺬا اﻟﺪﻟﻴﻞ ﺑﻌﻨﺎﻳﺔ. ﻋﻨﺪﺋﺬ ﻓﻘﻂ ﺳﻴﻤﻜﻨﻚ اﺳﺘﺨﺪام اﻟﺠﻬﺎز ﺑﺸﻜﻞ إ ر ﺷ ﺎ د ا ت ا ﻷ ﻣ ﺎ ن ا ﻟ ﻤ ﻬ ﻤ ﺔ ا...
- Page 36 ....اﻟﺘﺨﻠﺺ ﻣﻦ اﻟﻤﺨﻠﻔﺎت ﺑﻄﺮﻳﻘﺔ ﻻ ﺗﻀﺮ ﺑﺎﻟﺒﻴﺌﺔ :ﻋﻠﻰ ﻣﻮﻗﻊ اﻹﻧﺘﺮﻧﺖ www.siemens-home.bsh-group.com :اﻟﻤﺘﺠﺮ اﻹﻟﻜﺘﺮوﻧﻲ ﻋﻠﻰ ﻣﻮﻗﻊ اﻹﻧﺘﺮﻧﺖ وﻓﻲ ......
- Page 40 Manufactured by BSH Hausgeräte GmbH under Trademark License of Siemens AG وﻳﺤﻤﻞ ﺗﺮﺧﻴﺺ اﻟﻌﻼﻣﺔ اﻟﺘﺠﺎرﻳﺔ ﺳﻴﻤﻨﺰ ﺗﻢ اﻟﺘﺼﻨﻴﻊ ﺑﻮاﺳﻄﺔ اﻻﺳﻢ اﻟﻘﺎﻧﻮﻧﻲ ﻟﻤﺠﻤﻮﻋﺔ ﺑﻲ إس إﺗﺶ Siemens AG BSH Hausgeräte GmbH *9001449525* 9001449525 990701...
Need help?
Do you have a question about the VG011DBR0M and is the answer not in the manual?
Questions and answers