Advertisement
Quick Links
Advertisement

Related Manuals for EMC Celerra NX4


Summary of Contents for EMC Celerra NX4
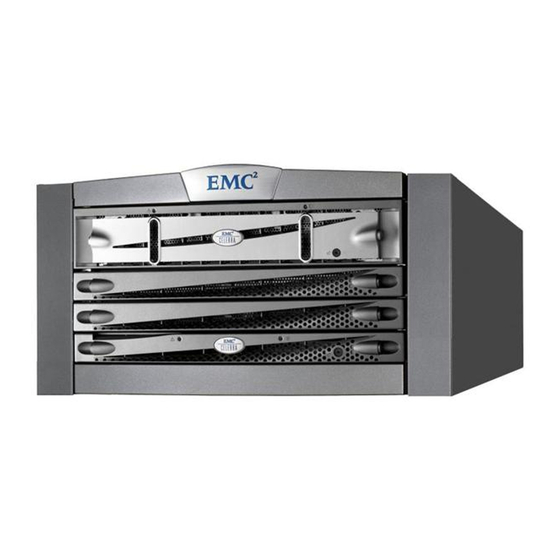
- Page 1 ® Celerra ® NX4 System Dual Blade Installation Guide Version 6.0 P/N 300-010-728 Rev A01...
- Page 2 EMC believes the information in this publication is accurate as of its publication date. The information is subject to change without notice. THE INFORMATION IN THIS PUBLICATION IS PROVIDED “AS IS.” EMC CORPORATION MAKES NO REPRESENTATIONS OR WARRANTIES OF ANY KIND WITH RESPECT TO THE INFORMATION IN THIS PUBLICATION, AND SPECIFICALLY DISCLAIMS IMPLIED WARRANTIES OF MERCHANTABILITY OR FITNESS FOR A PARTICULAR PURPOSE.
-
Page 3: Before You Begin
Before you begin Welcome The system that you are about to install comes factory pre-loaded with EMC ® Celerra ® ® ® Network Server software (DART) and CLARiiON storage array software (FLARE Software upgrade If you bought a software maintenance contract, you are entitled to a software upgrade that is performed only after the installation, Celerra Startup Assistant (CSA), and registration have successfully completed. -
Page 4: Installation Overview
Step 3. Install the Celerra Startup Assistant. Step 1. Order the Celerra NX4 and prepare the site. Step 4. Register with the service provider. Implementation Step 5. Configure for production. CNS-001409 For more information, refer to Celerra Tools on http://Powerlink.EMC.com... - Page 5 25-30, and verify that the site is properly prepared for the installation of your Celerra NX4. About 20 minutes. 2. If your Celerra NX4 is to be installed in a customer-supplied rack, use this document to unpack the system from the disposable mini-rack shipping container, and install the system in your available rack.
- Page 6 Unpacking your Celerra NX4 system If your Celerra NX4 system was purchased and shipped in an EMC 40 unit cabinet of 70 in., where 1 unit =1.75 in., start on page 12 of this document and confi rm that the cables are installed correctly and securely.
- Page 7 Environmental compliance information and notices Accessory box Standby power supply interconnect Crossover cables cable kit Fibre Channel cables Ethernet cables for internal network Power cables Bezels Serial cables Hardware for non-factory installs For more information, refer to Celerra Tools on http://Powerlink.EMC.com...
- Page 8 Te S PA A dd : 19 : 19 n t r 3. The ganged rails remain in the mini-rack c l o shipping container at this time. B l a For more information, refer to Celerra Tools on http://Powerlink.EMC.com...
- Page 9 This allows some Install 2 screws adjustment space on each side for the installation of the rack to of the components. hold the rail Front of your rack CNS-001411MOD in place. For more information, refer to Celerra Tools on http://Powerlink.EMC.com...
- Page 10 Install the lower screw first with 2 screws on each side. Inside Snap on bezels The indentation goes Press to install the bezel, toward the inside of then release. the rack. CNS-001430 For more information, refer to Celerra Tools on http://Powerlink.EMC.com...
- Page 11 2 port 10 GbE optical Ethernet and 2 port copper 10/100 10/100 fxg 0 fxg 1 fxg 0 fxg 1 FRU label FRU label 046-003-710_A01 046-003-710_A01 Blade 3 Blade 2 CNS-001439 For more information, refer to Celerra Tools on http://Powerlink.EMC.com...
- Page 12 Cabling EMC Celerra NX4 system Cable the Celerra NX4 dual blade Fibre Channel ports. Blade 2 SP A 2 AUX Blade 2 SP B 2 AUX Blade 3 SP A 3 AUX SP B 3 AUX Blade 3 SP A 3 AUX...
- Page 13 Cabling EMC Celerra NX4 system Cable the Celerra NX4 standby power supply (SPS) and MODEM ports. Modem SP A SPS A SP B SPS B Disk processor enclosure (DPE) SP A SP B MODEM plug Control Station (CS) SPS B...
- Page 14 Cabling EMC Celerra NX4 system Cable the Celerra NX4 dual blade private local area network (LAN) ports. Blade 2 Blade 2 SP A Blade 3 SP B Blade 3 Disk processor enclosure (DPE) SP B SP A Control Station (CS)
- Page 15 Cabling EMC Celerra NX4 system Cable the Celerra NX4 dual blade public local area network (LAN) ports. MGMT To public LAN To public LAN To public LAN Disk processor SP A enclosure (DPE) SP B Control Station (CS) MGMT SPS A...
- Page 16 Cabling EMC Celerra NX4 system Cable up to four additional Celerra NX4 optional disk-array enclosures (DAE). Pull/release tab Pull/release tab Optional disk-array enclosure (DAE) Optional DAE Optional DAE Optional DAE Disk processor enclosure SP B SP A MODEM Control Station...
- Page 17 EMC Celerra NX4 system notes For more information, refer to Celerra Tools on http://Powerlink.EMC.com...
- Page 18 8. Connect the Control Station (CS) to the left PDP. If the system power LED does not light up, take the bezel off of the front of the CS and press the power button. For more information, refer to Celerra Tools on http://Powerlink.EMC.com...
- Page 19 SPS B power switch. SPS A power switch. CNS-001434 Note: The blades in your system may have four port Ethernet copper or two port 10 GbE optical and two port copper. For more information, refer to Celerra Tools on http://Powerlink.EMC.com...
- Page 20 7. Connect the power cable for the Control Station (CS). If the system power LED does not light up, take the bezel off of the front of the CS and press the power button. For more information, refer to Celerra Tools on http://Powerlink.EMC.com...
- Page 21 Blade enclosure Blade 2 SPS A power switch. CNS-001435 Note: The blades in your system may have four port Ethernet copper or two port 10 GbE optical and two port copper. For more information, refer to Celerra Tools on http://Powerlink.EMC.com...
- Page 22 Cabling EMC Celerra NX4 system Cabling diagram of the Celerra NX4 dual blade system with four port copper Ethernet. 2 AUX 3 AUX 0 Fibre 1 Fibre 3 AUX 0 Fibre 1 Fibre 2 AUX SP B SP A 3 AUX...
- Page 23 Cabling EMC Celerra NX4 system Cabling diagram of the Celerra NX4 dual blade system with two port 10 GbE optical and two port copper. 2 AUX 3 AUX 0 Fibre 1 Fibre 3 AUX 0 Fibre 1 Fibre 2 AUX...
- Page 24 NX4 system LEDs Celerra NX4 light emitting diode (LED) locations. Check the LEDs to verify that the system is powered and running correctly. Disk-array enclosure Optional disk-array enclosure Blinks green Blue Blue when booting. when cabled. when cabled. Disk processor enclosure...
- Page 25 The passwords can be changed during the CSA installation process or later, from within Unisphere. root_password (default value = nasadmin) NAS Administrator (default value = nasadmin) For more information, refer to Celerra Tools on http://Powerlink.EMC.com...
- Page 26 6. Check the boxes of the licenses that you have purchased. CIFS (Windows) NFS (Linux) iSCSI At this point, the installation and pre-confi guration portions of CSA are complete. For more information, refer to Celerra Tools on http://Powerlink.EMC.com...
- Page 27 You can perform provisioning via the CSA Provisioning Wizards or Unisphere software. You can also add additional storage and perform additional provisioning later. For more information, see Step 5. Confi gure for Production on Celerra Tools. For more information, refer to Celerra Tools on http://Powerlink.EMC.com...
- Page 28 If you want to create an NFS (UNIX/Linux) export using the CSA, complete this section. Blade name Export name Allocate storage from (select from dropdown) Export size (MB, GB, or TB) Host access read-only export Read-only hosts Read/Write hosts Root hosts Access hosts For more information, refer to Celerra Tools on http://Powerlink.EMC.com...
- Page 29 IP address iSCSI target name Allocate storage from (select from dropdown) iSCSI LUN number iSCSI LUN size (MB, GB, or TB) Number of expected Snaps Number of expected Promotes For more information, refer to Celerra Tools on http://Powerlink.EMC.com...
- Page 30 Windows 2003) Domain admin user name (Windows 2000 and Windows 2003) Domain admin password (Windows 2000 and Windows 2003) Organizational unit (Windows 2000 and Windows 2003) Workgroup (Standalone) Local admin password Interfaces For more information, refer to Celerra Tools on http://Powerlink.EMC.com...
- Page 31 Download the CSA from a link on the Celerra Tools page of the Powerlink website. If you do not have access to the Powerlink website, insert the Celerra Network Server Applications and Tools CD into your computer. In the EMC Product Installation window, click Celerra Startup Assistant to install the CSA on your computer. Network Load the Apps &...
- Page 32 Add additional hosts for Fibre Channel enabled systems. • Preform Common Post-CSA tasks. Go to the Celerra Tools page for the NX4 on Powerlink and select Step 5: Confi gure for Production, for more information. For more information, refer to Celerra Tools on http://Powerlink.EMC.com...
Need help?
Do you have a question about the Celerra NX4 and is the answer not in the manual?
Questions and answers