
Related Manuals for Timeguard TS900N


Summary of Contents for Timeguard TS900N
- Page 1 All manuals and user guides at all-guides.com 24 Hour Immersion Heater Time Controller Model: TS900N...
- Page 2 all-...
-
Page 3: General Information
1. General Information All manuals and user guides at all-guides.com These instructions should be read carefully and retained for further reference and maintenance. 2. Safety • Before installation or maintenance, ensure the mains supply to the time switch is switched off and the circuit supply fuses are removed or the circuit breaker turned off. -
Page 4: Technical Specifications
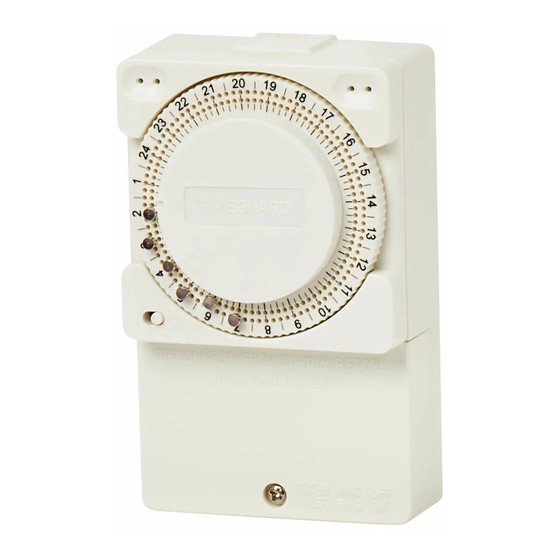
3. Technical Specifications All manuals and user guides at all-guides.com • 230V AC 50 Hz • This time switch is of class I construction and must be earthed • Switch Rating: 13A resistive (3kW) 400W filament lighting 60W Fluorescent/ CFL lighting •... - Page 5 Diagram A All manuals and user guides at all-guides.com 24 hour programme ring (inner holes = ON, outer holes = OFF) Setting pins Time indicator Self- cancelling Removable override cover switch Concealed wiring for Cover safety fixing screw...
-
Page 6: Installation
4. Installation All manuals and user guides at all-guides.com • Ensure the mains supply is switched off and the circuit supply fuses are removed or the circuit breaker turned off. • An isolating switch should be installed to enable the power to be switched ON & OFF for maintenance purposes. - Page 7 • Fix the top mounting screw in place (using the All manuals and user guides at all-guides.com correct screw for the rawl plug installed) and leave 2.5mm proud off of the wall. 2.5mm • Place the key hole, located at the top of the product, over the screw head and slide down.
- Page 8 all-...
- Page 9 Note: The 230V 50Hz mains supply and load All manuals and user guides at all-guides.com cables can also enter through the cable entry ports provided at the bottom of the unit. If you are not wiring through the rear entry knock outs, use the cable clamps provided to secure the cables.
-
Page 10: Connection Diagram
5. Connection Diagram All manuals and user guides at all-guides.com The terminals are marked as follows on the bottom of the wall plate; SL N minimum To Heater From Supply Supply Live (Brown or Red) to Terminal 5 Neutral (Blue or Black) to Terminal 4 Earth (Green/Yellow) to Terminal E Load Switch Live (Brown or Red) to Terminal 1... -
Page 11: Operation
6. Operation All manuals and user guides at all-guides.com • Decide what times you would like the time switch to switch ON and OFF. • Insert a pin in the Inner Circle for an ON period. • Insert a pin in the Outer Circle for an OFF period. •... -
Page 12: Manual Override
Manual Override All manuals and user guides at all-guides.com • It is possible to manually override the programmed time by operating the override switch in the right hand corner. • 1 = ON. O = OFF. • If you use the manual override it will self-cancel at the next programmed time. -
Page 13: Year Guarantee
020 8450 0515. Note: A proof of purchase is required in all cases. For all eligible replacements (where agreed by Timeguard) the customer is responsible for all shipping/postage charges outside of the UK. All shipping costs are to be paid in advance... - Page 14 all-...
- Page 15 If you experience problems, do not immediately All manuals and user guides at all-guides.com return the unit to the store. Telephone the Timeguard Customer Helpline; HELPLINE 020 8450 0515 or email helpline @ timeguard.com Qualified Customer Support Co-ordinators will be on-line to assist in resolving your query.
Need help?
Do you have a question about the TS900N and is the answer not in the manual?
Questions and answers