Dormakaba ED900 Installation Instructions Manual
Low energy swing door operator
Hide thumbs
Also See for ED900:
- Installation instructions manual (124 pages) ,
- Troubleshooting instructions (54 pages) ,
- Owner's manual (14 pages)

Related Manuals for Dormakaba ED900


Summary of Contents for Dormakaba ED900
- Page 1 ED900 Low energy swing door operator Installation Instructions 08125370 – 09-2021 | EN |...
- Page 2 15.1 Mounting plate attachment to jamb or Optional key switch panels wall ED900 fine cover kits 15.2 Connect customer 115 Vac to ED900 Fine cover kit hardware mounting plate terminal block 5.10 Conduit box and wiring kit – options 15.3 Route accessory wiring to mounting plate 5.11...
-
Page 3: Table Of Contents
Remove protective film strips from each 24.2 ED900 environment and cleaning ED900 operator 24.3 Yellow LED, service level 17.10 Install each ED900 operator onto its 24.4 Pull arm maintenance mounting plate 24.5 Arm fasteners – torque requirements 17.11 Full width cover option – Install Mode 24.6... - Page 4 ED900 installation: observe applicable national and local presented in this document. building codes. ED900 Arm configurations 1.2.1 Arm configurations. ED900 is suitable for installation using the following arm configurations: • J8 – Standard push arm, 0 - 8" reveal •...
- Page 5 2.1.4 ED900 hardware as shipped. Reference Chapter 5 for ED900 hardware overview. Fig. 2.1.1 ED900 operator 2.1.2 Low energy operator. ED900 is supplied only as a low energy operator. • The operator is supplied with a reduced power motor and a brake. •...
- Page 6 Proper signs and labels, per ANSI/BHMA A156.19 Crushing hazards at door closing edges! Standard for Power Assist and Low Energy Power Operated Doors, shall be applied and maintained on the door controlled by the ED900 swing door operator. Fig. 3.1 Door closing edges •...
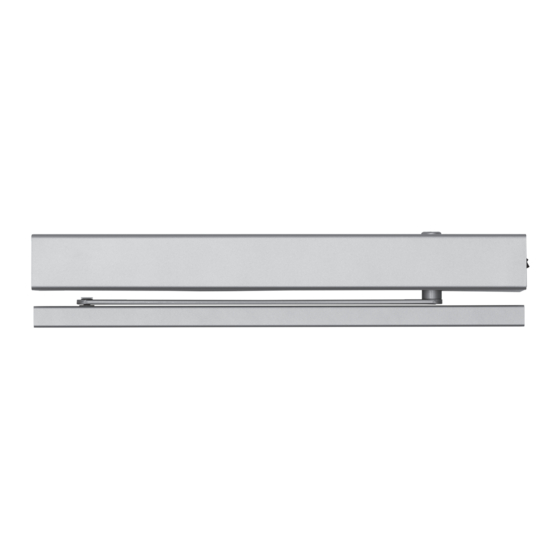
- Page 7 ED900 Installation Instructions Chapter 4 4 ED900 Product overview ED900 push arm system Fig. 4.1.1 RH push arm system example ED900 operator J/pull arm assembly Axle extension Standard cover End cap, mode switch End cap, power switch Mounting plate...
- Page 8 ED900 Installation Instructions Chapter 4 Single door configuration examples Fig. 4.3.1 LH push Fig. 4.3.2 LH deep pull Fig. 4.3.3 LH pull as a push Fig. 4.3.4 RH push Fig. 4.3.5 RH deep pull Fig. 4.3.6 RH pull as a push...
- Page 9 ED900 Installation Instructions Chapter 4 Double door configuration examples Fig. 4.4.1 Push Fig. 4.4.2 Deep pull Fig. 4.4.3 Pull as push Double egress door configurations Fig. 4.5.1 LH double egress Fig. 4.5.2 RH double egress ED900 08125370 09-2021...
- Page 10 ED900 Installation Instructions Chapter 4 Single door full length cover options Fig. 4.6.6 LH push Fig. 4.6.1 LH pull Fig. 4.6.2 RH pull Fig. 4.6.7 RH push Fig. 4.6.3 RH deep pull Fig. 4.6.8 RH deep push Fig. 4.6.4 LH deep pull Fig.
- Page 11 ED900 Installation Instructions Chapter 4 Double door full length cover options Fig. 4.7.1 Pair pull – track mount installation Fig. 4.7.2 Pair deep pull Fig. 4.7.3 Pair push Fig. 4.7.4 Pair deep push Fig. 4.7.5 Pair pull as push...
- Page 12 ED900 Installation Instructions Chapter 4 Double egress door full length cover options Fig. 4.8.1 LH double egress Fig. 4.8.2 RH double egress ED900 08125370 09-2021...
- Page 13 ED900 Installation Instructions Chapter 5 5 ED900 hardware ED900 operator and mounting plate Fig. 5.1.1 ED900 operator and mounting plate Fig. 5.1.2 Accessory terminals Fig. 5.1.3 5 mm T-handle hex key Terminals for accessory wiring Bag containing terminals and third...
- Page 14 ED900 Installation Instructions Chapter 5 Arm assemblies Fig. 5.3.1 J8 – Splined push arm assembly, Fig. 5.3.2 J12 – Splined push arm assembly, 225 mm, 0 - 8" reveal 300 mm, 8" - 12" reveal Drive arm Adjustment shaft tube, 225 mm 2.2 Adjustment shaft,...
- Page 15 ED900 Installation Instructions Chapter 5 ED900 mounting plate screw kit Fig. 5.5.1 Two sets - Mounting plate fasteners 15,16 Mounting plate (12) 15 fastener kit HK4053-010 (12) 16 1/4-20 x 1" FH machine screw No. 14 x 2 1/2" FH...
- Page 16 ED900 Installation Instructions Chapter 5 ED900 fine cover kits 5.8.1 Fine cover kits. • HK3401-01X Fine cover kit basic. • HK3401-05X Fine cover professional single. • HK3401-07X Fine cover professional pair. Table 5.8.1 Fine cover kit part numbers Part number and description...
- Page 17 ED900 Installation Instructions Chapter 5 Fig. 5.8.1 Fine cover kit, basic HK3401-01X HK3401-01X Fine cover kit basic HK3401-05X Fine cover professional single HK3401-07X Fine cover professional pair ED900 08125370 00-2021...
- Page 18 ED900 Installation Instructions Chapter 5 Fine cover kit hardware Fig. 5.9.5 Backplate connect kit HK3491-001 Mounting, extr. connector HC3491-010 M6 x 10 mm SHCS and washer HF3495-01Z M6 x 10 mm PFHS HF3496-01Z Fig. 5.9.1 End cap sets End cap set, silver,...
- Page 19 ED900 Installation Instructions Chapter 5 5.10 Conduit box and wiring kit – options Fig. 5.10.1 Conduit box Conduit box HX3501-001 Fig. 5.10.2 Power cord wiring kit HK3597-010 Power cord HX3500-001 Wire nut Cord grip HX3502-001 Conduit box HX3501-001 120 Vac label HD3597-001 5.11...
- Page 20 ED900 Installation Instructions Chapter 6 6 Technical data ED900 Technical data 6.1.4 Outputs Maximum wire size 6.1.1 Required operating conditions. 16 AWG Connector plug 1/16” screw size Ambient temperature 5 to 122 °F Sr parameter Suitable for dry Relative air humidity:...
- Page 21 ED900 Installation Instructions Chapters 6 and 7 Operating specifications 6.2.1 ED900 Maximum power [20] 13/16" 120 watt Axle extensions, consumption [30] 1 3/16" [mm] inches [60] 2 3/8" Opening force Minimum Maximum N (lbf) Reveal depth for pull 20 (4.5) 60 (13.5.5)
- Page 22 ED900 Installation Instructions Chapter 7 7 ED900 terminal board interfaces ED900 terminal board interfaces Fig. 7.1.1 Terminal board electrical connections Green LED (Para. 8.4) Night- Activation inputs Yellow LED (Para. 8.4) Interior Exterior bank Safety sensors Red LED (Para. 8.4)
- Page 23 ED900 Installation Instructions Chapter 8 8 Mode, Exit Only switch panel Mode switch and Exit Only switch panel Fig. 8.1.1 ED operator fine cover Fig. 8.1.7 Optional key switch panels Mode switch, Exit Only switch, 3 position 2 position 8.1.1 Mode switch...
- Page 24 ED900 Installation Instructions Chapter 10 10 ED900 door signage 10.1 Low energy operator 10.1.1 Overview Fig. 10.1.1 AUTOMATIC CAUTION DOOR decal Signage and warnings are specified in ANSI /BHMA A156.19, American National Standard for power assist AUTOMATIC and low energy power operated doors.
- Page 25 ED900 Installation Instructions Chapter 10 10.2 Door signage, low energy single swing door Fig. 10.2.1 Knowing act device initiation of door operation AUTOMATIC CAUTION DOOR DD0586-010 ACTIVATE SWITC H TO OPERATE Activate Switch to Operate Fig. 10.2.2 Push/Pull initiation of door operation Fig.
- Page 26 ED900 Installation Instructions Chapter 10 10.3 Door signage, low energy double swing door 10.3.1 Knowing act switch used to initiate door operation. Fig. 10.3.1 Door push side Fig. 10.3.2 Door swing side AUTOMATIC AUTOMATIC CAUTION CAUTION AUTOMATIC AUTOMATIC CAUTION...
- Page 27 ED900 Installation Instructions Chapter 10 10.4 Door signage, low energy double egress swing door 10.4.1 Knowing act switch used to initiate door operation. Fig. 10.4.1 RH approach side Fig. 10.4.2 RH swing side AUTOMATIC AUTOMATIC CAUTION CAUTION DOOR DOOR...
- Page 28 ED900 Installation Instructions Chapter 10 10.5 Safety Information label, low Fig. 10.5.1 Safety Fig. 10.5.2 Annual information compliance energy swing doors label inspection label 10.5.1 Low energy swinging door safety information ANNUAL COMPLIANCE SAFETY INFORMATION label. INSPECTION Low Energy Swinging...
- Page 29 ED900 Installation Instructions Chapter 11 11 Recommended tools and torque chart 11.1 Recommended tools Fig. 11.1.1 Recommended tools T-handle hex key, 5 Supplied with ED900 Hex keys, 2.5 mm, 3 mm, 6 mm Screwdriver, flat blade Door pressure gauge, 0 to 35 ft - lbf...
- Page 30 WARNING objects and debris. Electrical shock hazard! 115 Vac branch circuit disconnect for ED900 must be Off prior to 12.1.2 Accessories start of electrical installation. 1. Verify accessories planned for or in place for the door.
- Page 31 ED900 Installation Instructions Chapter 13 13 ED900 installation templates 13.1 Installation templates – pull arm Fig. 13.1.1 Assembly on hinge side, pull version with slide channel CPD and short pivot pin 5 7/8” [150] 4 3/16” [106] 4 3/4”...
- Page 32 ED900 Installation Instructions Chapter 13 Fig. 13.1.2 Assembly on hinge side, pull version with slide channel CPD and long pivot pin 5 7/8” [150] 4 3/16” [106] 3 15/16” 4 3/4” 4 3/4” 4 3/4” 3 3/4” 1 3/4”...
- Page 33 ED900 Installation Instructions Chapter 13 Fig. 13.1.3 Assembly on hinge side, pull version with slide channel and long pivot pin 5 7/8” [150] 4 3/16” [106] 3 15/16” 4 3/4” 4 3/4” 4 3/4” 3 3/4” 1 3/4” [120]...
- Page 34 ED900 Installation Instructions Chapter 13 13.2 Installation template – push arm Fig. 13.2.1 Assembly on opposite hinge side, push version with J/arm assembly 5 7/8” [150] 4 3/16” [106] 3 3/4” 4 3/4” 4 3/4” 4 3/4” 3 15/16”...
- Page 35 1. Remove 115 Vac plug (5) from its 115 Vac socket receptacle (6). 14.1.2 Remove mounting plate from ED900 operator. 1. Loosen all eight captive ED900 M6 socket head cap screws (SHCS) using a 5 mm hex T-handle. TIPS AND RECOMMENDATIONS Insure all eight fasteners are free of the mounting plate.
- Page 36 Mode switch Mode switch Power switch Power switch (disabled) 14.4 Double door ED900 operator installation with full width cover (option) Fig. 14.4.1 ED900 full width cover installation for double door operation Inactive door Active door Power switch Single Mode switch...
- Page 37 1. Remove M3 x 5 screw securing 115 Vac terminal block assembly to mounting plate. 2. Remove 115 Vac terminal block assembly. Fig. 14.5.3 ED900 mounting plates – installation with optional full width cover example Inactive door 115 VAC terminal...
- Page 38 1. Power cord wiring kit (Fig. 14.6.4). TIGHTEN MAINS TERMINAL TO 5-7 in-lb • Eliminates need for hard wiring. Permits Use Copper Conductors ONLY ED900 to plug directly into 115 Vac receptacle. Fig. 14.6.3 Conduit box • Power cord length: 15" from end of Conduit box conduit box to center of plug.
- Page 39 ED900 Installation Instructions Chapter 14 14.6.3 Install conduit box (option). Fig. 14.6.5 115 Vac terminal block mounting 115 VAC terminal TIPS AND RECOMMENDATIONS block Ground terminal 115 Vac terminal block is secured M3.5 screw to mounting plate by M3 x 25 115 Vac plug to Phillips head screw.
- Page 40 14.7.2 Remove ED900 115 Vac plug. 1. Swing open upper bracket (3). 2. Remove ED900 115 Vac plug (5) from power supply circuit board socket (6). 14.7.3 Remove power supply circuit board. 1. Remove power supply circuit board (4) from its slot in ED900.
- Page 41 ED900 Installation Instructions Chapter 16 Fig. 14.7.3 Mounting plate assembly Mounting plate, Mounting plate, 14.7.4 Drill two holes in pair mounting plate for M6 operator pair fastener. Fig. 14.7.4 Pair mounting plate hole for M6 fastener 1. Drill hole in each end of pair mounting plate for M6 x 10 mm PFHS (Fig.
- Page 42 ED900 Installation Instructions Chapter 15 15 ED900 mounting plate and operator installation - Single door 15.1 Mounting plate attachment to jamb or wall Fig. 15.1.1 Mounting plate installation NOTICE Installation templates Mounting plate installation location based on selected installation template.
- Page 43 ED900 Installation Instructions Chapter 15 15.2 Connect customer 115 Vac to ED900 mounting plate terminal block Fig. 15.2.1 115 Vac wiring example 15.2.1 Connect customer 115 Vac wiring. 115 Vac terminal block Ground post WARNING Work on electrical equipment and...
- Page 44 15.5 Install ED900 operator onto mounting plate 15.5.1 Install ED900 operator onto Fig. 15.5.1 Installation of ED900 on mounting plate mounting plate. CAUTION Protective film strip removal. Insure two protective film strips have been removed from operator heat conductive pads (Para.
- Page 45 ED900 Installation Instructions Chapter 15 15.6 Full width cover (option) installation instructions Fig. 15.6.1 Mounting plate 15.6.1 Install ED900 mounting plate. Mounting plate installation: • Reference Chapter 13 for installation templates. 15.6.2 Secure mounting plate extension to door frame and/or wall.
- Page 46 Once ED900 operator is installed, HC3481-010 program switch wires will be Mode switch kit connected to terminal board HX3482-010 (Fig. 15.6.10). Fig. 15.6.9 ED900 installation with mounting plate extension Professional cover bracket DC3481-010 Program switch kit DC3482-010 Program switch cable Fig.
- Page 47 ED900 Installation Instructions Chapter 17 17 ED900 mounting plate and operator installation – double door 17.1 ED900 mounting plate attachment to jamb and/or wall examples Fig. 17.1.1 Double door mounting plate installation – standard covers example ED900 mounting Third guide pin...
- Page 48 ED900 Installation Instructions Chapter 17 17.2 Install ED900 mounting plates to jamb and/or wall 17.2.1 Select installation template. Fig. 17.2.1 Mounting plate fasteners HK4053-010 1. Select applicable installation template. (12) 15 NOTICE (12) 16 Installation templates: Reference Chapter 13.
- Page 49 • Standard Mode switch is disabled in double door operation. • Reference Para.15.8 for single Mode switch installation. Fig. 17.4.2 ED900 installation with optional full width cover ED900 – Inactive door ED900 – Active door Mode switch Mode switch Spindle...
- Page 50 TIPS AND RECOMMENDATIONS inactive door extension Mounting plate, 115 Vac terminal block Active/inactive door orientation. active door May be reversed from Fig. 17.6.1 Fig. 17.6.2 ED900 cables at inactive door orientation. Mounting plate, active door NOTICE Mounting plate, inactive door Installer responsibilities.
- Page 51 ED900 Installation Instructions Chapter 17 Fig. 17.6.5 Single Mode switch HX3486 17.6.4 Fasten 115 Vac cable ground wires 3 position Mode to mounting plate ground studs. switch 1. Inactive door mounting plate – fasten 3 conductor cable ground wire ring lug to mounting plate ground stud (Fig.
- Page 52 ED900 Installation Instructions Chapter 17 17.7 Customer 115 Vac connection to ED900 mounting plate terminal block 17.7.1 ED900 115 Vac electrical installation. 17.7.2 ED900 installation with standard covers. • Customer 115 Vac power wiring required to terminal WARNING block (3) on each mounting plate (Fig. 17.7.1).
-
Page 53: Route Accessory Wiring To Active Door Mounting Plate
17.7.4 Connect customer 115 Vac wiring. 115 Vac terminal block Ground post WARNING Routing and connection of 115 Vac wiring to ED900 must be performed by a qualified person! WARNING 115 Vac branch circuit disconnect or circuit breaker must be OFF! 1. -
Page 54: Remove Protective Film Strips From Each Ed900 Operator
ED900 Installation Instructions Chapter 17 17.9 Remove protective film strips from each ED900 operator Fig. 17.9.1 Operator protective film strips 17.9.1 Remove protective film strips. Heat conductive 1. Remove two protective film strips from pads each operator's heat conductive pads. -
Page 55: Full Width Cover Option - Install Mode Switch, Active Door Ed900
ED900 Installation Instructions Chapter 17 17.11 Full width cover option – Install Mode switch, active door ED900 Fig. 17.11.1 Mode switch installation on active door Single Mode switch Inactive door Active door Power switch Fig. 17.11.2 Mode switch and cable... -
Page 56: Full Width Cover Option - 115 Vac Pair Power Cable Connections
(5) into ED900 power supply circuit board 115 Vac interconnect socket (4) (Fig.17.12.2). cable plug, male connection Fig. 17.12.2 ED900 115 Vac pair power cable – inactive door ED900 115 Vac plug from 115 Vac socket, female connection ED900 power supply circuit board... -
Page 57: Push Arm Installation
ED900 Installation Instructions Chapter 18 18 J/Push arm installation 18.1 Push arm installation templates NOTICE Reference Chapter 13 for push arm installation templates. Fig. 18.1.1 Push arm assemblies J8/Standard push arm, reveal depths 0 - 8" maximum J12/Deep push arm reveal depths 8 - 12"... - Page 58 Fig. 18.2.5 Push arm assemblies for installation Reference Chapter 20, Operator spring tension. 2. Insert axle extension into drive arm. 3. Move arm to ED900, inserting arm into operator spindle at a 90⁰ angle (Fig. 16.2.5). 4. Insert M8 SHCS through drive arm and axle extension.
- Page 59 ED900 Installation Instructions Chapter 18 Fig. 18.2.7 Arm assemblies attached to door and ED900 18.2.4 Connect adjustment arm to drive arm. 1. Loosen the two adjustment M6 x 10 mm flanged button head screws (Fig. 18.2.9). 1. Using square, position adjustment arm assembly at 90⁰...
-
Page 60: Arm With Track Mount Installation
ED900 Installation Instructions Chapter 19 19 Arm with track mount installation 19.1 Arm with track installation NOTICE Reference Chapter 13 for pull arm and pull arm as push installation templates. 19.2 Splined arm and track assemblies Fig. 19.2.1 T275/Splined arm with CPD Fig. -
Page 61: Slide Shoe Assembly
ED900 Installation Instructions Chapter 19 19.4 Slide shoe assembly 19.4.1 Install pivot pin into slide shoe. Fig. 19.4.1 Slide shoe and pivot pin 1. Insert pivot pin into slide shoe. Slide shoe Pivot pin, 1/2" 2. Install spring clip into pivot pin slot. -
Page 62: Arm Assembly
ED900 Installation Instructions Chapter 19 19.6 Arm assembly Fig. 19.6.1 Arm assembly 19.7 Arm assembly with CPD lever 19.7.1 Arm with CPD lever assembly. Fig. 19.7.1 Slotted Fig. 19.7.2 M6 x 10 spring SHCS M6 x 10 SHCS CAUTION... -
Page 63: Deep Pull Arm Installation
In order to mount the drive arm in the correct position, the spindle must be at the zero position. 1. Set ED900 operator spring tension Fig. 19.8.2 Deep pull arm installed on spindle based on door width. Reference Chapter 11. - Page 64 ED900 Installation Instructions Chapter 19 19.8.2 Locate and drill track mounting Fig. 19.8.4 Track mounting holes in door holes. 1. Using applicable template, locate and drill mounting holes for track. 19.8.3 Install slide shoe assembly onto CPD lever M8 mounting hole.
-
Page 65: Standard Pull Arm Installation
ED900 operator axle zero position. In order to mount the drive arm in the correct position, the spindle must be at the closed position. 1. Set ED900 operator spring tension based on door width. Reference Chapter 20. 2. Position drive arm with axle extension... - Page 66 ED900 Installation Instructions Chapter 19 19.9.2 Locate and drill track mounting Fig. 19.9.4 Track mounting holes in door holes. 1. Using applicable template, locate and drill mounting holes for track. 19.9.3 Install slide shoe assembly onto drive arm. 1. Thread pivot pin M8 SHCS into drive arm mounting hole (Fig.
-
Page 67: Operator Spring Tension
ED900 Installation Instructions Chapter 20 20 Operator spring tension 20.1 Set ED900 operator spring tension Fig. 20.1.1 Spring tension adjustment Spring tension adjustment 20.1.1 Spring tension setting revolutions. 20.1.2 Operator spring tension function. 1. Spring tension sets closing force on door. -
Page 68: Ansi/Bhma Standards
ED900 Installation Instructions Chapter 21 21 ANSI/BHMA standards 21.1 A156.19 Low energy power operated doors The following table references portions of content from ANSI/BHMA A156.19. Refer to the standard, available through ANSI or BHMA for additional information. Standard material reprinted with BHMA permission. -
Page 69: Install Door Signage
23.1 Fine cover end cap and spindle installation 23.1.1 Cover and end cap installation. Fine cover and end caps will be installed after ED900 operator setup is completed. • Reference ED900 Setup and Troubleshooting Manual 08125380. 23.1.2 Install Service Call label. Fig. A.1.11 Label, service call 1. -
Page 70: Maintenance
ED900 Installation Instructions Chapter 24 Fig. 24.1.2 Annual Fig. 24.1.1 Safety compliance information 24 Maintenance inspection label label ANNUAL COMPLIANCE SAFETY INFORMATION 24.1 Safety label, low energy swing INSPECTION Low Energy Swinging Doors INSPECT FOR AND doors COMPLIES WITH ANSI These minimum safety checks, A156.19 ON:... -
Page 71: Ed900 Environment And Cleaning
24.2.3 Cleaning WARNING Cleaning of ED900 cover surfaces should be done with Mode switch in Close position! AUTOMATIC CAUTION ED900 cover can be cleaned with a damp cloth and DOOR DD0586-010 commercial cleaning agents. ACTIVATE SWITC H TO OPERATE TIPS AND RECOMMENDATIONS Abrasive (scouring) agents should not be used as they may damage cover surface. -
Page 72: Pull Arm Maintenance
ED900 Installation Instructions Chapter 24 24.4 Pull arm maintenance Fig. 32.4.1 Arm and track assembly Fig. 24.4.5 Mode switch 24.4.1 Track mounting screws. 1. Set Mode switch to CLOSE. 2. Remove track end caps 3. Check tightness of track mounting screws. -
Page 73: Arm Fasteners - Torque Requirements
ED900 Installation Instructions Chapter 24 24.5 Arm fasteners – torque requirements 24.5.1 Check drive arm M8 SHCS torque. Fig. 24.5.1 Arm M8 SHCS cap 1. Set Mode switch to CLOSE. 2. Remove cap over M8 SHCS. 3. Check torque. -
Page 74: Push Arm Maintenance
24.6.2 Shoe door mounting screws . 1. Remove screw cover caps (Fig. 24.6.1). 2. Check for tightness of mounting screws (Fig. 24.6.3). 3. Replace screw cover caps. 24.6.3 Drive arm to ED900 spindle. 1. Remove spindle cap. Drive arm M6 x 10 button Adjustment arm... - Page 75 ED900 Installation Instructions Blank page This page left intentionally blank. ED900 08125370 09-2021...
-
Page 76: Ed900 Brake Maintenance
ED900 Installation Instructions Chapter 24 24.7 ED900 brake maintenance 24.7.1 Adjustment of air gap: Fig. 24.7.1 ED900 operator brake to brake disc (Fig. 32.7.2). TIPS AND RECOMMENDATIONS Reference drawing: 254197-01-50 WARNING Brake assembly Set Mode switch to CLOSE before Fig. - Page 77 ED900 Installation Instructions Chapter 24 24.7.2 Torque setting of M3 x 5 SHCS. Fig. 24.7.5 M3 x 5 SHCS • 5.3 in-lb + 0.9 in-lb [0.6 Nm +0.1 Nm] Brake assembly Brake disc assembly M3 x 5 SHCS Fig. 24.7.6 Brake disc assembly removed...
-
Page 78: Appendix A - Wiring Diagrams
AUTO CLOSE OPEN A1.1.1 Key switch panel option. Set parameter PS to 1. CAUTION Key switch panel option. Mode switch wired to ED900 terminal board. 1) Parameter PS (Mode switch type) must be set to 1. 2) Internal Mode switch connector must be disconnected from its socket. -
Page 79: A2.1 Key Switch Panel
Length = 80 inches A2.1.1 Key switch panel option. Set parameter PS to 1. CAUTION Key switch panel option. Mode switch wired to ED900 terminal board. AUTO CLOSE OPEN 2) Internal Mode switch connector must be disconnected from its Fig. A.2.1.3 Mode switch connector socket. - Page 80 USA, Inc. 1 Dorma Drive, Drawer AC Reamstown, PA 17567 T: 717-336-3881 F: 717-336-2106 www.dormakaba.us...
Need help?
Do you have a question about the ED900 and is the answer not in the manual?
Questions and answers