
Related Manuals for Hyco Accona AN500T


Summary of Contents for Hyco Accona AN500T
- Page 1 Product Instruction Manual Accona AN500T, AN1000, AN1000T, AN1500, AN1500T AN2000, AN2000T Panel heater Version 3.2 Jan 2015 v16.5/5...
-
Page 2: Table Of Contents
Contents Important safety points Installation 2.1. Wall mounting Electrical Operation - Non-timer models Operation – 7-day timer models How to set the date and time on your heater Setting the target temperatures Selecting a pre-loaded schedule Programming your own customised schedule Advanced features (7-day timer models) Copy and paste programming Activating the child lock... -
Page 3: Important Safety Points
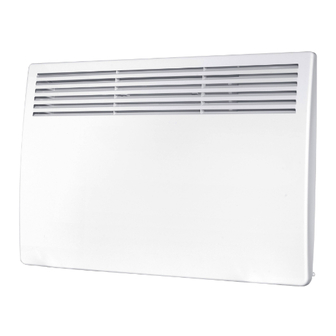
Thank you for purchasing a Hyco Accona panel heater. The Accona is ideal for a wide range of fixed installation heating applications in the home and office environment. The Accona panel heater is available in 4 power outputs and with 7-day LCD timer and non-timer options (the 0.5kW model is available in timer version only). -
Page 4: Installation
Some parts of this product can become very hot and cause burns. Particular attention has to be given where children and vulnerable people are present. Only use the mounting bracket supplied and do not modify the bracket. In order to avoid overheating, do not cover the heater. Fixed heaters likely to be used in bathrooms are to be installed so that switches and other controls cannot be touched by a person in the bath or shower. - Page 5 Step 2: Hold the bracket up against the mounting surface, ensuring it is horizontal, and mark the outer holes through the bracket onto the surface of the mounting wall. Drill and fit wall plugs and then fix the bracket to the mounting surface. Step 3: Offer up the heater to the bracket and attach as per figure 2.
-
Page 6: Electrical
Electrical The Electrical installation must be carried out by a qualified electrician in accordance with the current edition of the I.E.E. Wiring Regulations. Only connect the unit to a single phase supply with a mains voltage as specified on the rating plate. If the heater is to be connected to the fixed wiring of the property then installation must include a double pole isolating switch with a break contact distance of at least 3mm. -
Page 7: Operation: 7-Day Timer Models
4. Operation: 7-day timer models (AN500T, AN1000T, AN1500T & AN2000T) 1. Control Unit 10. Standby Button 2. Air Outlet 11. Date and Time Setting Button 3. Air Inlet 12. Copy and Paste Button 4. Red ‘Peak’ Temperature Indicator 13. Down Select Button 5. -
Page 8: Setting The Target Temperatures
Step 3: Press the clock icon again and this will store the day as well as highlight the next field which is the hour of the day. Step 4: Use the up/down icons to cycle through the hours, in this example we will press the up button three times in order to display 15:00 Step 5: Press the clock icon to save the hour setting and... - Page 9 Step 1: Press the °C icon to enter the ‘Peak’ temperature setting mode. When selected correctly it will be indicates by the flashing symbol. Step 2: To alter the target temperature, press the up/down icon the desired number of times. In this example the up icon had been pressed three times to increase the set point from 22°C to 25°C.
-
Page 10: Selecting A Pre-Loaded Schedule
4.3 Selecting a pre-loaded schedule The heater is supplied with a number of pre-loaded operating schedules already stored in memory. It will be quicker to choose one of these defaults if it corresponds sufficiently closely to your requirements, but you can create your own schedule if you wish (see ‘Programming your own customised schedule’). -
Page 11: Programming Your Own Customised Schedule
The pre-loaded schedules that are available are defined in the previous table. If you wish to have the unit operate in non-timer style you should select pre-set ‘CC’ to switch the heater on/off press the button. Study the available pre-sets to decide which setting is best suited to the requirements. Step 1: Press the P icon to enter the schedule selection mode. -
Page 12: Advanced Features (7-Day Timer Models)
Step 3: Now the day is selected a value for every segment of a full day must be assigned (there are 24 in total). The programme will only be saved when this is complete. Use the up/down icon to allocate the mode for each segment. Up = ‘peak’ setting and down = ‘Off peak’. In the below example the down button has been pressed eight times followed by the up button eight times and finally the down button eight times. -
Page 13: Activating The Child Lock
Step 3: Press the timer icon the desired number of times to cycle to the day to programme to. In this example we have pressed the timer icon twice in order to display Wednesday (Wed). Step 4: Press the icon to complete the paste of the custom setting onto the desired day. -
Page 14: Delayed Start And Shut Down Mode
5.4 Delayed start and shut down mode It is possible to turn the unit on automatically a number of hours in the future. For example, to automatically start in 10hrs time this can be achieved as follows: Step 1: The heater must first be in standby mode. Press the alarm clock icon and a symbol of a clock will be displayed. -
Page 15: Maintenance
6. Maintenance • Replacing the battery is required from time to time; the LCD will display the remaining charge of the battery. • Before cleaning, ensure the heater is disconnected from the mains supply and has completely cooled • Wipe the exterior surfaces with a soft dry cloth •... -
Page 16: Guarantee And Service Policy
This product is guaranteed against faulty materials and manufacture for a period of one year from the date of purchase. Hyco will in its sole discretion replace, repair or refund any faulty unit. Incorrect installation and failure to follow correct operating instructions are excluded.
Need help?
Do you have a question about the Accona AN500T and is the answer not in the manual?
Questions and answers