Hyco Accona AN2000T Instruction Manual
Panel heater
Hide thumbs
Also See for Accona AN2000T:
- Product instruction manual (16 pages) ,
- Product instruction manual (16 pages)

Related Manuals for Hyco Accona AN2000T


Summary of Contents for Hyco Accona AN2000T
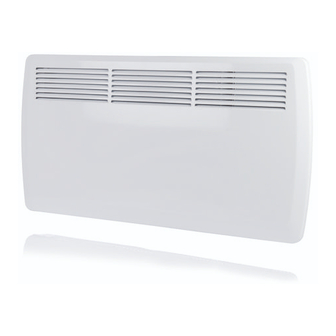
- Page 1 Accona Panel Heater Models AN1500, AN1500T, AN2000 & AN2000T Instruction Manual Version 1.0 October 2012...
-
Page 2: Table Of Contents
HYCO ACCONA PANEL HEATER MODELS AN1500, AN1500T, AN2000 & AN2000T CONTENTS 1. Introduction 2. Safety 3. Wall Mounting 4. Electrical installation 5. Operating guide (non-timer models AN1500 and AN2000) 6. Operating guide (7-day timer models AN1500T and AN2000T) 6.1 How to set the date and time on your heater 6.2 Setting the target temperatures... -
Page 3: Introduction
1. INTRODUCTION Thank you for purchasing a Hyco Accona panel heater. The Accona panel heater range is available in two power outputs and with 7 day LCD timer and non-timer options. The available models are as follows: AN1500 (1.5kW non-timer) AN1500T (1.5kW with 7 day LCD timer) -
Page 4: Safety
2. IMPORTANT SAFETY POINTS (Continued) CHILDREN OF LESS THAN 3 YEARS SHOULD BE KEPT AWAY UNLESS CONTINUOUSLY SUPERVISED. CHILDREN AGED FROM 3 YEARS AND LESS THAN 8 YEARS SHALL ONLY SWITCH ON/OFF THE APPLIANCE PROVIDED THAT IT HAS BEEN PLACED OR INSTALLED IN ITS INTENDED NORMAL OPERATING POSITION AND THEY HAVE BEEN GIVEN SUPERVISION OR INSTRUCTION CONCERNING USE OF THE APPLIANCE IN A SAFE WAY AND UNDERSTAND... -
Page 5: Wall Mounting
3. WALL MOUNTING Step 1: Choose a suitable location for the mounting of the heater ensuring that the surface will be strong enough to hold the weight of the product. The heater must not be mounted closer than 150mm to any horizontal or vertical surface, as detailed in fi... -
Page 6: Electrical Installation
4. ELECTRICAL INSTALLATION • The installation, electrical connection and fi rst operation of this appliance should be carried out by a qualifi ed electrician. • If the heater is to be connected to the fi xed wiring of the property then installation must include a double pole isolating switch with a break contact distance of at least 3mm. -
Page 7: Operating Guide (7-Day Timer Models An1500T And An2000T)
6. OPERATING GUIDE (7-day timer models AN1500T and AN2000T) 15 14 11 12 9 13 1. Control Unit 10. Standby Button 2. Air Outlet 11. Date and Time Setting Button 3. Air Inlet 12. Copy and Paste Button 4. Red "Peak" Temperature Indicator 13. - Page 8 6.1 HOW TO SET THE DATE AND TIME ON YOUR HEATER (continued) Step 4: Use the up/down icons to cycle through the hours, in this example we will press the up button three times in order to display 15:00. Step 5: Press the clock icon to save the hour setting and move on to the minutes setting.
-
Page 9: Setting The Target Temperatures
6.2 SETTING THE TARGET TEMPERATURES The thermostat settings can only be set whilst the unit is turned on (not standby). Unlike many panel heaters the Accona Timer range utilises two temperature ranges. The fi rst is the temperature the heater will maintain during the ‘Peak’ setting, and the second is the ‘Off peak’... -
Page 10: Selecting A Pre-Loaded Schedule
6.3 SELECTING A PRE-LOADED SCHEDULE The heater is supplied with number of pre-loaded operating schedules already stored in memory. It will be quicker to choose one of these defaults if it corresponds suffi ciently closely to your requirements, but you can create your own schedule if you wish (see ‘programming your own customised schedule’). -
Page 11: Programming Your Own Customised Schedule
6.3 SELECTING A PRE-LOADED SCHEDULE (continued) The pre-loaded schedules that are available are defi ned in the previous table. If you wish to have the unit operate in non-timer style you should select pre-set ‘ CC ’ to swith the heater on/off press the button. -
Page 12: Advanced Features (7-Day Timer Models An1500T And An2000T)
6.4 PROGRAMMING YOUR OWN CUSTOMISED SCHEDULE (cont.) Step 2: Next select the day to programme. Simply press the timer icon until the required day is displayed. In this example we have selected Wednesday (Wed) which required two presses of the timer icon. Step 3: Now the day is selected a value for every segment of a full day must be assigned (there are 24 in total). -
Page 13: Activating The Child Lock
7.1 COPY AND PASTE PROGRAMMING (continued) Step 2: To copy the Monday (Mon) programme, press the icon. This will copy the programme and the screen will confi rm this with the word ‘Copy’ displayed alongside the word ‘Prog’. Note: to copy from a different day, select the required day using the clock icon before pressing the icon. -
Page 14: Centigrade/Fahrenheit Display
7.3 CENTIGRADE / FAHRENHEIT DISPLAY It is possible to switch the temperature setting between Fahrenheit (F) and Celsius (C). Simply hold down the temp icon (°C) for approximately 3 seconds. Both modes are illustrated below. 7.4 DELAYED START AND DELAYED SHUT DOWN MODE It is possible to turn the unit on automatically a number of hours in the future. -
Page 15: Cleaning And Maintenance
7.4 DELAYED START AND DELAYED SHUT DOWN MODE (continued) Step 2: Use the up/down icon to enter the amount of hours to wait before the heater goes into ‘sleep’ mode. In this example we have gone for ten hours which is achieved by pressing the up button ten times. -
Page 16: Guarantee And Service Policy
10. GUARANTEE AND SERVICE POLICY This product is guaranteed against faulty materials and manufacture for a period of one year from the date of purchase. Hyco will in its sole discretion replace, repair or refund any faulty unit. Incorrect installation and frost damage are excluded.
Need help?
Do you have a question about the Accona AN2000T and is the answer not in the manual?
Questions and answers