Advertisement
Available languages
Available languages
Quick Links
Advertisement
Chapters

Subscribe to Our Youtube Channel
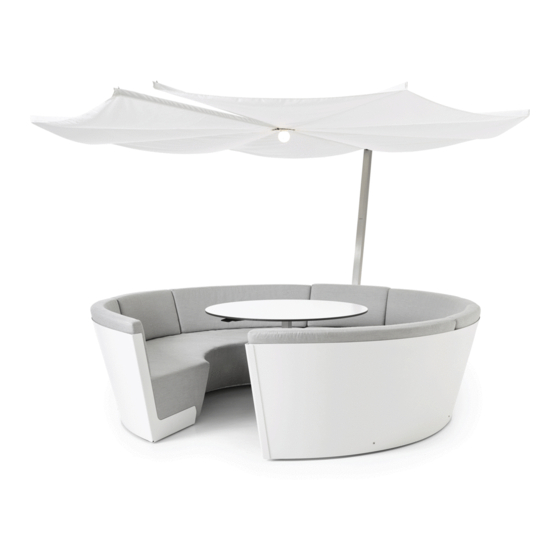
Related Manuals for Extremis KOSMOS


Summary of Contents for Extremis KOSMOS
- Page 1 LANGUAGES ASSEMBLY INSTRUCTIONS, EN – NL – DE – FR – IT – ES HOW TO USE, USEFUL TIPS MORE FOR KEEPING YOUR TOOL FOR TOGETHERNESS IN SHAPE WWW.EXTREMIS.BE PRODUCT KOSMOS – KOSMOS WITH PARASOL – FREESTANDING TABLE – MAINTENANCE...
-
Page 2: Table Of Contents
3 assembly kosmos p. 6 assembly with kosmos shade p. 8 adjusting adjustable table p. 10 covers p. 11 bulb replacement p. 12 onderhoud p. 13 assembly freestanding table p. 14 inhoud p. 17 montage kosmos p. 20 montage met kosmos shade p. -
Page 3: Content
INHOUD 1 x left & right half of the seat 1 x small seat frame 1 x backrest (low / high) (low / high) 1 x adjustable table leg 1 x tabletop 1 x tabletop cushion fixed table leg 2 x large seating cushion 1 x small seating cushion 4 x large backrest cushion (low / high) - Page 4 OPTION KOSMOS SHQDE 1 x shade frame with fabric 1 x vertical shade pole 1 x plastic spacer 1 x cap 50 x 50 1 x cap 60 x 60 4 x bolt M8 x 70 inhoud...
- Page 5 OPTION VRIJSTAANDE TAFEL 1 x tabletop 1 x tube 1 x base plate 3 x bolt M6x25 8 x bolt M6x12 english...
-
Page 6: Assembly Kosmos
ASSEMBLY KOSMOS UTILITIES 2 people screwdriver +/- 45 min. 1. First mount the table leg to the small seat frame with 4 bolts M6x30. Now remove the transport screw. in case you bought a fixed table, first mount the 2. Now connect the two halves of the seat to the small aluminium profile to the small seat frame and the seat frame using three bolts M6x80 and three M8 nuts. - Page 7 4. Screw the table top down with the countersunk screws 5. Now place the cushions in the Kosmos. M6x2. The control element for the height adjustment is fastened with 4 bolts M4x10 at the bottom of the table top. This control element must point towards the seat...
-
Page 8: Assembly With Kosmos Shade
ASSEMBLY WITH KOSMOS SHADE UTILITIES 2 people screwdriver +/- 45 min. Follow the first 4 steps from pages 4-5. 5. From the inside of the furniture, insert 4 bolts M8x70 On the outside, then slide the plastic spacer Erover and through the holes provided (two at the bottom and two then the parasol pole. - Page 9 8. Install the appropriate caps on the parasol frame and hold, first loosen the velcro strap and open the parasol the vertical tube. Now place the cushions in the Kosmos again. Only now you can close the velcro again. In closed as in step 5 on page 5.
-
Page 10: Adjusting Adjustable Table
ADJUSTING ADJUSTABLE TABLE 1. Disassemble the valve by unscrewing the screws and turn the valve over. 3. Check for any slack between the cable & mounting 4. If so, turn the screw out until the play is gone & turn screw. -
Page 11: Covers
4. At the back of the Kosmos, tie the string attached, 5. Close at the front the velcro fasteners and the snap under the parasol pole. It is best to do this as described closure. -
Page 12: Bulb Replacement
BULB REPLACEMENT 1. Remove the tube cap with switch and remove the LED 2. Remove the red and black cables from the adapter. adapter from the parasol tube. 3. Remove the tube cap in the center of the parasol, pull 4. -
Page 13: Onderhoud
100% waterproof for ventilation reasons. Do not leave the Kosmos parasol closed if it is not completely dry. Do The cushions should be cleaned not leave it closed for long periods in... -
Page 14: Assembly Freestanding Table
ASSEMBLY FREESTANDING TABLE 1. Take the base plate and mount it by means of 3 2. Now place the table top on the stainless steel tube as countersunk hexagonal bolts M10 x 25 on the underside of indicated in the on the stainless steel tube as shown in the the stainless steel tube as shown in the drawing. - Page 15 english...
- Page 16 3 assembly kosmos p. 6 assembly with kosmos shade p. 8 adjusting adjustable table p. 10 covers p. 11 bulb replacement p. 12 onderhoud p. 13 assembly freestanding table p. 14 inhoud p. 17 montage kosmos p. 20 montage met kosmos shade p.
-
Page 17: Inhoud
INHOUD 1 x linkse en rechtse zetelhelft 1 x zetelframe klein 1 x rugsteun (laag of hoog) (laag of hoog) 1 x verstelbare tafelpoot 1 x tafelblad 1 x tafelkussen of vaste tafelpoot 2 x groot zitkussen 1 x klein zitkussen 4 x groot rugkussen (laag of hoog) 3 x klein rugkussen... - Page 18 OPTIONEEL KOSMOS PARASOL 1 x parasolframe met doek 1 x parasolpaal 1 x plastic plaat 1 x dop 50 x 50 1 x dop 60 x 60 4 x bout M8 x 70 inhoud...
- Page 19 OPTIONEEL VRIJSTAANDE TAFEL 1 x tafelblad 1 x buis 1 x voetplaat 3 x verzonken binnenzekantbout M6x25 8 x binnenzeskantbout M6x12 nederlands...
-
Page 20: Montage Kosmos
MONTAGE KOSMOS BENODIGDHEDEN 2 personen extremis sleutel philips schroevendraaier +/- 45 min. 1. Monteer eerst de tafelpoot op het kleine zetelframe met 4 bouten M6x30. Verwijder nu de transportschroef. In geval van vaste tafelpoot: monteer eerst de lange 2. Koppel nu de beide zetelhelften aan het kleine... - Page 21 4. Schroef het tafelblad vast met de verzonken bouten 5. Plaats nu de kussens in de Kosmos. M6x2. Het bedieningselement voor de hoogte- instelling wordt met 4 bouten M4x10 bevestigd onderaan het blad. Dit bedieningselement moet naar sitting lounging de zetelopening wijzen.
-
Page 22: Montage Met Kosmos Shade
MONTAGE KOSMOS MET KOSMOS PARASOL BENODIGDHEDEN 2 personen extremis sleutel philips schroevendraaier +/- 45 min. Volg de eerste 4 stappen van pagina’s 4-5. 5. Steek langs de binnenkant van het meubel 4 bouten Schuif aan de buitenkant vervolgens de plastic M8x70 door de daarvoor voorziene openingen (twee afstandshouder Erover en vervolgens de parasolpaal. - Page 23 8. Monteer de passende doppen op het parasolframe en niet, maak dan eerst de velcroband los en open de de vertikale buis. Plaats nu de kussens in de Kosmos parasol opnieuw. Pas nu mag je de velcroband zoals in stap 5 op pagina 5.
-
Page 24: Bijregelen Verstelbare Kabel
BIJREGELEN VERSTELBARE TAFEL BENODIGDHEDEN 2 personen extremis sleutel philips schroevendraaier +/- 45 min. 1. Demonteer de klep door de schroeven uit de draaien en draai de klep om. 3. Controleer of er speling tussen de kabel & de 4. Zo ja, draai de schroef uit tot de speling weg is & draai bevestigingsschroef zit. -
Page 25: Montage Hoezen
4. Knoop aan de achterkant van de Kosmos het touwtje 5. Sluit aan de voorzijde de velcrosluitingen en de vast, onder de parasolpaal. Het beste kan dit zoals kliksluiting. -
Page 26: Lamp Vervangen
LAMP VERVANGEN 1. Verwijder de buisdop met schakelaar en haal de LED 2. Haal het rode en het zwarte kabeltje uit de adapter. adapter uit de parasolbuis. 3. Verwijder de buisdop in het centrum van de parasol, 4. Verwijder de kapotte LED uit de buis en draai de bol trek het snoer doorheen de buis en draai de moer van er af, zodat deze op de nieuwe LED lamp bevestigd de verlichtingssokkel los. -
Page 27: Onderhoud
Laat de Kosmos parasol niet gesloten om ventilatie redenen niet 100% als ze niet volledig droog is. Laat ze waterdicht zijn. -
Page 28: Monatage Vrijstaande Tafel
MONTAGE VRIJSTA ANDE TAFEL BENODIGDHEDEN persoon inbussleutel nr. 4 +/- 15 min. 1. Neem de voetplaat en monteer deze d.m.v. 3 verzonken 2. Plaats nu het tafelblad op de inoxen buis zoals binnenzeskantbouten M10 x 25 aan de onderkant van aangegeven op de tekening en bevestig deze d.m.v. - Page 29 nederlands...
- Page 32 All rights reserved. Unless otherwise specified, all designs and photographs contained in this publication are copyright protected and are the property of Extremis. No part of this publication may be copied or distributed without Extremis’ prior written consent. The names of the authors of photographs to which we do not hold rights are mentioned here. We have done our utmost to provide a...
Need help?
Do you have a question about the KOSMOS and is the answer not in the manual?
Questions and answers