Table of Contents
Advertisement
Available languages
Available languages
Quick Links
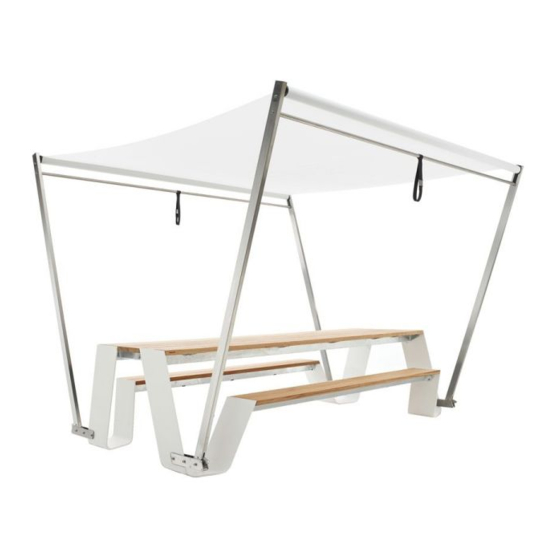
HOPPER SHADE
© design by dirk wynants
READ INSIDE
ASSEMBLY INSTRUCTIONS,
HOW TO USE, USEFUL TIPS
FOR KEEPING YOUR TOOL FOR
TOGETHERNESS IN SHAPE
PRODUCT
HOPPER SHADE – ASSEMBLY FOR HOPPER – ASSEMBLY TO
HOPPER LEGS – FLOOR FASTENING – CONCRETE BASE –
MAINTENANCE
LANGUAGES
EN – NL – DE
MORE
WWW.EXTREMIS.COM
Advertisement
Table of Contents

Related Manuals for Extremis HOPPER SHADE


Summary of Contents for Extremis HOPPER SHADE
- Page 1 EN – NL – DE HOW TO USE, USEFUL TIPS MORE FOR KEEPING YOUR TOOL FOR TOGETHERNESS IN SHAPE WWW.EXTREMIS.COM PRODUCT HOPPER SHADE – ASSEMBLY FOR HOPPER – ASSEMBLY TO HOPPER LEGS – FLOOR FASTENING – CONCRETE BASE – MAINTENANCE...
-
Page 2: Table Of Contents
LANGUAGES ENGLISH P. 3 contents p. 3 combined with hopper p. 6 assembly with freestanding bases p. 9 assembly with floor fastening p. 10 assembly to hopper legs p. 12 floor fastening with hopper table p. 13 opening/closing the shade p. -
Page 3: English
CONTENTS BASIC COMPONENTS 4 x pole 1 x fabric roller rube (2 left-hand side + 2 right-hand side) 8 x spring washer 8 x bolt 4 x bolt 4 x nut M8x20 OPTION 1: COMBINED WITH HOPPER 2 x right-hand side base palte 2 x left-hand side base palte 2 x union tube 4 x fixing pin... - Page 4 CONTENTS OPTION 2: FREESTANDING BASE 2 x freestanding base 4 x weight OPTION 3: FLOOR FASTENING 4 x ground anchor contents...
- Page 5 CONTENTS OPTION 4: ATTACHED TO HOPPER LEGS 2 x left-hand side inner 2 x right-hand side inner 4 x outer fastening plate fastening plate fastening plate 8 x thick plastic ring 16 x thin plastic ring 4 x stainless steel tube ø14x2x30 12 x socket head bolt 12 x spring washer M10x45...
-
Page 6: Combined With Hopper
COMBINED WITH HOPPER UTILITIES 2 people no. 17 spanner no. 4 - 5 hex key +/- 45 min. 1. Screw the two base plates (1 left (7) + 1 right (6)) to the union tube (8) using bolts B (at the bottom) and bolts C, in combination with spring washer (3) (at the side). - Page 7 3. Insert the poles (1) into the base plates. Caution! The cut-out at the top should be facing inwards and the hook should be facing outwards. Position the pole (1) in the base plate (6,7) in such a manner that you can put the bolt (4) through the hole in the base plate and through the hole in the pole.
- Page 8 COMBINED WITH HOPPER 5. Fasten the fabric roller tubes by means of the 8 M8x20 bolts (C), in combination with feather ring (3). 6. Loosen the 4 fastening screws to put the fabric under tension. Fasten the screw until it almost entirely disappears CAUTION! in the black plastic element.
-
Page 9: Assembly With Freestanding Bases
ASSEMBLY WITH FREESTANDING BASES UTILITIES 2 people no. 17 spanner no. 4 - 5 hex key +/- 30 min. 1. Position the 2 freestanding bases In case of HS10 people X = 353 cm (10) parallel to each other, at a In case of HS8 people X = 293 cm distance of x between the inside of In case of HS6 people X = 233 cm... -
Page 10: Assembly With Floor Fastening
(use the fixing media most 4. Perfectly align the holes in the ground anchor (12) suited to the type of ground on which you intend to with the holes in the floor. install the Hopper Shade). assembly with floor fastening... - Page 11 6. Insert the poles (1) in the ground anchors (12). Caution! The cut-out at the top should be facing inwards and the hook should be facing outwards. Position the pole (1) in the ground anchor (12) in such a way that you can put the bolt (4) through the hole in the ground anchor and through the hole in the pole.
-
Page 12: Assembly To Hopper Legs
ASSEMBLY TO HOPPER LEGS UTILITIES 2 people 1. If necessary, first drill holes in the 4 Hopper legs as shown in the diagrams and assembly the Hopper table as explained in the Hopper manual. no. 17 spanner no. 4 - 5 hex key +/- 45 min. -
Page 13: Floor Fastening With Hopper Table
3. Insert the tubes Ø14 x 2 x 30 (19) in the bottom hole of the 4 poles and insert the poles into the fastening plates. CAUTION! The cut-outs at the top should be facing inwards and the latches at the bottom should be facing outwards. Position the pole in the fastening plate in such a manner that you can put the M10 x 45 bolt (20) with its spring washer (21) through the hole in the fastening plate and in the pole. -
Page 14: Opening/Closing The Shade
This way you will prevent any possible damage shown in the drawing. to the shade. opening / closing the hopper shade... - Page 15 CLOSING THE SHADE 1. Tilt the latches upwards. 2. Close the two sides of the shade using the strap. CAUTION: When closing the shade, it will suddenly speed up when it reaches its tipping point. Keep a firm grip on the leather strap and carefully guide the shade into its closed position.
-
Page 16: Disassembly
WRONG CAUSE SERIOUS INJURY! 1. The springs are under tension! Turn the 4 fastening 2. In order to disassemble the Hopper Shade follow the screws clockwise to lock the fabric. The groove in the assembly steps in reverse order. fabric roller tube must be positioned in line with the fastening screw. -
Page 17: Maintenance
Never leave the shade unattended Never use a high-pressure cleaner to when opened. clean the shade. Do not leave the hopper shade closed Always brush very softly and be if the fabric is not completely dry. Do particularly careful at the seams. If... - Page 18 LANGUAGES ENGLISH P. 3 contents p. 3 combined with hopper p. 6 assembly with freestanding bases p. 9 assembly with floor fastening p. 10 assembly to hopper legs p. 12 floor fastening with hopper table p. 13 opening/closing the shade p.
-
Page 19: Nederlands
INHOUD BASISCOMPONENTEN 4 x zijprofiel 1 x doekrol (2 links + 2 rechts) 8 x veerring 8 x bout 4 x bout 4 x borgmoer M8x20 OPTIE 1: COMBINATIE MET HOPPER 2 x rechtse onderplaat 2 x linkse onderplaat 2 x verbindingsbuis 4 x vergrendeling 4 x bout 8 x bout... - Page 20 INHOUD OPTIE 2: VRIJSTAANDE VOET 2 x vrijstaande voet 4 x verzwaringsblok OPTIE 3: GRONDVERANKERING 4 x grondverankering inhoud...
- Page 21 INHOUD OPTIE 4: MONTAGE AAN HOPPER POTEN 2 x linkse binnenplaat 2 x rechtse binnenplaat 4 x buitenplaat 8 x kunststof ring dik 16 x kunststof ring dun 4 x inox buisje ø14x2x30 12 x cilinderkop met inbus 12 x veerring M10x45 BECHERMHOES 1 x beschermhoes...
-
Page 22: Montage Met Hopper
MONTAGE MET HOPPER BENODIGDHEDEN 2 personen steeksleutel nr. 17 inbussleutel nr. 4 - 5 +/- 45 min. 1. Monteer de twee grondplaten (1 links + 1 rechts ) door bout B onderaan en bout C, in combinatie met een veerring (3) langs de zijkant in de verbindingsbuis te schroeven. - Page 23 3. Bevestig de zijprofielen in de grondplaat. Let op! De uitsnijding bovenaan moet naar binnen wijzen en de haakjes onderaan moeten naar buiten wijzen. Positioneer het zijprofiel in de grondplaat zodat je de bout door het gat van de grondplaat en het zijprofiel kan steken. Draai de borgmoer op de bout en span aan met een steeksleutel 17.
- Page 24 MONTAGE MET HOPPER 5. Fixeer de doekrollen met de 8 M8 x 20 bouten en veerring 6. Draai de 4 stelschroeven los zodat het doek onder spanning komt. Draai de stelschroef in totdat ze bijna volledig LET OP in het zwarte kunststof stuk verdwenen is. Als je de stelschroef te veel indraait kan het zijprofiel vervormen.
-
Page 25: Montage Betonnen Sokkel
MONTAGE BETONNEN SOKKEL BENODIGDHEDEN 2 personen steeksleutel nr. 17 inbussleutel nr. 4 - 5 +/- 30 min. 1. Positioneer de 2 vrijstaande Bij HS360 is X = 353 cm voeten evenwijdig aan elkaar op Bij HS300 is X = 293 cm een afstand x tussen de Bij HS240 is X = 233 cm binnenzijdes van de 2 buizen. -
Page 26: Montage Vrijstaand
(gebruik hiervoor de 4. Plaats de grondverankering terug en zorg dat de bevestigingsmiddelen die meest geschikt zijn voor de gaten mooi over de geboorde gaten liggen ondergrond waarop de Hopper Shade moet staan). montage vrijstaand... - Page 27 LET OP 6. Bevestig de zijprofielen in de grondverankering De uitsnijding bovenaan moet naar binnen wijzen en de haakjes onderaan naar buiten. Positioneer het zijprofiel in de grondverankering zodat je de bout door het gat van de grondplaat en het zijprofiel kan steken. Draai de borgmoer op de bout en span aan met een steeksleutel nr.
-
Page 28: Montage Aan Hopper Poten
MONTAGE A AN HOPPER POTEN BENODIGDHEDEN 2 personen 1. Indien nodig, boor eerst de gaten in de 4 poten van de Hopper zoals vermeld op de tekeningen en monteer de Hopper zoals vermeld in de handleiding van de Hopper. steeksleutel nr. 17 inbussleutel nr. -
Page 29: Grondverankering Met Hopper Tafel
ø 3. Plaats de buisjes 14 x 2 x 30 in het onderste gat van de 4 zijprofielen en bevestig de zijprofielen in de LET OP bevestigingsstukken. De uitsnijdingen bovenaan moet naar binnen wijzen en de haakjes onderaan moeten naar buiten wijzen. Positioneer het zijprofiel in het bevestigingsstuk zodat je de bout M10 x 45 met de veerring... -
Page 30: Openen/Sluiten
Open de luifel dan met 2 kant aan het zijprofiel te trekken en zorg er steeds voor personen zoals hier aangegeven. dat beide zijden open staan, teneinde eventuele schade aan de luifel te voorkomen. hopper shade openen / sluiten... - Page 31 SLUITEN 1. Kantel de blokkeerhaken naar boven. 2. Sluit de 2 kanten van de luifel met behulp van LET OP het handvat. : Bij het sluiten zal de luifel plots versnellen wanneer hij zijn kantelpunt bereikt. Houd het handvat stevig vast en begeleid de luifel tot de gesloten positie.
-
Page 32: Demonteren
1. De veren zijn opgespannen! Draai de 4 stelschroeven 2. Volg de stappen van de montage in omgekeere in wijzerzin om het doek te blokkeren. De gleuf in volgorde om de Hopper Shade te demonteren. de doekrol moet in het verlengde van de stelschroef gepositioneerd worden. -
Page 33: Onderhoud
Laat de geopende Shade nooit de parasol. onbewaakt achter. Spuit de parasol nooit af met een Laat de Hopper Shade niet gesloten hoge drukreiniger. als ze niet volledig droog is. Laat ze niet gedurende lange tijd gesloten Borstel zeer zacht, wees extra in vochtige omstandigheden. - Page 34 LANGUAGES ENGLISH P. 3 contents p. 3 combined with hopper p. 6 assembly with freestanding bases p. 9 assembly with floor fastening p. 10 assembly to hopper legs p. 12 floor fastening with hopper table p. 13 opening/closing the shade p.
-
Page 35: Deutsch
INHALT BASISELEMENTE 4 x Seitenprofil 1 x Tuchrolle (2 links + 2 rechts) 8 x Sprengring 8 x Schraube 4 x Schraube 4 x Mutter M8x20 OPTION 1: KOMBINATION MIT HOPPER 2 x recht Bodenplatte 2 x linke Bodenplatte 2 x Verbindungsrohr 4 x Verriegelung 4 x Schraube 8 x Schraube... - Page 36 INHALT OPTION 2: FREISTEHENDER FUSS 2 x freistehender fuss 4 x Ballastblock OPTION 3: BODENVERANKERUNG 4 x Bodenverankerung inhalt...
- Page 37 INHALT OPTION 4: MONTAGE AN HOPPER-BEINEN 2 x linke Innenplatte 2 x rechte Innenplatte 4 x Ausseplatte 8 x dicker Kunststoffring 16 x dünner Kunststofring 4 x Edelstahlröhrchen ø14x2x30 12 x Zylinderschraube mit Inbus 12 x Sprengring M10x45 SCHUTZHÜLLE 1 x Schutzhülle deutsch...
-
Page 38: Montage Mit Hopper
MONTAGE MIT HOPPER WAS SIE BRAUCHEN 2 Personen Maulschlüssel Nr. 17 inbusschlüssel Nr. 4 - 5 +/- 45 min. 1. Montieren Sie die beiden Bodenplatten (6, 7), indem Sie Schraube B von unten und Schraube C, in Kombination mit Sprengring (3), seitlich in das Verbindungsrohr (8) schrauben. - Page 39 3. Befestigen Sie die Seitenprofile in der Bodenplatte. Achtung! Die Aussparung oben muss nach innen weisen. Stecken Sie das Seitenprofil (1) in die Bodenplatte (6, 7), sodass Sie den Schraube (4) durch die Löcher in Bodenplatte und Seitenprofil stecken können. Ziehen Sie die Mutter (5) auf den Schraube (4). ACHTUNG 4.
- Page 40 MONTAGE MIT HOPPER 5. Befestigen Sie die Tuchrolle mit den 8 Schrauben M8 x 20 (C), in Kombination mit Feder Ring (3). 6. Drehen Sie die 4 Stellschrauben los, sodass das Tuch unter Spannung kommt. Drehen Sie die Stellschraube hinein, ACHTUNG! bis sie beinahe vollständig in dem schwarzen Kunststoffelement verschwunden ist.
-
Page 41: Freistehende Montage
FREISTEHENDE MONTAGE WAS SIE BRAUCHEN 2 Personen Maulschlüssel Nr. 17 inbusschlüssel Nr. 4 - 5 +/- 30 min. 1. Positionieren Sie die beiden Bei HS 10 Personen ist X = 353 cm freistehenden Füße (10) parallel Bei HS 8 Personen ist X = 293cm zueinander im Abstand x zwischen Bei HS 6 Personen ist X = 233cm den Innenseiten der beiden... -
Page 42: Montage Mit Bodenverankerung
5. Jede Bodenverankerung (12) kann jetzt mithilfe von Schrauben (Benutzen Sie hierzu die Befestigungsmittel, 4. Platzieren Sie die Bodenverankerungen (12) genau die am besten für die Unterlage, auf der Hopper Shade über den gebohrten Löchern. stehen sollte, geeignet sind). montage mit bodenverankerung... - Page 43 6. Befestigen Sie die Seitenprofile (1) in die Bodenverankerung. Achtung! Die Aussparung oben muss nach innen weisen. Stecken Sie das Seitenprofil (1) in die Bodenverankerung (12), sodass Sie den Schraube (4) durch die Löcher in Bodenverankerung und Seitenprofil stecken können. Ziehen Sie die mutter (5) auf den Schraube (4). 7.
-
Page 44: Montage An Hopper-Beinen
MONTAGE AN HOPPER-BEINEN WAS SIE BRAUCHEN 2 Personen 1. Falls erforderlich bohren Sie zuerst die Löcher in die vier Beine von Hopper wie auf den Zeichnungen angegeben und montieren Sie Hopper so, wie in der Hopper-Anleitung beschrieben. Maulschlüssel Nr. 17 inbusschlüssel Nr. -
Page 45: Bodenverankerung Mit Hopper
3. Stecken Sie die Röhrchen ø 14 x 2 x 30 (19) in das unterste Loch der 4 Seitenprofile und befestigen Sie die Seitenprofile in den Befestigungselementen. Bitte beachten Sie: Die Aussparungen oben müssen nach innen weisen und die Haken unten müssen nach außen weisen. Stecken Sie das Seitenprofil in das Befestigungselement, sodass Sie die Schraube M10 x 45 (20) mit dem Sprengring (21) durch die Löcher in Befestigungselement und Seitenprofil stecken können. -
Page 46: Öffnen/Schließen
öffnen. Öffnen Sie einseitig an dem Seitenprofil zu ziehen und sorgen Sie das Sonnendach dann wie hier gezeigt zu zweit. dafür, dass die beiden seiten geöffnet sind. So kann man eventuellen schaden an dem Sonnenschirm vermeiden. öffnen / schließen hopper shade... - Page 47 SCHLIESSEN 1. Die Sperrhaken nach oben schwenken. 2. Schließen Sie beiden Seiten des Sonnendachs mithilfe ACHTUNG: der Griffschlaufe aus Leder. Beim Schließen entwickelt das Sonnendach plötzlich Zug, wenn es den Scheitelpunkt überschreitet. Halten Sie die Griffschlaufe aus Leder gut fest und begleiten Sie das Sonnendach bis in die geschlossene Position.
-
Page 48: Demontage
1. Die Federn sind gespannt! Drehen Sie die 4 2. Folgen Sie den Montageschritten in umgekehrter Stellschrauben im Uhrzeigersinn, um das Tuch zu Reihenfolge, um den Hopper Shade zu demontieren. blockieren. Die Nut in der Tuchrolle muss in der Verlängerung der Stellschraube positioniert werden. -
Page 49: Pflege
PFLEGE SONNENDACHTUCH WARNUNG Reinigen Segel Bei starkwind oder nichtgebrauch Sonnendachs und die Hülle durch schließen sonnendach, Spülen mit Wasser und Handseife schwenken Sie die sperrhaken nach sowie vorsichtiges Reiben mit einer unten, und ziehen Sie die Hülle weichen Bürste. Sorgen Sie in erster darüber, um zu vermeiden, dass es Linie dafür, dass das Tuch nicht sich im wind öffnet oder schmutzig... - Page 50 tools for togetherness...
- Page 52 W W W. E X T R E M I S .C O M All images, ideas, designs and design content are the intellectual property of Extremis and may not be copied, imitated or used, in whole or in part, without the prior written permission of Extremis.
Need help?
Do you have a question about the HOPPER SHADE and is the answer not in the manual?
Questions and answers