DeFelsko PosiTector SmartLink Instruction Manual
Hide thumbs
Also See for PosiTector SmartLink:
- Instruction manual (28 pages) ,
- Instruction manual (30 pages)
Table of Contents
Advertisement
Quick Links
Advertisement
Table of Contents

Subscribe to Our Youtube Channel
Related Manuals for DeFelsko PosiTector SmartLink


Summary of Contents for DeFelsko PosiTector SmartLink
- Page 1 with PosiTector DPM probes Instruction Manual v. 1.0 - Android...
-
Page 2: Table Of Contents
Smart Trend Indicators ........PosiTector App ............Connect PosiTector App to PosiTector probe User Interface ..........PosiTector SmartLink .......... Connect a Probe ..........10 Power-up/Power-down ........10 Tri-Color LED Button ........10 PosiTector DPM Probes ........11 Factory Calibration ......... 12 Certification ............ - Page 3 Delete ............. 20 Batch Report Configuration ......20 Batch Report ..........21 Setup Menu ............21 SmartLink Info ..........21 Change Units ..........21 SmartLink Lock ..........22 Dew Point Alarm ..........22 Reset (Menu Reset / LED Button Reset) ..23 Troubleshooting ..........
-
Page 4: Introduction
Introduction Introduction... -
Page 5: Why Is Measurement Important
Why is Measurement Important? For industrial painters, the primary reason for measuring climatic conditions is to avoid rework and the premature failure of protective coatings. Recommendations and requirements are covered under various internationally recognized standards. Temperature - It is important to measure both surface and air temperatures as they are often different. -
Page 6: Calibration
Operation Overview Operation Overview The PosiTector SmartLink powers-up when the LED button is pressed. To preserve battery life, the PosiTector SmartLink powers-down after 5 minutes of no activity. Alternatively, press and hold the LED button until it turns red and shuts off (approximately 5 seconds). - Page 7 Magnetic Surface Temperature probe. Both models feature Auto Log mode for monitoring climatic parameter over extended periods of time. Learn more: www.defelsko.com/dpm/ Td -The dew point temperature is a function of air temperature and relative humidity (see ISO 8502-4 Annex A). It is the temperature to which a volume of air must be cooled in order to reach saturation.
-
Page 8: Smart Trend Indicators
Tw - The wet bulb temperature is the temperature of adiabatic saturation. This is the temperature indicated by a moistened thermometer bulb exposed to air flow. The wet bulb temperature is calculated from Ta and RH using an air pressure of 1.0 atmospheres (1013 mbar). It approximates the temperature indicated by a moistened thermometer bulb exposed to airflow. -
Page 9: Positector App
PosiTector App PosiTector App The PosiTector App connects a PosiTector SmartLink to your Smart device enabling you to use PosiTector 6000, DPM, SPG or RTR-H probes on your device without the need for a conventional gage body. Screen fonts, brightness and displayed language are inherited from your smart device settings. -
Page 10: User Interface
In the above example, Search and Menu navigation options are available. Search returns back to the list of available PosiTector SmartLink devices. Menu accesses the Main Menu. SmartLink Status Bar Displays information about the connected PosiTector SmartLink and associated probe. - Page 11 Measurement Area Displays measurement (dataset) related information. The example on page 7 shows and environmental dataset. Memory is ON and datasets are being stored into Batch 1 (B1). The measurement area will change depending on the connected probe type and selected modes. Modes Icons and Units Displays icons for active modes (such as the disk icon X for Memory mode, pg 13) and measurement units ( X Fahrenheit).
-
Page 12: Positector Smartlink
PosiTector SmartLink PosiTector SmartLink The PosiTector SmartLink acts as a relay between the PosiTector probe and PosiTector App using wireless Bluetooth Smart (BLE Bluetooth Low Energy). No pairing required! Auto-pairing Bluetooth connection works up to 10 m (30 feet) away. -
Page 13: Connect A Probe
SmartLink. The PosiTector App will automatically recognize the probe and be ready to measure. Power-up / Power-down The PosiTector SmartLink powers-up when the LED button is pressed. To preserve battery life, the PosiTector SmartLink powers-down after 5 minutes of no activity. Alternatively, press and hold the LED button until it turns red and shuts off (approximately 5 seconds). -
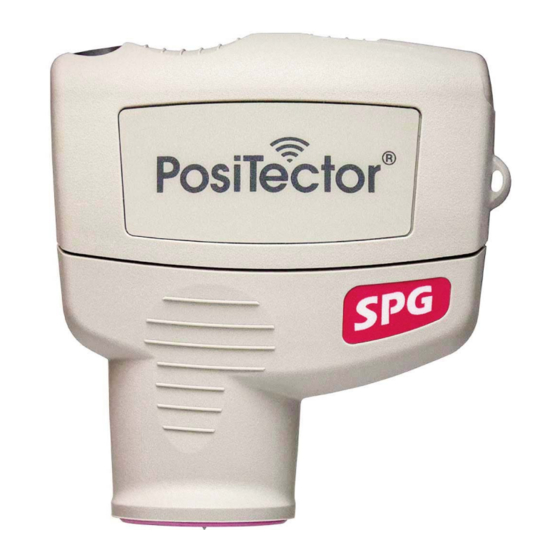
Page 14: Positector Dpm Probes
When using the surface temperature probe, do not use excessive downward force, and do not drag it sideways. More probe information is available at www.defelsko.com/dpm Protective Cap PosiTector DPM probes ship with a protective rubber cap (on surface temperature sensor). -
Page 15: Factory Calibration
National Metrology Institution. For organizations with re-certification requirements, instruments may be returned at regular intervals for calibration. DeFelsko recommends that customers establish calibration intervals based upon their own experience and work environment. Based on our product knowledge, data and customer feedback;... -
Page 16: Memory Menu
Store a dataset into the currently opened batch by pressing the X icon on the display or the LED button on the PosiTector SmartLink. The following screen views (3 of 6 views displayed) are available when a batch is open (Memory ON). -
Page 17: Batch Summary View
Batch Summary View In the PosiTector DPM memory example below, the batch name is B1 and contains 20 datasets. Use the Tool bar icons to add notes and change the batch name (pg 17), store dataset (pg 15) and add an image (pg 16). -
Page 18: Delete/Ignore Reading
Delete Reading permanently removes the selected dataset from the current batch. Cancel exits the menu. X Store Dataset Stores dataset into currently opened batch. Alternatively, press the LED button on the PosiTector SmartLink. -
Page 19: Add Photo
Choose from three paint brush colors - Red, Green or Blue. Use finger or stylus to draw over the displayed image. NOTE: Connection to a PosiTector SmartLink is not required to add a photo or image annotation to an existing batch. -
Page 20: Add Notes
Add Notes to currently opened batch or dataset. Change the batch name and add batch notes using your smart device's keyboard or dictation tools. Batch names/notes appear reports. Share Batch Share/view professional PDF reports and CSV data instantly via email, Dropbox or other applications on the smart device. -
Page 21: Batch Readings View
Batch Readings View Lists all datasets contained in current batch. datasets are added to the list instantly as they are taken. A note and/or photo can be added each individual dataset. Notes and photos can be displayed in batch reports. Batch Chart View Display x-y charts for datasets contained in the current batch. -
Page 22: Open
PosiTector SmartLink. NOTE: Opening a batch that was not created with the currently attached probe will disconnect the PosiTector SmartLink from the PosiTector App. You will still be able to add notes, photos, etc. to the dataset (batch). -
Page 23: Delete
Delete Permanently remove a batch from the PosiTector App. Select batches deletion, then select OK. select Delete batches for all probes to permanently delete all measurement data from smart device (phone/tablet). Batch Report Configuration Customize reports using the Batch Report Configuration to include/exclude notes, images, logo, company/report name, fonts, alignment, image sizes and more. -
Page 24: Batch Report
Batch Report Generate a report summarizing an individual batch multiple batches. Select desired batch or batches to include in the report and press OK. Share the report instantly via email, Dropbox other applications on your device. Setup Menu Setup Menu SmartLink Info Provides information about the currently connected PosiTector... -
Page 25: Smartlink Lock
You will have to unlock it if you want to wirelessly connect to another smart device. NOTE: The PosiTector SmartLink is not visible on other smart devices while you are connected (once you have selected the PosiTector SmartLink from the Search screen). Dew Point Alarm When toggled ON, user is visibly alerted when the surface temperature is less than 3°C (5°F) above the dew point... -
Page 26: Reset (Menu Reset / Led Button Reset)
Reset Restores factory default settings. Ideal for returning settings to a known condition. There are two available Reset options: Menu Reset and PosiTector SmartLink (LED Button) Reset Menu Reset (PosiTector App) Select Reset from the Setup menu Settings are returned to (pg 21). -
Page 27: Troubleshooting
PosiTector SmartLink not displaying on Search screen. Ensure PosiTector SmartLink is powered-up (pg 10), LED is blinking blue and is within range. Refresh the search using the arrow icon in the upper left of the display. Verify Bluetooth is ON in smart device settings. -
Page 28: Warranty
Every effort has been made to ensure that the information in this manual is accurate. DeFelsko is not responsible for printing or clerical errors. This device complies with part 15 of the FCC Rules. Operation is subject to...
Need help?
Do you have a question about the PosiTector SmartLink and is the answer not in the manual?
Questions and answers