Table of Contents
Advertisement
Quick Links
READ AND SAVE THESE INSTRUCTIONS
QUICK ASSEMBLY NOTES:
* Do not wire in fan while house wires are Live. Turn power off at breaker before installation
begins.
* Do not use any controls, wall or remote, other than those provided by Matthews Fan Company.
* Please do not use any electric or battery powered tools in the assembly and installation of this
or any other Matthews Fan Company product.
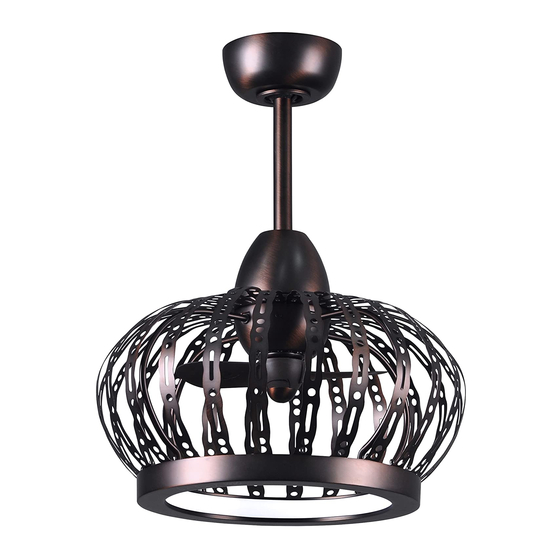
Dana
Ceiling Fan
FAN RATING AC 120V. 60Hz
For Damp Location
Advertisement
Table of Contents

Subscribe to Our Youtube Channel
Related Manuals for Atlas fan company Dana


Summary of Contents for Atlas fan company Dana
- Page 1 Dana Ceiling Fan READ AND SAVE THESE INSTRUCTIONS FAN RATING AC 120V. 60Hz For Damp Location QUICK ASSEMBLY NOTES: * Do not wire in fan while house wires are Live. Turn power off at breaker before installation begins. * Do not use any controls, wall or remote, other than those provided by Matthews Fan Company.
-
Page 2: Table Of Contents
TABLE OF CONTENTS Tools and Materials Required..................Package Contents ......................Safety Rules........................Mounting Options......................Hanging the Fan ......................Make the Electric Connections..................Finishing the Installation....................Disassembling Your Fan ....................Operating the Remote Control..................Care of Your Fan......................Troubleshooting...................... -
Page 3: Tools And Materials Required
TOOLS AND MATERIALS REQUIRED Philips screw driver Standard, flat-head screw driver 11 mm wrench Step ladder Wire cutters PACKAGE CONTENTS Unpack your fan and check the contents. You should have the following items: Hanger bracket assembly Ball / down rod assembly Coupling cover Fan motor assembly Allen wrench... -
Page 4: Safety Rules
READ AND SAVE THESE SAFETY AND INSTALLATION INSTRUCTIONS. Consult a licensed electrician if unsure of any point below mentioned. DANGER/WARNING/CAUTION 1. High voltage and moving parts around motors and motor driven equipment can cause serious or fatal injuries. Always disconnect power source at main switch before wiring, servicing or cleaning unit. -
Page 5: Mounting Options
11. To reduce the risk of personal injury, install the supplementary mounting means and use only the hardware provided with the fan. 12. Warning: TO REDUCE THE RISKS OF FIRE, ELECTRIC SHOCK OR INJURY TO PERSONS, OBSERVE THE FOLLOWING: A. Use this unit only in the manner intended by the manufacturer. If you have any questions, contact the manufacturer. -
Page 6: Hanging The Fan
MOUNTING/INSTALLATION OF THE FAN Ceiling hanger bracket Before touching a screw driver thoroughly read these instructions. Ceiling canopy Warning/Caution: Before installing fan, turn off power at service panel and check all visible Canopy screws and bolts for tightness. cover Figure 5 1. -
Page 7: Make The Electric Connections
8. Now lift the motor assembly into position and place the hanger ball into the hanger bracket. Rotate down rod until the "Check Tab" has dropped into the "Registration Slot" and the down rod and ball assembly seat firmly. The Screw down rod and ball assembly should not rotate if this is done correctly. - Page 8 MAKING THE ELECTRICAL CONNECTIONS Warning: The power should have already been disconnected. Follow the steps below to connect the fan to your household wiring. Use the wire nuts supplied with your fan. Secure the wire nuts with electrical tape. Make sure there are no loose strands or connections.
-
Page 9: Finishing The Installation
4. If your outlet box has a GROUND wire (Green or Bare Copper) connect this wire to the Hanger Ball and Hanger Bracket Ground wires. If your outlet box does not have a Outlet box Ground Wire, then connect the Hanger Ball and Hanger Bracket Ground Wires together. -
Page 10: Disassembling Your Fan
DISASSEMBLING YOUR This fan comes with a pre-assembled the blade for your easy installation. Check that all screws are tight and securely in place. If you need to disassemble the fan for any reason such as cleaning, follow these steps below: Motor shaft 1. -
Page 11: Operating The Remote Control
OPERATING THE REMOTE CONTROL Install 12V MN21/A23 battery (included). To prevent damage to transmitter, remove the battery if not used for long periods. (Fig. 14) Restore Power to Ceiling Fan. A. H, M, L Buttons: These buttons are used to set the fan speeds as follows;... - Page 12 Speed settings for warm or cool weather depend on factors such as the room size. Ceiling height, number of fans and so on. The Reverse switch is located on the top of the motor housing. Slide the switch to the Left for warm weather operation.
-
Page 13: Care Of Your Fan
CARE OF YOUR FAN Here are some suggestions to help you maintain your fan 1. Because of the fan's natural movement, some connections may become loose. Check the support connections, brackets, and blade attachments twice a year. Make sure they are secure. -
Page 14: Troubleshooting
TROUBLESHOOTING Problem Solution Fan will not start. 1. Check circuit fuses or breakers. 2. Check line wire connections to the fan and switch wire connections in the switch housing. CAUTION: Make sure main power is off. Fan is noisy. 1. Make sure all motor housing screws are snug. 2. - Page 15 LIMITED LIFETIME WARRANTY MATTHEWS-GERBAR, LTD. DBA MATTHEWS FAN COMPANY LIFETIME LIMITED WARRANTY. warranted by Matthews-Gerbar, Ltd. to the original user against defects in workmanship or materials under normal use and inside or outside damp location installation for: Motors: Lifetime of original purchaser: Labor &...
Need help?
Do you have a question about the Dana and is the answer not in the manual?
Questions and answers