Table of Contents
Advertisement
Quick Links
Advertisement
Table of Contents

Related Manuals for Ozone Roadrunner


Summary of Contents for Ozone Roadrunner
- Page 1 Pilots Manual - EN...
-
Page 2: Table Of Contents
CONTENTS Thank You Warning Your Roadrunner Limitations Preparation Basic Flight Techniques Caring and Maintenance Ozone Quality Technical Specifications Drawing/Riser lengths Line diagram Materials EN v1.0 April 2021... -
Page 3: Thank You
Ozone’s mission is to build agile paragliders of the highest quality with cutting edge designs, performance and maximum security. Confidence and belief in your paraglider is a far greater asset than any small gains in performance - ask any of the Ozone pilots on your local hills, or those who have taken our gliders on ground-breaking adventures or stood on podiums around the world. All our research and development is concentrated on creating the best handling/performance characteristics possible with optimum security. Our development team is based in the south of France. This area, which includes the sites of Gourdon, Monaco and Col de Bleyne guarantees us more than 300 flyable days per year which is a great asset in the development of the Ozone range. -
Page 4: Warning
WARNING • Paragliding is a potentially dangerous sport that can cause serious injury including bodily harm, paralysis and death. Using an Ozone paraglider is undertaken with the full knowledge that paragliding involves such risks, even when ground handling. • As the owner of an Ozone paraglider you take exclusive responsibility for all risks associated with its use. Inappropriate use and or abuse of your equipment will increase these risks. • Any liability claims resulting from use of this product towards the manufacturer, distributor or dealers are excluded. • The Roadrunner is for ground-handling purposes ONLY. It has NOT been designed, tested or certified for flight nor has it been subjected to a load test. DO NOT attempt to fly with this wing under any circumstances, doing so may result in serious injury or death. • Seek professional instruction, do not attempt to self-learn paragliding. • Be prepared to practice as much as you can - especially ground-handling, as this is a critical aspect of paragliding. Poor control whilst on the ground is one of the most common causes of accidents. • Be ready to continue your learning by attending advanced courses to follow the evolution of our sport as techniques and materials keep improving. • Ensure the area you have chosen is suitable for ground-handling: Free from rotor, power lines, uneven ground, trees, fences, rocks or other obstructions. • Make sure you complete a thorough daily and pre-flight inspection of all of your equipment. Never attempt to ground-handle with unsuitable or damaged equipment. -
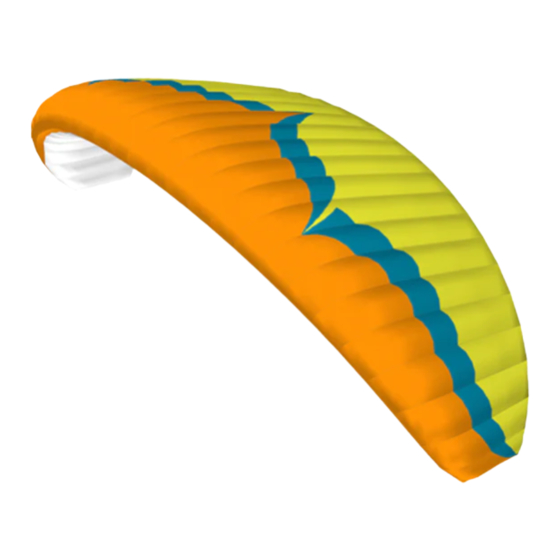
Page 5: Your Roadrunner
Whether you are training for high wind or zero-wind launches, the Roadrunner allows a fun and easy progression. In strong wind the wing has no over-shooting tendencies, and doesn’t generate too much lift either. In zero wind, it rises gently and with minimal effort. Schools will love the ease of use and the cost-savings. Save your “flight” wings for flying, instead of wearing them out for ground-handling. The Roadrunner was designed from the start with price in mind,... - Page 6 Stuff Sack As standard, your wing is supplied with a stuff sac. Its large volume allows you to store your wing easily whilst protecting it from dust and UV exposure. We have a large range of rucksacs available as optional extras at the time of order. Brake Lines The brake line lengths have been set carefully during testing. However, if you do choose to adjust their length please keep in mind the following: • Ensure both main brake lines are of equal length. • If a brake handle has been removed, check that its line is routed through the pulley when it is replaced. • When the brakes are fully released in flight, the brake lines should be slack. There must be a substantial bow in them. Risers The Roadrunner has been designed with 3 risers per side. The A risers are covered with coloured webbing for easy identification.
-
Page 7: Limitations
LIMITATIONS The Roadrunner has been designed as a solo ground-handling training wing suitable for all levels of pilots from beginner to advanced. It has NOT been designed, tested or certified for flight nor has it been subjected to a load test. DO NOT attempt to fly with this wing under any circumstances. Doing so may result in serious injury or death. Seek professional instruction before attempting to use the Roadrunner. It is not suitable for self- learning. Total Weight in flight IMPORTANT DO NOT attempt to fly There is no upper or lower weight limit however it is not suitable for light pilots in strong winds. Choose the conditions very carefully depending on the weight of the pilot. Light pilots are more likely to be the wing under any inadvertently lifted off their feet. Consider the wind too strong if there is a chance of becoming airborne. -
Page 8: Preparation
PREPARATION Harness Any certified paragliding harness is suitable for use with the Roadrunner, however we recommend to use one with a certified back protector for added security. Wing To prepare the wing, lay it out on the top surface and perform a thorough daily check. You should inspect the top and bottom surfaces for any rips and tears or any other obvious signs of damage. Lay out the lines one side at a time, hold up the risers and starting with the brake lines, pull all lines clear. Repeat with the stabilo, D (uppers), C, B and A lines, laying the checked lines on top of the previous set, and making sure no lines are tangled, knotted or snagged. Mirror the process on the other side and then inspect the lines for any visual damage. Then inspect the risers for any signs of obvious damage. The general rule is if it looks OK then it is OK, however if you have any doubts please get advice from an experienced pilot or your local dealer or instructor. Inflation checklist: 1. Helmet on and fastened 2. All harness buckles closed - check leg-loops again 3. Risers connected to the harness correctly with carabiners and maillons tight 4. Holding the A risers and your brake handles correctly 5. Leading edge open 6. Aligned in the middle of the wing and directly into wind 7. Airspace and visibility clear... -
Page 9: Basic Flight Techniques
BASIC TECHNIQUES Inflation Your Roadrunner can be inflated with either the forward or reverse technique. The wing should be laid out in a pronounced arc, with the centre of the wing higher than the tips. Forward Launch Nil to Light winds When the wind is favourable, whilst gently holding the A risers move forward positively, your lines should become tight within one or two steps and the Roadrunner will immediately start to inflate. You should maintain a constant pressure on the risers until the wing is overhead. Do not pull down or push the risers forward excessively, or the leading edge will deform and possibly collapse making taking-off more difficult and potentially dangerous. Move smoothly throughout the entire process, there is no need to rush or snatch at it. You should have plenty of time to look up and check your canopy whilst gaining speed on the ground. Practice checking both tips are clear whilst running. Reverse Launch Light to Strong Winds Lay out your wing as you would for the forward launch. However, this time turn to face it, passing one entire set of risers over your head as you turn. Now you can inflate the glider with your body weight and the A-risers. Once the wing is overhead release the risers and brake gently if necessary. You can practice controlling it whilst facing the wing or alternatively turn and control whilst facing the wind. Practicing this transition will really help improve your technique. In stronger winds, be prepared to take a few steps towards the glider as it inflates. This will take some of the energy out of the glider and it will be less likely to overfly you. -
Page 10: Caring And Maintenance
CARE AND MAINTENANCE Caring Tips Careless ground-handling damages many paragliders. Here are some things to avoid in order to prolong the life of your aircraft: • DO NOT drag your wing along the ground or any hard surface as this is guaranteed to cause damage to the sailcloth. Lift it up and carry it clear of the ground. • DO NOT try to open your wing in strong winds without untangling the lines first - this puts unnecessary strain on the lines. • DO NOT walk on the wing or lines. • DO NOT repeatedly inflate the glider and then allow it to crash back down. Try to keep this movement as smooth as possible by moving towards the glider as it comes down. • DO NOT slam your glider down on the ground leading edge first! This impact puts great strain on the wing and stitching and can even explode cells. • Ground-handling in salty air, in areas with abrasive surfaces (sand, rocks etc.) and ground handling in strong winds will accelerate the aging process. • DO NOT ground-handle in the rain or expose the wing to moisture. • DO NOT expose the wing to unnecessary UV or high levels of heat. Leaving the wing sitting in the sun or allowing it to get hot (e.g in the back of a car) will significantly increase the chances of premature ageing. • Change your main brake lines if they are damaged. • When ground-handling be careful to not saw the brake lines against the risers or main lines. The abrasion caused by a sawing motion can damage the main lines and the risers. If you notice any signs of abrasion, especially to the lines, make sure to replace them. It is important to modify your ground- handling technique to stop any future damage. - Page 11 Never use detergent or across the surface. chemical cleaners. If you land in salt water, you must first rinse it thoroughly with clean fresh water. Dry the wing completely, preferably out of the sun, in the wind. Never use a hair dryer or other sources of direct heat. Wing Repairs Always let a registered dealer, professional repair centre or the manufacturer carry out any major or complex repairs, especially those near seam margins. If you damage the sail: If the rip is small and in the middle of a panel however you can fix it yourself. You’ll find all the materials in the repair kit you need. The fabric can be simply mended with the sticky rip stop/spinnaker tape. When cutting out the patches allow ample overlap of the tear and make sure both sides are different sizes. Make sure to round off each corner of the patches. You can find more information about repairing your wing on the Ozone website, including step by step instructions with pictures.
- Page 12 If you damage a line: Any line that is visually damaged MUST be replaced. Lines can be ordered from your local Ozone dealer or from a reputable paragliding service centre who will be able to make replacement lines. Contact your dealer for the most efficient option. It is important that replacement lines are made from the correct materials and diameters. You should check lengths against their counterpart on the other side of the wing to make ensure symmetry. Once the line has been replaced, inflate and check the glider before flying. Maintenance Checks You alone are responsible for your flying equipment and your safety depends on it. Take care of your equipment and have it regularly inspected. Changes in inflation/groundhandling behaviour indicates the...
- Page 13 Packing To prolong the life of your wing and to keep the plastic reinforcements in the best possible condition it is very important to pack the wing carefully. Ozone recommends to use the concertina packing method exactly as shown so that all of the cells rest alongside each other and the plastic reinforcements are not unnecessarily bent. Using an Ozone Saucisse or Saucisse light pack will help preserve the life of the wing and aid with the speed and ease of packing. Step 1. Lay mushroomed wing on the ground. It is best to start from the mushroomed position as this reduces the dragging of the leading edge across the ground. Step 2. Group LE reinforcements with the A tabs aligned, make sure the plastic reinforcements lay side by side. Step 3. Lay wing on its side and Strap LE...Note the glider is NOT folded in half; it is folded with a complete concertina from tip to tip. It is really important to not stress the middle cell or bend the plastic too tightly.
- Page 14 Step 4. Group together the middle/trailing edge of the wing by sorting the folds near the B, C and D tabs. If using a Saucisse pack go to Step 8. Step 5. Once the LE and rear of the wing have been sorted, turn the whole wing on its side. Step 6. Fold the wing with 3 or 4 folds whilst being careful to not crush the LE. Step 7. Now place the folded wing into the stuff sack.
- Page 15 Step 8. If using the Saucisse Pack, carefully zip it up without trapping any material. Step 9. Turn the Saucisse on its side and make the first fold just after the LE reinforcements. Do not fold the plastic reinforcements, use 3 or 4 folds around the LE. IMPORTANT: Do NOT lay the wing flat on the ground before packing the glider, this will cause abrasion damage to the top surface as you pull the glider towards the middle. ALWAYS pack from a mushroom or lift the wing off the ground when gathering the wing and grouping the leading edge.
-
Page 16: Ozone Quality
OZONE QUALITY GUARANTEE Summary Safety is paramount in our sport. To be safe, we must be trained, practised and alert to the dangers around us. To achieve this we must fly as regularly as we can, ground-handle as much as possible and take a continuous interest in the weather. If you are lacking in any of these areas you will be exposing yourself to more danger than is necessary. Every year many pilots get hurt launching; don’t be one of them. Launching is the time that you are most exposed to danger so practice it lots. Some launch sites are small and difficult and conditions aren’t always perfect. If you’re good at ground-handling you’ll be able to confidently and safely launch whilst... -
Page 17: Technical Specifications
TECHNICAL SPECIFICATIONS No. of Cells Projected Area (m 12.1 Flat Area (m Projected Span (m) 6.06 Flat Span (m) 7.74 Projected Aspect Ratio Flat Aspect Ratio Root Chord (m) 2.36 Glider Weight (kg) 2.97 Weight Range (kg) > 40 Certification EN/LTF... -
Page 18: Drawing/Riser Lengths
TECHNICAL DRAWINGS Trailing Lower Surface Edge Leading Upper Surface Edge Riser Riser Riser Upper Cell Lines Openings Brake Brake Handle Lines Butt Hole Middle Lines Riser Stabilo Line Riser Lengths Lines 500mm Risers 500mm 500mm Main Hangpoint to Harness Karabiner... -
Page 19: Line Diagram
LINE DIAGRAM Individual and linked line lengths can be found online. Roadrunner A Riser B Riser B1 B2 B3 B4 B5 B6 B9 B10 Brake handle C Riser... -
Page 20: Materials
MATERIALS All Ozone gliders are made from the highest quality materials available. Cloth Upper Surface Dominico 40D MF Lower Surface Dominico 40D MF Internal Ribs Dominico 30D FM Leading Edge Reinforcement Plastic Main Line Set Brake Lines Riser Lines Main brake Lines Edelrid 6843 Liros - 10-200-040 Middle Lines Middle brake lines Liros DSL Liros DSL Upper Lines Upper brake lines... - Page 21 IMPORTANT DO NOT attempt to fly the wing under any circumstances.
- Page 22 1258 Route de Grasse Le Bar sur Loup 06620 France...
Need help?
Do you have a question about the Roadrunner and is the answer not in the manual?
Questions and answers