Table of Contents
Advertisement
Quick Links
Advertisement
Table of Contents

Related Manuals for Ozone Roadster 3


Summary of Contents for Ozone Roadster 3
- Page 1 Pilots Manual...
-
Page 2: Table Of Contents
CONTENTS Thank You Warning Team Ozone Your Roadster 3 Risers Preparation Basic Flight Techniques Advanced Flying Techniques Incidents Caring and Maintenance Limitations Ozone Quality Line diagram Technical Specifications Drawing/Riser lengths Materials EN v 1.2 January 2020... -
Page 3: Thank You
Confidence and belief in your paraglider is a far greater asset than any small gains in performance - ask any of the Ozone pilots on your local hills, or those who have taken our gliders on ground-breaking adventures or stood on podiums around the world. All our research and development is concentrated on creating the best handling/performance characteristics possible with optimum security. -
Page 4: Warning
Flying an Ozone paraglider is undertaken with the full knowledge of the involved risks. • As the owner of an Ozone paraglider you take exclusive responsibility for all risks associated with its use. Inappropriate use and or abuse of your equipment will increase these risks. -
Page 5: Team Ozone
TEAM OZONE Everyone at Ozone continues to be driven by our passion for flying, our love of adventure and our quest to see Ozone’s paraglider development create better, safer and more versatile paragliders. The design team consists of David Dagault, Luc Armant, Fred Pieri, Russell Ogden, Honorin Hamard, Emilia Plak and Alex Mateos. -
Page 6: Your Roadster
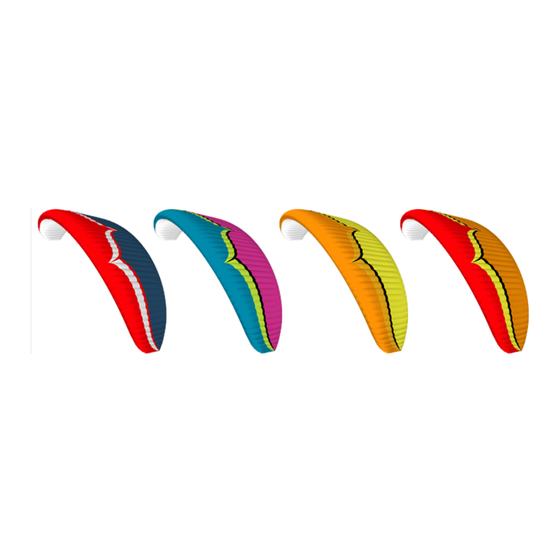
YOUR ROADSTER 3 The Roadster 3 is a dedicated paramotor wing developed from the successful Roadster 2. It is a fun, safe and easy to use wing specifically aimed at the newly qualified but also suitable for a wide range of pilots from beginners to the more experienced alike. Beginners under training and the newly qualified will appreciate the impeccable launching characteristics and rock solid stability whilst experienced XC pilots will appreciate its overall efficiency, performance and agile handling. -
Page 7: Risers
Trimmers This wing has passed the The Roadster 3 is supplied with a trim riser set. The ‘standard’ position is when the trimmers criteria required by the are pulled all the way down. The trimmers can be set to the red line for faster inflation DGAC and has been load behaviour during the take-off, this is especially useful in light winds and/or at high altitudes. - Page 8 Accelerator System The risers feature a foot operated speed system with ball bearing pulleys for easy, comfortable high speed cruising. Using the speed system has exactly the same effect as releasing the IMPORTANT trimmers - either can be used in any combination to accelerate the wing. Be careful, fully In the unlikely accelerated with trimmers released is very fast and should only be used in calm conditions event of a brake line...
- Page 9 Tip Steering System The Tip Steering System (TST) uses ergonomic handles for control of the wing during high speed accelerated flight. Located on the B risers, the handles are easily accessible and linked to the very tips of the wing, giving high levels of precision and comfort for high speed cruising or accurate low level carving.
-
Page 10: Preparation
The 28, 26 and 24 were certified with The Roadster 3 is suitable for all types of motor. There are many different motor units available hangpoint width and it is vitally important that you choose one that is suitable for your needs, weight and skill between 44-48cm. - Page 11 Wing To familiarise yourself with the glider it is a good idea to perform practice inflations and IMPORTANT ground handling both with and without the motor. As with all new equipment, only fly in Wing loading has a conditions that you would normally fly in and on a familiar site. Fly the wing in a progressive direct effect on the manner and be aware that wing loading has a direct effect on the wing’s flying characteristics.
-
Page 12: Basic Flight Techniques
When the wind is favourable, move forward positively: your lines should become tight within landing use only the one or two steps. The Roadster 3 will immediately start to inflate. You should maintain a brakes. In turbulent constant pressure on the risers until the wing is overhead. - Page 13 Lay out your Roadster 3 as you would for the forward launch. However, this time face the wing, and attach the risers in the correct manor (half a turn in each riser, and crossed in the direction you want to turn). Now you can pull up the Roadster 3 by its A-risers. Once the wing IMPORTANT is overhead, brake it gently, turn and launch.
- Page 14 By pulling the trimmers to the slow position and applying a small amount of brake, the Roadster 3 will achieve its best minimum-sink rate; this is the speed to use for thermalling and ridge soaring whilst free flying.
- Page 15 To familiarize yourself with the Roadster 3 your first turns should be gradual and progressive. IMPORTANT To make efficient and coordinated turns with the Roadster 3 first look in the direction you Never initiate a turn at want to go and check that the airspace is clear. Your first input for directional change should minimum speed (i.e.
- Page 16 If the wind is very strong, and you feel you might be dragged, stall the glider with the C risers. This stalls the Roadster 3 in a very quick and controllable way and will drag you less than if you use the brakes.
-
Page 17: Advanced Flying Techniques
Big Ears Folding in the wing tips of the Roadster 3 increases its sink rate. This is useful for staying out of cloud or descending quickly. To pull big ears on the Roadster 3 take hold of the outermost A-line (Baby A) on each side whilst keeping the brake handles in your hand. - Page 18 Spiral Dives If you turn your Roadster 3 in a series of tightening 360’s it will enter a spiral dive. This will result in rapid height loss. To initiate a spiral dive, look and lean in to the direction you want to turn and then smoothly apply the inside brake.
-
Page 19: Incidents
INCIDENTS IN FLIGHT Deflations Due to the flexible form of a paraglider, turbulence may cause a portion of the wing suddenly to collapse. This can be anything from a small 30% (asymmetric) collapse to a complete (symmetric) collapse. If you have a collapse, the first thing to do is to control your direction. You should fly away from the ground or obstacles and other pilots, or at least not to fly into them... - Page 20 Cravats If the tip of your wing gets stuck in the lines, this is called a ‘cravat’. This can make your glider IMPORTANT go into a spiral, which is difficult to control. The first solution to get out of this situation is to A bad preparation stabilise the glider into normal flight, i.e get control of your direction and then pull down the on launch, aerobatic...
-
Page 21: Caring And Maintenance
Ozone recommends to use the concertina packing method exactly as shown so that all of the cells rest alongside each other and the plastic reinforcements are not unnecessarily bent. Using an Ozone Saucisse or Saucisse light pack will help preserve the life of the wing and aid with the speed and ease of packing. - Page 22 Step 4. Group together the middle/trailing edge of the wing by sorting the folds near the B, C and D tabs. If using a Saucisse pack go to Step 8. Step 5. Once the LE and rear of the wing have been sorted, turn the whole wing on its side.
- Page 23 Step 8. If using the Saucisse Pack, carefully zip it up without trapping any material. Step 9. Turn the Saucisse on its side and make the first fold just after the LE reinforcements. Do not fold the plastic reinforcements, use 3 or 4 folds around the LE. IMPORTANT: Do NOT lay the wing flat on the ground before packing the glider, this will cause abrasion damage...
- Page 24 • Your Ozone wing has an opening closed using Velcro on the trailing edge of the tip called the ‘Butt hole’. This has been designed to easily empty all the things which have been...
- Page 25 When cutting out the patches allow ample overlap of the tear and make sure both sides are different sizes. Make sure to round off each corner of the patches. You can find more information about repairing your wing on the Ozone website, including step by step instructions with pictures.
- Page 26 If you damage a line: Any line that is visually damaged MUST be replaced. Use a reputable paragliding service centre to make the replacement lines. Alternatively you can order them from your local Ozone dealer. It is important that replacement lines are made from the correct materials and diameters. You should check lengths against their counterpart on the other side of the wing to make ensure symmetry.
- Page 27 The tearing resistance of the cloth - A non-destructive test following the TS-108 standard which specifies minimum tear strength for sky diving canopies should be made using a Bettsometer. (B.M.A.A. Approved Patent No. GB 2270768 Clive Betts Sails) Strength of the lines - An upper, middle and lower A line, along with a lower B and a lower C (and lower D if applicable) line should be tested for strength.
-
Page 28: Limitations
LIMITATIONS Pilot Suitability The Roadster 3 has been designed as a solo paramotoring wing for beginner and intermediate pilots. It is suitable for training, but it is not suitable for tandem flights or aerobatic manoeuvres. Certification This wing has passed the criteria required by the DGAC and has been load tested to the EN 926.1 standard. - Page 29 “normal” definition: spiral dives with descent rates of ~10m/s are considered generally safe. However, in our testing at Ozone we have recorded loads of up to 5.25G during fully engaged, nose-down spiral dives, at all parts of the weight range. Theoretically, it should not be possible to break a wing whilst flying at the maximum PPG weight of the larger sizes (smaller wing sizes have an inherent safety margin due to the fact that the same number &...
- Page 30 It is strongly Trike Flying recommended to The Roadster 3 may be used with a light solo trike so long as the maximum recommended not perform deeply weight range is respected. It is strongly recommended to not perform deeply engaged, high engaged, high sink sink rate spirals when flying with a trike.
- Page 31 Modifications IMPORTANT Do not modify your Your Ozone Roadster 3 was designed and trimmed to give the optimum balance of performance, wing in any way. handling and safety. Any modification voids the certification and will also make the wing more difficult and dangerous to fly.
-
Page 32: Ozone Quality
OZONE QUALITY GUARANTEE At Ozone we take the quality of our products very seriously, all our gliders are made to the highest standards in our own manufacturing facility. Every glider manufactured goes through a stringent series of quality control procedures and all the components used to build your glider are traceable. -
Page 33: Line Diagram
Roadster 3 Rigging Diagram LINE DIAGRAM Individual and linked line lengths can be found online. A Riser B Riser C Riser AR 1 AR 3 AR 2 BR 1 BR 2 CR 2 CR 1 BR 3 BR 4 CR 3... -
Page 34: Technical Specifications
TECHNICAL SPECIFICATIONS No. of Cells Projected Area (m2) 18.9 20.6 22.4 24.1 25.8 Flat Area (m2) Projected Span (m) 8.32 8.69 9.04 9.39 9.71 Flat Span (m) 10.59 11.06 11.52 11.95 12.37 Projected Aspect Ratio Flat Aspect Ratio Root Chord (m) 2.67 2.79 3.01... -
Page 35: Drawing/Riser Lengths
TECHNICAL DRAWINGS Trailing Lower Surface TST handle Edge Leading Upper Surface Edge Adjustable brake handle pulley Upper TST attachment point Lower TST attachment point Upper Cell Lines Openings Brake Trim tab Lines Butt Hole Speed System Middle Red trimmer Lines stitch line Riser Certi ed trim... -
Page 36: Materials
MATERIALS All Ozone gliders are made from the highest quality materials available. Cloth Upper Surface Dominico DOKDO 30D MF Lower Surface Dominico DOKDO 30D MF / Porcher 9018 EasyFly* Internal Ribs Dominico DOKDO 30D FM / Porcher 9017 E29* Leading Edge Reinforcement 2.5/1.8mm Plastic pipe... - Page 37 1258 Route de Grasse Le Bar sur Loup 06620 France...
Need help?
Do you have a question about the Roadster 3 and is the answer not in the manual?
Questions and answers