Table of Contents
Advertisement
Quick Links
Advertisement
Table of Contents
Troubleshooting

Related Manuals for Sakura Cyto-Tek 2500


Summary of Contents for Sakura Cyto-Tek 2500
- Page 1 Cyto-Tek 2500 ® Cytocentrifuge...
- Page 4 The brand names of products that have been registered or trademarked by and are owned by Sakura Finetek USA, Inc., Sakura Finetek Japan Co., Ltd., and Sakura Finetek Europe B.V. appear here: Cyto-Tek Sakura Tissue-Tek © 2015 Sakura Finetek USA, Inc.
-
Page 5: Table Of Contents
TABLE OF CONTENTS 1. INTRODUCTION 1.1 Intended Use ....................................3 1.2 General Description ..................................3 1.3 Physical Characteristics .................................. 3 1.3.1 Components and Figures ............................... 3 1.3.2 Guard Bowl Unit ..................................4 1.3.3 Control Panel ................................... 5 1.4 Specifications....................................6 1.5 Safety Standards .................................... - Page 6 5.3.2 Other Errors ................................... 33 5.4 Service Information ..................................34 5.4.1 When there is a Problem with the Instrument ........................34 5.4.2 Cyto-Tek 2500 Cytocentrifuge PreService Checklist ......................34 5.4 Accessory Items .................................... 35 5.5 Replacement Parts ..................................35 5.6 Where to Order ..................................... 35 6.
-
Page 7: Introduction
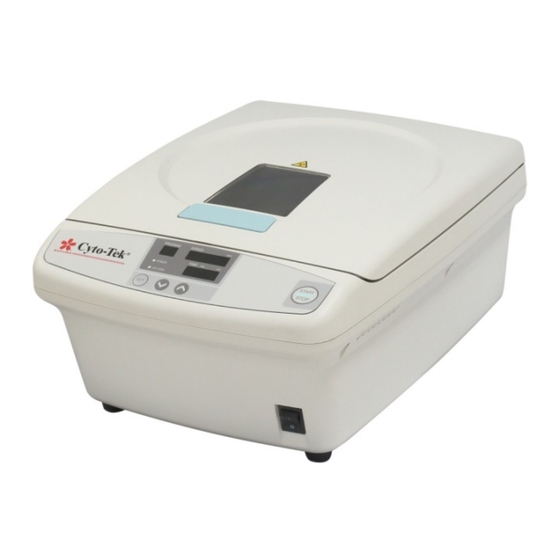
④ 1.2 General Description ⑤ ③ The Cyto-Tek 2500 Cytocentrifuge (Figure 1A) is a self- contained instrument designed to transfer cells from suspension onto a glass slide by cytocentrifugation. This instrument has the capacity for up to 12 specimen holders. -
Page 8: Guard Bowl Unit
1. INTRODUCTION ① Power Switch Turns the instrument power on and off. ② Control Panel Provides the control buttons and indicators to display the instrument status. ③ Instrument Lid Is opened and closed when the guard bowl unit is placed into the instrument. -
Page 9: Control Panel
1.3.3 Control Panel (Figure 1F) ⑤ ⑥ ⑦ Figure 1F ① ⑨ ⑧ ② ③ ④ ① START/STOP key Starts and stops the operation. ② SET key Switches the Standby mode to the Program mode and the Set & View mode. ③... -
Page 10: Specifications
1. INTRODUCTION 1.4 Specifications Operating Conditions: Operational temperature: 10 to 40°C (50 to 104°F) Power Required: Operational relative humidity: 30 to 85%RH (non-condensing) Power Rating: AC100 to 240V, 50/60Hz Storage temperature: 20 to 60°C (–4 to 140°F) Power Consumption: 100VA Storage relative humidity: 20-90% RH Power protection: Class I, Pollution Degree 2... - Page 11 CAUTION: The instrument is intended to be operated indoors. Do not use it outdoors. COMPARISION OF ROTATION SPEED RELATIVE TO CENTRIFUGAL FORCE Relative Acceleration Rotation speed Centrifugal (m/s (rpm) Force (g) Approx. Approx. 1000 1151 1100 1393 1200 1658 1300 1946 1400 2256...
- Page 12 1. INTRODUCTION Page 8...
-
Page 13: Installation And Setup
2.2 Installation Requirements for overseas customers. The Cyto-Tek 2500 Cytocentrifuge will deliver optimum If any of these items are missing contact Sakura Technical performance if the following requirements are observed: Support (see Section 5.4). 1. Place the cytocentrifuge on a strong, level surface If there is any visible shipping damage to any item, away from any induced mechanical vibration. - Page 14 2. INSTALLATION AND SETUP Figure 2B Figure 2E 3. Remove box tape. 7. Remove adhesive tape that holds the guard bowl unit in place and close the lid (Figure 2F). 4. Slightly hold up the instrument lid and remove the foam support inserts (Figure 2C).
- Page 15 9. Open the lid by pressing the Lid Open button 10. Remove a foam cushion (Figure 2J). (Figure 2H). Remove the guard bowl unit from the instrument (Figure 2I). Lid open push button Foam cushion Figure 2J Figure 2H 11. Install the lid gasket, see Section 4.1.3. (Figure 2K). 12.
-
Page 16: Standard Accessories And Options
972-7800 (U.S. Customers only). If you are located outside The cell deposition area of 1mL paper filter is 6 x 6 mm. ・ the U.S., contact your nearest Sakura instrument distributor ・ The cell deposition area of 6mL paper filter and 6mL rubber gasket is 14 x 14 mm. -
Page 17: Operating Instructions
(Figure 3A) The following is a basic operating flow when using the The instrument starts up in the standby mode after power- Cyto-Tek 2500 Cytocentrifuge: on. The control panel displays the program number and settings of a currently-selected program. The instrument Assemble the specimen chambers, dispense specimen into each chamber and saves up to 30 programs. - Page 18 3. OPERATING INSTRUCTIONS NOTE: To return to the standby mode without saving the 3. Press the SET key to save the changes. change, press the START/STOP key. CAUTION: The rotation speed is selectable from 200 NOTE: To return to the standby mode without saving the rpm to 2,500 rpm.
- Page 19 Selecting a Sound Volume SET-3 (Figure 3H) Figure 3J Error Codes have been programmed into the Cyto-Tek 2500 Cytocentrifuge. These 2-digit codes alert the operator to a Figure 3H possible instrument malfunction or operating error. They are displayed in the Speed Display window.
-
Page 20: Assembling The Specimen Chamber And Dispensing The Specimen
3. OPERATING INSTRUCTIONS NOTE: The occurrence order of the errors is displayed in cause an imbalance error to occur during the Program display. The error code of each error is operation. displayed in the Speed display. If there is no error stored in •... - Page 21 3. Insert the two tabs at the bottom of a clean specimen chamber into the corresponding holes of Chamber cap the chamber holder, as shown below (Figure 3M). 1.0mL 0.5mL Figure 3O NOTE 1: Do not fill the 1.0 mL specimen holder with more than 1.0 mL of specimen, as excess specimen may aerosol into the rotor bowl.
-
Page 22: How To Load The Rotor
CAUTION: Confirm that a name and ID on each glass slide match those of individual patients or subject. CAUTION: Load the Cyto-Tek 2500 Cytocentrifuge rotor so that it remains balanced. An improperly Figure 3U... -
Page 23: Starting The Operation
CAUTION: Make sure that the bowl lid is firmly 4. If there are an odd number of specimen samples to process, maintain the rotor balance by adding locked. one specimen chamber filled with water to pair CAUTION: If the guard bowl unit needs to be with the last unpaired specimen. -
Page 24: Discontinuing The Operation
3. OPERATING INSTRUCTIONS 4. Press the START/STOP key (b) to start the operation 3.8 Removing the Guard Bowl (Figure 3Z). CAUTION: In order to minimize a risk of infection, place the guard bowl inside a biological safety hood NOTE: The instrument lid is locked during operation. when installing or removing the bowl lid. - Page 25 according to the specimen processed or reagents used, as they are disposable. CAUTION: Drain the fluid waste accumulated in the guard bowl after every run. CAUTION: Do not leave the bowl lid locked after use. If the pressure inside the guard bowl becomes negative, the lid will become difficult to remove.
- Page 26 3. OPERATING INSTRUCTIONS Page 22...
-
Page 27: Care Of The Instrument
4.1.3 Disassembling and Cleaning 4.1 General Information the Guard Bowl Unit The Cyto-Tek 2500 Cytocentrifuge is a precision instrument designed for trouble-free operation and requires minimal CAUTION: To lessen the infection risk, place the routine maintenance. Handle the instrument with care to guard bowl unit inside a safety cabinet before avoid damage to the sensitive electronics. - Page 28 4. CARE OF THE INSTRUMENT Disassembly of the Guard Bowl The guard bowl unit has been disassembled as shown below (Figure 4F). 1. Loosen two screws that hold the rotor unit in place. Guard Bowl Remove the rotor unit (Figure 4C and 4D). Bowl Lid V-shape Figure 4C...
- Page 29 Installation (replacement) of the 2. Install the bowl lid gasket to the bowl lid (Figure 4I). Instrument Lid Gasket (Figure 4K) Gasket Instrument <Section View> Figure 4K “UPSIDE” 1. Open the instrument lid and pull out the old lid gasket on this surface from the groove.
-
Page 30: Cleaning 6Ml/12Ml Specimen Chambers, 6Ml/12Ml Rubber Gaskets, 6Ml/12Ml Chamber Cap And Chamber Holder
4. CARE OF THE INSTRUMENT 4.1.4 Cleaning 6mL/12mL specimen List of Disinfection/Sterilization Methods chambers, 6mL/12mL rubber CAUTION: When sterilizing the guard bowl unit by gaskets, 6mL/12mL chamber cap high pressure steam, wear protective clothing like and chamber holder (Figure 4M) gloves and take care not to get burned. -
Page 31: Gasket Replacement
F61-058-00 Grease (Sealub S-11), whenever the guard Decontamination. bowl unit becomes difficult to be removed easily from the Please call the Sakura Technical Support Department at 1- instrument or during periodic maintenance. 800-725-8723, option 2. 1. Open the instrument lid. Remove the guard bowl unit If located outside the United States, contact the nearest from the instrument. - Page 32 4. CARE OF THE INSTRUMENT Figure 4N 3. Put a small amount of grease on the spindle in eight places as shown below. 4. Use a dry paper towel such as Kimwipe to spread the grease evenly over the circumference of the protruding rims on the side of the spindle.
-
Page 33: Troubleshooting And Service
5. TROUBLESHOOTING AND SERVICE 5.1 Power Outage WARNING: BEFORE OPENING THE INSTRUMENT LID AFTER IT IS UNLOCKED, TAKE INFECTION CONTROL MEASURES SUCH AS WEARING PROTECTIVE Unlock the Lid Mechanically During CLOTHING AND PLACING THE INSTRUMENT IN A Power Outage SAFETY CABINET. WARNING: MAKE SURE THAT THE ROTATION HAS STOPPED BEFORE PERFORMING THE WORK. -
Page 34: Troubleshooting Charts
“PreService Checklist” at the end of this section. Then contact the Technical Support Department of Sakura Finetek USA., Inc. by calling toll free 1-800-725-8723, option 2 (U.S. only). If located outside the United States, contact the nearest Sakura instrument distributor or representative for information and assistance. -
Page 35: Error Code Of Monitored Errors
Description/Symptom Major Causes Action(s) Code Faulty solenoid or wiring Contact Sakura Technical Support or distributor. Poor connector contact To remove specimen chambers, see “How to The instrument lid remains locked unlock the lid mechanically during power outage”, Controller board failure P2-15. - Page 36 Improper guard bowl placement Place the guard bowl properly. Rotation detection error occurred Poor connector contact during deceleration Place the guard bowl properly. Contact Sakura (the rotation speed does not decrease Controller board failure Technical Support or distributor. during deceleration) Faulty motor, motor driver or wiring Turn the instrument power off.
-
Page 37: Other Errors
Unlock the bowl lid. Warm the guard bowl and open the lid. The pressure inside the guard bowl is negative. If the problem persists, contact Sakura Technical Support or distributor. The bowl lid cannot be opened. Warm the guard bowl and open the lid. -
Page 38: Service Information
Rotor mounting screws cannot If the problem persists, contact Sakura Technical be loosened by hand Support or sales representative. Worn or corroded female threads in bowl shaft housing Contact Sakura Technical Support or sales representative. Corrosion of screw threads 5.4 Service Information... -
Page 39: Accessory Items
1750 West 214th Street Torrance, CA 90501 U.S.A. 1-800-725-8723, option 1 Or contact the nearest authorized Sakura distributor or representative. In countries other than the United States, contact the nearest authorized Sakura distributor or representative for service information and assistance. - Page 40 5. TROUBLESHOOTING AND SERVICE Page 36...
-
Page 41: Safety Precautions
6. SAFETY PRECAUTIONS 6.1 Safety Precautions A label bearing this symbol specifies a cautionary item. Improper handling against the instruction may endanger the operator or Operation of the Cyto-Tek ® 2500 Cytocytocentrifuge damage the instrument. Always follow the requires expert knowledge of the intended application, instruction. -
Page 42: Dangers
In the event of instrument malfunction, turn off the instrument ・ If the instrument needs to be installed in a special place, power and call Sakura Technical Support Center. Unplugging the contact a Sakura sales representative. instrument can also turn off the main power supply. If the... -
Page 43: Warnings
Specimens should be regarded as biologically hazardous. Use of Install the instrument in a horizontal and vertical the components like the guard bowl for biological safety may not posture. be enough to prevent contamination with pathogenic organisms. The instrument in a slanted posture may lead to an accident. The instrument and guard bowl, however, are not resistant to an Leave 30cm or more of clearance around the UV germicidal lamp or ozone. - Page 44 Contact a Open the instrument lid only when needed to operate the Sakura sales representative for details instrument as instructed in this manual. The time the lid is opened Do not clean the instrument with benzene or should be as short as possible.
Need help?
Do you have a question about the Cyto-Tek 2500 and is the answer not in the manual?
Questions and answers