Table of Contents
Advertisement
Advertisement
Table of Contents

Related Manuals for Sakura Histo-Tek VP1


Summary of Contents for Sakura Histo-Tek VP1
- Page 1 Operating Manual...
- Page 2 Manufactured for: Sakura Finetek U.S.A., Inc. Torrance, CA 90501 Sakura Finetek Europe B.V., 2048 Alphen aan den Rijn. NL Sakura Finetek Japan Co., Ltd. Tokyo, Japan 103-0023...
-
Page 4: Table Of Contents
Table of Contents 1. Safety Precautions Chapter 1 Basic Knowledge of the Instrument Installation Method Installation of the Instrument [1] Flow of installation [2] Required tools [3] Installation Environment Checking the Installation Conditions Checking the Work Area Transporting the Instrument Unpacking Procedure [1] Unpacking the instrument [2] Removing the fixing members inside the instrument... - Page 5 Chapter 2 How to Operate Tissue Processing Operating Procedure Basic Operations [1] Operation flow Logging On the System [1] Logging off the instrument Preparing Solutions and Paraffin [1] Setting solution [2] Setting paraffin Preparing for Processing [1] Selecting the tissue processing program [2] Checking the solution level [3] Checking the bottle connection [4] Confirming the start...
- Page 6 [3] Editing the program processing time [2] Editing the program input temperature [5] Editing the program P/V [6] Editing the program Mix [7] Editing the program predicted endtime [8] Copying the settings to all stations Chapter 6 Application (Customization) Other Operations Process Report Screen [1] Checking the details of tissue processing results [2] Confirming the run history of the tissue processing report...
- Page 7 (End)
- Page 8 1. Safety Precautions Designate the "Instrument Control Manager" ● Operation of this instrument requires expert knowledge of the target application, method of use, and so on. Therefore, to use the instrument correctly and safely, designate a "Instrument Control Manager." ● When the instrument is delivered, the Instrument Control Manager should receive explanation on the handling of the instrument directly from our sales representative.
- Page 9 When removing the instrument from the pallet this way, indicate so in the shipping document and inspect the cargo for damage. As a rule, the instrument is unpacked/installed by Sakura Finetek or our authorized dealer.
- Page 10 If the instrument is moved while reagent or molten paraffin is set in it, the reagent may leak or paraffin may overflow. When moving the instrument, remove the paraffin container/reagent bottles first. When moving the instrument, contact the Sakura Finetek Technical Support representative or local representative.
- Page 11 If water, metal, paper or other foreign matter enters the air inlets (to the fan, etc.), fire, electric shock, injury of the user, instrument failure, etc., may occur. If foreign matter entered the instrument, immediately stop the instrument and contact the Sakura Finetek Technical Support representative or local representative. Do not operate the instrument while wearing metal accessories.
- Page 12 If a power cord not specified by the PSE standard, UL/CSA standard or EC standard is required, contact the Sakura Finetek Technical Support representative or local representative. Be sure to connect the power plug to a power outlet with grounding terminals.
- Page 13 1. Safety Precautions WARNING Do not move the instrument while operating. Move the instrument after removing all reagent bottles, paraffin containers and other components carrying liquid inside. Moving the instrument while operating may cause the reagent or paraffin to leak. Accident or failure may also occur.
- Page 14 1. Safety Precautions WARNING Connect all reagent bottles, paraffin containers and activated carbon filters. Connect all reagent bottles, paraffin containers and activated carbon filters. So that the bottle connection check will complete properly, connect an empty bottle or container to all stations including those not used in tissue processing.
- Page 15 If the lid is opened while the retort is still under pressure, injury may occur. If the indication does not return to "Ambient," do not forcibly open the retort lid, but contact the Sakura Finetek Technical Support representative or local representative.
- Page 16 When a reagent bottle is carried by hand, reagent may spill if the bottle is tilted. Handle reagent bottles with care. If the instrument must be moved after installation, contact the Sakura Finetek Technical Support representative or local representative.
- Page 17 In this case, use a uninterruptible power supply. If you find that the tissue processing had stopped during processing due to an unexpected power outage lasting for an extended period of time, protect the tissues and immediately contact the Sakura Finetek Technical Support representative or local representative.
- Page 18 Also, thoroughly verify the cassettes being used, to prevent serious trouble. It is recommended that cassettes manufactured by Sakura Finetek be used. Use a type of cassette appropriate for the tissue size. Tissues may not be properly processed depending on the cassette.
- Page 19 If there is substantially less reagent in any station (the station is empty) although the processing was successful, an error may have occurred during the previous processing. Do not start the next operation, but contact the Sakura Finetek Technical Support representative or local representative.
- Page 20 1. Safety Precautions WARNING Be sure to write down the reagent name on each reagent bottle and add the reagent indicated on the bottle. Also, set the reagent bottle at the same position as where the reagent name is set/displayed on the screen. Processing cannot be performed correctly if a wrong reagent is set in the reagent bottle.
- Page 21 1. Safety Precautions WARNING Some surface areas of the instrument become hot during operation. When handling paraffin or removing the basket from the retort, be sure to wear heat-resistant gloves and/or other protective gears. The paraffin, paraffin oven, paraffin container and retort are set to high temperatures inside, presenting a burn hazard.
- Page 22 1. Safety Precautions WARNING When this instrument is used to handle any substance presenting biological hazard, ensure safety by following the relevant regulations and guidelines in your country or region. When performing operations that involve any such substance, also wear gloves, mask, safety goggles and/or other protective gears and perform the operations inside a safety cabinet by taking appropriate measures to protect yourself as the operator.
- Page 23 Chapter 1 Basic Knowledge of Instrument...
-
Page 24: Installation Method
1. Installation Method 1) Installation of the Instrument This section provides information on determining a location for, and installing the instrument. Installation should be performed by qualified service staff working exclusively with the instrument. The instrument must be installed correctly to ensure proper operation and service. Read this Operating Manual carefully before operating the instrument. -
Page 25: Checking The Installation Conditions
1. Installation Method 2) Checking the Installation Conditions Checking the installation location Confirm beforehand that the location is flat, strong and meets the dimensions of installation location (installation space) shown in the figure on the right. Also confirm that no space is left at the rear of the instrument which will be used for people to pass through frequently (recommended). -
Page 26: Checking The Work Area
1. Installation Method 3) Checking the Work Area The dimensions and weight of the instrument in packed state are as follows. Check them beforehand so that sufficient space and safety can be ensured when "transporting, unpacking and installing" the instrument. "Dimensions and "Instrument weight in packed... -
Page 27: Unpacking Procedure
1. Installation Method 5) Unpacking Procedure How to remove the instrument from the packing box that has been carried in, and remove the protective materials, is explained. To perform each work safely and correctly, be sure to follow the procedure specified herein. Warning! Two or more persons should always work together to unpack the instrument. -
Page 28: Removing The Fixing Members Inside The Instrument
1. Installation Method [2] Removing the fixing members inside the instrument Remove the cushion materials and fixing members inside the instrument. Refer to the explanation of how to open the door and retort lid. Removing the tape Retort Remove the tape fixing each part. -
Page 29: How To Operate The Retort Lid
1. Installation Method [3] How to operate the retort lid To operate the retort lid, operate the hook that locks the retort lid and the retort lock lever that covers the hook. Caution! Be careful not to pinch your hand. ... -
Page 30: How To Operate The Fume Control Unit Door
1. Installation Method [4] How to operate the fume control unit door Press the bottom of the door with a finger and quickly release the finger, and you will hear a click sound and the door will be unlocked [1] and open [2]. -
Page 31: Switching The Power-Supply Voltage Setting
Confirm that all of the accessories are present (refer to the table below) and the instrument and accessories are free from damage. If the instrument is damaged or any of the accessories is short or damaged, contact your nearest Sakura Finetek dealer. -
Page 32: Checking The Installation (Securing The Instrument)
1. Installation Method 8) Checking the Installation (Securing the Instrument) 1. Confirm that the location where the instrument will be installed is flat and sufficiently strong. 2. Move the instrument to the installation location and lower the stoppers of the front casters of the instrument to secure the instrument. - Page 33 1. Installation Method [3] Installing the Divider for fume control unit and activated carbon filters Warning! The fume control unit reduces the amount of organic solvent released from the instrument. To make sure fume is adsorbed and treated properly, replace the activated carbon filters in the fume control unit periodically.
-
Page 34: How To Set The Reagent Bottle
1. Installation Method [4] How to set the Reagent bottle How to set the Reagent bottle is explained. Installing the Reagent bottle 1. Open the Reagent bottle rack door. Push in the top of the Connection port (plug) Connection port (coupler) on the bottle side on the instrument side door to open the door. -
Page 35: How To Attach Labels
1. Installation Method [5] How to attach labels How to attach processing labels and cleaning labels Processing/cleaning labels provide important information for checking the solution level (p. 2-3), so attach them correctly. Find a concaved part with flat surface where the handle is on the front face of the bottle. Attach a label there. -
Page 36: How To Set The Paraffin Container
1. Installation Method [6] How to set the paraffin container How to set the paraffin container is explained. Warning! Exercise caution against burns because the paraffin oven and paraffin may be hot. Installing the paraffin container 1. Open the paraffin oven door. 2. -
Page 37: Explanation Of The Instrument
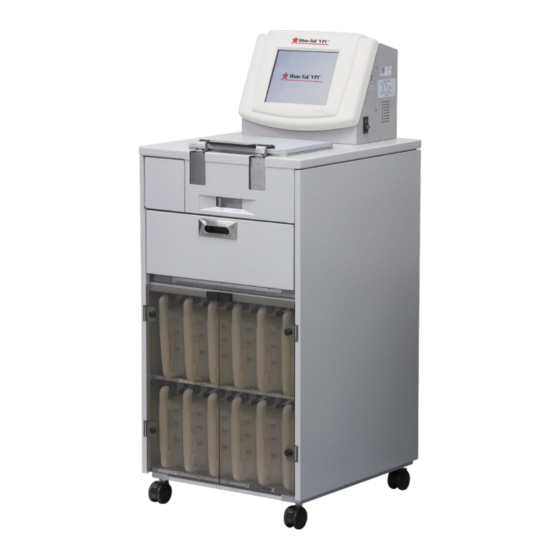
2. Explanation of the Instrument 1) Overview of the Instrument This instrument automatically performs in a single processing retort a series of tissue processing steps including fixation, dehydration, defatting and paraffin infiltration, to prepare pathological samples for histological studies and tests conducted in the fields of pathology, anatomy, clinical pathology, etc. ... -
Page 38: Name Of Each Part
3. Name of Each Part [16] [12] [14] [13] [15] [11] [10] [10] [11] [1] Monitor screen (screen) The icons used for program entry and operation and the tissue processing status are displayed. [2] Fume control unit door Open this door when replacing the activated carbon filters. [3] Retort lock cover This cover is for the hook that locks the retort lit. - Page 39 3. Name of Each Part [17] [18] [21] [19] [22] [23] [24] [20] [20] [17] Retort lid This lid is used to seal the retort. Open it to access the retort. [18] Retort seal [19] Retort A station used for processing. [20] Hook This metal part locks the retort lid.
-
Page 40: Standard Accessories/Options
4. Standard Accessories/Options [15] [16] [14] [10] [11] [12] [13] 1-17... - Page 41 4. Standard Accessories/Options Standard accessories Item Part number Q'ty Power Cord (100/115 VAC) A4-01-0518 1 each Power Cord ( 220-240 VAC) A4-01-0534 1 each Paraffin Container F60-907-00 4 each Complete Reagent bottle 1705 12 each Reagent bottle Plug Bottle Cap Basket with Handel (150 cassette size) 1706 2 each...
-
Page 42: Basic Knowledge
Dispose of reagent properly according to the applicable regulation in your country or region. Do not use chloroform or toluene. For any other chemical, contact the Sakura Finetek Technical Support or local representative. Processing solution volume; 3.2 to 3.5 L when processing 300 cassettes Usage of reagent Retort cleaning solution volume: 4.5 to 4.8 L... -
Page 43: Input Method
5. Basic Knowledge 2) Input Method When operating this instrument, characters and numeric values need to be entered on the touch screen. To enter characters and numerical values, the touch keyboard and ten-key keypad are used. [1] Using the touch keyboard The keyboard screen is displayed to create and save names such as a program name. -
Page 44: Log On/Log Off Function And Password Function
5. Basic Knowledge 3) Log On/Log Off Function and Password Function Since the instrument operates with nobody standing by for hours, an unauthorized person may operate the instrument without the operator noticing. To prevent such a situation, the instrument has the log on/log off function. The operator enters the preset password to log on and operate the system. -
Page 45: Automatic Transfer
5. Basic Knowledge 5) Automatic Transfer This instrument allows for solution exchange of processing solution at Sta.1 to Sta. 10 based on automatic transfer. Select the stations subject to automatic transfer, for each solution group set in the solution configuration information. -
Page 46: Explanation Of Screens
5. Basic Knowledge 7) Explanation of Screens The screen consists of the header, menu tab, main screen and footer. Institution Logged on display mark name/log-on user Current date/time Header Menu tab Standby Screen Main Screen Footer Tissue Processing Screen (Delayed Processing Screen) Utility Screen Solution Management Screen History Screen... -
Page 47: Screen Footer
5. Basic Knowledge [1] Header The screen header shows the current date & time, institution name, name of the currently logged on user, and icon indicating the authority of the logged on user (manager/user). If no user is currently logged on, this field remains blank. This icon is shown when the This icon is shown when a user is user is logged on as user. -
Page 48: Explanation Of The Standby Screen
5. Basic Knowledge 8) Explanation of the Standby Screen This screen is used to prepare for start of tissue processing. Follow the sequence in the preparation process display area and information in the message display area. Select Program button View/List Selector button Preparation process Solution configuration... - Page 49 5. Basic Knowledge Solution configuration display area A solution configuration diagram of the program currently selected is displayed. The solution configuration diagram consists of the stations listed below. Refer to p. 1-22 for their positions, etc. ・ Reagent stations (Station numbers 1 ~ 10) ・...
-
Page 50: Explanation Of Tissue Processing Screen
5. Basic Knowledge 9) Explanation of Tissue Processing Screen This screen is displayed while tissue processing is performed. Tissue processing program name VIEW/LIST Selector button Processing status Solution display area configuration display area Paused button Predicted Endtime Processing status display area The status of tissue processing is displayed. - Page 51 5. Basic Knowledge Solution configuration display area A solution configuration diagram of the program currently selected is displayed. The solution configuration diagram consists of the stations listed below. Refer to p. 1-22 for their positions, etc. ・ Reagent stations (Station numbers 1 ~ 10) ・...
-
Page 52: Utility Screen
5. Basic Knowledge 10) Utility Screen On the Utility screen, you can select Edit Solution Names, Edit Solution Configurations, Edit Program, System Setup, Manual Operations, Retort Cleaning and Select Language to perform the respective operations. Note These operations cannot be performed if the tissue processing is currently in progress. ... -
Page 53: Solution Management Screen
5. Basic Knowledge 11) Solution Management Screen The Solution Management screen lets you manage the usage statuses of reagent and paraffin and when to perform warm water flush. Note These operations cannot be performed if the tissue processing is currently in progress. ... -
Page 54: History Screen
5. Basic Knowledge 12) History Screen In the History screen, "Process Report," Event log," Error log," "Parts Usage" and "Software Version" can be confirmed. Note You can view the History screen even during tissue processing. Process Report (p. 6-1) Select this icon to confirm the process report. -
Page 55: How To Operate Tissue Processing
Chapter 2 How to Operate Tissue Processing... -
Page 57: Operating Procedure
1. Operating Procedure 1) Basic Operations This chapter explains a series of operating procedures. For details on related operation items, refer to the pages explaining the applicable items. Caution! Remember to start processing. If processing is not started, the specimens may be damaged. [1] Operation flow The basic operation flow is shown below by assuming normal use of the instrument. -
Page 58: Logging On The System
1. Operating Procedure 2) Logging On the System To start processing operation, a user must have "logged on" to the instrument. Only one user can "log on" to the instrument at a given time. 1. Touch LOG ON located in the bottom left-hand corner of the screen. The Password screen will appear. If other user is currently logged on, the LOG OFF button is shown in the bottom left-hand corner of the screen, with the name of the logged-on user and an applicable icon shown at the top of the screen. -
Page 59: Preparing Solutions And Paraffin
1. Operating Procedure 3) Preparing Solutions and Paraffin The preparation to be performed before processing is started is explained. Add the required volumes of solutions and paraffin to the applicable levels on the scale. Refer to the figure below for the scale levels. (Max) (Max) (Max) -
Page 60: Setting Solution
1. Operating Procedure [1] Setting solution Caution! Work on a flat table. Exercise due caution when handling solutions. Follow the relevant regulations and guidelines in your country or region and take proper measures to protect the operator, such as wearing gloves, mask and/or safety goggles. -
Page 61: Preparing For Processing
1. Operating Procedure 4) Preparing for Processing The standby screen is where you perform preparations to start tissue processing. Follow the messages in the preparation process display area on the left side of the screen to prepare for processing. Select Program button VIEW/LIST Selector button Preparation process... -
Page 62: Checking The Solution Level
When the solution levels in the reagent bottles were checked after the processing, some bottles contained a lot more solution or full and other bottles were empty. Contact the Sakura Finetek Technical Support representative or local representative. Note If the program only uses paraffin stations, automatic check is not performed and the Confirm Start window appears. -
Page 63: Confirming The Start
1. Operating Procedure [4] Confirming the start Check the predicted endtime and program details. If the entry of experiment numbers is set on or "Cassettes" is selected for solution usage management, also enter the experiment number and cassette count to be processed. Note If the entry of experiment numbers is not set or an item other than "Cassettes"... -
Page 64: Editing A Program Temporarily
1. Operating Procedure [5] Editing a program temporarily Touch Temporary Program Edit. The Temporary Program Edit window opens, where you can modify the details of the selected program temporarily. Refer to p.5-7 for information on how to edit. Note Modifications made under this function are temporary and effective only for the current run of tissue processing. -
Page 65: Running The Process
1. Operating Procedure 5) Running the Process [1] Assembling basket and setting specimens Prepare the supplied basket to be used in processing. Basket lid 1. Attach dividers into the basket. 2. Put the tissue slices into the cassette, put the cassette lid on, and put the cassette in the basket. -
Page 66: Monitoring Tissue Processing
1. Operating Procedure [3] Monitoring tissue processing Touching START in the window to confirm start of tissue processing starts tissue processing. If "Immediate Start" is selected as the tissue processing starting method, the Tissue Processing screen appears. If "Delayed Start" is selected, the instrument will stand by until it is time to start processing. Delayed Processing Screen Tissue Processing Screen Caution! - Page 67 1. Operating Procedure Delayed Processing screen This screen appears when "Delayed Start" is selected as the tissue processing starting method. [1] Processing status display area The status of tissue processing is displayed. During delayed processing, the time to start is displayed. The illustration of the retort shows the step number and processing time of the current processing.
- Page 68 1. Operating Procedure Tissue Processing screen This screen appears when "Immediate Start" is selected as the tissue processing starting method, or the starting time arrives in the case of delayed start. [1] Processing status display area The status of tissue processing is displayed. The illustration of the retort shows the step number at which the instrument is standing by, and the remaining processing time.
-
Page 69: Ending Tissue Processing
1. Operating Procedure 6) Ending Tissue Processing When all steps in the tissue processing program end, the Tissue Processing completed window appears. Since you as the operator are currently logged off, log on first and then remove the specimens and drain the paraffin from the retort. -
Page 70: Cleaning The Retort
1. Operating Procedure [2] Cleaning the retort Once the tissue processing ends, and the specimens are removed and retort is drained, the retort cleaning start screen appears. Touch Confirm according to the message. Touching START starts retort cleaning. The retort is warmed up to 70°C for 10 minutes. Thereafter, clean retort nine times with Sta. -
Page 71: Pausing, Aborting
1. Operating Procedure 7) Pausing, Aborting Touching Pause pauses the processing. Touching Pause not only stops the tissue processing, but it also resumes the tissue processing, allows you to temporarily edit the program or perform paraffin melt check, and aborts the tissue processing. If Pause is touched during delayed processing, you can also perform immediate start or change the predicted endtime. - Page 72 1. Operating Procedure Resuming tissue processing Touching Resume returns you to the Delayed Processing screen if the instrument was in the delayed processing mode, or to the Tissue Processing screen if it was performing tissue processing. Aborting tissue processing Touching Abort displays the Confirm window.
-
Page 73: Chapter 3 Cleaning
Chapter 3 Cleaning... -
Page 74: Cleaning
1. Cleaning 1) Type of Cleaning Operations There are two types of cleaning operations: Retort cleaning where the interior of the retort and tubing are cleaned with cleaning xylene and cleaning alcohol to clear attached paraffin, and warm water flush where precipitate build-up formed in the interior of tubing when neutral buffered formalin is used are cleaned with warm water. -
Page 75: Starting Warm Water Flush
1. Cleaning 3) Starting Warm Water Flush Warm water flush is performed to wash away with warm water the precipitate build-up that forms in the tubing when buffered formalin is used. Warm water flush is performed only for Sta. 1 to Sta. 5. Each station is flushed for 2 cycles, where each cycle consists of fill and drain. -
Page 76: Solution Exchange
Chapter 4 Solution Exchange... -
Page 78: Automatic Transfer
1. Solution Exchange 1) Automatic Transfer This instrument allows for solution exchange of processing solution at Sta.1 to Sta. 10 based on automatic transfer. Select the stations to perform automatic transfer for, in each solution group set in the solution configuration information. -
Page 79: Clearing The Usage Data
1. Solution Exchange 2) Resetting Solution Usage Information You can manage the solution usage statuses of Sta. 1 to Sta. 10, paraffin usage statuses of Sta. 11 to Sta. 14, cleaning xylene usage status of Sta. C1, cleaning alcohol usage status of Sta. C2, and when to perform warm water flush. -
Page 80: Program Creation (Editing)
Chapter 5 Program Creation (Editing) -
Page 82: Flow Of Editing A Program
1. Program Creation (Editing) 1) Flow of Editing a Program This chapter explains the flow of editing a program. For details on related operation items, refer to the pages explaining the applicable items. Editing Solution Names Details: p. 5-2 •... -
Page 83: Edit Menu Screen
2. Edit Menu Screen 1) Editing Solution Names Up to 100 solution names can be stored in the instrument memory. Solution names can be added (create new), copied, edited and deleted in the Edit Solution Names screen. Caution! Names of the solutions currently used for the station configuration cannot be changed. [1] Solution Name List A list of solution names currently stored in the instrument memory is displayed. -
Page 84: Edit Solution Configuration
2. Edit Menu Screen 2) Edit Solution Configuration On the Utility tab screen, touch the Edit Solution Configuration icon to open the Edit Solution Configuration screen. A solution group can be set for Sta. 1 to Sta. 10 on the Edit Solution Configuration screen. Up to six solution groups can be set. -
Page 85: Setting A Solution Name
2. Edit Menu Screen [2] Setting a solution name 1. Touch a desired solution name in the "Solution Name" field [1] in the solution configuration display field. 2. The Select Solution Name window appears. 3. Select from the "Solution Name List" [2]. If "Solution Group"... -
Page 86: Setting A Usage Limit For Solution
2. Edit Menu Screen [4] Setting a usage limit for solution Touch the area where the solution usage limit is displayed [1], and an input limit window will be displayed. Enter a value according to the selected management method. Touching Save saves the settings, after which the Utility screen will be displayed. -
Page 87: Editing Tissue Processing Programs
2. Edit Menu Screen 3) Editing Tissue Processing Programs On the Utility tab screen, touch the Edit Programs icon to open the Select Program screen. On the Select Program screen, you can change the name of the selected program or select a program you want to edit. -
Page 88: Editing A Program
2. Edit Menu Screen [2] Editing a program On the Utility tab screen, touch the Edit Programs icon to open the Select Program screen. Select the program you want to edit, and touch Edit. The Edit Program screen appears. On the Edit Program screen, "Time,"... -
Page 89: Editing The Program Input Temperature
2. Edit Menu Screen [4] Editing the program input temperature In the program details display field, touch Temp (C) [1] for the station you want to edit, and a value entry window appears. Enter a value in a range of 35 to 50, or no heating, for Sta. -
Page 90: Copying The Settings To All Stations
2. Edit Menu Screen [8] Copying the settings to all stations By touching each display field in [1], you can copy all of the settings of "Time," "Temp," "P/V" and "Mix" for the selected station, to all other stations at a time. 1. -
Page 91: Other Operations
Chapter 6 Other Operations... -
Page 93: Process Report Screen
1. Other Operations 1) Process Report Screen On the History tab screen, touch the Process Report icon to display the Process Report screen. On the Process Report screen, you can check and output the tissue processing history. Note If there are 12 or more results, a slide bar appears on the right side of the End status display field. You can move the slide bar to show more results. -
Page 94: Checking The Details Of Tissue Processing Results
1. Other Operations [1] Checking the details of tissue processing results On the Process Report screen, touch the Check field of a tissue processing result and then touch Details, and the details of the selected tissue processing result will be displayed. Moreover, touching Run History will display the run history. -
Page 95: Event Log Screen
1. Other Operations 2) Event Log Screen On the History tab screen, touch the Event log icon to open the Event log screen. On the event log screen, you can check or output the event details. Touch on the right to display the next page. Touch to move to the previous page. Up to 100 Note events are displayed, starting from the latest one. -
Page 96: Parts Usage Screen
Touch , and clear the usage data on the main screen after checking the details. Should you encounter any situation you cannot handle, Contact the Sakura Finetek Technical Support representative or local representative. 5) Software Version On the History tab screen, touch the Software Version icon to open the Software Version screen. -
Page 97: System Setup
1. Other Operations 6) System Setup On the Utility tab screen, touch the System Setup icon to open the System Setup screen. On the System Setup screen, "Date Format," Time Format, "Experiment Number," "Back Light Off" and "Activated carbon filter Management" can be set. You can also move to the "Date &... -
Page 98: Setting The Date & Time
1. Other Operations [1] Setting the Date & Time On the Date & Time screen, date and time are set. Setting the year/month Set the year/month by touching the / on the left and right sides of the year/month display area [1]. ... -
Page 99: Setting The Alarm Sound
1. Other Operations [3] Setting the alarm sound On the Sound screen, you can change the types of "Error," "Warning," "Lid Open" "Ending" and "Click" sounds and adjust the volume. Select a desired sound from six different patterns. The volume can be changed only for the "Click."... -
Page 100: Manual Operations Screen
1. Other Operations 7)Manual Operations Screen Current station position On the Utility tab screen, touch the Manual Operations icon to display the Manual Operations screen. On the Manual Operations screen, you can fill, drain and move through stations. [1] Retort/instrument status display field The retort status and instrument status are displayed. -
Page 101: Select Language
1. Other Operations 8) Select Language On the Utility tab screen, touch the Select Language icon to open the Select Language window. You can select one of the following nine languages. • English • Japanese • French • German • Spanish •... - Page 102 Chapter 7 Maintenance and Inspection...
-
Page 104: Daily Care, Inspection And Cleaning
1. Daily Care, Inspection and Cleaning This chapter explains how to maintain the system. So that the system operates properly, it must be maintained correctly. Before performing maintenance, read this chapter carefully and follow the specified procedures. 1) Periodic Maintenance To maintain this system in a usable condition, it must be maintained correctly and periodically. -
Page 105: Cleaning Of The Paraffin Oven And Spill Tray
1. Daily Care, Inspection and Cleaning 4) Cleaning of the Paraffin Oven and Spill Tray If the paraffin oven became dirty, clean it according to the method specified below. Warning! The paraffin oven and paraffin may be hot, so be careful not to burn yourself. 1. -
Page 106: Cleaning Of The Reagent Bottles
1. Daily Care, Inspection and Cleaning 6) Cleaning of the Reagent bottles Check the reagent bottles for dirt periodically. Also clean each reagent bottle at the time of solution exchange. <Front side of instrument> <Back side of instrument> Handle on the top of the bottle Bottle cap Plug... -
Page 107: Cleaning Of Exterior Panels
1. Daily Care, Inspection and Cleaning 7) Cleaning of Exterior Panels Protect the exterior panels from attachment of dust and dirt. In general, dust attached to the exterior panels can be removed only by wiping with a clean cloth wrung tightly after moistened with water. To clean the front surface of the monitor screen, wipe with 10% diluted ethanol solution and then let the surface dry naturally. -
Page 108: Replacement Of The Retort Seal
1. Daily Care, Inspection and Cleaning 10) Replacement of the Retort Seal Replace the retort seal periodically. If the retort is not sealed properly, pressure may not rise or other problems may occur. 1. Open the retort lid and pull out the worn retort seal. 2. -
Page 109: Chapter 8 Troubleshooting
Chapter 8 Troubleshooting... -
Page 111: Instrument Conditions And Remedial Actions
Use this information to identify the instrument condition and resolve the problem. If the problem cannot be resolved or the applicable condition is not listed, contact the Sakura Finetek Technical Support representative or local representative. - Page 112 Faulty paraffin oven door sensor LS2. Contact the Sakura Finetek Technical Support representative or local representative. Faulty CPU board. Contact the Sakura Finetek Technical Support representative or local representative.
- Page 113 Instrument condition Probable cause Action Stored instrument setup data The control file storing the setup data Contact the Sakura Finetek Technical Support was initialized. is lost or corrupted. representative or local representative. The CF card in the instrument is Contact the Sakura Finetek Technical Support corrupted.
- Page 114 Probable cause Action The specified alarm sound The WAV file storing the alarm sound Contact the Sakura Finetek Technical Support representative is no longer output. data is lost or corrupted. or local representative. The CF card in the instrument is Contact the Sakura Finetek Technical Support representative corrupted.
- Page 115 1. Troubleshooting Instrument condition Probable cause Action There is solution smell No activated carbon filter is set. Check that a activated carbon filter is set in the fume control unit. If around the instrument there is no activated carbon filter, set a filter. during processing.
- Page 116 1. Troubleshooting Instrument condition Probable cause Action Paraffin overflowed. Too much paraffin was filled to the If paraffin is added to above the top graduation in the paraffin paraffin container. container, it may overflow as reagent is brought in, etc. It is necessary to always confirm that paraffin is not above the upper limit of the graduation before the start of processing.
- Page 117 Also, the door may not be closed to the normal position. In this case, replace the damaged catch. External alarms are External alarms were not Contact the Sakura Finetek Technical Support representative or not output. communicated due to an external local representative. (When the optional wiring or connection equipment error.
- Page 118 The primary power line was Turn off the power immediately. instrument. overheated and smoke was generated Contact the Sakura Finetek Technical Support representative or from the vinyl wire. local representative. Smoke was generated due to an Turn off the power immediately.
-
Page 119: Error Codes Displayed During System Operation
Probable causes and remedial actions are described for each problem. Use this information to identify the instrument condition and resolve the problem. If the problem cannot be resolved or the applicable condition is not listed, contact the Sakura Finetek Technical Support representative or local representative. The number in the table indicates the applicable error number. - Page 120 Detached bottle (coupler). Do not remove the bottle once processing is started. The solenoid valve SV2 is always ON. Contact the Sakura Finetek Technical Support representative or local representative. Pump-in was not The reagent bottle or flow tube is...
- Page 121 Or, lock the lid. 3 attempts. Damaged lead valve or diaphragm of Contact the Sakura Finetek Technical Support the air pump. representative or local representative. Leak in the air circuit. Contact the Sakura Finetek Technical Support representative or local representative.
- Page 122 (temperature too low). Heater or wiring to the heater was Contact the Sakura Finetek Technical Support disconnected. representative or local representative. Faulty heater driver board. Contact the Sakura Finetek Technical Support representative or local representative.
- Page 123 Let the instrument stand for a while at an time-out. operable temperature and then turn on the power. Heater or wiring to the heater was Contact the Sakura Finetek Technical Support disconnected. representative or local representative. Faulty heater driver board. Contact the Sakura Finetek Technical Support representative or local representative.
- Page 124 Probable cause Action number 120 ~ 145 File system error. No available space in the CF card. Contact the Sakura Finetek Technical Support representative or local representative. Damaged CF card file or file format Contact the Sakura Finetek Technical Support error.
-
Page 125: Power Outage Recovery During Auto Operation
1. Troubleshooting 3) Power Outage Recovery during Auto Operation If the power is restored following an outage that occurred during auto operation, the processing resumes automatically. Note that if the power is turned off during processing, the instrument recognizes it as a power outage. The paraffin oven is not heated while the power is out. -
Page 126: Service Life
1. Troubleshooting 4) Service Life Service life: 8 years after manufacture/shipment Condition: The instrument shall be used by observing the handling precautions specified in the Operating Manual or documents attached thereto, and inspected daily and maintained regularly according to the instructions for maintenance/inspection. -
Page 127: Explanation Of Terms And Index
2. Explanation of Terms and Index Term (in alphabetical Explanation Reference page order) P. 5-8 The reagent in the retort is mixed with repeated pumped out/in. The retort is pressurized and vacuumed repeatedly. P. 5-8 A spare power supply that supplies the power from the instrument to operate the P. -
Page 128: Certificate Of Decontamination (Sample)
3. Certificate of Decontamination (Sample) If you are returning any used medical device to Sakura Finetek Japan, please provide the following information to help prevent contamination of other devices, etc., or living environment at our facility and the workers who will be working on/handling your device. Fill out this Certificate of Decontamination and return it with the device. - Page 129 8-19...
- Page 130 M01-018E-01...
Need help?
Do you have a question about the Histo-Tek VP1 and is the answer not in the manual?
Questions and answers