
Subscribe to Our Youtube Channel
Related Manuals for ControlByWeb WebRelay-Quad X-WR-4R1-5


Summary of Contents for ControlByWeb WebRelay-Quad X-WR-4R1-5
- Page 1 WebRelay-Quad Users Manual Revision: 2.6 - Dec 2015 Covers: X-WR-4R1-5 X-WR-4R1-I X-WR-4R1-E a division of... Xytronix Research & Design, Inc. Nibley, Utah, USA © 2006-2015 Xytronix Research & Design, Inc.
-
Page 2: Table Of Contents
Revision 2.6 WebRelay-Quad™ Users Manual Contents Trademark and Copyright Information Warranty FCC Statement Installation Guidelines (Read Before Installing) Section 1: Introduction 1.1 Features 1.2 WebRelay-Quad™ Models Available 1.3 Connectors & Indicators 1.4 Example Configurations and Applications 1.4.1 Basic Setup 1.4.2 Controlling High Power Devices 1.4.3 Using WebRelay-Quad™... - Page 3 Revision 2.6 WebRelay-Quad™ Users Manual Appendix Appendix A: Restoring Factory Default Settings Appendix B: Installing New Firmware Appendix C: Specifications Appendix D: Mechanical Information Xytronix Research & Design, Inc. page 3...
-
Page 4: Trademark And Copyright Information
Trademark and Copyright Information This document is Copyright ©2005-2015 by Xytronix Research & Design, Inc. All rights reserved. WebRelay-Quad™ and ControlByWeb™ are Trademarks of Xytronix Research & Design, Inc. 2005-2015. All parts of this product and design including but not limited to firmware, hardware design, schematics, PCB layout, concept, graphics, users manual, etc., are property of Xytronix Research... -
Page 5: Fcc Statement
Revision 2.6 WebRelay-Quad™ Users Manual FCC Statement This device complies with Part 15 of the FCC Rules. Operation is subject to the following two conditions: ━ This device may not cause harmful interference. ━ This device must accept any interference received, including interference that may cause undesired operation. -
Page 6: Installation Guidelines (Read Before Installing)
Virtual Private Network (VPN) between the network where WebRelay-Quad™ resides and the client machine (web browser, second WebRelay-Quad™, etc.). Final installation note. This ControlByWeb™ product supports connection to 10Mbps and 100Mbps networks. Although 100Mbps networks are faster, the amount of data transferred to and from this device is very minimal and little if any performance increase will be gained by setting it to 100Mbps. -
Page 7: Section 1: Introduction
Revision 2.6 WebRelay-Quad™ Users Manual Section 1: Introduction WebRelay-Quad™ is a compact, four-relay module with a built in web server. It can be controlled and/or monitored over any IP network including private networks, IP-based industrial control networks, and the Internet. Users can operate WebRelay-Quad™ using a web browser or a custom application. -
Page 8: Connectors & Indicators
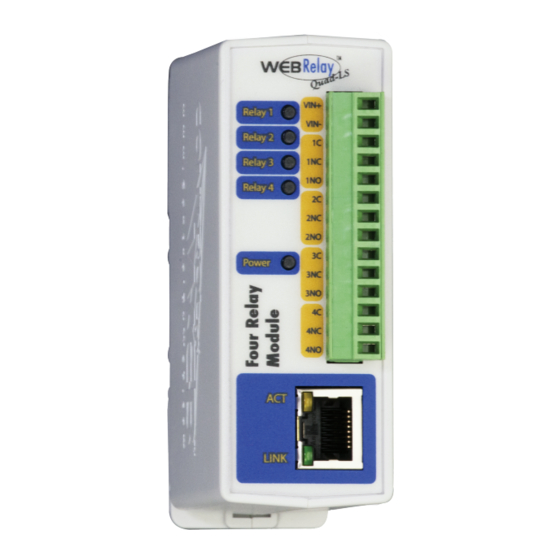
Revision 2.6 WebRelay-Quad™ Users Manual 1.3 Connectors & Indicators WebRelay-Quad™ has a removable terminal connector and an Ethernet connector. The terminal connector is used to provide power to the internal web server, and is used to connect external electrical loads to the relay contacts. There are seven LED indicators on WebRelay-Quad™. -
Page 9: Example Configurations And Applications
Revision 2.6 WebRelay-Quad™ Users Manual 1.4 Example Configurations and Applications WebRelay-Quad™ is very versatile and can be used in many applications. Several basic installation schemes are illustrated in this section. 1.4.1 Basic Setup The illustration below shows a simple WebRelay-Quad™ application. The example shows how a 3-color industrial light tower can be controlled remotely over an Ethernet network. -
Page 10: Controlling High Power Devices
N e t w o r k 1.4.3 Using WebRelay-Quad™ Without a Computer WebRelay-Quad™ can be used in conjunction with other ControlByWeb products such as WebRelay™ or the Five- Input Module. This allows users to control devices at a remote location by using switches or buttons instead of using a computer. -
Page 11: Section 2: Installation And Setup
Revision 2.6 WebRelay-Quad™ Users Manual Section 2: Installation and Setup Installation consists of mounting WebRelay-Quad™, connecting to an IP network, providing power, configuring via a web browser, and wiring relay contacts to the device that will be controlled. 2.1 Mounting WebRelay-Quad™... -
Page 12: Connection
Revision 2.6 WebRelay-Quad™ Users Manual 2.2 Connection CAUTION: MAKE SURE POWER IS SHUT OFF BEFORE WIRING! Two removable terminal connectors are provided for simple wiring to WebRelay-Quad™. The correct wiring procedure is as follows; 1. Make sure power is turned off. 2. -
Page 13: Power Supply Connection
Revision 2.6 WebRelay-Quad™ Users Manual 14-pin connector pinout: Description VIN+ Power supply input. Connect to the positive side of the appropriate power supply. DO NOT EXCEED MAXIMUM POWER SUPPLY VOLTAGE. Model X-WR-4R3-I 9~28VDC Power supply Model X-WR-4R3-E Power Over Ethernet model. These units do not require a power supply to be connected to this pin when the unit is connected to an 802.3af compliant network. -
Page 14: Network Connection
Revision 2.6 WebRelay-Quad™ Users Manual 2.2.2 Network Connection Connect the Ethernet port to a 10 Base T or 10/100 Base T Ethernet connection. This typically connects to an Ethernet hub, switch, or router. For configuration, WebRelay-Quad™ may be connected directly to the Ethernet port on a computer using a “crossover” cable. Otherwise for connection through a hub or router, a standard “straight-thru”... - Page 15 Revision 2.6 WebRelay-Quad™ Users Manual ping -l 102 10.10.10.40 Linux/Unix: Open a terminal, change to root user (su -, then enter root password). Type... arp -s {new IP address} {serial number of WebRelay-Quad™ } Note: IP address format is: xxx.xxx.xxx.xxx Serial number format is: ss:ss:ss:ss:ss:ss For example, to set a WebRelay-Quad™...
-
Page 16: Option 2: Assign A Temporary Ip Address To Configuration Computer
Revision 2.6 WebRelay-Quad™ Users Manual 2.3.2 Option 2: Assign a temporary IP address to configuration computer If the first option above is not used, you can use this option to communicate with WebRelay- Quad™ . By default, WebRelay-Quad™ comes from the factory with an IP address of 192.168.1.2. - Page 17 Revision 2.6 WebRelay-Quad™ Users Manual Step 2: Double click on the icon labeled Network Connections. The following menu will pop up. Step 3: Right click on the icon labeled Local Area Connection. Another menu will appear. Select the option at the bottom of the menu labeled Properties. The Local Area Connection Properties window will appear.
-
Page 18: Open Configuration Web Page
Revision 2.6 WebRelay-Quad™ Users Manual Step 5: Before making any changes to the network settings, write down the current settings so they can be restored once WebRelay-Quad™ is configured. Next, select the radio button labeled “Use the following IP address,” and type in the IP address 192.168.1.50. Type in a subnet mask of 255.255.255.0. -
Page 19: Web-Based Setup
Revision 2.6 WebRelay-Quad™ Users Manual 2.4 Web-Based Setup WebRelay-Quad™ is fully configurable through HTML 4.0 compliant web browsers such as Internet Explorer and Mozilla Firefox. It’s easy to use tab based menu system has been designed to allow the unit to be configured easily. Note that in this chapter, the default IP address of 192.168.1.2 is used in all examples. - Page 20 Revision 2.6 WebRelay-Quad™ Users Manual Navigating between setup pages is done by clicking on the tabs at the top of the page. All setup pages require a password. The default password is ‘webrelay’ (no quotes, all lower case) and no user name is required.
-
Page 21: Network Setup Page
Revision 2.6 WebRelay-Quad™ Users Manual 2.4.2 Network Setup Page The network parameters are changed on this page. Note that if multiple WebRelay-Quad™ units are used on the same network, install one unit at a time and set the IP address of each unit before connecting the next unit to the network. - Page 22 Revision 2.6 WebRelay-Quad™ Users Manual If WebRelay-Quad™ will be used over the Internet, the IP address must be a routable address assigned by the upstream Internet Service Provider (ISP). In cases where the ISP only provides a single routable IP address for the entire network (this is typical with ISPs such as cable providers), a proxy server (or gateway router) may be used.
- Page 23 WebRelay-Quad™ must have its TCP Port set to 8002 in it's network settings page. This pattern continues through 10.10.10.77 which is assigned the port 8007. To access the ControlByWeb™ units from the Internet, enter the IP address of the gateway plus the port number of the desired device.
-
Page 24: Password Setup Page
Revision 2.6 WebRelay-Quad™ Users Manual MTU Setting To change the MTU, manually enter the advSetup.html (case sensitive) page into the address bar. (http://192.168.1.2/advSetup.html). This new setup page will have a text box that will allow the MTU to be changed. The valid range is 256 to 1476 bytes. MTU is a network parameter that stands for Maximum Transmission Unit. -
Page 25: Relay Setup
Revision 2.6 WebRelay-Quad™ Users Manual 2.4.4 Relay Setup Pages These pages are used to set up the function of each of the four relays, and how each relay is represented on the control page. All four pages are identical, with the exception of the Relay 1 page which also includes a field for the main header text on the control page, the option to automatically refresh the control page, and the time duration for auto refresh. - Page 26 Revision 2.6 WebRelay-Quad™ Users Manual Auto Refresh Page: Web pages traditionally display static information. The WebRelay-Quad™ control page, however, displays information that is dynamic. Each time the control page is loaded to the browser, it displays a snapshot of the current status of the unit. If the state of the unit changes, the information on the control page will be outdated unless the page is re-loaded.
- Page 27 Revision 2.6 WebRelay-Quad™ Users Manual Pulse Button: This option allows the user to include a pulse button to control the relay. If the pulse button is included, the relay will pulse for the time specified in the ‘Pulse Duration’ field in the ‘Relay/Input’...
-
Page 28: Section 3: Operation
Revision 2.6 WebRelay-Quad™ Users Manual Section 3: Operation WebRelay-Quad™ can be operated by using a web browser, by sending text commands to an XML status/control page, or by sending Modbus/TCP requests. 3.1 Browser Operation Once the unit is set up, the control page may be accessed by typing the following URL into the web browser: http://192.168.1.2 (Note that if the IP address was changed, replace the default IP address shown with the new address that was assigned. -
Page 29: Xml Operation
Revision 2.6 WebRelay-Quad™ Users Manual 3.2 XML Operation Custom computer applications may be created to monitor and control WebRelay-Quad™ without using a web browser. Monitoring the state of the relays is done by sending a GET request to port 80 (or port specified in setup) for the XML page. Control of the relay is done by sending GET requests to the same page. - Page 30 Revision 2.6 WebRelay-Quad™ Users Manual The pulseTimeX variable does not change the pulse time specified in the setup page and it is not stored or recorded. The pulseTimeX variable only changes the pulse duration for the single pulse initiated by that command. In other words, you must issue the pulseTimeX for each pulse command that differs from the preset pulse time.
-
Page 31: Get Requests
64 encoded version of the username and password none:webrelay. A utility is provided at http://www.ControlByWeb.com/encoder that can be used to encode the password. The utility is used by simply typing the string username:password into the website and pressing encode. -
Page 32: Modbus Operation
Revision 2.6 WebRelay-Quad™ Users Manual 3.3 Modbus Operation WebRelay-Quad™ can be controlled (and read) using Modbus/TCP protocol. This provides a standard means of using WebRelay-Quad™ in conjunction with devices and software from other manufacturers. This section contains the information necessary to communicate with WebRelay- Quad™... - Page 33 Revision 2.6 WebRelay-Quad™ Users Manual Protocol identifier (2 Bytes): 0x0000 Length (2 Bytes): 0x0004 Unit identifier (1 Byte): 0xff Modbus: Function code (1 Byte): 0x01 (Read coils) Byte count (1 Byte): 0x01 Coil status (1 Byte): 0x00 to 0x0F (see chart below) Data Byte LS Data Bits Relay 4 State Relay 3 State Relay 2 State...
-
Page 34: Write Single Coil (Modbus Function Code 05 (0X05))
Revision 2.6 WebRelay-Quad™ Users Manual 3.3.2 Write Single Coil (Modbus Function Code 05 (0x05)) This function is used to change the state of the coil Request Modbus/TCP: Transaction identifier (2 Bytes): 0x0001 Protocol identifier (2 Bytes): 0x0000 Length (2 Bytes): 0x0006 Unit identifier (1 Byte): 0xff Modbus: Function code (1 Byte): 0x05 (write coil) -
Page 35: Write Multiple Coils (Modbus Function Code 15 (0X0F))
Revision 2.6 WebRelay-Quad™ Users Manual 3.3.3 Write Multiple Coils (Modbus Function Code 15 (0x0F)) A single byte can be written to set the state of all four relays. To do this, set the starting address to 0, set the quantity of outputs to 4, and write a single byte with the appropriate value according to the table below. -
Page 36: Write Multiple Registers (Modbus Function Code 16 (0X10))
Revision 2.6 WebRelay-Quad™ Users Manual Response Modbus/TCP: Transaction identifier (2 Bytes): 0x0001 Protocol identifier (2 Bytes): 0x0000 Length(2 Bytes): 0x0006 Unit identifier (1 Byte): 0xff Modbus: Function code (1 Byte): 0x0f (write coil) Starting address (2 Bytes): 0x0000 Quantity of outputs (2 Bytes): 0x0000 - 0x0004 Modbus Error: Function code (1 Byte): 0x8f Exception code (1 Byte): 0x01 or 0x02... - Page 37 Revision 2.6 WebRelay-Quad™ Users Manual Character String Example: char write_registers_mb_request = {0x00, 0x01, 0x00, 0x00, 0x00, 0x0b, 0xff, 0x10, 0x00, 0x10, 0x00, 0x02, 0x04, 0x00, 0x00, 0x41, 0x20 }; Response Modbus/TCP: Transaction identifier (2 Bytes): 0x0001 Protocol identifier (2 Bytes): 0x0000 Length (2 Bytes): 0x0006 Unit identifier: 0xff Modbus:...
- Page 38 Revision 2.6 WebRelay-Quad™ Users Manual Appendix A: Restoring Factory Default Settings In the event that the IP address or passwords are forgotten, WebRelay-Quad™ may be restored to its original factory default settings. To do this, first remove the power from the unit. Next, insert a thin object (such as a toothpick) through the small hole in the bottom of the unit to press the small button that is located inside the unit.
- Page 39 Setup 1. Download the firmware zip file from the ControlByWeb website. Only a WebRelay-Quad™ image can be installed on a WebRelay-Quad™ so make sure the correct image is being downloaded. 2. bootloader.exe will connect to WebRelay-Quad™ using default IP address 192.168.1.2, not the address currently assigned to WebRelay-Quad™.
- Page 40 Continue to hold the reset button for the next step. 4. While holding the reset button, press the Upload Firmware button at the bottom of the ControlByWeb™ Programmer window. After the programming process begins, the reset button can be released 5.
- Page 41 Revision 2.6 WebRelay-Quad™ Users Manual Appendix C: Specifications Power Requirements: Model X-WR-4R3-I Voltage: 9~28VDC Current: See table below for typical values Power Supply All Relays OFF All Relays ON 10 Mbps 100 Mbps 10 Mbps 100 Mbps 9 VDC 110 mA 192 mA 334 mA 425 mA...
- Page 42 Revision 2.6 WebRelay-Quad™ Users Manual Physical: Operating Temperature: -40°C to 65.5°C ( -40°F to 150°F) Size: 1.41in (35.7mm) wide X 3.88in (98.5mm) tall X 3.1 in(78.0mm) deep Weight: 4.5oz (128 grams) Enclosure Material: Lexan 940 (UL94 V0 flame rated) Password Settings: Password protection on setup page: Yes Password protection on control page: Optional Password Encoding: Base 64...
- Page 43 Revision 2.6 WebRelay-Quad™ Users Manual Appendix D: Mechanical Information Xytronix Research & Design, Inc. page 43...
Need help?
Do you have a question about the WebRelay-Quad X-WR-4R1-5 and is the answer not in the manual?
Questions and answers