Advertisement
Quick Links
Advertisement

Related Manuals for Forward Industries HM-ST007-001


Summary of Contents for Forward Industries HM-ST007-001
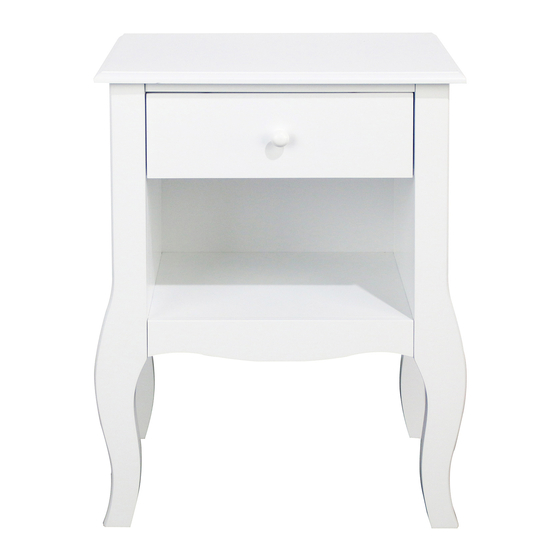
- Page 1 NIGHTSTAND Product Refs-HM-ST007-001 Issue 1 -11/11/20...
- Page 2 1. The maximum weight that can be placed on this product is 110lbs. 2. This product must not be used as a seat. 3. Check carefully to ensure correct and complete assembly before using. 4. Don’t allow children to play near the product as their behaviour is unpredictable. The manufacturer is not responsible for loss, injury, or damage due to improper actions or use.
- Page 3 Top Panel Qty 1 Front Leg (Left) Qty 1 (18.89×13.38×0.59") (25.39×2.75×0.98") Back Leg (Left) Qty 1 Side Panel (Left) Qty 1 (25.39×2.75×0.98") (10.62×15.55×0.47") Front Leg (Right) Qty 1 Back Leg (Right) Qty 1 (25.39×2.75×0.98") (25.39×2.75×0.98")
- Page 4 Side Panel (Right) Qty 1 Apron Qty 1 (10.62×15.55×0.47") (13.77×0.59×2.36") Base Panel Qty 1 Stretcher Qty 1 (13.77×11.81×0.59") (13.77×0.59×0.78") Back Panel Qty 1 Drawer Front Qty 1 (14.56×14.33×0.11") (13.62×4.72×0.59")
- Page 5 Drawer Side (Left) Qty 1 Drawer Side (Right) Qty 1 (11.81×3.93×0.47") (11.81×3.93×0.47") Drawer Back Panel Qty 1 Drawer Base Qty 1 (11.81×3.93×0.47") (12.12×11.65×0.11")
- Page 6 Large Wooden Dowel Qty 20 Cam Dowel Qty 23 Large Cam Nut Qty 7 × × × 1.18") 1.41") (M15 0.47”) Small Wooden Dowel Qty 2 Small Cam Nut Qty 16 Screw Qty 12 × × (M15 0.37”) 0.78") × (M2.5 0.39") (CL)
- Page 7 561-465-0030, Option 0. Address: Forward Industries, 105 South Narcissus Avenue Suite 412, West Palm Beach, FL 33401...
- Page 8 STEP 1 Screw cam dowels into various components as shown. Cam Dowel Qty 23...
- Page 9 STEP 2 Fit large wooden dowels and small wooden dowels into various components as shown. Large Wooden Dowel Qty 20 Small Wooden Dowel Qty 2...
- Page 10 STEP 3 Insert small cam nuts F F F F F F F F F F F F F F D into side panels Locate front and rear legs the exact locations shown. Secure by tightening cam nuts F F F F F F F F F F F F F F D Small Cam Nut Qty 8...
- Page 11 STEP 4 Assemble drawer runners (CL) to side panels (CR) using screws (CL) (CR) (CR) (CL) Metal Slider(CL) Qty 1 Metal Slider(CR) Qty 1 Screw Qty 4 STEP 5 Assemble stretcher to underside of top panel using screws Underside Screw Qty 2 Shown upside down...
- Page 12 STEP 6 Fit large cam nut into base panel Locate apron into position and secure by tightening the cam nut. Underside Shown upside down Large Cam Nut Qty 1 STEP 7 Fit large cam nuts into base panel shown. Locate base panel assembly onto side panel Secure by tightening...
- Page 13 STEP 8 Repeat step 7 assembly for side panel Large Cam Nut Qty 3 STEP 9 Stand the unit upright. Fit small cam nuts F F F F F F F F F F F F F F D into side panels Locate top panel into position and secure by tightening cam nuts.
- Page 14 STEP 10 Fit back panel using screws Screw Qty 12...
- Page 15 STEP 11 Align grooves Fit small cam nuts into drawer side panels Assemble drawer side panels and drawer front together and secure by tightening the cam nuts. Slide drawer base into the grooves. Assemble drawer back panel using screws Small Cam Nut Qty 4 Wood Screw Qty 4...
- Page 16 STEP 12 Fit drawer runners (DR) using screws (DL) (DL) Fit drawer knob using screw (DR) (DL) (DR) (DL) Metal Slider(DR) Qty 1 Metal Slider(DL) Qty 1 Screw Qty 1 Knob Qty 1 Screw Qty 4 STEP 13 Locate drawer onto runners.
Need help?
Do you have a question about the HM-ST007-001 and is the answer not in the manual?
Questions and answers