Advertisement
RA94 SQB-1 Parts Location and Replacement
This basic guide is to show the parts location of the RA94 SQB-1 and how to remove or install certain parts.
To see more detailed guidelines, please visit:
For 30" wall mount models: RA9430SQB-1, RA9430SQB-DC30-1, RA9430SQB-DC46-1
For 36" wall mount models: RA9436SQB-1, RA9436SQB-DC30-1, RA9436SQB-DC46-1
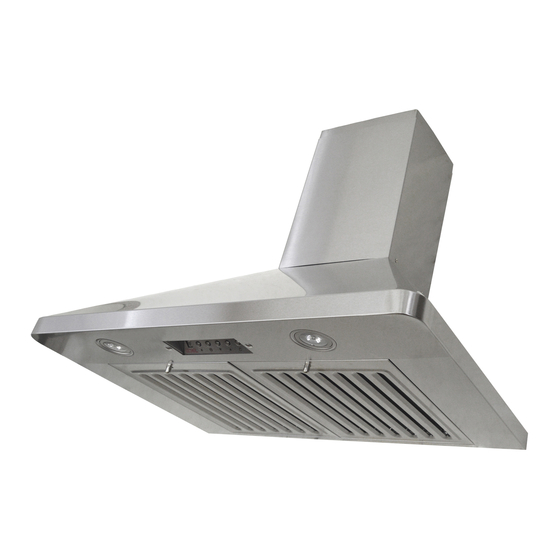
1. Blower System
2. Control Panel
3. LED Light (3W)
KOBE Range Hoods
"So Quiet...You Won't Believe It's On!"
Overall Snapshot of RA94 SQB-1
3
Part #7 – See "Parts List" page on manual)
(Manual
Part #5 – See "Parts List" page on manual)
(Manual
Part #4 – See "Parts List" page on manual)
(Manual
Page 1 of 5
Version 20160725
Kobe Service and Repair
2
1
3
Advertisement
Table of Contents

Related Manuals for KOBE RA94 SQB-1 Series


Summary of Contents for KOBE RA94 SQB-1 Series
- Page 1 This basic guide is to show the parts location of the RA94 SQB-1 and how to remove or install certain parts. To see more detailed guidelines, please visit: Kobe Service and Repair For 30” wall mount models: RA9430SQB-1, RA9430SQB-DC30-1, RA9430SQB-DC46-1 For 36”...
- Page 2 KOBE Range Hoods “So Quiet…You Won’t Believe It’s On!” Removing the Capacitor Support Warning: 1. Loosen the screw first with a hand tool screw driver. 2. When pulling the wires from the capacitor support, press the ‘push release’ at the back of the cord.
- Page 3 KOBE Range Hoods “So Quiet…You Won’t Believe It’s On!” Accessing the Capacitor and Processor Board Part #10 – See “Parts List” page on manual) 5. Capacitor (Manual Part #9 – See “Parts List” page on manual) 6. Processor Board (Manual...
- Page 4 KOBE Range Hoods “So Quiet…You Won’t Believe It’s On!” Removing the Control Panel Figure 1 Figure 2 Figure 3 Figure 4 Accessing the LED Light For a more detailed guideline, visit: How to Replace LED Lights Page 4 of 5...
- Page 5 KOBE Range Hoods “So Quiet…You Won’t Believe It’s On!” Removing the Blower System Warning: 1. Loosen the screw first with a hand tool screw driver. 2. Place a support or hold the blower before removing it. Figure 1 Figure 2...
Need help?
Do you have a question about the RA94 SQB-1 Series and is the answer not in the manual?
Questions and answers