Table of Contents
Advertisement
Quick Links
Advertisement
Table of Contents

Subscribe to Our Youtube Channel
Related Manuals for THERMOROSSI CIAO


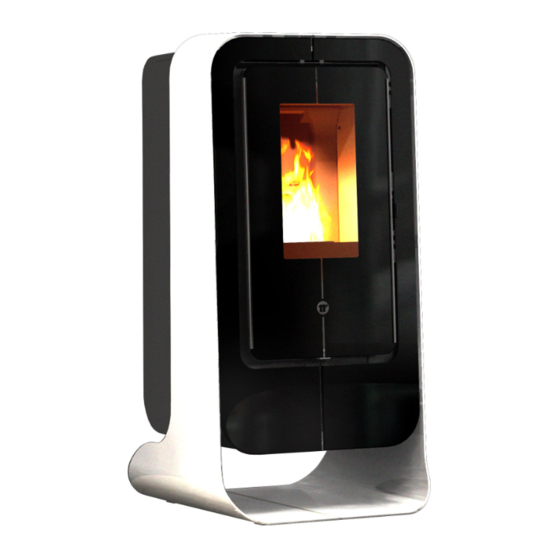
Summary of Contents for THERMOROSSI CIAO
-
Page 2: Table Of Contents
8.2 CLEANING AND MAINTAINING THE APPLIANCE ..................0 8.3 REPLACING THE BATTERY OF THE REMOTE CONTROL ................. 0 8.4 REPLACING THE BATTERY OF THE CONTROL PANEL FOR MODEL CIAO..........0 8.5 REPLACING THE BATTERY OF THE CONTROL PANEL FOR MODEL 2000..........0 9 –... - Page 3 13.4 MAIN COMPONENTS AND THEIR POSITION 4/5 ..................0 13.5 MAIN COMPONENTS AND THEIR POSITION 5/5 ..................0 14 – REPAINTING OF THE CASING MODEL CIAO .................. 0 14.1 FOREWORD..............................0 14.2 DISMANTLING THE SIDE PANELS AND FRONT GLASS ................0 14.3 DISMANTLING THE STOVE BODY AND CASING ..................
-
Page 4: Ec" Declaration Of Conformity Model Ciao
------------------------------------------------------------------------------------------------------------------------------------------------------------------------------ “EC” DECLARATION OF CONFORMITY MODEL CIAO ------------------------------------------------------------------------------------------------------------------------------------------------------------------------------ Pg. 4... -
Page 5: Ec" Declaration Of Conformity Model 2000
------------------------------------------------------------------------------------------------------------------------------------------------------------------------------ “EC” DECLARATION OF CONFORMITY MODEL 2000 Pg. 5... -
Page 6: Introduction
Any repairs or actions carried out on any systems, components or internal parts of the appliance, or on any of the accessories supplied with it, that are not specifically authorised by Thermorossi S.p.A, will automatically void the warranty and the manufacturer's responsibility, pursuant to D.P.R. -
Page 7: Transportation And Storage
The Company denies all responsibility for damage caused to wood floors or floors made from any other material. It is inadvisable to store the heater for long periods of time. 2 – TECHNICAL CHARACTERISTICS* 2.1 MODEL CIAO CIAO Height (mm) -
Page 8: Model 2000
2.2 MODEL 2000 2000 Height (mm) Depth (mm) Length (mm) Weight (Kg) Maximum power at firebox (kW) 2.9/7.45 Rated power min./max. (kW) 2.5/6.39 Min/max consumption (Kg/h) 0.60/1.54 Ø smoke exhaust pipe (mm) Min. draught at rated power (Pa) Min. draught at reduced power (Pa) Tank capacity (Kg) approx. -
Page 9: Installation
4 - INSTALLATION 4.1 APPLIANCE LOCATION Follow the general guidelines set out in paragraph 1.1 to the letter. Keep in mind that the flooring of the room in which the appliance is to be installed must withstand the combined weight of the appliance and the pellets contained in the tank. -
Page 10: Mounting The Casing Of Model 2000
4.3 MOUNTING THE CASING OF MODEL 2000 Once the heater had been positioned and the mounting feet adjusted, proceed to mount the casing. Attach the plates A to the left and right side panels with the supplied screws C. Position the left and right kickplates D on their respective sides and fix with screws E and F. -
Page 11: Back Panel
3) Auxiliary settings button: service button necessary for programming the on-off cycles, operating levels, clock settings. 4) Auxiliary settings button: service button necessary for programming the on-off cycles, operating levels, clock settings. 5) Programming activation and deactivation button 6) “MENU” selection button: Press this button repeatedly to scroll the various regulation, setting and programming options (see paragraphs 5.2 and subsequent paragraphs.) 7) Display 8) Infrared sensor for remote control... -
Page 12: Operating Level Setting
• The two digits representing the minutes will be turn on. Press button (3) or (4) to enter the minutes of the first cycle start time. To confirm the selection press the button (1). • The first start up time for Monday has now been set. Then the inscription OFF1 will appear in the display and the two digits representing the hours will turn on. -
Page 13: Use Of The Appliance
• By holding down button (4) and pressing button (3) repeatedly the level changes in the following sequence: P2..P0 ... P1. If the change is made while the appliance is running the difference in the flame will be apparent in a few seconds. •... -
Page 14: Operating With The Room Temperature Thermostat (Not Supplied)
(see par. 11 – ELECTRICAL WIRING) CAUTION: In the event of connections to a chronothermostat, Thermorossi S.p.A. shall not be held responsible for the appliance not starting up, smoke leaks, breakage of the lighting components. In the event of a programmed cycle on always ensure that the brazier is clean and seated correctly in its lodging. -
Page 15: Cleaning And Maintaining The Appliance
8.2 CLEANING AND MAINTAINING THE APPLIANCE CAUTION: all the operations must be carried out with the stove switched off and cold. • EVERY DAY: clean out all the combustion residues from the brazier and remount correctly the brazier (figure - 1 ). CAUTION: make sure, before every start up, that the brazier is clean and if necessary also thoroughly clean the burner with a suction unit. - Page 16 (Figure – 4) Pg. 16...
-
Page 17: Replacing The Battery Of The Remote Control
Using a suitably sized Philips screwdriver, undo the screw of the battery cover on the back of the remote control and replace the battery. The dead battery must be disposed of in compliance with the regulations in force. 8.4 REPLACING THE BATTERY OF THE CONTROL PANEL FOR MODEL CIAO Inside the control panel there is a buffer battery type CR2032. -
Page 18: Replacing The Battery Of The Control Panel For Model 2000
8.5 REPLACING THE BATTERY OF THE CONTROL PANEL FOR MODEL 2000 Inside the control panel there is a buffer battery CR2032 type CR2032. When the time and programming are not being memorised, then the battery needs replacing. Undo the two screws A which can be reached from the back of the appliance and remove protection B. - Page 19 9.2.1 SINGLE OR MULTIPLE VENTILATION DUCTING If the combustion air is supplied through pipes, the available draught, produced by the installed appliance in use and by the corresponding combustion product evacuation system, must be greater than the sum of the resistance offered by the pipes (frictional resistance, resistance due to direction changes, cross-sectional restrictions, etc...).
- Page 20 COMIGNOLO E CANNA FUMARIA SECONDO NORMA UNI 10683 LASTRA DI COPERTURA INTERNO ESTERNO LAMIERA DI ACCIAIO A TENUTA STAGNA ISPEZIONE ISPEZIONE Legenda figura in alto a sinistra Key top left figure Tutte le tubazioni devono essere termicamente isolate. All the pipes must be thermally insulated. INTERNO / ESTERNO INTERNAL / EXTERNAL COMIGNOLO E CANNA FUMARIA SECONDO NORMA UNI 10683...
- Page 21 9.3.3 CONTROLS PRIOR TO INSTALLING THE APPLIANCE The user must possess a certificate of conformance for the flue outlet (Ministerial Decree 22 January 2008, no. 37). The flue outlet must be built in compliance with UNI 10683. •The smoke exhaust shown in the following figures is the best solution to ensure the discharge of smoke even when the fan is not operational, such as for example if there is an electrical power failure.
- Page 22 11 - ELECTRICAL WIRING LEGENDA CRONOTERMOSTATO CHRONOTHERMOSTAT 220-240 V AGGIUNTIVO (ADDITIONAL) 5 0 H z TERMOSTATO AMB. ROOM THERMOSTAT AGGIUNTIVO (ADDITIONAL) PRESSOSTATO PRESSURE SWITCH TERMOSTATO 95° Thermostat 95° TERMOSTATO 45° Thermostat 45° SCHEDA COMANDO CONTROL BOARD RESISTENZA HEATER MOTORE CARICO PELLET FEED MOTOR PELLETS TERMOSTATO RIARMO...
- Page 23 12 - INFORMATION FOR THE SKILLED TECHNICIAN 12.1 MAIN COMPONENTS AND THEIR POSITION SMOKE PRESSURE SWITCH This is a safety switch that stops the screw feeder motor whenever necessary. The main cause for the pressure switch tripping is a blocked flue outlet or smoke exhaust pipe. Note that it is strictly forbidden to apply any kind of mesh screen to the end of the pipe. When the holes of the mesh clog up they create a plug that trips the pressure switch which stops the pellet feeder.
- Page 24 12.3 TROUBLESHOOTING CAUSE-SOLUTION PROBLEM CAUSE REMOVAL OF THE CAUSE PELLET TANK IS EMPTY EMPTY THE BURNER AND CLEAN IT PELLETS DO NOT DROP INTO (DISPLAY SHOWS THE THE BURNER FILL UP THE TANK WITH PELLETS INSCRIPTION “AL PE”) FEEDER SCREW BLOCKED BY FOREIGN OBJECT SUCH AS NAIL, NYLON, PIECE OF WOOD CUT OFF THE POWER AND...
- Page 25 THE ROOM FAN IS BROKEN AND THE RESET THERMOSTAT MUST BE REPLACED. REPLACE THE TRIPPED FAN AND REACTIVATE THE (DISPLAY SHOWS THE THERMOSTAT BEHIND THE INSCRIPTION “AL T max” ) AAPPLIANCE THE APPLIANCE SHUTS OFF DELAYED START BECAUSE THE SCREW FEEDER WAS EMPTY EMPTY THE BURNER AND CLEAN IT UP FILL UP THE TANK WITH PELLETS A FEW MINUTES...
- Page 26 THE APPLIANCE OPERATES THE APPLIANCE NEEDS TO WITH FREQUENT ON-OFF OPERATE AT A HIGHER POWER CYCLES LEVEL Pg. 26...
- Page 27 SEPARATE THE SPACES ROOM TOO BIG AND/OR THE HEATER SHOULD OPERATE WALLS TOO COLD FOR MORE TIME AND WITH MORE POWER REPLACE THE PELLETS WITH A BRAND THAT IS CERTIFIED IN POOR PELLETS THE HEATER DOES NOT SEEM ACCORDANCE WITH STANDARD OM 7135 TO HEAT SEPARATE THE SPACES...
- Page 28 IN THE MEMORY IF THE RECOMMENDED REMEDIES DO NOT SOLVE THE PROBLEM CONTACT A TECHNICAL ASSISTANCE SERVICE Pg. 28...
- Page 29 13 – SPARE PARTS - MODEL CIAO 13.1 MAIN COMPONENTS AND THEIR POSITION 1/5 70014557 MANIGLIA APRI PORTA DATI DI TARGA 70014766 70014765 LEGENDA MANIGLIA DOOR HANDLE PORTA DATI DI TARGA DATA PLATE Pg. 29...
- Page 30 13.2 MAIN COMPONENTS AND THEIR POSITION 2/5 LEGENDA 70016021 SUPPORTO PANNELLO COMANDI CONTROL PANEL SUPPORT SUPPORTO PANNELO COMANDI SCATOLA CHIUSURA VANO PROTECTION COVER SCHEDA COMANDO CONTROL BOARD 70016022 TARGHETTA PANNELLO COMANDI CONTROL PANEL DATA PLATE SCATOLA CHIUSURA VANO CORNICE FRAME VETRO GLASS 60012773...
- Page 31 13.3 MAIN COMPONENTS AND THEIR POSITION 3/5 70015649 WHITE RH/LH WHITE RH/LH BIANCO SINISTRO BLACK RH/LH BLACK RH/LH GREY RH/LH GREY RH/LH 70015651 60004192 BLUE RH/LH BLUE RH/LH NERO SINISTRO GREEN RH/LH GREEN RH/LH RED RH/LH RED RH/LH 70015653 70015783 GRIGIO SINISTRO 70015655 CELESTE SINISTRO...
- Page 32 13.4 MAIN COMPONENTS AND THEIR POSITION 4/5 LEGENDA TERM. 42° C THERM. 42° C CASSETTO COMPLETO COMPLETE DRAWER 70014765 60013827 60013760 60013761 70014758 60013761 70015088 60011750 60011656 60013760 60013827 70014763 70013637 70014766 70014769 70015403 70014743 70011242 70014770 CASSETTO COMPLETO 70014775 70014773 60010343 Term.
- Page 33 13.5 MAIN COMPONENTS AND THEIR POSITION 5/5 70015222 PORTA COMPLETA 60010335 - GUARNIZIONE 70015221 - VETRO 60004192 60013605 - MANIGLIA COMPLETA 60011454 - FINE CORSA 60010185 60012804 70010402 60010185 60010336 - GUARNIZIONE LEGENDA FIGURA 60011428 FIGURE KEY 70014154F GUARNIZIONE GASKET 60010344 VETRO GLASS...
- Page 34 This operation must be carried out with the utmost care as the heater body is extremely heavy to move. THERMOROSSI S.p.A. declines all responsibility for injury to persons or damage to objects caused by negligence.
- Page 35 15 – SPARE PARTS - MODEL 2000 15.1 MAIN COMPONENTS AND THEIR POSITION 1/3 LEGENDA BEIGE BEIGE NERO BLACK BIANCO WHITE 70015784 - BEIGE ROSSO 70015824 - NERO 70015825 - BIANCO 70015826 - ROSSO 70015504 - BEIGE 70015827 - NERO 70015828 - BIANCO 70015829 - ROSSO 70016103...
- Page 36 15.2 MAIN COMPONENTS AND THEIR POSITION 2/3 60012773 Scheda comando 60013772 70015749 Targhetta pannello comandi 70016111 60011750 70016110 60011656 70013637 70015403 70015502 70014743 70016101 70014770 CASSETTO COMPLETO 70014775 70014773 60005254 LEGENDA FIGURA FIGURE KEY CASSETTO COMPLETO COMPLETE DRAWER SCHEDA COMANDO CONTROL BOARD TARGHETTA PANNELLO COMANDO CONTROL PANEL DATA PLATE...
- Page 37 15.3 MAIN COMPONENTS AND THEIR POSITION 3/3 70015392 - BEIGE 70015222 60013843 PORTA COMPLETA 70015830 - NERO SET CORSIE COMPLETO 70015831 - BIANCO 70015832 - ROSSO 70015514 60010335 - GUARNIZIONE 70015221 - VETRO 60004192 70015780 60013605 - MANIGLIA COMPLETA 60010185 60011454 - FINE CORSA 70010402 60012804...
- Page 38 NOTES Pg. 38...
- Page 39 NOTES Pg. 39...
- Page 40 NOTES Pg. 40...
Need help?
Do you have a question about the CIAO and is the answer not in the manual?
Questions and answers