Table of Contents
Advertisement
Quick Links
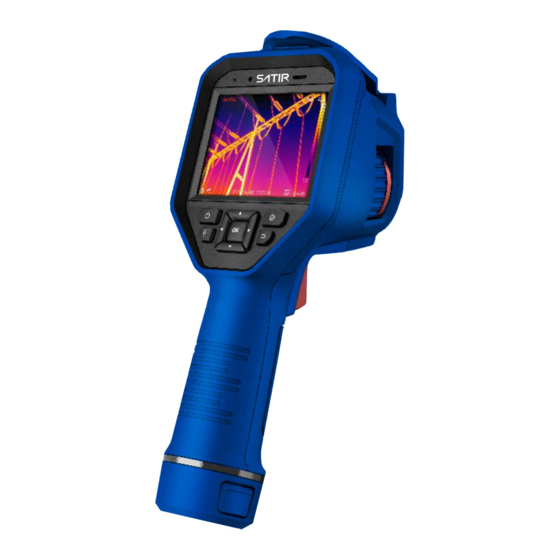
Thermal Camera
i-Series
User's manual
Trademark Acknowledgments
Europe (Ireland)
• SATIR is trademark of SATIR
LTD.
• Microsoft, Windows and Windows logo is either registered trademarks or
trademarks of Microsoft Corporation in the United States and/or other
countries.
•Other names and products not mentioned above may be registered
trademarks or trademarks of their respective companies.
Version 1.2
Copyright © 2021 SATIR LTD. All rights reserved
.
Advertisement
Table of Contents

Subscribe to Our Youtube Channel
Related Manuals for Satir i-Series


Summary of Contents for Satir i-Series
- Page 1 • Microsoft, Windows and Windows logo is either registered trademarks or trademarks of Microsoft Corporation in the United States and/or other countries. •Other names and products not mentioned above may be registered trademarks or trademarks of their respective companies. Version 1.2 Copyright © 2021 SATIR LTD. All rights reserved...
- Page 2 About this IR Camera User Guide Symbols Used This mark denotes issues that may affect the IR camera’s operation. This mark denotes additional topics that complement the basic operation procedures.
- Page 3 Thumb Index Introduction of camera components. Preparing the IR Camera Describes basic functions, learning how to turn on/off Basic function the IR camera and work with the control panel and LCD monitor. Describes working with the camera, from each Shooting analysis settings to using the camera’s various analysis tools.
-
Page 4: Table Of Contents
Table of Contents Read This First ....................5 Component Guide .................... 9 Front View ..................9 Side / Top View ................10 Preparing the IR Camera ................11 Charging the device ................. 11 Charging the Device via Cable Interface ......... 12 Turning the Power On / Off .............. - Page 5 File Manager ..................36 Connection and Download ................37 Connect Bluetooth ................37 Connect to Thermal APP ..............38 Connect Via Wi-Fi ................39 Connect Via Hot Spot ..............40 Connect to a Computer ..............41 Maintenance ....................42 Upgrade Device ................42 Troubleshooting .....................
-
Page 6: Read This First
IR camera is operating and being operated correctly. Please note that SATIR, its subsidiaries and affiliates, and its distributors are not liable for any consequential damages arising from any malfunction of an IR camera or accessory that results in the failure of an image to be recorded or to be recorded in a format that is machine readable. - Page 7 Warnings Read on to learn about using IR camera properly. Avoid damaging eyesight Warning: Do not trigger the laser pointer in human or animal eyes. Exposure to the laser produced by the laser pointer may damage eyesight. Do not disassemble Do not attempt to disassemble or alter any part of the equipment that is not expressly described this guide.
- Page 8 wire and insulation, creating the potential for fires and electrical shocks. Do not cut, alter or place heavy items on the power adapter cord Any of these actions may cause an electrical short circuit, which may lead to fire or electrical shock. Use only the recommended power accessories Use of power sources not expressly recommended for this IR camera may lead to overheating, distortion of the IR camera, fire, electrical...
- Page 9 IR camera. Remove the PC card, and a household power source, from the IR camera and wait until moisture evaporates completely before resuming use. Right Reserved SATIR reserves the right to change the functions and configurations of our products without prior notice.
-
Page 10: Component Guide
Component Guide Front View... -
Page 11: Side / Top View
Side / Top View... -
Page 12: Preparing The Ir Camera
Preparing the IR Camera Charging the device Please only use the approved batteries and power adaptor supplied with • the camera Hold the device and press both sides of • the battery lock catch as illustrated above. Keep hold of the battery and withdraw it from the housing. •... -
Page 13: Charging The Device Via Cable Interface
Charging the Device via Cable Interface Before You Start Please make sure the battery is installed before charging. Steps 1. Open the top cover of the device. 2. Connect the interface and the power adaptor with Type-C or USB cable. -
Page 14: Turning The Power On / Off
Turning the Power On / Off The power indicator is lit while the power of the camera is on. Holding the camera correctly with your left hand, put your thumb above the key pad and put your forefinger in front of the definable trigger. -
Page 15: Auto Power Off Duration
Auto Power off Duration Set Auto Power-off Duration Go to Local Settings → Device Settings → Auto Power-off Duration Settings to set the automatic shutdown time for device as required. -
Page 16: Basic Functions
Basic Functions Menu Operation The device supports both touch-screen control and button control. Touch-screen control Tap on the screen to set parameters and configurations. Figure 2-4 Touch-screen Control Button control Press the navigation buttons to set parameters and configurations. ● Press and to move the cursor up/down/left/right. - Page 17 Description Function Component Laser Button Hold the button to turn on laser, and release the button to turn off laser. Navigation Button Menu Mode: ● Press ,and to select parameters. ● Press to confirm. Non-Menu Mode: ● Press to turn on/off the LED light supplement.
-
Page 18: Menu Description
Menu Description In the observation interface, tap the screen or press to show the menu bar. -
Page 19: Set Date And Time
Set Date and Time Steps 1. Go to Local Settings → Device Settings → Time and Date. 2. Set the date and time. 3. Press to save and exit. Note Go to Local Settings → Image Settings → Display Settings to enable or disable time and date display. -
Page 20: Shooting
Shooting IR camera Adjustment Focus Lens Adjust the lens focal length properly before you set any other configurations, or it may affect the image display and temperature accuracy. Steps 1. Power on the device. 2. Aim the device lens to the appropriate scene. 3. -
Page 21: Display Mode
Display Mode You can set the thermal/optical view of the device. Thermal, Fusion, PIP, and Optical are selectable. Steps 1. Select from the main menu. 2. Tap on the icon to select the display mode . In thermal mode, the device displays the thermal view. In fusion mode, the device displays the combined view of thermal channel and optical channel. -
Page 22: Palettes Setting
Palettes Setting The palettes allow you to select the desired colours. Steps 1. Select from the main menu. Tap on the icons to select a palette type. White Hot The hot part is light-coloured in view. Black Hot The hot part is black coloured in view. Rainbow The target displays multiple colours, it is suitable for scene without obvious temperature difference. -
Page 23: Digital Zoom Adjustment
Digital Zoom Adjustment In the live view interface, press to adjust the digital zoom to 1×, 2×, or 4× Then you can view the target or scene in larger size. Local Display Settings Go to Local Settings → Image Settings → Display Settings to enable the corresponding icons. -
Page 24: Temperature Measurement
Temperature Measurement The thermography (temperature measurement) function provides the real- time temperature of the scene and display it on the left of your screen. The thermography function is turned on by default. Set Thermography Parameters You can set thermography parameters to improve the accuracy of temperature measurement. - Page 25 Note Go to Local Settings → Image Settings → Display Settings to enable/disable the emissivity display. Note. You can go to Local Settings → Device Settings → Device Initialization → Measurement Tool Initialization to initialize the temperature measurement parameters. Set Unit Go to Local Settings →...
- Page 26 Temperature Range Set a temperature section and the palette only works for targets within the temperature section. You can adjust the temperature range. Steps 3. Select from the main menu 4. Select auto adjustment or manual adjustment Auto adjustment Select and press the device adjust temperature range parameters automatically...
-
Page 27: Led Torch
LED Torch Go to Local Settings → Device Settings → Light Supplement. to enable LED light, or press in the live view to enable/disable the LED light. Laser In the live view interface, hold to enable/disable the laser light. Caution The laser radiation emitted from the device can cause eye injuries, burning of skin or inflammable substances. -
Page 28: Analysis
Analysis Setting Analysis tools You can set thermography parameters to improve the accuracy of temperature measurement. Steps 1. Select from the main menu. 2. Set the analysis parameters , point, line , as shown below. - Page 29 Point Tool You can set four types of point thermography rules. Icon Description Centre Point Thermography High-temperature Point Thermography Low-temperature Point Thermography Custom Point Thermography The setting method of centre point, high-temperature, and low- temperature point thermography are all the same. Here is the example of setting high-temperature point thermography.
- Page 30 Set Line Tool Steps 1. Select. 2. Press to generate a default line. 3. Press , and to move the line up/down/left/right. 4. Drag points of the line on the touchscreen to extend or shorten the line. 5. Press. Note Only one line is supported.
- Page 31 Delete Tools and press to clear all temperature rules. Or tap and choose the single rule you want to delete. Set Temperature Alarm Set the alarm rules and the device will alarm when the temperature triggers the rule. Steps 1. Go to Palettes from the main menu. 2.
-
Page 32: Picture And Video
Picture and Video Insert memory card into the device, then you can record videos, capture snapshots, and mark and save important data. Note ● Device does not support capturing or recording when the menu is shown. ● When the device is connected to your PC, it does not support capturing or recording. -
Page 33: Snapshot And Edit The Image
Snapshot and Edit the Image Capture Picture Steps 1. Go to Local settings Capture Settings 2. Select Capture Mode to set the capture mode a. Single capture i. Capture one picture for one time b. Continuous Capture i. Capture multiple pictures for one time. you can set the amount of pictures c. - Page 34 a. In this mode when the users click the trigger button the live image will freeze, and the display has a editing interface b. Tap to add text remarks. Tap the screen to show the keypad interface, enter the comments and confirm.
-
Page 35: Record / Replay The Video
Record / Replay the Video Steps In the live view interface, pull the trigger to start recording. The recording icon and count down number display in the interface When you finish, pull the trigger again to stop recording. The recording video will be saved automatically and exit. -
Page 36: Playback And Erase
Playback and Erase Opening images Steps 1. Select from the main menu. 2. Press, to select the video or snapshot. 3. Press to view the file. Note ● When you are viewing the videos or capture snapshots, you can switch the file by tapping ●... -
Page 37: File Manager
File Manager Connect the device to your PC with supplied cable, you can export the recorded videos and captured snapshot. Steps 1. Open the cover of cable interface. 2. Connect the device to your PC with cable and open the detected disk. -
Page 38: Connection And Download
Connection and Download Connect Bluetooth You can record and hear the sound contained in the videos or images via Bluetooth headsets after pairing the device with Bluetooth headsets successfully. Steps 1. Select from the main menu. 2. Go to Local Settings → Device Settings → Bluetooth. 3. -
Page 39: Connect To Thermal App
Connect to Thermal APP The device supports both Wi-Fi connection and WLAN hot spot. Connect the device to SATIR-Thermal software, and you can control the device via mobile client. -
Page 40: Connect Via Wi-Fi
Connect Via Wi-Fi Before You Start Download and install client software on your phone. Steps 1. Go to Local Settings → Device Settings → Wi-Fi. 2. Tap to enable Wi-Fi, and the searched Wi-Fi will be listed as below. 3. Select Wi-Fi and enter password to show the keypad interface. Note DO NOT tap enter or space, or the password may be incorrect. -
Page 41: Connect Via Hot Spot
Connect Via Hot Spot Before You Start Download and install client software on your phone. Steps 1. Go to Local Settings → Device Settings → Wi-Fi Hotspot Settings. 2. Tap to enable WLAN hot spot function. 3. Tap Set Hot Spot to set the WLAN hot spot. The hot spot name and password display automatically. -
Page 42: Connect To A Computer
Connect to a Computer Connect the USB cable to the computer’s USB port and the multi- functional dock’s terminal. • You do not need to turn off the computer or camera when making this connection. • Please refer to your computer manual for information regarding the location of the USB port... -
Page 43: Maintenance
Maintenance Upgrade Device View Device Information Go to Local Settings → Device Information to view the device information. Upgrade Device Steps 1. Connect the device to your PC with cable and open the detected disk. 2. Copy the upgrade file and paste it to the root directory of the device. -
Page 44: Troubleshooting
Troubleshooting Problem Cause Solution Camera will Power is not turned on • Turn on the camera. See not operate Turning the Power On / Off Insufficient battery voltage • Fully charge the battery. Camera will Internal memory is full • If required, download the not record images to a computer and erase them to make some... -
Page 45: Appendix
Appendix Camera Care and Maintenance Use the following procedures to clean the camera body, lens, LCD monitor and other parts. Wipe the body clean with soft cloth or eyeglass Camera Body lens wiper. First use a lens blower to remove dust and dirt, then remove any remaining dirt by wiping the lens lightly with soft cloth. -
Page 46: Emissivity Table
Emissivity table Emissivity Material Temperature ° C ( ) approximation Metal Aluminum Polished aluminum 0.09 Commercial aluminum 0.09 foil Electrolytic 0.55 6 00 ~ chromeplate alumina Mild alumina 25 ~ 600 0.10 ~ 0.20 Strong alumina 25 ~ 600 0.30 ~ 0.40 Brass Brass mirror (highly 0.03... - Page 47 Emissivity table (cont.) Emissivity Material Temperature ° C ( ) approximation Polished cast iron 0.21 Processed cast iron 0.44 Polished tempered 40 ~ 250 0.28 Iron Polished steel ingot 770 ~ 1040 0.52 ~ 0.56 Raw welded steel 945 ~ 1100 0.52 ~ 0.61 Surface ferric oxide 0.69...
- Page 48 Emissivity table (cont.) Emissivity Material Temperature ° C ( ) approximation Lead Pure lead (Non- 2 25 0.06 0 .08 ~ ~ oxidization) Mildly oxidized 25 ~300 0.20 ~ 0.45 Magnesium Magnesia 275 ~ 825 0.55 ~ 0.20 Magnesia 900 ~ 1670 0.20 0 ~ 100 0.90 ~ 0.12...
- Page 49 Emissivity table (cont.) Emissivity Material Temperature ° C ( ) approximation Stainless steel 18-8 0.16 304(8Cr,18Ni) 215 ~ 490 0.44 ~ 0.36 310(25Cr,20Ni) 215 ~ 520 0.99 ~ 0.97 Commercial tin plate 0.07 Strong oxidization 0 ~ 200 0.60 Zinc Oxidizing at 400°C 0.01 galvanized shining...
- Page 50 Emissivity table (cont.) Emissivity Material Temperature ° C ( ) approximation Carbon piece 0.85 Isolation piece 0.91 0 .94 ~ Sheet metal 0.88 ~ 0.90 Glass pipe 0.90 Loop type 0.87 Porcelain enamel 0.90 products Porcelain enamel 0.83 0 .95 ~...
- Page 51 Emissivity table (cont.) Emissivity Material Temperature ° C ( ) approximation Electric materials Epoxy glass plate 0.86 Epoxy 0.80 hydroxybenzene plate Gilded sheet copper 0.30 Solder-coated copper 0.35 Tin-coated lead wire 0.28 Brass wires 0.87 ~ 0.88 Block talcum terminal 0.87...
-
Page 52: Specification
Specification All data is based on SATIR’s testing standard. Subject to change without notice. Type i 160 i 384 Image performance FOV/Min.focus distance 25° x19°/0.07m 37.5° x28.5°/0.10m Spatial resolution 1.7 mrad 1.7 mrad Thermal sensitivity ≤0.05°C@25°C Detector type Resolution 160x120 (17µm) 384 x288 (17µm) - Page 53 10 movable spots, auto hot/cold spot, profile, 3 area Measurement mode boxes, isotherm, line Emissivity, ambient temperature, distance, relative Correction humidity, reflected temperature Alarm Image storage Type 16GB / 64GB Removable Micro SD card File format .JPG(thermal/Visual) Annotation Voice, note annotation Wi-Fi 802.11a/ac/b/g/n/ (2.4and 5Ghz) Bluetooth...
- Page 54 Weight Less than 660g Tripod mounting 1/4"_20 Additional features Illuminator Laser pointer Video record Text comment Voice comment Ports USB port , Analog video output...
-
Page 55: Contact Us
Contact Us...
Need help?
Do you have a question about the i-Series and is the answer not in the manual?
Questions and answers