Table of Contents
Advertisement
Advertisement
Table of Contents

Related Manuals for EMMO Monta Pro


Summary of Contents for EMMO Monta Pro
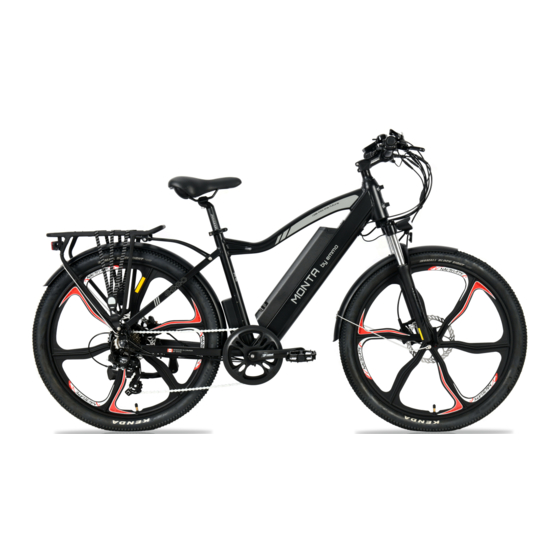
- Page 1 USER’S MANUAL EMMOM Monta 2019 EMMO Monta Pro...
- Page 2 © 2019 Emmo Inc. All rights reserved. No texts, details, or illustrations from this Manual may be reproduced or distributed, or become the subject of unauthorized use for commercial purposes. Should you discover any errors,...
-
Page 3: Table Of Contents
MENU About EMMO --------------------------------------------------- Rules and Regulations of Riding an E-Bike --------- Parts Overview ------------------------------------------------ Speedometer and Control Buttons --------------------- Gear Shifter ----------------------------------------------------- Thumb Throttle ------------------------------------------------- Safety Instructions ------------------------------------------ How to ride ----------------------------------------------------- How to charger ------------------------------------------------- How to remove the battery... -
Page 4: About Emmo
ABOUT EMMO Established in 2009, Emmo Inc. is a proud Canadian venture that is focused on creating a more sustainable future by providing high quality electric bicycles. We offer a wide variety of E-bikes that are suitable for leading a greener, and more stylish, way of living. Emmo E-bikes are priced competitively with other green solutions. -
Page 5: Rules And Regulations Of Riding An E-Bike
RULES AND REGULATIONS of riding an e-bike According to Canada’s Motor Vehicle Safety Regulations ( MVSR ). A qualified e- bike (defined as Power Assist Bicycle) must meet the following requirements: • The e-bike must have operable pedals • Upper wattage limit for the motor is 500W. Other requirements include a permanently affixed compliance label from the manufacturer stating that the vehicle is a power-assisted bicycle under statutory requirements in force at the time of manufacture. -
Page 6: Parts Overview
1. PARTS OVERVIEW... -
Page 7: Speedometer And Control Buttons
2. SPEEDOMETER Electrical Parameters 3.2inch IPS screen 24V/36V/48V battery supply Rated operating current : 40mA Max operating current : 100mA (36V battery, with USB equipment changed) USB changing port : 5V 500mA Off leakage current < 1uA ... - Page 8 Features Suitable for low temperature,Max -20℃. High-contrast 3.2inch IPS colorful matrix screen. Ergonomic external button design, easy to operate. Speed display : AVG SPEED, MAX SPEED, SPEED(Real-time). Kilometer / Mile : Can be set according to customers’ habits. ...
- Page 9 2.4.Display explanation Battery Clock Brake Signal Front Light Power loop Speed Scale Speed value Power Power indicator Assist level Power Scale Time Mileage Switchover area 2.5 Functional Description • 1 Power On/Off Press and hold Power button for 1 second can turn on/off the display. The Display can automatically shut down when there is no operate &...
- Page 10 • 3 Speed & Mileage mode switch Short press POWER button can change betweenthe speed and mileage info, TRIP→ ODO→RANGE→TRIP→TIME→MAX SPEED→AVG SPEED **If there is no operation for 5 seconds, display will return Speed (Real-Time) display automatically. • 4 Headlight/backlight On/Off Press and hold UP button for 1 second can turn on/off the headlight, and the screen will switch to the corresponding mode.
- Page 11 • 5 Walking mode (6km/h) button can get into walking mode, quit the mode when the button Press and hold DOWN is released. * This feature needs to be supported by controller. • 6 Temporary data clearance Press and hold UP & DOWN buttons together for 1 second can reset several temporary data, temporary data include AVG Speed / MAX Speed / Trip / Time.
- Page 12 2.6.1 Language:Default EN, Unadjustable 2.6.2 System unit: Press Up / Down button to switch between Metric / Imperial. 2.6.3 Brightness : Press Up / Down button to change the brightness of the backlight, ׀is the dimmest, ׀׀׀׀׀is the brightest. 2.6.4 Auto off : Press UP/DOWN button to change the auto power off time, from 1 to 9, the number represent time (in minutes) to shutdown, default value is 5 minutes.
- Page 13 2.6.5 Scenes : Press UP/DOWN button to change the scenes, Digital / Analog(default). 2.6.6 Battery Ind : Press UP/DOWN button to change the battery indicator, Voltage / Percentage / OFF. Voltage Percentage...
- Page 14 2.6.7 Pow Ind : Press UP/DOWN button to change the Power indicator, Power / Current. * This data represent power output of the battery (not motor). 2.6.8 Clock : Clock setting, press POWER button get into the clock setting menu, press UP/DOWN button to set Year/Month/Day/Hour/Min/Sec.
- Page 15 You need to input the correct password within 30 seconds, the display will power off automatically if the password is wrong. Basic Setting *Press DOWN button to move the red arrow to , press POWER button can show all items of the Basic Setting. 2.6.10 Wheel : Press UP/DOWN can change the wheel setting, optional wheel diameter is 16/18/20/22/24/26/27/27.5/28/29 inch.
- Page 16 2.6.11 Battery: Press UP/DOWN will change battery voltage setting, optional value is 24V/36V/48V/UBE,UBE means user define value. 2.6.12 USB port: Press UP/DOWN button to change the setting. OFF means no power on the USB port when the bike is off. 2.6.13 Light sensor (Optional): Press the UP/DOWN button to turn ON/OFF the sensor.
- Page 17 2.6.14 Advance setting : Press POWER button can get into the advance setting menu, default password is ‘1919’. 2.6.15 Speed limit : Press UP/DOWN will change the speed limit. 2.6.16 Current limit : Press UP/DOWN will change current limit, range 6A~50A. Default value is 15A.
- Page 18 2.6.17 Poles in motor : Magnetic poles inside the motor, press UP/DOWN will change pole number, range 1~6. Default value is 1. 2.6.18 Start after poles : How many poles (speed sensor) need to be detected by controller before starting motor. Default value is 3. 2.6.19 Clockwise start : This parameter represent speed sensor turning direction, default value is Y (forward).
- Page 19 2.6.20 Throttle 6KM : this parameter can set the throttle function, N represent max speed, Y represent 6km/h. 2.6.21 Throttle Level : This parameter is only valid when Throttle 6KM is set as N, Press UP/DOWN will change Y/N, N represent Throttle start max speed, Y represent throttle’s speed is related to the assist level.
- Page 20 2.6.23 Assist levels : This parameter can customize assist levels, options are 3/5/9/UBE, UBE represent factory default settings. 2.6.24 Assist Setting : This parameter can customize assist ratio. 2.6.25 Factory setting : Press POWER button to enter Restore Factory Settings, set YES will restore all parameters to factory default values.
- Page 21 2.6.26 Information : Show information of the E-bike. 2.6.27 Product info : Get into this item can show hardware version software version… 2.6.28 Battery info : Get into this item can show all information of battery, including Voltage, Capacity, Cycle times, Health, Temperature of battery, Remaining Capacity, Full Charge Capacity, Initial Capacity,Max Charge Times.
- Page 22 2.7. Error Code define 850C can show warning message, icon shows on the screen, and show error code at the bottom of the screen, error code from 01~25, definition see the table below. Error Code Error description Handle Communication Error Check the cable connection Current protection Check controller.
- Page 23 There are 2 directions for the clamp installation, forward or backward. Clamps suit for 3 size of handlebar, 31.8mm, 25.4mm, 22.2mm, there are transfer rings for 25.4mm and 22.2mm, transfer ring must be assembled with the special directions, pay attention to the green arrow below. 2.8....
- Page 24 2.9. Assist level instructions Assist level can be customized, the highest level is 9, common used assist level see the table below: 3 level 5 level 9 level No power assist 2.10. Certification CE / IP65 (water proof) / ROHS.
-
Page 25: Gear Shifter
3.GEAR SHIFTER Pushing the upper lever to raise the gear lever (smaller numbers). Pushing the button to lower the gear lever (bigger numbers). -
Page 26: Thumb Throttle
4. THUMB THROTTLE Gently pushing the throttle lever downwards to accelerate. -
Page 27: Safety Instructions
5. SAFETY INSTRUCTIONS To ensure the safety of you and others, • Do not ride after you take medications which may affect your riding ability, drink alcohol, or when you are unwell. • Please make sure you are familiar with your local bylaw regarding e-bikes. •... -
Page 28: How To Ride
6. HOW TO RIDE THE BIKE • Sit on the bike. Put on the helmet or any protective equipment required. • With your feet still on the floor, turn the bike on (refer to page 10). • Before you start off, kick the side kick- stand up. -
Page 29: How To Charger
7. HOW TO CHARGE The charger is separated into two different parts: 1. A cable with one end that goes into a 110V power outlet, and the other end that goes into the charger box itself. 2. The charger box with a cable that plugs into the bike. - Page 30 7. HOW TO CHARGE Step 3. Make sure the indicator on the charger turns red (red indicator means it is charging, green indicator means the battery is fully charged.) Step 4. Once the battery is fully charged, unplug the charger from the power outlet first and then unplug the charger from the battery.
-
Page 31: How To Remove The Battery
8. REMOVE THE BATTERY • Plug in the key. Unlock the battery lock. • Keep the battery lock in unlocked position. Pull the lever out and remove the battery from the bike. - Page 32 8. REMOVE THE BATTERY • Remove the battery carefully. TIP: If you want to put the battery back to the bike, make sure the bottom tooth on the battery goes into the notch on the frame. Pull the lever, keep the battery lock in unlocked position, and gently put the battery onto the frame and lock the battery.
-
Page 33: Maintenance
9. MAINTENANCE Regular maintenance is required to keep the bike in its best working conditions. CLEAN Please use clean water and neutral detergent to clean the bike. Use soft cloths or sponges to clean the surfaces. Please do not use metal brushes, sandpaper or any other abrasive material to avoid scratches or physical damage. -
Page 34: E-Bike Registration Form
Invoice Number: __________________________ Store Location: _______________________________________________ Customer Name: __________________________ Address: ___________________________________________________ Phone Number: ____________________________ E-mail:______________________________ Survey: How did you find out about Emmo Inc.? (Please select the options that apply) □ Returning Customer □Family/Friend □Passing by Store □Kijiji □TERA □Google □Yelp...
Need help?
Do you have a question about the Monta Pro and is the answer not in the manual?
Questions and answers
i have an 1E-BIKEEMMO Monta S 10AH the battery is charged. I inserted the battery after the winter and the bike was running. a day later, I tried to turn the bike on and the screen doesn't lit and the bike is not running. I took the battery and in again with no success. What can I do?
If the EMMO Monta Pro e-bike does not turn on after charging the battery, check the following:
1. Ensure the side kickstand is up, as the throttle will not work and the brake light will stay on if it is down.
2. Verify that the brake levers are fully released. If the brake sensors are activated, they will cut power to the bike.
3. Inspect for worn-out brake pads, broken brake cables, or a damaged brake system, as these can cause the brake sensors to remain active.
If the issue continues, contact an Emmo dealer or email service@emmo.ca for assistance.
This answer is automatically generated