
Related Manuals for Andatech SOBERLIVE FRX


Summary of Contents for Andatech SOBERLIVE FRX
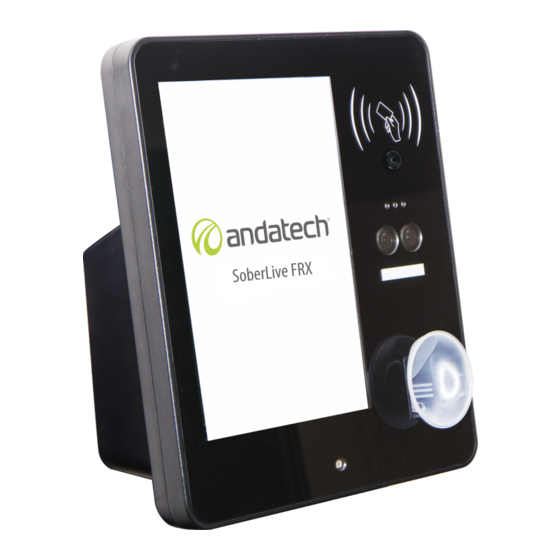
- Page 1 Andatech SOBERLIVE FRX Facial Recognition Breathalyser with Temperature Screening User Manual Version 1.5. Updated December 2020.
-
Page 2: Table Of Contents
ID to screen employees and visitors before they even enter your premises. With the ability to be connected to any access control system, the Soberlive FRX can also automatically restrict access to those who are running a fever or are over your workplace policy's alcohol limit. - Page 3 OPERATING INSTRUCTIONS PRE-TEST CONDITIONS TEST PROCEDURES DEVICE SETTINGS Calibration Network Advanced Setting Alcohol Test Percentage Recognition (Device screen will show ‘Blow’) Temperature Enrolment Device Info Record Date & Time Language Voice Customize Printer Temperature Calibration Calibration interval Manual calibration Show alcohol test reading TROUBLESHOOTING / WARNING DISPLAY FACIAL RECOGNITION GUIDELINES FAQs...
-
Page 4: Contents
DEVICE FEATURES CONTENTS : 1 x Soberlive FRX 1 x Power Cable 1 x RS232 Cable 2 x Straw Adapters 5 x Sampling Cups 2 x Keys (unlock to connect to bracket) 2 x Screws 2 x Wall Plugs... -
Page 5: Lcd Screen
LCD SCREEN... -
Page 6: Specifications
SPECIFICATIONS Indication of BAC 0.00 - 0.40% BAC Display LCD screen Units of Measure BAC: %BAC, g/100mL, Infrared Accuracy within ±0.3°C, ‰, mg/100mL, g/L Temperature < 1 second response rate Sensor BrAC: mg/L, ug/100mL, mg/mL, mg%, mcg/L, g/210L Warm up time 30 - 60 seconds Camera 100W pixels... -
Page 7: Device Installation
DEVICE INSTALLATION GUIDELINES ● Install the device only indoors, in a covered environment. ● Install the device in a location with sufficient lighting ● Do not use the facial recognition feature under a strong light. ● Do not expose the device to the sun for a prolonged period of time. ●... -
Page 8: Andalink
t o see the updated Andalink manual and log in with the credentials provided in the letter with your device during purchase. ADMIN SETUP : Before operating the Soberlive FRX, please create at least one (1) staff that has the u ser Important role Admin... -
Page 9: About Temperature Calibration
Soberlive FRX's temperature measurements. TEMPERATURE CALIBRATION PROCEDURE To perform a Temperature Calibration, a calibration operator stands in front of the Soberlive FRX and faces the camera. The device will then take their temperature and use that as the guideline for 'normal body temperature'. -
Page 10: Calibration Operators
To do this, connect a mouse to the device and enter the Device Settings Menu > Temperature Calibration and click on 'Start Manual Calibration'. Then, follow the steps under 'Temperature Calibration Procedure'. CALIBRATION OPERATORS By default, only a user with an Admin role (set in Andalink) can conduct the Interval and Manual Temperature Calibration. -
Page 11: Operating Instructions
OPERATING INSTRUCTIONS PRE-TEST CONDITIONS 1. The operating temperature range is between -10°C to 50°C. Using the device within this temperature range will limit condensation from a user’s breath to ensure an accurate reading from a user’s breath sample. 2. It is recommended that the user does not consume anything for 20 minutes before the breath test. -
Page 12: Test Procedures
TEST PROCEDURES Follow the device's instructions shown in the Notification Area when taking a test. 1. 'Face camera. Keep face inside the frame' Stand in front of the device, face the camera and position face within the Facial Recognition Frame shown on the LCD display. 2. -
Page 13: Device Settings
DEVICE SETTINGS To access the Device Settings Menu, plug in a USB mouse into the device and long press (click + hold) the icon on the bottom left of the screen. Calibration Access is restricted to authorised calibration centres only. Network There are 3 methods of connection: Ethernet, Wifi, and 4G (additional module) Ethernet... -
Page 14: Advanced Setting
Advanced Setting Enter the password 9 78165 t o access the Advanced Setting menu for Recognition, Temperature and Enrollment. Alcohol Test Percentage Set the percentage of registered users to randomly test for alcohol. or example: When this is set to 100%, all registered users will be tested for their alcohol reading. -
Page 15: Recognition (Device Screen Will Show 'Blow')
Recognition (Device screen will show ‘Blow’) ● Disable Alcohol Test - T ick this to disable alcohol testing on the device. Untick to enable alcohol testing on the device. ● Quick test mode - Tick this for fast testing using a sampling cup. - Page 16 ● Enable Mask Detection ○ Tick to enforce all users to wear a mask. If a user is detected as not wearing a mask, device will notify 'PLEASE WEAR A MASK' and sound an alert. Users cannot take a test unless a mask is detected. ■...
-
Page 17: Temperature
After making changes, click to save the settings. Temperature ● Body Temperature - ○ Tick to enable temperature scanning for all users ○ Untick to disable temperature scanning completely Body Temperature Scale - ● ○ Tick to select either °C or °F for body temperature reading. - Page 18 ○ Tick to allow only Admin to conduct the Manual Temperature Calibration (default setting). ○ Untick to allow anyone to perform the Manual Temperature Calibration. ● Calibration by first measurement result a nd S tartup calibration only - Controls the settings for Interval Temperature Calibration.
-
Page 19: Enrolment
Enrolment Use this step to enrol anyone, including admin role users for temperature calibration, into the device or Andalink. ● Connect an external keyboard to the device ● Enter the staff’s details into the system. All fields are required (Staff ID or Username, Position, First and Last Names, and Role). -
Page 20: Record
Record 2,000 test records can be stored along with the photo of the users. Click on to scroll or to search for a record. Click on a record to view details of the test record. Click on to print the test record (compatible printer must be connected) or click return to view test records. -
Page 21: Date & Time
Date & Time Set the device date and time here. Language Set device language preferences here. Select the preferred language from the drop down menu then click to save. -
Page 22: Voice
Voice Control the voice and audio alert volume here. Voice recorded alerts Controls the voice recorded alerts such as 'Visitor / Temperature Reading / Pass'. Drag the red dot on the bar to adjust the volume level. To mute or disable all voice alerts on the device, click on the icon. -
Page 23: Customize
Customize Set a customized Boot Animation and background picture for the device. Tick the checkbox for 'Customize' and follow the instructions on the screen to upload the files. Boot Animation Video - Save the file name as 'StartVideo.mp4' (resolution 800x1280, 10 seconds) Background Image... -
Page 24: Printer
Tick the checkboxes to select the applicable settings for the printer. After making changes, click to save the settings. Note: The printer is an optional accessory and not included with the device. Contact Andatech for purchase options. Temperature Calibration Please read 'About Temperature Calibration' for more information. Calibration interval By default, the device will require a Temperature Calibration every 60 minutes. -
Page 25: Manual Calibration
Manual calibration If a temperature calibration is needed outside of its regular interval period (e.g. temperatures seem too high or too low, or is measuring inconsistently), a manual temperature calibration can be performed. To do this, just click on the 'Start manual calibration' button. A calibration operator needs to be physically present to conduct the temperature calibration on the device. -
Page 26: Troubleshooting / Warning Display
'Blow completed. Please Wait'. Alcohol test failed A user's face was recognised and Face the Soberlive FRX camera again to the Soberlive FRX was ready to take take a test. a test, but the user failed to provide a sample. - Page 27 User was recently registered in Ensure the device is connected to the Andalink but not yet synced to the internet. Wait 10 minutes or Force Sync device. to sync user to device. User is not registered and Visitors Register user or enable Visitors Mode Mode is disabled.
-
Page 28: Facial Recognition Guidelines
FACIAL RECOGNITION GUIDELINES... -
Page 29: Faqs
Tail Sampling to get a more accurate alcohol test result. However, if you are using the Soberlive FRX as a screening device and just need a pass or fail result (Quick Test mode and using a sampling cup), then you can disable Tail Sampling. -
Page 30: Measurements & Conditions For Alcohol Testing
The liability for proper functioning of the instrument is irrevocably transferred to the owner or operator in the event the instrument is serviced or repaired by personnel not employed or authorised by Andatech. In such an event, the warranty will be void. WARRANTY BREATHALYSER CALIBRATION &... -
Page 31: How To Remove/Replace Sensor For Calibration
HOW TO REMOVE/REPLACE SENSOR FOR CALIBRATION The Soberlive FRX has a replaceable sensor that can be removed and returned for the calibration service without sending the whole device back. A new sensor can then be replaced into the device easily. Follow the instructions below:... -
Page 32: Warranty Details
● The product if it is located outside of Australia. ● Any damage caused by improper power input or improper cable connection. Andatech Pty. Ltd. PO Box 3038, Nunawading VIC 3131, Australia. Phone: 1300 800 200 Fax: 1300 883 802 Email: ...
Need help?
Do you have a question about the SOBERLIVE FRX and is the answer not in the manual?
Questions and answers