Table of Contents
Advertisement
Quick Links
Advertisement
Table of Contents

Subscribe to Our Youtube Channel
Related Manuals for Harman Martin MAC Ultra Performance


Summary of Contents for Harman Martin MAC Ultra Performance
- Page 1 MAC Ultra Performance Safety and Installation Manual...
- Page 2 ©2020-2021 HARMAN PROFESSIONAL DENMARK ApS. All rights reserved. Features, specifications and appearance are subject to change without notice. HARMAN PROFESSIONAL DENMARK ApS and all affiliated companies disclaim liability for any injury, damage, direct or indirect loss, consequential or economic loss or any other loss occasioned by the use of, inability to use or reliance on the information contained in this document.
-
Page 3: Table Of Contents
Contents Safety Information ..............4 Introduction . -
Page 4: Safety Information
The latest software, manuals and other documentation for all Martin products are available for download at www.martin.com Technical Support If you have questions about how to install or operate the fixture safely, please contact Harman Professional Technical support: • For technical support in North America, please contact: HProTechSupportUSA@harman.com Phone: (844) 776-4899 •... - Page 5 P R O T E C T I O N F R O M E L E C T R I C S H O C K • The fixture has an ingress protection rating of IP20 and is for use in dry locations only. Do not expose it to rain or moisture.
- Page 6 • This fixture corresponds to Risk Group 3 according to EN 62471 when all photobiological risks are considered and Risk Group 2 according to IEC/TR 62778 for blue light only. It emits possibly hazardous optical radiation. • The fixture falls into the Risk Group categories shown below according to both EN 62471 and IEC/TR 62778 under worst-case conditions: •...
-
Page 7: Introduction
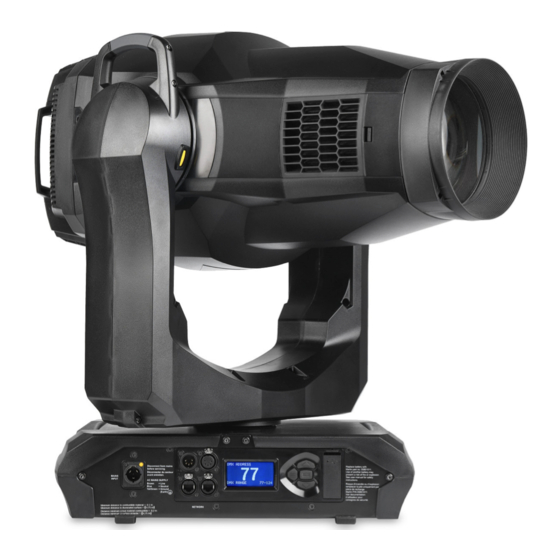
Introduction Thank you for selecting the MAC Ultra Performance lighting fixture from Martin®. This Safety and Installation Manual is supplied with the fixture. It gives details of installing and servicing the fixture. The MAC Ultra Performance User Guide, containing full instructions to help you set up, control and monitor the fixture, is available for download from the MAC Ultra Performance area of the Martin website at www.martin.com. -
Page 8: Physical Installation
Physical installation Installation safety The fixture weighs 44 kg (97.1 lbs.), not including installation hardware. See “Dimensions” on page 2 for details of the fixture’s physical dimensions. Warning! The MAC Ultra Performance has a powerful pan motor. The torque reaction when the head is panned suddenly can cause the base to move if the fixture is standing unsecured on a surface. - Page 9 The four pairs of quarter-turn mounting points in the base accept 106 mm (4.17 in.) center-to-center omega brackets (see Figure 4) for rigging clamp attachment. The omega brackets can be fastened to the base parallel to the fixture’s sides or diagonally (see Figure 3). Figure 3: Omega bracket mounting points Installation hardware Two omega brackets suitable for use when rigging the MAC Ultra Performance are supplied with the fixture.
- Page 10 3. See Figure 3 on page 9. Align the first clamp and bracket with 2 mounting points in the base, and engage both the clamp bracket’s quarter-turn fasteners in corresponding sockets in the base. See Figure 4. Turn the levers on the quarter-turn fasteners a full 90°...
-
Page 11: Ac Power
AC power Electrical safety The MAC Ultra Performance features an auto-sensing switch-mode power supply that automatically adapts to AC mains power at 200-240 VAC (nominal), 50/60 Hz. Do not connect the fixture to power that is not within this range. Note that the fixture must not be connected to AC mains power at 100-120 V. Maximum current draw is as follows: •... - Page 12 Applying power Warning! The MAC Ultra Performance does not have a power On/Off switch. As soon as you connect an energized power input cable to the fixture or apply power to a power input cable that has already been connected, the fixture will power up: check that there is no safety risk from head movement or intense light output.
-
Page 13: Data Links
Data links Important! Shut down power to the fixture before connecting to or disconnecting from data. The MAC Ultra Performance has two pairs of connectors for control data In/Out: • one pair of XLR sockets (A in Figure 8), and •... -
Page 14: Data Via Ethernet Cable
4. Terminate the data link by connecting a 120 Ohm, 0.25 Watt resistor between the data 1 hot (+) and cold (-) conductors at the data output of the last fixture on the link. If the link is divided into branches using a DMX splitter, terminate each branch of the link. -
Page 15: Service And Maintenance
Service and maintenance Warning! Read “Safety Information” on page 4 before servicing the MAC Ultra Performance. Warning! Disconnect the fixture from AC mains power and allow to cool for at least 30 minutes before handling. Do not stare into the light output. Be prepared for the fixture to light and move suddenly when connected to power. -
Page 16: Cleaning
Cleaning Regular cleaning is very important for fixture life and performance. Buildup of dust, dirt, smoke particles, fog fluid residues, etc. degrades the fixture’s light output and cooling ability. Cleaning schedules for lighting fixtures vary greatly depending on the operating environment. It is therefore impossible to specify precise cleaning intervals for the MAC Ultra Performance. -
Page 17: Head Air Filter
See Figure 9. The battery is located in the USB port / battery compartment (arrowed) next to the control panel on the base of the fixture. To replace the battery: 1. Disconnect the fixture from AC mains power and allow to cool. 2. -
Page 18: Lubrication
6. Place the clean air filter into the space in the head, making sure that there is no gap for air to pass through around the edges of the filter. 7. Hook the rear end of the filter cover into the head and push the front end of the cover into the head until its clip engages fully. -
Page 19: Installing Firmware
Loading and storing default calibration offsets • CALIBRATION → LOAD DEFAULTS lets you erase any custom calibration offsets that you have defined and reload the default calibration offsets that are stored in memory. • CALIBRATION → SAVE DEFAULTS lets you overwrite the factory default calibration offsets that are stored in memory with any new offsets that you have defined. -
Page 20: Opening The Head For Access
3. Click on Select Folder. Martin Companion will automatically save the firmware files in a correctly named folder to the USB drive’s root directory. 4. When you see a Download Successful message you can close Martin Companion. Check that the USB drive now contains a folder whose name is the fixture type and software version. -
Page 21: Rotating Gobo Replacement
Rotating gobo replacement The MAC Ultra Performance uses specially designed borosilicate 3.3 rotating gobos. The gobos are a custom size. Their external diameter is 37.5 mm +0/-0.2 mm (1.476 in. +0/-0.008 in.), and the image diameter is 30 mm (1.181 in.). The gobo thickness is 1.1 mm +/- 0.1 mm (0.04 in. +/- 0.004 in.). The gobos are manufactured in Borofloat 33 glass with a heavy matted aluminum coating. - Page 22 Goboholder clips See Figure 13. The goboholders in both gobo wheels are held in position by clips. When you install a gobo in a gobo wheel, you must make sure that the jaws of the clip A engage in the flange in the goboholder on both sides of the goboholder as shown at B.
- Page 23 3. See Figure 15. Using a pair of flat-nosed pliers, grasp the teeth of the goboholder firmly and pull the goboholder out of its clip in the gobo wheel. Figure 15: Removing a goboholder from Gobo Wheel 1 4. For instructions on how to install a new gobo in a goboholder, see “Replacing a gobo in a goboholder” on page 25.
- Page 24 Replacing a rotating gobo on Gobo Wheel 2 Gobo wheels 1 and 2 sit very close to each other in the effects module, in almost the same plane of focus. Gobo wheel 2, the breakup wheel, is the wheel that is closer to the front lens. To replace a rotating gobo on Gobo Wheel 2: 1.
- Page 25 Replacing a gobo in a goboholder The rotating gobos in the MAC Ultra Performance are held in their holders by springs and can be removed from their holders as described in this section. Gobo orientation: general Make sure that you install gobos facing in the correct direction, or they may suffer heat damage. The orientations shown in Figure 18 are correct in most cases, but consult your Martin dealer or gobo supplier if you are in any doubt about the orientation of a specific gobo type.
- Page 26 Goboholder and gobo orientation, Gobo Wheel 1 (Aerial Wheel) • Gobo Wheel 1 is the wheel that is closest to the LED light source. • The side of the goboholder with the gobo retaining spring and with the teeth faces towards the LED light source.
-
Page 27: Replacing The Prism With A Frost Filter
2. Turn the goboholder over so that the recess faces downwards and let the gobo fall out of the holder onto a clean, soft surface. Turn the goboholder back again and put it on the surface teeth with the recess facing upwards. - Page 28 5. See Figure 23. When the drive belt is free of the prism, twist it so that it will pass sideways through the gap (arrowed) between the prism drive pulley and the sensor PCB. Lift the belt up through this gap and remove it from the head.
-
Page 29: Using The Fixture
Using the fixture Before using the fixture, download and read the latest version of the MAC Ultra Performance User Guide from the MAC Ultra Performance area of the Martin website at www.martin.com. The User Guide contains details of: • The effects available in the fixture. •... -
Page 30: Troubleshooting
Troubleshooting Problem Probable cause(s) Remedy Check that power is switched on and cables are No power to fixture. plugged in. Contact Martin Service or authorized service partner. Do not remove base or yoke covers, One or more of the fixtures is attempt to replace a fuse or carry out any repairs or completely dead. -
Page 31: Compliance And Legal
Supplier’s Declaration of Conformity Harman Professional, Inc. have issued an FCC Supplier’s Declaration of Conformity for this product. The Declaration of Conformity is available for download from the MAC Ultra Performance area of the Martin website at www.martin.com Canadian Interference-Causing Equipment Regulations - Règlement sur le Matériel Brouilleur du Canada... - Page 32 Disposing of this product Martin products are supplied in compliance with Directive 2012/19/EC of the European Parliament and of the Council of the European Union on WEEE (Waste Electrical and Electronic Equipment), where applicable. Help preserve the environment! Ensure that this product is recycled at the end of its life. Your supplier can give details of local arrangements for the disposal of Martin products.
- Page 36 www.martin.com...
Need help?
Do you have a question about the Martin MAC Ultra Performance and is the answer not in the manual?
Questions and answers