
Related Manuals for Harman Martin Exterior 400 Series


Summary of Contents for Harman Martin Exterior 400 Series
- Page 1 Exterior 400 Exterior 410 Exterior 420 Exterior 430 Exterior 400™ Range user manual...
-
Page 2: Dimensions
Dimensions All dimensions are in millimeters ©2010-2015 Martin Professional ApS. Information subject to change without notice. Martin Professional ApS and all affiliated companies disclaim liability for any injury, damage, direct or indirect loss, consequential or economic loss or any other loss occasioned by the use of, inability to use or reliance on the information contained in this manual. -
Page 3: Safety Information
Safety Information WARNING! Read the safety precautions in this section before installing, powering, operating or servicing this product. The following symbols are used to identify important safety information on the product and in this manual: WARNING! WARNING! WARNING! WARNING! WARNING! Safety hazard. - Page 4 P R O T E C T I O N F R O M B U R N S A N D F I R E • Do not operate the fixture if the ambient temperature (Ta) exceeds 45° C (113° F). •...
-
Page 5: Table Of Contents
Contents Dimensions ............... . 2 Safety Information . -
Page 6: Introduction
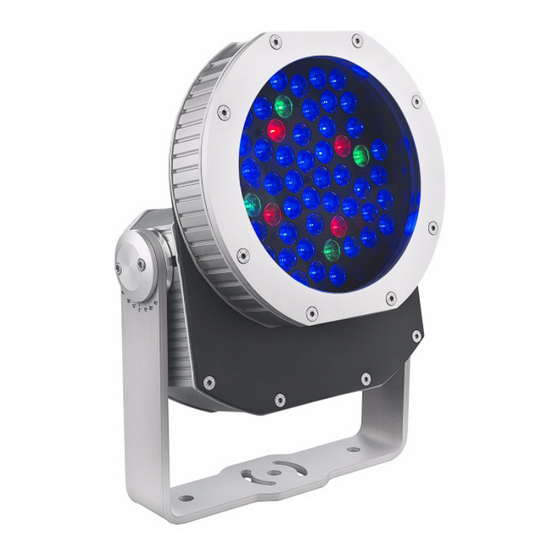
Introduction Thank you for selecting a product from the Exterior 400™ Range of compact IP65-rated LED-based floodlights from Martin Professional™. The Exterior 400 Range includes the following models: Exterior 400 • Optimized for long-throw applications in combination with very narrow beam angle optics •... -
Page 7: Managing Humidity
Managing humidity The fixtures in the Exterior 400 Range are IP65-rated and are designed to resist water and moisture in environments with widely varying climate, temperature and humidity conditions. But if fixtures are not managed correctly during installation and service, water and moisture can enter, leading to humidity and condensation inside the fixtures. -
Page 8: Physical Installation
Physical installation Warning! Read "Safety Information" on page 3 before installing the Exterior 400 Range. Warning! The safety and suitability of lifting equipment, installation location, anchoring method, mounting hardware and electrical installation is the responsibility of the installer. All local safety regulations and legal requirements must be observed when installing and connecting the Exterior 400 Range. - Page 9 Avoiding water pooling on the power box See Figure 2. If you install a fixture in the Exterior 400 range Rainwater with its power box under the main fixture housing, and if you drains aim the light beam downwards from approx. +5° to -95°, away rainwater can form a pool on top of the power box (see arrow).
-
Page 10: Mounting Fasteners
Mounting fasteners Warning! All fasteners used to mount the Exterior 400 Range must be corrosion-resistant and strong enough to mount the fixture safely. The washers supplied with the fixture must be installed directly under the fasteners’ heads when anchoring the yoke base to the installation surface. The mounting yoke base must be safely anchored to a flat surface. -
Page 11: Power And Dmx Data Cable Layout
Power and DMX data cable layout Figure 7 gives an overview of a suitable cable layout. The dotted lines represent AC power Universe #2 Universe #2 OPTO- OPTO- circuits. The solid lines represent the data link. SPLITTER SPLITTER Fixture Fixture Fixture Power Power... -
Page 12: Ac Power
AC power DANGER! Read “Safety Information” on page 3 before attempting to install an Exterior 400 Range fixture. Lock out power to the entire installation before working on cables and connections or removing any cover. Electrical installation must be carried out by qualified professionals only. For protection from dangerous electric shock, the fixture must be grounded (earthed). -
Page 13: Replacing The Power Cable
3. Check that all installation work is completed and carry out appropriate tests and safety checks before applying power. Replacing the power cable If you replace the supplied power cable, the new cable must be listed, adequately dimensioned for the current requirements and suitable for the installation environment, particularly with regard to water, pollution, thermal and UV resistance. - Page 14 - If using two phases of a three-phase system to obtain 200 - 240 V between two phases, connect one phase to terminal L and the other phase to terminal L2. Do not connect anything to terminal N. - If using a single-phase three-wire earthed mid-point system (used in certain regions of the USA) to obtain 200 - 240 V between two live conductors, connect one live wire to terminal L and the other live wire to terminal L2.
-
Page 15: Control Data Link
Control data link Exterior 400 Range fixtures must be connected via a control data link for DMX controller or synchronized (master/client) operation.The following considerations must be taken into account when planning the data link: • RS-485 data cable designed for exterior use is required for outdoor installations. RS-485 cable has low capacitance and a characteristic impedance of 85 to 150 Ohms. -
Page 16: Connecting The Data Link
To avoid ground/earth loop interference, ensure that the DMX cable shield does not come into contact with the shell or body of XLR connectors. RJ-45 connection RJ-45 connectors are suitable if CAT 5 cable is used for the data link. RJ-45 cable connector pins are numbered from the left looking at the face of the connector with the locking clip on top (see Figure 12). -
Page 17: Fixture Setup
Fixture setup The Martin MUM (Multi-Utility Manager) application allows you to program and configure Martin Exterior 400 Range fixtures from a laptop PC and features an intuitive GUI (graphic user interface). Using MUM, you can connect to and set up one fixture at a time. Refer to the MUM user manual for instructions on installing and starting the MUM application. -
Page 18: Configuring A Fixture With Mum
Configuring a fixture with MUM Setting the clock Exterior 400 Range fixtures have a battery-operated 24-hour clock that is used to start and stop stand-alone operation. To set the clock: 1. Click on the Fixture Info button in MUM: Figure 15: Fixture info window 2. - Page 19 DMX Address To set the DMX address using MUM, click on the Fixture settings button and use the DMX Address spin buttons to set the fixture’s DMX address. The DMX address will be updated in the fixture in real time. Figure 16: Fixture settings window DMX Mode The DMX Mode setting allows you to set the fixture to respond in various control modes.
- Page 20 Options for managing color in different fixtures The different fixture types in the Exterior 400 Range use different LEDs, and it is normal that these have different color gamuts. The Color Gamut setting lets you take this into account and set the fixture to either Exterior 400 Range or Fixture: •...
-
Page 21: Operation
Operation Exterior 400 Range fixtures can be operated using a DMX controller or programmed to run a stand-alone light show without DMX control. Ambient temperatures The Exterior 400 Range can be operated at ambient temperatures from -30° C (-22° F) to 45° C (113° F). At temperatures below 0°... - Page 22 Stand-alone operation can be set to: • start automatically as soon as power is applied • respond to a timer trigger that activates operation for one or two periods in a 24 hour period, or • respond to a light-level trigger that uses a light sensor to activate operation when ambient light is below a certain level.
- Page 23 3. Select a fade time and a wait time for the scene. Figure 19: Stand-alone programming window Scene management Once you have specified values for the effects and fade and wait times for the scene, you can store and manage scenes using the commands available at the bottom of the Stand-alone program window: Store scene Save settings in the current scene.
- Page 24 Before running synchronized operation, you must set fixtures to one of the following in the Synchronized drop-down dialog box (see Figure 17): • Single Fixture: operates in stand-alone mode independently of other fixtures • Master: sends trigger signals to other fixtures, or •...
- Page 25 client fixture has (4, for example) in whole numbers (no decimal places). In this example 5 divided by 4 results in 1, with 1 remainder. This remainder will be the number of the scene that the client fixture starts - scene 1. Generally though, when a Client fixture reaches its own last scene before the Master fixture, a “go to scene xx”...
-
Page 26: Service And Maintenance
Service and maintenance DANGER! Read “Safety Information” on page 3 before carrying out service or maintenance work on the Exterior 400 Range. Lock out power to the entire distribution system before servicing or opening any cover. Important! The Exterior 400 Range requires regular service and maintenance to maintain reliable operation and protect the investment it represents. -
Page 27: Installing And Removing A Diffuser Filter
Installing and removing a diffuser filter Important! Install diffuser filter sheets with the matt, textured surface facing in towards the LEDs and the shiny surface against the front glass. Exterior 400 Range fixtures are supplied with no diffuser filter installed and narrow, medium and wide diffuser filters packed separately with each product. -
Page 28: Fuse Replacement
Fuse replacement DANGER! Lock out power to the entire distribution system before servicing or opening any cover. Replace fuses with ones of the same type and rating only. Primary fuse Exterior 400 Range fixtures are protected by a 2.5 amp slow-blow primary fuse located on the power PCB. If a fixture is completely dead, the primary fuse may have blown. -
Page 29: Software Installation
Software installation It may be necessary to upload new software (i.e. firmware) to an Exterior 400 Range fixture if you believe that the product has a software-related fault or if you want to update to a newer version. Software updates are available from the Martin website (http://www.martin.com) and can be installed via the DMX data link with the following items: •... -
Page 30: Status Indicators
Status indicators Two LEDs on the rear cover give information about fixture status. LED 1 (Fixture status) • Flashes red if an error occurs that requires service intervention. • Lights steady green when the fixture is ready for operation. • Lights steady yellow during a software upload. -
Page 31: Dmx Protocols
DMX protocols Exterior 400, Exterior 410 RAW mode, uncalibrated Start code = 0 Channel Value Percent Function → 0 - 255 0 - 100 Intensity 0 100% Green → 0 - 255 0 - 100 Intensity 0 100% Blue → 0 - 255 0 - 100 Intensity 0... -
Page 32: Exterior 420
HSIC mode, calibrated Start code = 0 Channel Value Percent Function → → → → 0 - 255 0 - 100 Orange Yellow Green → → → → Cyan Blue Indigo Violet → Magenta Saturation → 0 - 255 0 - 100 Zero (white) Full saturation Intensity... -
Page 33: Exterior 430
Exterior 430 I (Intensity) mode (red, green, blue, warm white and cold white fixtures) Red, green and blue fixtures are calibrated if Color Gamut is set to Exterior 400 Range and uncalibrated if Color Gamut is set to Fixture. Cold white and warm white fixtures are uncalibrated and Color Gamut is disabled. Start code = 0 Channel Value... -
Page 34: Troubleshooting
Troubleshooting Problem Probable cause(s) Remedy No power to fixture. Check power and connections. Fixture is completely dead. Primary fuse blown. Isolate fixture from power. Check fuse and replace. Inspect connections and cables. Correct poor Fault on DMX link. connections. Repair or replace damaged cables. Check fixture is set to correct DMX mode. -
Page 35: Specifications
Specifications P h y s i c a l Length ..........169 mm (6.7 in.) including cable gland Width . - Page 36 I n s t a l l a t i o n Orientation ............... .Any Mounting .
- Page 37 O r d e r i n g I n f o r m a t i o n Exterior 400™ Exterior 400 EU model (aluminum) ..........P/N 90545050 Exterior 400 US model (aluminum) .
- Page 40 • • • www.martin.com Olof Palmes Allé 18 8200 Aarhus N Denmark Tel: +45 8740 0000 • Fax +45 8740 0010...
Need help?
Do you have a question about the Martin Exterior 400 Series and is the answer not in the manual?
Questions and answers